Philips PD9030 User Manual
Hide thumbs
Also See for PD9030:
- User manual (32 pages) ,
- Specifications (3 pages) ,
- Manual del usuario (28 pages)

Related Manuals for Philips PD9030


Summary of Contents for Philips PD9030
-
Page 1: User Manual
Register your product and get support at Register your product and get support at www.philips.com/welcome PD9030 User manual... -
Page 3: Table Of Contents
Contents 1 Important Important Safety Instructions Hearing safety Notice 2 Your portable DVD player Introduction 3 What's in the box 4 Overview of the main unit 5 Overview of the remote control 6 Get started Preparation (for in-car use) Charge the battery Install remote control battery Connect additional equipment... - Page 4 7 Use your player Turn on Select OSD language Play discs Play from USB Play options Adjust brightness of screen backlight 8 Adjust settings 9 Product information 10 Troubleshooting...
-
Page 5: Important
Important Important Safety Instructions a Read these instructions. b Keep these instructions. c Heed all warnings. d Follow all instructions. e Do not use this apparatus near water. f Clean only with dry cloth. g Do not block any ventilation openings. Install in accordance with the manufacturer's instructions. - Page 6 l Unplug this apparatus during lightning storms or when unused for long periods of time. m Refer all servicing to qualified service personnel. Servicing is required when the apparatus has been damaged in any way, such as power-supply cord or plug is damaged, liquid has been spilled or objects have fallen into the apparatus, the apparatus has been exposed to rain or moisture, does not operate normally, or has been dropped.
-
Page 7: Hearing Safety
Hearing safety Listen at a moderate volume. • Using headphones at a high volume can impair your hearing. This product can produce sounds in decibel ranges that may cause hearing loss for a normal person, even for exposure less than a minute. The higher decibel ranges are offered for those that may have already experienced some hearing loss. -
Page 8: Notice
Notice Any changes or modifications made to this device that are not expressly approved by Philips Consumer Lifestyle may void the user’s authority to operate the equipment. Recycling Your product is designed and manufactured with high quality materials and components, which can be recycled and reused. When you see the crossed-out wheel bin symbol attached to a product, it means the product is covered by the European Directive 2002/96/EC: Never dispose of your product with other household waste. - Page 9 The making of unauthorized copies of copy-protected material, including computer programs, files, broadcasts and sound recordings, may be an infringement of copyrights and constitute a criminal offence. This equipment should not be used for such purposes. Recording and playback of material might require consent. See Copyright Act 1956 and The Performer’s Protection Acts 1958 to 1972.
- Page 10 ABOUT DIVX VIDEO-ON-DEMAND: This DivX Certified® device must be registered in order to play purchased DivX Video-on-Demand (VOD) movies. To obtain your registration code, locate the DivX VOD section in your device setup menu. Go to vod.divx.com for more information on how to complete your registration. Covered by one or more of the following U.S.
-
Page 11: Your Portable Dvd Player
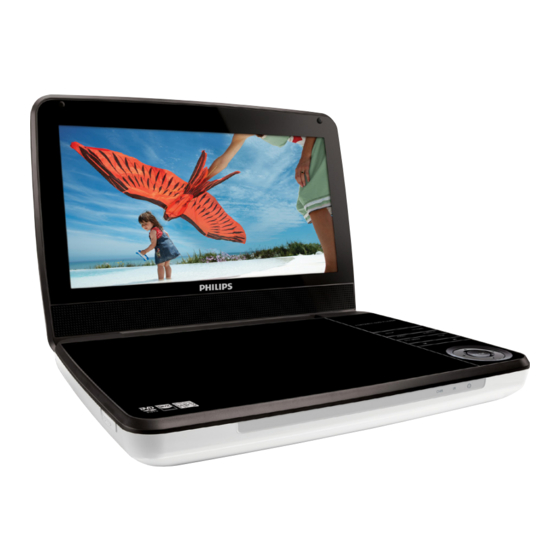
Your portable DVD player Congratulations on your purchase, and welcome to Philips! To fully benefit from the support that Philips offers, register your product at www.philips.com/support. Introduction Your portable DVD player plays digital video discs that conform to the universal DVD Video standard. With it, you can play movies with true cinema picture quality and stereo or multi-channel sound (depending on disc and playback set-up). -
Page 12: What's In The Box
What's in the box Check and identify the contents of your package: • Portable DVD player • Remote control • AC power adaptor, AY5808/75 or DSA-9PFB-09 FEU090100 • Car adaptor • AV cable • Car mounting bracket • User manual... -
Page 13: Overview Of The Main Unit
Overview of the main unit a Display panel b OPTIONS • Accesses options relating to the current activity or selection. c SOURCE • Switches between DVD and USB. d SUBTITLE • Selects DVD subtitle language. e SETUP • Accesses or exits the setup menu. f DC IN •... -
Page 14: Disc Menu
g AV OUT • Audio/video output jack. • Headphone jack. • Connects a USB storage device. j VOL+/- • Increases or decreases volume. k (CHR)OFF•POWER•ON • Turns on/off DVD player. • Navigates menus. • Searches backward/forward at different speeds. • Confirms an entry or selection. -
Page 15: Overview Of The Remote Control
Overview of the remote control SOURCE OPTIONS a SOURCE • Switches between DVD and USB. b DISPLAY • Displays play information. - Page 16 • Adjusts brightness of the screen backlight. d MENU • For DVD, accesses or exits disc menu. • For VCD, turns on or off PBC (Playback Control) mode. • For VCD version 2.0 or SVCD with PBC turned on, returns to the menu.
-
Page 17: Get Started
• Always follow the instructions in this chapter in sequence. If you contact Philips, you will be asked for the model and serial number of your player. The model number and serial number are on the bottom of your player. - Page 18 a Position the bracket on the bars of the headrest. b Fasten the screw to fix the bracket firmly on the bars. Fix the DVD mount bracket to the portable DVD player. Note • There are three holes on the bracket. Use any one as you like. Aim the screw of the bracket to the screw nut on the back of the DVD player.
-
Page 19: Charge The Battery
• Buckle DVD bracket into the headrest mount bracket. Adjust the viewing angle. a Release the node. b Adjust the viewing angle as desired. c Fasten the node. Press the release button to release the DVD player from headrest. Charge the battery Caution •... - Page 20 Note • The type plate is located on the bottom of the player. To fast charge the battery, Slide the OFF•POWER•ON switch to OFF position. Connect the supplied AC adaptor to the player and to the AC outlet. » The CHR indicator turns on (red). »...
-
Page 21: Install Remote Control Battery
Install remote control battery Caution • Risk of explosion! Keep batteries away from heat, sunshine or fire. Never discard batteries in fire. • Danger of explosion if battery is incorrectly replaced. Replace only with the same or equivalent type. • Batteries contain chemical substances, they should be disposed of properly. • Perchlorate Material - special handling may apply. -
Page 22: Connect Additional Equipment
Connect additional equipment Caution • Turn off your player before connecting to any additional equipment. You can connect the player to a TV or an amplifier to enjoy DVDs. VIDEO IN Match the color of the AV cables (the AV cable connected to TV is not supplied) with the jacks: • the yellow cable is for the yellow video jack •... -
Page 23: Use Your Player
Use your player Turn on Slide the OFF•POWER•ON switch to the ON position. » The indicator turns on (green). Select OSD language You can choose a different language for the on-screen display text. Press SETUP. The setup menu appears. » Select [General] >... -
Page 24: Play Discs
Play discs Slide OPEN on the player. Insert the disc with label side facing up. Push down to close the disc compartment. » Play starts automatically. If not, press /OK. • If a menu is displayed, select an item, then press /OK to start play. -
Page 25: Play Options
Play options During play, press OPTIONS to select some play options. Follow the on-screen instructions. Adjust brightness of screen backlight Note • You can adjusts brightness of the screen backlight to match lighting conditions. During play, press repeatedly to select an option. [High] •... -
Page 26: Adjust Settings
Adjust settings To maximize your play experience, use SETUP to fine tune your settings. Press SETUP. » The setup menu is displayed. Use navigation keys to select an option and press OK to confirm. [General] [Language] Select on-screen display language [PBC settings] Set playback control function on/off. [DivX (VOD)] Get DivX registration code. -
Page 27: Product Information
Product information Note • Product information is subject to change without prior notice. Dimensions 239 x 39 x 178 mm Weight 1.1 kg Power supply Input: 100-240V~ 50/60Hz Output: DC 9V 1.0A Power consumption Operating temperature range 0-45°C Laser wavelength 650 nm Video output Format... -
Page 28: 10 Troubleshooting
To keep the warranty valid, never try to repair the system yourself. If you encounter problems when using the player, check the following points before requesting service. If the problem remains unsolved, register your player and get support at www.philips.com/welcome. No power •... - Page 29 No response to the remote control • Ensure that the path between the remote control and the player is clear from obstacles. • From a close distance, point the remote control directly at the player. • Replace the remote control batteries. •...
- Page 30 Warranty against Defects In this warranty: We or us means Philips Electronics Australia Limited ACN 008 445 743 or Philips New Zealand Limited (Company Number 1723), and our contact details are set out at the end of this warranty; You means the purchaser or the original end-user of the Goods;...
- Page 32 Specifications are subject to change without notice © 2012 Koninklijke Philips Electronics N.V. All rights reserved. PD9030_79_UM_Sunplus_V2.0...