Table of Contents
Advertisement
Quick Links
Dear Customer
Thank you for purchasing this product.
Before connecting, operating or adjusting this product, please read the
instructions completely. Please keep this manual for future reference.
Caution
This unit is not waterproof and should not be exposed to excessive
moisture.
Matsushita Electric Industrial Co., Ltd.
Web site: http://www.panasonic.co.jp/global/
Operating Instructions
Digital Audio Player
SV-MP805V
Model No.
SV-MP810V
GC
RQTT0845-G
Advertisement
Table of Contents

Related Manuals for Panasonic SV-MP805V


Summary of Contents for Panasonic SV-MP805V
- Page 1 Before connecting, operating or adjusting this product, please read the instructions completely. Please keep this manual for future reference. Caution This unit is not waterproof and should not be exposed to excessive moisture. Matsushita Electric Industrial Co., Ltd. Web site: http://www.panasonic.co.jp/global/ RQTT0845-G...
-
Page 2: Safety Precautions
Safety precautions • Leave some slack in the cord of the earphones and the strap if you wind them around the unit. • Keep this unit out of the reach of babies and little children. Babies or little children may accidentally swallow the unit. If you believe that this might have happened, seek medical advice immediately. -
Page 3: Table Of Contents
Table of contents Introduction Supplied accessories ............4 Battery (included) ..............5 System requirements ............5 Listening to music ..............6 Recording music CDs on your computer ......7 Recording music on the unit ..........8 Files and folders structure display on your computer ..12 Saving data ..................13 Basic operations Name of parts and basic operations ........14 Selecting modes ..............15... -
Page 4: Supplied Accessories
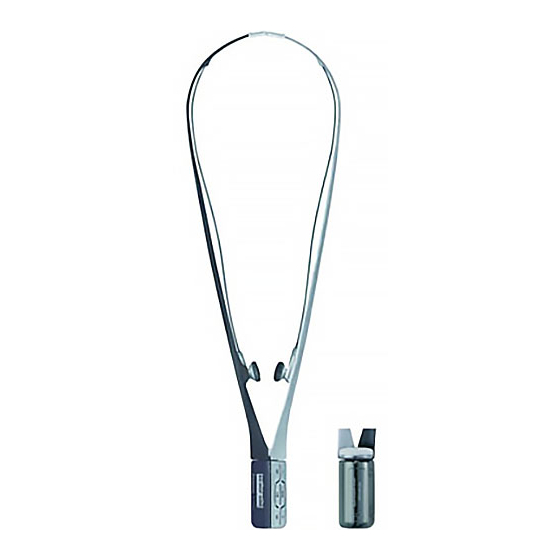
Supplied accessories Please check and identify the supplied accessories. USB Cable (with Line-in) —1 pc Alkaline battery (LR03) —1 pc Strap Stereo earphones —1 pc Will come apart if pulled strongly. (This is a safety feature.) Marks Earphone holder 1. Align the marks and insert securely. -
Page 5: Battery (Included)
• When the battery charge is low and the display flashes, the display panel backlight will not light. • If rechargeable batteries are to be used, rechargeable batteries manufactured by Panasonic are recommended. • Operation is not guaranteed when used with manganese batteries. Do not use manganese batteries. -
Page 6: Listening To Music
Listening to music Have the music CDs recorded on your computer Step beforehand. ( page 7) Use Windows Media Player, a standard Windows software ® program. ● This unit supports WMA and MP3 music files. You can also use music content (as either WMA or MP3 music files) downloaded from music distribution services. -
Page 7: Recording Music Cds On Your Computer
Recording music CDs on your computer An example of how to record music CDs is given below using Windows Media Player (hereafter abbreviated to “WMP”) Version 9 (“WMP9”) or 10 (“WMP10”). Insert the music CD into your computer, and start WMP. -
Page 8: Recording Music On The Unit
Recording music on the unit Connecting the unit to the computer Before connecting the unit to the computer, be absolutely sure to insert the battery into the unit. ( page 5) USB cable (included) Start the computer. Open the USB port cover and connect the USB cable to the unit. - Page 9 ■ Connection precautions Slanted Arrow side facing in the opposite direction X=Incorrect Disconnecting the unit Right-click the “Safely Remove Hardware” icon on the computer’s taskbar. The “USB Mass Storage Device” window appears on the computer screen. Follow the on-screen instructions to disconnect the USB cable. When the USB cable is disconnected, the unit’s power goes off.
- Page 10 Recording music on the unit Copy and paste the MP3/WMA files In My Computer or Explorer, open the folder for the unit (removable disk or device). Open the MUSIC folder. Copy and paste or drag and drop the MP3/WMA files or folder from your computer’s folder into the MUSIC folder.
- Page 11 Using WMP9 or WMP10 to record music Select [start] → [All Programs] → [Accessories] → [Entertainment] → [Windows Media Player]. (The displays given here are one example.) WMP9: Click [Copy to CD or Device]. WMP10: Click [Sync]. For WMP10: 1. Select [Tools] → [Options] → [Devices] → “Removable Disk (x:).” 2.
-
Page 12: Files And Folders Structure Display On Your Computer
Files and folders structure display on your computer Removable disk or device (this unit) This unit Copy and paste or drag and drop MP3/WMA files into the MUSIC folder. MUSIC Up to 7 levels of subfolders can be created under the MUSIC folder. ARTIST_A Naming files and ALBUM_A1... -
Page 13: Saving Data
FM RADIO, VOICE, and LINE IN folders). The maximum number of files and folders that can be displayed may be lower depending on recording conditions. No. of tracks recorded by SV-MP810V (1 GB) SV-MP805V (512 MB) sound quality 64 kbps Approx. 500 tracks Approx. 250 tracks... -
Page 14: Basic Operations
Name of parts and basic operations MODE button Microphone below) Volume button REC/STOP, page 26) HOLD switch below) A-B REPEAT below) button USB port page 21, 23, page 8) 26, 28) Skip/Search button Battery lid below) page 5) Display Turn on, off / Play/Stop button Earphones jack below) -
Page 15: Selecting Modes
Selecting modes Select the mode to be used from the main menu. Preparation: Release the HOLD switch. ( page 14) Turn the unit on. If selecting MUSIC mode Press Display the main menu. Main menu Press Select mode. Press Press •... - Page 16 Selecting modes VOICE RECORD mode You can record sound using the built-in microphone. ( page 26, Voice recording) Select “VOICE RECORD”. “VOICE RECORD” Press Press standby screen LINE IN mode You can connect an external device such as a CD player and record sound onto the unit.
-
Page 17: Playing Music
Playing music Preparation: 1. Record music on the unit. ( page 8) 2. Put on the earphones. ( page 4) 3. Release the HOLD switch. ( page 14) 4. Turn the unit on. ( page 15) If the unit is already switched Display the main menu. -
Page 18: Selecting A Playlist And Listening To Music
Selecting a playlist and listening to music Preparation: 1. Recording music on the unit ( page 8) 2. Release the HOLD switch. ( page 14) 3. Put on the earphones. ( page 4) 4. Turn the unit on. ( page 15) 5. - Page 19 Selecting the folder containing the tracks to be played (FOLDER PLAY) Example: To play all the tracks in ALBUM-B2 Select “FOLDER PLAY” in step 5. When you press [ ], all of the tunes in “ALBUM-B2” will play in the order in which they were recorded. Select “FOLDER PLAY”.
-
Page 20: Selecting Various Play Modes
Selecting various play modes PLAY MODE settings NORMAL: Normal play ALL-REP.: All tracks in a list repeat ONE-REP.: One track repeat RANDOM: All tracks in a list random repeat Preparation: 1. Release the HOLD switch. ( page 14) 2. Turn the unit on. ( page 15) 3. -
Page 21: A-B Repeat
A-B REPEAT ■ A-B REPEAT settings Follow these steps after performing steps 1 and 2 shown in “PLAY MODE settings” on page 20. Select “A-B REPEAT”. Press Press Select “ON”. Press Press • The display returns to the playback screen where the “A-B REPEAT”... -
Page 22: Listening To Fm Radio
Listening to FM radio Preparation: 1. Put on the earphones. ( page 4) As the cord of the earphones acts the FM antenna, extend it as far as possible rather than leaving it coiled. 2. Release the HOLD switch. ( page 14) 3. -
Page 23: Recording The Fm Radio
General rule of thumb for maximum total recording time (when recording only FM broadcasts until the maximum memory capacity is reached) SV-MP810V: 46 hours 40 minutes SV-MP805V: 23 hours 20 minutes • Do not remove the battery while recording. All the data being recorded will be lost. -
Page 24: Presetting Stations (Fm1, Fm2)
Presetting stations (FM1, FM2) FM1: 10 stations can be stored. FM2: 10 stations can be stored. AUTO presetting Preparation: Display the main menu during FM reception. ( page 15, Selecting modes) Select “SET”. Press Press Select “AUTO PRESET”. Press Press Select FM1 or FM2. - Page 25 MANUAL presetting Preparation: Tune in FM1 or FM2. ( page 22, Listening to FM radio) While listening to FM radio: Press Select the frequency. Press Press Select the channel. Press Press Repeat from step 1 to step 3 for each of the stations to be stored as preset stations.
-
Page 26: Voice Record Mode
Voice recording Preparation: 1. Release the HOLD switch. ( page 14) 2. Turn the unit on. ( page 15) If the unit is already set to VOICE RECORD mode, the VOICE RECORD standby screen shown in step 2 will be displayed. Display the main menu. - Page 27 Note • The VOICE folder (playlist) is automatically created, the file is saved in this folder, and the unit is set to the recording standby mode. • Do not remove the battery while recording. All the data being recorded will be lost.
-
Page 28: Line In Recording
LINE IN recording Preparation: Turn the unit on (M3 jack) USB cable (included) / LINE OUT 3. Connect the recording device to the unit. Connect the LINE OUT connector or earphone jack of the recording source device to the unit’s USB connector using the USB cable supplied. When connecting with the earphone jack, adjust the volume of the recording source device before connecting. - Page 29 Note • With some tracks, it may not be possible to record the beginning. (AUTO SYNC. mode and 1-SYNC. mode) • The recorded tracks are saved in the LINE IN folder under the filename of “Linexxx”. • If there is a section where no sound is recorded for 2 seconds during recording, this section will be identified as the end of the track.
-
Page 30: Setting Various Items
Setting various items You can set various items in each mode. MUSIC mode FM RADIO mode SOUND MODE AUTO PRESET EQ SETTING SURROUND REMASTER BAND STEP PLAY MODE 50kHz A-B REPEAT 100kHz ERASE MODE 200kHz SPEED MODE SYSTEM LOW2 LINE IN mode LOW1 NORMAL HIGH1... -
Page 31: Making Basic Settings
Making basic settings Example: Setting the amount of time for the backlight to be displayed Display the main menu. Press Select “SET”. When “SET” is selected Press Press from the MUSIC mode. Select “SYSTEM”. Press Press The SYSTEM settings menu will be displayed. Select “BACKLIGHT”. - Page 32 Setting various items ■ MUSIC SOUND MODE EQ SETTING NORMAL: No change in sound ROCK: Adds impact JAZZ: Adds club-like POP: Clarifies the treble range CLASSIC: Adds concert hall-like SURROUND ON: The SURROUND effect with presence OFF: Normal play REMASTER ON: Sound enhanced (Digital Re-master) OFF: Normal play...
- Page 33 ■ VOICE RECORD RECORD MODE Recording time guide (Maximum hours available when player is empty of files) MODE SV-MP810V SV-MP805V 32Kbps Long play 70 hours 35 hours 48Kbps Standard 47 hours 23 hours 64Kbps High quality 35 hours 17 hours...
-
Page 34: Erasing Folders And Files
Erasing folders and files The recorded data can be erased using the unit menu. Preparation: 1. Release the HOLD switch. ( page 14) 2. Turn the unit on. ( page 15) 3. Select MUSIC mode. ( page 15) This unit When erasing all the tracks in the MUSIC folder MUSIC... - Page 35 Select “ERASE MODE”. Press Press Select the folder to be erased. Press Press Select “YES”. Press Press Select “YES”. Press Press All the tracks in the MUSIC folder will be erased. When erasing a track Example: When erasing TRACK1 While “TRACK1” is playing or stopped: Select “TRACK”.
-
Page 36: Formatting
Formatting The unit’s memory can be initialized (formatted) by the unit itself. Doing so will erase all the data recorded on it. Initiate the formatting while the battery indicator shows a full charge. Preparation: 1. Release the HOLD switch. ( page 14) 2. -
Page 37: Troubleshooting Guide
Troubleshooting guide Before requesting service, make the following checks. If you are in doubt about any of the check points, or if the solutions indicated in the chart do not solve the problem, consult your dealer for instructions. No operation •... -
Page 38: Reset Procedure
Troubleshooting guide • When recording with a connection using The volume of the the earphone jack, adjust the volume of the recorded tracks is recording source device before recording. too low • Disconnect the USB cable, reboot the The unit is not computer, and then connect the unit to the recognized even when computer again. -
Page 39: Specifications
Specifications Memory size SV-MP810V: 1 GB SV-MP805V: 512 MB Supported MP3: 8 kHz to 48 kHz sampling frequency WMA: 22.05 kHz, 32 kHz, 44.1 kHz and 48 kHz Supported bit- MP3: 8 kbps to 320 kbps (128 kbps is recommend) - Page 40 Recording and operating problems may occur on some computer systems. Please note that Panasonic and Panasonic dealers cannot be held liable for any lost audio data or other direct or indirect damage except in cases of intentional or gross negligence.