Panasonic KX-TG9321 Operating Instructions Manual
Expandable digital cordless phone
Hide thumbs
Also See for KX-TG9321:
- Operating instructions manual (56 pages) ,
- Operating instructions manual (14 pages)
Table of Contents
Advertisement
TG9321(e).book Page 1 Friday, May 28, 2010 4:34 PM
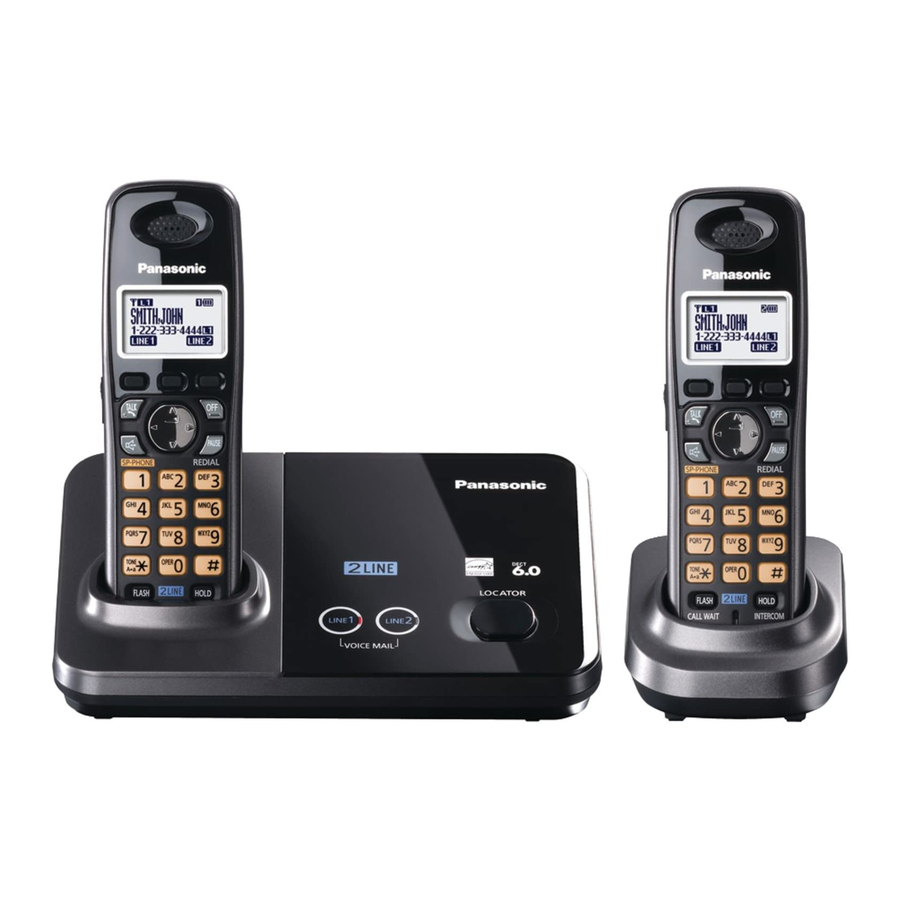
Model shown is KX-TG9321.
Before initial use, see "Getting
Started" on page 8.
Thank you for purchasing a Panasonic product.
Please read these operating instructions before using the unit and save
them for future reference.
Consulte "Guía Rápida Española", página 47.
This unit is compatible with Caller ID. You must subscribe to the appropriate
service offered by your service provider/telephone company.
For assistance, visit our Web site: http://www.panasonic.com/help for
customers in the U.S.A. or Puerto Rico.
Please register your product: http://www.panasonic.com/prodreg
Operating Instructions
Expandable Digital Cordless Phone
Model No.
KX-TG9321
KX-TG9322
Advertisement
Table of Contents

Related Manuals for Panasonic KX-TG9321


Summary of Contents for Panasonic KX-TG9321
-
Page 1: Operating Instructions
This unit is compatible with Caller ID. You must subscribe to the appropriate service offered by your service provider/telephone company. For assistance, visit our Web site: http://www.panasonic.com/help for customers in the U.S.A. or Puerto Rico. Please register your product: http://www.panasonic.com/prodreg... -
Page 2: Table Of Contents
TG9321(e).book Page 2 Friday, May 28, 2010 4:34 PM Table of Contents Introduction Error messages ....39 Troubleshooting ....41 Model composition . -
Page 3: Introduction
4-wire telephone line cord with green plugs/ PQJA10088Z 2-wire telephone line cord with transparent plugs/PQJA10075Z Wall mounting adaptor/PQKL10078Z2 Rechargeable batteries/HHR-4DPA (Part No. HHR-55AAABU or N4DHYYY00004) Handset cover /PNYNTGA939TR Belt clip/PNKE1004Z1 Charger/PNLC1001YT – *1 The handset cover comes attached to the handset. For assistance, please visit http://www.panasonic.com/help... -
Page 4: Expanding Your Phone System
TG9321(e).book Page 4 Friday, May 28, 2010 4:34 PM Introduction Additional/replacement accessories Please contact your nearest Panasonic dealer for sales information (page 51). Accessory item Order number Rechargeable HHR-4DPA batteries L To order, please call 1-800-332-5368 or visit http://www.panasonic.com/batterystore Battery type: –... -
Page 5: Important Information
These conditions can CAUTION cause fire or electric shock. Confirm that smoke has stopped emitting and contact the Panasonic Call Center at 1-800-211- Installation and location PANA (1-800-211-7262). L Never install telephone wiring during an L Unplug from power outlets and never touch electrical storm. -
Page 6: Important Safety Instructions
Base unit location/avoiding noise L Only use a compatible base unit (or The base unit and other compatible Panasonic charger) to charge the batteries. Do not units use radio waves to communicate with tamper with the base unit (or charger). -
Page 7: Other Information
0 °C – 40 °C (32 °F – 104 °F), 20 % – 80 % relative air humidity (dry) Note: L Design and specifications are subject to change without notice. L The illustrations in these instructions may vary slightly from the actual product. For assistance, please visit http://www.panasonic.com/help... -
Page 8: Getting Started
Refer to one of the following methods Connecting the AC adaptor depending on your situation: L Use only the supplied Panasonic AC – To connect to a 2-line telephone jack: adaptor PQLV219. page 8 – To connect to 2 single-line telephone ■... - Page 9 “GREEN” plug To connect to a 2-line telephone jack To single-line For this connection, please purchase a telephone jacks (RJ11C) Panasonic 2-line splitter (page 4). Line 1 Example: DSL/ADSL line is line 2 2-wire cord “Click” Line 2 4-wire cord...
-
Page 10: Battery Charge
DSL/ADSL filter* *DSL/ADSL filter (not supplied) is required if you have DSL/ADSL service. Battery charge Charge for about 7 hours. L When the batteries are fully charged, “Charge completed” is displayed. Confirm “Charging” is displayed. For assistance, please visit http://www.panasonic.com/help... -
Page 11: Note When Setting Up
Panasonic T-adaptor (page 4). Emergency power can be supplied to the L Even after the handset is fully unit by connecting a Panasonic battery charged, the handset can be left on back-up power supply noted on page 4. the base unit or charger without any ill effect on the batteries. -
Page 12: Controls
C LINE2 indicator for VOICE MAIL A Speaker D {LOCATOR} B Headset jack C {C} (TALK) D {s} (SP-PHONE: Speakerphone) E Dial keypad ({*}: TONE) F {FLASH} {CALL WAIT} G Charge indicator Ringer indicator H Receiver I Display J {OFF} For assistance, please visit http://www.panasonic.com/help... -
Page 13: Display
If you cannot make calls, change this setting according to your telephone line service. The default setting is “Tone”. “Tone”: For tone dial service. “Pulse”: For rotary/pulse dial service. {MENU} i {#}{1}{2}{0} {V}/{^}: Select the desired setting. {SAVE} i {OFF} For assistance, please visit http://www.panasonic.com/help... - Page 14 (page 30), the indicated line is used. When answering a call, the ringing line is selected. – “Line1”: Line 1 is selected. – “Line2”: Line 2 is selected. {MENU} i {#}{2}{5}{0} For assistance, please visit http://www.panasonic.com/help...
-
Page 15: Making/Answering Calls
L For best performance, use the L A 3.5 second pause is inserted each speakerphone in a quiet environment. time {PAUSE} is pressed. Repeat as L To switch back to the receiver, press needed to create longer pauses. {C}. For assistance, please visit http://www.panasonic.com/help... -
Page 16: Answering Calls
L {MUTE} is a soft key visible on the pressing {OFF}. handset display during a call. Flash {FLASH} allows you to use the special features of your host PBX such as transferring an extension call, or accessing optional telephone services. For assistance, please visit http://www.panasonic.com/help... -
Page 17: Privacy Mode
{SELECT} dialing. {V}/{^}: “On” or “Off” i {SELECT} Call share L When this feature is turned on, “PRIV.” is displayed. This feature allows you to join an existing outside call. For assistance, please visit http://www.panasonic.com/help... -
Page 18: Using The Other Line During A Call
To return to the 1st call (line 1), press {LINE 1}. Note: L If you subscribe to Caller ID, the 2nd caller’s information is displayed when a call is being received on the other line (page 30). For assistance, please visit http://www.panasonic.com/help... -
Page 19: Phonebook
The group – ringer tone feature is available for Caller ID subscribers (page 30). Changing group names The default group name is “Group 1” to “Group 9”. {MENU} i {#}{2}{8}{0} {MENU} {V}/{^}: “Group” i {SELECT} For assistance, please visit http://www.panasonic.com/help... -
Page 20: Editing Entries
L You can also make a call by {V}/{^}: “Yes” i {SELECT} i pressing {CALL}, then pressing {OFF} {LINE 1} or {LINE 2}. Erasing all entries Searching by group {MENU} i {#}{2}{8}{0} {MENU} i {#}{2}{8}{0} {MENU} {GROUP} For assistance, please visit http://www.panasonic.com/help... -
Page 21: Copying Phonebook Entries
Find the desired entry (page {*} (TONE) to the beginning of 20). i {SEND} phone numbers you wish to chain dial (page 19). {OFF} Copying all entries {MENU} i {#}{2}{8}{0} i {MENU} {V}/{^}: “Copy all to HS” i {SELECT} For assistance, please visit http://www.panasonic.com/help... - Page 22 TG9321(e).book Page 22 Friday, May 28, 2010 4:34 PM Phonebook Enter the handset number you want to copy to. L When all entries have been copied, “Completed” is displayed. {OFF} For assistance, please visit http://www.panasonic.com/help...
-
Page 23: Programming
Sub-menu 1 Sub-menu 2 Page – – View Caller ID – – Phonebook – – V.M. access – Ringer settings Ringer volume Line1 Line2 – Ringer tone Line1 Line2 – Interrupt tone Night mode Start/End On/Off For assistance, please visit http://www.panasonic.com/help... - Page 24 HS registration Deregistration Change language Display language – – – Customer support *1 If you program these settings using one of the handsets, you do not need to program the same item using another handset. For assistance, please visit http://www.panasonic.com/help...
- Page 25 {2}{2}{6} adjustment Manual Line 1 – Store V.M. no. {3}{3}{1} Line 2 <On> VM tone detect {3}{3}{2} (VM: Voice mail) Level 1–6 <3> – – Contrast {1}{4}{5} (Display contrast) <On> – – Key tone {1}{6}{5} For assistance, please visit http://www.panasonic.com/help...
- Page 26 (page 28), intercom calls, and paging (page 35). *3 If you subscribe to a distinctive ring service (such as IDENTA-RING), select a tone (tone 1 to 5). If you select a melody, you cannot distinguish lines by their ringers. For assistance, please visit http://www.panasonic.com/help...
- Page 27 “A”. *12The handset can display the Internet address where you can download the operating instructions or get further information for this product, using your computer. For assistance, please visit http://www.panasonic.com/help...
-
Page 28: Special Programming
{V}/{^}: Select “On” or “Off”. i L The ringer volume for alarm follows the higher volume level of the 2 lines {SAVE} (page 25). {OFF} L When the night mode is set, 3 is displayed. For assistance, please visit http://www.panasonic.com/help... -
Page 29: Registering A Unit
Press {OK}, then wait until a long beep sounds. Note: L When you purchase an additional handset, refer to the additional handset’s installation manual for registration. Deregistering a handset A handset can cancel its own registration (or the registration of For assistance, please visit http://www.panasonic.com/help... -
Page 30: Caller Id Service
Caller list Important: L Only 1 person can access the caller list at a time. L Make sure the unit’s date and time setting is correct (page 14). For assistance, please visit http://www.panasonic.com/help... -
Page 31: Calling Back
{MENU} i {V}/{^}: “View entry in the caller list, then call that Caller ID” i {SELECT} number. After that, phone numbers from that caller’s area code are edited {V}/{^}: Select the desired entry. automatically. i {CALL} For assistance, please visit http://www.panasonic.com/help... - Page 32 L To edit the number, press {SAVE}. i Press {EDIT} repeatedly until the phone number is shown in the desired format. i {SAVE} i Go to step 4. Press {SAVE} 2 times. Continue from step 3, “Editing entries”, page 20. For assistance, please visit http://www.panasonic.com/help...
-
Page 33: Voice Mail Service
Contact {MENU} i {#}{3}{3}{2} your service provider/telephone {V}/{^}: Select the desired setting. company for the required pause time. i {SAVE} i {OFF} Example: 1-222-333-4444 PPPP 8888 VM access Pauses Password number For assistance, please visit http://www.panasonic.com/help... - Page 34 If you want to use another phone to listen to voice mail messages, you have to dial your access number manually. For assistance, please visit http://www.panasonic.com/help...
-
Page 35: Intercom/Locator
You can locate a misplaced handset by or {LINE 2}, then dial the phone pressing {LOCATOR} on the base unit. number. L All registered handsets beep for 1 minute. To stop paging, press it again or {OFF} on the handset. For assistance, please visit http://www.panasonic.com/help... - Page 36 {OFF}. The other 2 parties can continue the conversation. Note: L The outside call can be put on hold by pressing {HOLD}. Only the person who placed the call on hold can resume the full conference by pressing {CONF}. For assistance, please visit http://www.panasonic.com/help...
-
Page 37: Useful Information
Tuck the telephone line cord inside the wall mounting adaptor (A). Connect the AC adaptor cord and telephone line cord (B). Hook AC adaptor cord For assistance, please visit http://www.panasonic.com/help... -
Page 38: Belt Clip
(120 V AC, 60 Hz) 83 mm 102 mm inches) (4 inches) Belt clip ■ To attach ■ To remove To remove the wall mounting adaptor While pushing down the release levers (A), remove the adaptor (B). For assistance, please visit http://www.panasonic.com/help... -
Page 39: Error Messages
Incomplete receiver’s phonebook memory is full. Erase the unnecessary phonebook entries (page 20) from the other unit (the receiver) and try again. L The phonebook memory is full. Erase Memory full unnecessary entries (page 20). For assistance, please visit http://www.panasonic.com/help... - Page 40 4, 6. L You must subscribe to a Caller ID service. You must first Once you receive caller information after subscribe to Caller ID. subscribing to a Caller ID service, this message will not be displayed. For assistance, please visit http://www.panasonic.com/help...
-
Page 41: Troubleshooting
L New voice mail messages have been recorded. unit flashes. Listen to the new voice mail messages (page 34). Programmable settings Problem Cause/solution The display is in a L Change the display language (page 13). language I cannot read. For assistance, please visit http://www.panasonic.com/help... - Page 42 L The dialing mode may be set incorrectly. Change the setting (page 13). L The handset is too far from the base unit. Move closer and try again. I cannot make long L Make sure that you have long distance service. distance calls. For assistance, please visit http://www.panasonic.com/help...
- Page 43 After subscribing, you may need to contact your service provider/telephone company again to activate this specific service, even if you already subscribed to both Caller ID and Call Waiting with Caller ID services (CWID). For assistance, please visit http://www.panasonic.com/help...
- Page 44 Insert the batteries and charge fully before use. If the unit does not work properly, contact an authorized service center. Caution: L To avoid permanent damage, do not use a microwave oven to speed up the drying process. For assistance, please visit http://www.panasonic.com/help...
-
Page 45: Fcc And Other Information
Hearing Aids which provide adequate as soon as possible. Also, you will be shielding to RF energy commonly emitted advised of your right to file a complaint with by digital devices. the FCC if you believe it is necessary. For assistance, please visit http://www.panasonic.com/help... - Page 46 – Reorient or relocate the receiving antenna. – Increase the separation between the equipment and receiver. – Connect the equipment into an outlet on a circuit different from that to which the TIA-1083 receiver is connected. For assistance, please visit http://www.panasonic.com/help...
-
Page 47: Guía Rápida Española
TG9321(e).book Page 47 Friday, May 28, 2010 4:34 PM Guía Rápida Española Guía Rápida Española Instalación Cómo conectar el adaptador para corriente L Use solo el adaptador de corriente Panasonic PQLV219 incluido. Correcto Oprima firmemente el contacto. Incorrecto (120 V CA, 60 Hz) Gancho Cómo conectar el cable de la línea telefónica... - Page 48 {LINEA1}, {MENU}, {LINEA2} y otras funciones adicionales se asignan a las teclas de función. Preste atención a la pantalla para ver qué funciones están asignadas a las teclas de función durante la operación del auricular. Para obtener ayuda, visite http://www.panasonic.com/help (solo en inglés)
- Page 49 Introduzca el número telefónico de la persona (máx. 24 dígitos). i {OK} {V}/{^}: Seleccione el grupo deseado. i {SELEC.} 2 veces i {OFF} Para hacer llamadas {MENU} i {#}{2}{8}{0} {V}/{^}: Seleccione la entrada deseada. i {C} Para obtener ayuda, visite http://www.panasonic.com/help (solo en inglés)
- Page 50 ¿Cómo se contestan las L Oprima {CALL WAIT} cuando escuche el tono de llamada en llamadas en espera espera. (segunda llamada)? Para obtener más información acerca del registro, visite http://www.panasonic.com/RegisterYourHandset (solo en inglés) Para obtener ayuda, visite http://www.panasonic.com/help (solo en inglés)
-
Page 51: Appendix
TTY users (hearing or speech impaired users) can call 1-877-833-8855. Accessory Purchases (United States and Puerto Rico) Purchase Parts, Accessories and Instruction Books online for all Panasonic Products by visiting our Web Site at: http://www.pstc.panasonic.com or, send your request by E-mail to: npcparts@us.panasonic.com... -
Page 52: Warranty (For United States And Puerto Rico)
Limited Warranty Coverage If your product does not work properly because of a defect in materials or workmanship, Panasonic Corporation of North America (referred to as “the warrantor”) will, for the length of the period indicated on the chart below, which starts with the date of original purchase (“Limited Warranty period”), at its... - Page 53 L Send the unit to PSTC (Panasonic) Exchange Center, prepaid and adequately insured. L Do not send your unit to Panasonic Corporation of North America listed on the back cover or to executive or regional sales offices. These locations do not repair consumer products.
-
Page 54: Index
TG9321(e).book Page 54 Friday, May 28, 2010 4:34 PM Index Night mode: 28 Index Pause: 15 Phonebook: 19 Power failure: 11 Additional handset: 29 Privacy mode: 17 Alarm: 28 Answering calls: 16 Redialing: 15 Auto talk: 16 Ringer tone: 25, 30 Rotary/pulse service: 17 Battery: 10, 11 Belt clip: 38... - Page 55 TG9321(e).book Page 55 Friday, May 28, 2010 4:34 PM Notes...
- Page 56 One Panasonic Way, Secaucus, New Jersey 07094 Copyright: This material is copyrighted by Panasonic System Networks Co., Ltd., and may be reproduced for internal use only. All other reproduction, in whole or in part, is prohibited without the written consent of Panasonic System Networks Co., Ltd.