
Related Manuals for JVC KW-R700BT


Summary of Contents for JVC KW-R700BT
- Page 1 ENGLISH KW-R700BT CD RECEIVER / CD For canceling the display demonstration, see page 4. / For installation and connections, refer to the separate manual. GET0793-001A...
- Page 2 Thank you for purchasing a JVC product. Please read all instructions carefully before operation, to ensure your complete understanding and to obtain the best possible performance from the unit. IMPORTANT FOR LASER PRODUCTS 1. CLASS 1 LASER PRODUCT 2. CAUTION: Do not open the top cover. There are no user serviceable parts inside the unit;...
-
Page 3: Table Of Contents
How to reset your unit Contents Preparation ............4 Canceling the display demonstration Setting the clock Basic operations ........... 4 Radio ................ 6 Your preset adjustments will also be erased. CD/USB ..............8 How to forcibly eject a disc iPod/iPhone ............. 9 Quick Search ............ -
Page 4: Preparation
Preparation Preparation Canceling the display Setting the clock demonstration (Hold) The display demonstration is always turned on unless you cancel it. 2 Select <CLOCK>. (Hold) 3 Select <CLOCK SET>. (Initial setting) 3 Select <DEMO OFF>. 4 Adjust the hour. 4 Press MENU to exit. 5 Adjust the minute. -
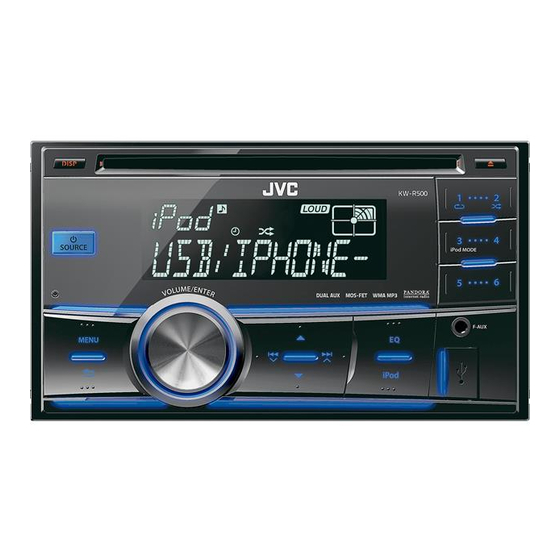
Page 5: Control Panel
Basic operations Control panel Remote controller Display window Ejects the disc Loading slot AUX input jack USB input terminal Control dial Remote sensor Aim the remote controller directly at the sensor. DO NOT expose to bright sunlight. When you press or hold the following button(s)... Remote Control panel General function... -
Page 6: Radio
Radio Radio Searching for a station Select <FM> or <AM>. Auto search. (Press) Manual search. (Hold) “M” flashes, then press the button repeatedly. “ST” lights up when receiving an FM stereo broadcast with sufficient signal strength. Auto presetting (FM only) Storing stations in memory SSM (Strong-station Sequential Memory) Manual presetting... -
Page 7: Setting The Radio Timer
Radio Setting the Radio Timer Naming the stations You can tune in to a preset station at a specific You can assign names for up to 30 station time regardless of the current source. frequencies (FM and AM) using a maximum of 8 characters for each name. -
Page 8: Cd/Usb
CD/USB CD/USB Playing a CD/USB device USB input terminal Label side USB 2.0 cable (not supplied) USB cable from the rear of the unit The source changes to “CD” and playback starts. The source changes to “USB” and playback starts. This unit can play MP3/WMA files stored in CD-R, CD-RW, and MP3/WMA/WAV files in USB mass storage device (such as a USB memory and Digital Audio Player). -
Page 9: Ipod/Iphone
Selecting a track from the list iPhone. Applicable under <HEAD MODE> only. iPod/iPhone application You can operate JVC original application with this 2 Select the desired list. unit in <APP MODE>. For more details, visit JVC website: <http://www3.jvckenwood.com/ english/car/index.html> (English website only). PLAYLISTS ARTISTS ALBUMS... -
Page 10: Quick Search
Quick Search Quick Search If you have many folders/tracks/contacts, you can search through them quickly according to the first character (A to Z, 0 to 9 and OTHERS). 1 Enter list menu or “Hands-Free” menu. CD (MP3/WMA)/ iPod/iPhone Bluetooth phonebook USB (MP3/WMA/WAV) Select <PHONEBOOK>. -
Page 11: Pairing Bluetooth Device
KS-UBT1 USB cable from the rear of the unit 2 Search and select “JVC Unit” on the Bluetooth device. “BT PAIRING” flashes on the display. For some Bluetooth devices, you may need to enter the Personal Identification Number (PIN) code immediately after searching. -
Page 12: Connecting/Disconnecting Registered Device Manually
Bluetooth connection 3 Perform (A) or (B) depending on what scrolls on the display. For some Bluetooth devices, pairing sequence may vary from the steps described below (A) If “[Device Name]” “XXXXXX” (B) If “[Device Name]” “VOL – YES” “BACK – NO” scrolls on the display, “VOL –... -
Page 13: Bluetooth Mobile Phone
Connecting to JVC original Deleting a registered device application (Hold) JVC original application is designed to view JVC car receiver status and perform simple control operations on Android smart phones. 2 Select <DELETE YES>. For JVC original application operations, visit JVC <BLUETOOTH>... - Page 14 Bluetooth mobile phone Adjustments during a call Text message notification Phone volume (00 — 50) When a text message is received, the unit rings [VOLUME 15]: Volume and “RCV MESSAGE” “[Device name]” appears. adjustments made during a call <MSG NOTICE> must be set to <ON>. will not affect the other page 16) sources.
-
Page 15: Using Voice Recognition
Bluetooth mobile phone Making a call from memory If two phones are connected, Enter “phone list” Select the desired phone You can store up to 6 contacts in the memory of this unit for speed dialing. (Hold) To store contacts in memory 1 Enter the “Hands-Free”... -
Page 16: Using The Settings Menu
Bluetooth mobile phone Using the SETTINGS menu 3 Repeat this step to perform the necessary 1 Enter the “Hands-Free” menu. settings. 2 Select <SETTINGS>. To return to the previous menu, press To exit from the menu, press MENU. The following settings are applicable to the paired device. If another device is paired, perform the settings again. -
Page 17: Bluetooth Audio Player
Bluetooth audio player Bluetooth audio player Playing a Bluetooth audio player Select <BT REAR> or <BT FRONT> depending on the location of the USB Bluetooth adapter KS-UBT1. Operate the Bluetooth audio player to start playback. Operations and display indications may differ according to their availability on the connected device. Basic operations Selecting the playback modes Starts or resumes playback. -
Page 18: Illumination Color Adjustments
Illumination color adjustments Display zone Button zone All zone: Includes both Button zone and Display zone. Selecting the preset color Storing your own adjustments You can select a preset color for <BUTTON You can store your own day and night colors for ZONE>, <DISP ZONE>, and <ALL ZONE>... -
Page 19: Brightness Adjustments
Brightness adjustments Brightness adjustments You can select your preferred brightness for <BUTTON ZONE>, <DISP ZONE> separately. (Hold) <DIMMER> BUTTON ZONE BUTTON 00 to 31 <BRIGHTNESS> DISP ZONE DISP 00 to 31 <DAY>/<NIGHT> 4 Press MENU to exit. Sound adjustments This unit memorizes sound settings adjusted for each individual source. Selecting the preset sound Pro Equalizer You can select a preset sound mode, for each... -
Page 20: Menu Operations
Menu operations Menu operations 3 Repeat step 2 if necessary. (Hold) To return to the previous menu, press To exit from the menu, press DISP or MENU. If no operation is done for about 60 seconds, the operation will be canceled. Menu item Selectable setting (Initial: [XX]) DEMO... - Page 21 Menu operations Menu item Selectable setting (Initial: [XX]) FADER *3*4 R06 — F06 [00]: Adjusts the front and rear speaker output balance. BALANCE *4 L06 — R06 [00]: Adjusts the left and right speaker output balance. LOUD ON: Boosts low and high frequencies to produce a well-balanced sound at (Loudness) a low volume level.
- Page 22 INFORMATION PH CNNT DEV/AU CNNT DEV/APP CNT DEV *11: Displays connected phone/audio/application device name. MY BT NAME: Displays the unit name (JVC Unit). MY ADDRESS: Shows address of USB Bluetooth Adapter. AM *12 [ON]/OFF: Enables or disables “AM” in source selection.
-
Page 23: Remote Controller
Remote controller Remote controller Warning: Preparing Do not install any battery other than CR2025 or When you use the remote controller for the first its equivalent. time, pull out the insulation sheet. Do not leave the remote controller in places (such as dashboards) exposed to direct sunlight for a long time. -
Page 24: About Usb Device
Additional information About audio files About USB device Playable files When connecting a USB cable, use the USB 2.0 cable. File extensions: MP3(.mp3), WMA(.wma), You cannot connect a computer or portable WAV(.wav) HDD to the USB input terminal of the unit. For MP3/WMA discs: Connect only one USB device to the unit at a Bit rate:... -
Page 25: About Bluetooth
“Made for iPod” and “Made for iPhone” mean operations may not be performed correctly or that an electronic accessory has been designed as intended. In this case, visit the following JVC to connect specifically to iPod, or iPhone, website: respectively, and has been certified by the <http://www3.jvckenwood.com/english/car/... -
Page 26: Troubleshooting
RESET UNIT”/“WARNING CHK with tape before resetting the unit. ( page 3) WIRING THEN RESET UNIT” If the message does not disappear, consult your JVC car audio appears on the display and no dealer or kits supplying company. operations can be done. - Page 27 “HW ERROR” appears on the Reset the unit and try the operation again. If “HW ERROR” display. appears again, consult your nearest JVC car audio dealer. “BT DEVICE NOT FOUND” The unit failed to search for the registered Bluetooth devices appears on the display.
-
Page 28: Specifications
Specifications Specifications AUDIO AMPLIFIER SECTION Maximum Power Output 50 W per channel Continuous Power Output (RMS) 20 W per channel into 4Ω, 40 Hz to 20 000 Hz at less than 1% total harmonic distortion. Load Impedance 4Ω (4Ω to 8Ω allowance) Frequency Response 40 Hz to 20 000 Hz Signal-to-Noise Ratio... - Page 29 Specifications GENERAL Power Requirement (Operating Voltage) DC 14.4 V (11 V to 16 V allowance) Grounding System Negative ground Allowable Operating Temperature 0°C to +40°C Dimensions Installation Size approx. 178 mm × 100 mm × 156 mm (W × H × D) Panel Size approx.
- Page 30 iPod/ iPhone CD/USB...
- Page 31 ..............4 ..............4 ..............6 CD/USB ..............8 iPod/iPhone ............9 .............. 10 .............. 10 ............11 ............ 13 ..........17 ............ 18 .............. 19 .............. 19 .............. 20 ..............23 .............. 23 .............. 26 ................ 28 < > [XX]...
- Page 32 <CLOCK> <CLOCK SET> <DEMO OFF> MENU MENU CD/USB/ iPod/iPhone HEAD MODE/ “NO NAME” IPOD MODE iPod/iPhone APP MODE APP MODE AUX IN “NO NAME”...
- Page 33 — SOURCE SOURCE SOURCE VOL - / + — — — (1 - 6) SOUND “ ” — — MP3/WMA/WAV 8, 9, 17...
- Page 34 <FM> <AM> “M” “ST” <TUNER> <SSM> “MEMORY” <SSM 01 – 06> 1 - 6 “SSM” “SSM” - - - - - - - - - - - - - - - - <SSM 07 – 12>/<SSM 13 – 18> “PRESET MODE” - - - - - - - - - - - - - - - - “MEMORY”...
- Page 35 <FM> <AM> <TUNER> “ ” <RADIO TIMER> <OFF>/<ONCE>/ <DAILY> [OFF] ONCE DAILY <FM>/<AM> / < <01> ... <18> > <01> ... <06> MENU “NAME FULL” <AM> <OFF> DISP...
- Page 36 CD/USB CD/USB CD/USB “CD” “USB” CD-R CD-RW MP3/WMA MP3/WMA/WAV MP3/WMA/WAV REPEAT RANDOM - - - - - - - - - - - - - - - - <REPEAT> <RANDOM> MP3/WMA/ REPEAT RPT OFF TRACK RPT FOLDER RPT * RANDOM RND OFF FOLDER RND * MP3/WMA/WAV...
- Page 37 iPod/iPhone iPod/iPhone <HEAD MODE> “IPOD-FRONT/IPOD-REAR” REPEAT RANDOM <HEAD MODE>/<IPOD MODE>/ - - - - - - - - - - - - - - - - <APP MODE> HEAD iPod MODE <REPEAT> <RANDOM> IPOD iPod/iPhone iPod MODE iPod/iPhone MODE REPEAT RPT OFF <IPOD SWITCH>...
- Page 38 OTHERS ” “ CD MP3/WMA / iPod/iPhone USB MP3/WMA/WAV <PHONEBOOK> OTHERS CD/USB iPod/iPhone iPod/iPhone # - ! “OTHERS” <AUX IN>...
- Page 39 KS-UBT1 USB “ ” KS-UBT1 Hands-Free Profile— HFP 1.5 Object Push Profile— OPP 1.1 Phonebook Access Profile— PBAP 1.0 Advanced Audio Distribution Profile— A2DP 1.2 Audio/Video Remote Control Profile— AVRCP 1.3 KS-UBT1 KS-UBT1 “JVC Unit” “BT PAIRING”...
- Page 40 “[ ]” “XXXXXX” “[ ]” “VOL – YES” “BACK – NO” “VOL – YES” “BACK – NO” “YES” “XXXXXX” “PAIRING” “YES” “PIN 0000” “0000” “PAIRING” “PAIRING COMPLETED” “ ” “ ” “ ” <CONNECT> <DISCONNECT> <BLUETOOTH> <BLUETOOTH> <PHONE>/<AUDIO> <PHONE>/<AUDIO> <CONNECT> <DISCONNECT>...
- Page 41 Android <DELETE YES> <BLUETOOTH> <http //www3.jvckenwood.com/english/car/ <DELETE PAIR> index.html> <DELETE YES> “DELETED” MENU <CONNECT> <BLUETOOTH> <APPLICATION> <CONNECT> “CONNECTED” “[ ]” MENU “BT FRONT”/ “BT REAR” “RECEIVING” / / / /SOURCE / / / /SOURCE <AUTO ANSWER> <ON>...
- Page 42 (00 — 50) [VOLUME “RCV MESSAGE” “[ ]” <MSG NOTICE> <ON> (01— 03) [02] “ ” “ ” “ ” “ ” “ ” DIALED RECEIVED MISSED CALL PHONEBOOK “NO HISTORY” “NO DATA” <P.BOOK SEL> <P.BOOK IN UNIT> PBAP “SEND P.BOOK MANUALLY” DIAL NUMBER...
- Page 43 “WAIT VOICE” “[ “ ” ]” <DIALED>/ <RECEIVED>/ <MISSED CALL>/ <PHONEBOOK>/ <P.BOOK SEL> <P.BOOK IN UNIT> <DIAL NUMBER> “ ” <DIALED>/ <RECEIVED>/ <MISSED CALL>/ <PHONEBOOK> “MEMORY PX” 1 - 6 <DIAL NUMBER> “ ” “ ” <DELETE> <DELETE ALL> DELETE “NO PRESET”...
- Page 44 SETTINGS “ ” <SETTINGS> MENU [XX] P.BOOK SEL * [PB IN PHONE] PB IN UNIT <P.BOOK WAIT> AUTO ANSWER [OFF] RING TONE [IN UNIT] – CALL TONE 1 — 5 – MESSAGE TONE 1 — 5 IN PHONE RING COLOR COLOR 01 —...
- Page 45 KS-UBT1 <BT REAR> <BT FRONT> AVRCP 1.3 REPEAT RANDOM - - - - - - - - - - - - - - - - <REPEAT> <RANDOM> REPEAT RPT OFF TRACK RPT ALL RPT GROUP RPT RANDOM RND OFF ALL RND GROUP RND...
- Page 46 <BUTTON ZONE> <DISP ZONE> <BUTTON ZONE> <ALL ZONE> <DISP ZONE> <COLOR> <COLOR SETUP> COLOR 01-29/USER/ <RED/ BUTTON ZONE BUTTON GREEN/BLUE> COLOR FLOW 01-03* DISP ZONE ZONE <00-31> ALL ZONE COLOR DISP BUTTON ZONE [06] DISP ZONE ZONE [01] ALL ZONE [06] <ALL ZONE>...
- Page 47 <BUTTON ZONE> <DISP ZONE> <DIMMER> BUTTON ZONE BUTTON 00 <BRIGHTNESS> DISP ZONE DISP 00 <DAY>/<NIGHT> MENU <PRO EQ> <BASS>/<MIDDLE>/ <TREBLE> - - - - - - - - - - - - - - - - DYNAMIC VOCAL BOOST BASS BOOST USER FLAT NATURAL BASS [XX]...
- Page 48 DISP MENU [XX] DEMO CLOCK COLOR COLOR SETUP DIMMER SET <BRIGHTNESS>/<COLOR SETUP> [AUTO] BRIGHTNESS DAY[31]/NIGHT[15] BUTTON ZONE/DISP ZONE 00 — 31 SCROLL *2 [ONCE] AUTO TAG DISPLAY [ON] MP3/WMA/WAV PRO EQ “ ” <DIMMER AUTO>...
- Page 49 [XX] FADER *3*4 R06 — F06 [00] BALANCE *4 L06 — R06 [00] LOUD [OFF] VOL ADJUST -05 — +05 [00] “FM” “VOL ADJ FIX” L/O MODE LINE OUT (REAR) SUB.W [REAR] SUB. W *5 [ON] SUB.W LPF *6 LOW 55Hz/MID 85Hz/[HIGH 120Hz] 55 Hz/85 Hz/120 Hz SUB.W LEVEL *6 00 —...
- Page 50 SET PINCODE 0000 AUTO CNNCT [ON] INITIALIZE [NO] INFORMATION PH CNNT DEV/AU CNNT DEV/APP CNT DEV *11 MY BT NAME JVC Unit MY ADDRESS AM *12 [ON]/OFF “AM” AUX IN *12 [AUX ON]/AUX OFF “AUX IN” BT AUDIO *13 [BT AU ON]/BT AU OFF “BT AUDIO”...
- Page 51 CR2025 CR2025 “DualDisc ” “CD ”...
- Page 52 USB 2.0 MP3(.mp3 WMA(.wma WAV(.wav MP3/WMA MP3/WMA 5 kbps - 320 kbps MP3 MPEG-1 32 kHz 44.1 kHz 48 kHz MP3 MPEG-2 16 kHz 22.05 kHz 24 kHz WMA 8 kHz - 48 kHz MP3 MPEG-1 32 kbps - 320 kbps MP3 MPEG-2 8 kbps - 160 kbps WMA 5 kbps - 320 kbps...
- Page 53 Windows Media - iPod nano - iPhone 4S Bluetooth Bluetooth SIG, Inc. - iPhone 4 JVC KENWOOD Corporation - iPhone 3GS - iPhone 3G - iPhone “Made for iPod” and “Made for iPhone” mean that <IPOD MODE>/<APP MODE> an electronic accessory has been designed to <HEAD MODE>...
- Page 54 “MISWIRING CHK WIRING THEN RESET UNIT”/ “WARNING CHK WIRING THEN RESET UNIT” <SRC SELECT> FM/AM CD/USB/iPod/iPhone “PLEASE” “EJECT” “IN DISC” “READING” “NO FILE” iPod/iPhone “NOT SUPPORT” “CANNOT PLAY” iPod/iPhone iPod/iPhone iPod/iPhone iPod/iPhone iPod/ iPhone iPod/iPhone <IPOD SWITCH>...
- Page 55 “BT FRONT”/“BT REAR” <SRC SELECT> <BT AUDIO> “PAIRING FULL” <NR/EC MODE> <MIC LEVEL> DISP AVRCP “VOICE” “VOICE” “NR/EC MODE” “OFF” “NOT SUPPORT” “ERROR CNNCT” “ERROR” “ERROR” “PLEASE WAIT” “HW ERROR” “HW ERROR” “BT DEVICE NOT FOUND”...
- Page 56 50 W 20 W 40 Hz 20 000 Hz 4Ω 4Ω 4Ω 8Ω 40 Hz 20 000 Hz 80 dB 4.8 V/20 kΩ ≤ 600Ω 87.5 MHz 108.0 MHz 9.3 dBf 0.8 μV/75Ω 50 dB 16.3 dBf 1.8 μV/75Ω 65 dB 400 kHz 40 Hz 15 000 Hz...
- Page 57 DC 14.4 V 11 V 16 V 0°C +40°C 178 mm × 100 mm × 156 mm × × 184 mm × 112 mm × 22 mm 1.5 k...
- Page 58 Having TROUBLE with operation? Please reset your unit Refer to page of How to reset your unit EN, CT 1211DTSSANJEIN © 2011 JVC KENWOOD Corporation...