
Related Manuals for JVC KD-R826BT


Summary of Contents for JVC KD-R826BT
- Page 1 ENGLISH KD-R826BT CD RECEIVER / For canceling the display demonstration, see page 4. / For installation and connections, refer to the separate manual. INSTRUCTIONS GET0716-001A [U/UH]...
- Page 2 Stop the car before operating the unit. functions will start working again. Caution: JVC bears no responsibility for any loss of data Adjust the volume so that you can hear sounds in an iPod/iPhone and/or USB mass storage outside the car. Driving with the volume too class device while using this System.
-
Page 3: Table Of Contents
How to attach/detach the control CONTENTS panel 3 How to attach/detach the control panel 3 How to reset your unit 3 How to forcibly eject a disc 3 Maintenance Canceling the display demonstration How to reset your unit Setting the clock Your preset adjustments will Preparing the remote controller also be erased. -
Page 4: Canceling The Display Demonstration
Canceling the display demonstration Turn on the power. Select <Off>. DEMO SET UP SET UP DEMO [Hold] DEMO Clock Clock Color Color (Initial setting) Select <DEMO>. Finish the procedure. DEMO (Initial setting) Setting the clock Turn on the power. Adjust the minute. Set Clock 1 : 00 SET UP... -
Page 5: Preparing The Remote Controller
Preparing the remote controller Caution: When you use the remote controller for the first time, pull out the insulation sheet. • Danger of explosion if battery is incorrectly replaced. Replace only with the same or equivalent type. • Battery shall not be exposed to excessive heat Insulation sheet such as sunshine, fire, or the like. -
Page 6: Basic Operations
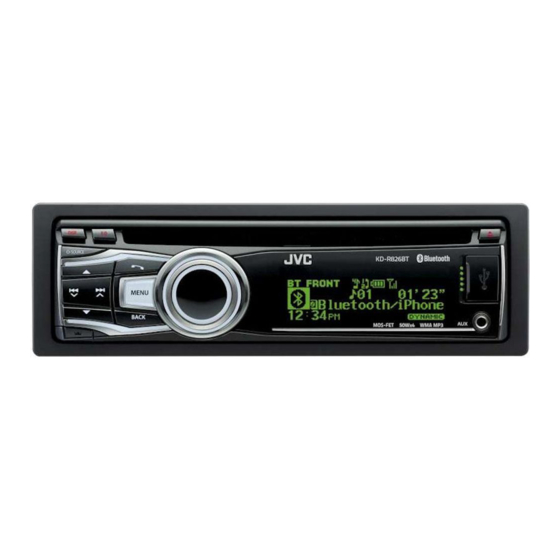
Basic operations Loading slot Control dial Display window Ejects the disc Remote sensor AUX (auxiliary) input jack • DO NOT expose to bright sunlight. USB (Universal Serial Detaches the panel Bus) input terminal When you press or hold the following button(s)... Remote Main unit General operation... -
Page 7: Listening To The Radio
Listening to the radio • [Press] Searches for stations automatically. Ÿ • [Hold] Searches for stations manually. “M” appears, then press the button ] “FM” or “AM” repeatedly. lights up when receiving an FM stereo broadcast with sufficient signal strength. Improving the FM reception Manual presetting (FM/AM) You can preset up to 18 stations for FM and... -
Page 8: Listening To A Disc
Title assignment Repeat step 3 until you have finished entering the title. You can assign titles up to 30 station frequencies (FM and AM) using 8 characters (maximum) for each title. • If you try to assign titles to more than 30 station frequencies, “Name Full”... -
Page 9: Selecting The Playback Modes
Basic operations • Only the existing characters will be shown on the search menu. • Press and hold 5/∞ to continuously change the character of the search menu. Selects folder of the MP3/WMA. • If your disc contains many tracks, searching take some time. -
Page 10: Listening To A Usb Device
Listening to a USB device This unit is equipped with two USB input terminals (on the control panel and USB cable from the rear of the unit). You can use these two terminals at the same time. You can operate the USB device in the same way you operate the files on a disc. (page 8, 9) •... -
Page 11: Using Bluetooth ® Devices
Bluetooth connection is disconnected. Continue the conversation using your mobile phone. • When the unit is turned off, the device is disconnected. • If you wish to receive more information about Bluetooth, visit the following JVC web site: <http://www.jvc.co.jp/english/car/index.html> (English website only). -
Page 12: Connecting A Bluetooth Device
Then, confirm the passkey on the Use the Bluetooth device to search and unit by pressing the control dial. Operate select “JVC Unit.” the Bluetooth device to confirm the • For some Bluetooth devices, you may passkey. need to enter the PIN code first after •... -
Page 13: Using A Bluetooth Mobile Phone
To delete a registered device To connect/disconnect a registered device 1 Press and hold MENU. 1 Press and hold MENU. 2 Turn the control dial to select 2 Turn the control dial to select <Bluetooth>, then press to confirm. <Bluetooth>, then press to confirm. 3 Turn the control dial to select 3 Turn the control dial to select <Delete Pairing>, then press to confirm. - Page 14 If “Settings” is selected in step 2 ... Ring Color • Turn the control dial to select an item (see 29 preset colors [ Initial: Color 06 ] : When a the following), then press the control dial call/text message comes in, the display will flash to confirm.
-
Page 15: Receiving/Ending A Phone Call
To delete a contact (name/phone number) Using the remote controller 5 / ∞ / 2 / 3 / SOURCE : [Press] Answers calls. Only when “In Unit” is selected for “Phonebook Select”. (page 14) [Hold] Rejects calls. 1 Press to enter “HF Menu” screen. 2 Display the list of name/phone numbers To switch conversation media (the unit/ using one of the calling methods. -
Page 16: Using A Bluetooth Audio Player
Using a Bluetooth audio player Operations and display indications differ Selecting the playback modes depending on their availability on the • For Bluetooth devices that support AVRCP 1.3. connected device. ] Select “BT FRONT” or [Hold] “BT REAR.” If playback does not start automatically, operate the Bluetooth audio player to start playback. -
Page 17: Changing The Bluetooth Settings
Yes : Initialize all the Bluetooth settings (including stored pairing, phonebook, and etc.). / No : Cancels. Information My BT Name : Shows the unit name (JVC Unit). / My Address : Shows address of USB Bluetooth Adapter. / ConnectedPhone * : Shows connected phone name. / ConnectedAudio * : Shows connected audio device name. -
Page 18: Listening To An Ipod/Iphone
Listening to an iPod/iPhone You can connect an Apple iPod/iPhone using the USB 2.0 cable (accessory of the iPod/iPhone) to the USB input terminal on the control panel or USB cable from the rear of the unit. Ÿ USB input terminal ] Turns on the power. - Page 19 • Searching may not work on some of the layers of the selected menu. You can operate JVC original application (eg. JVC Drive Smart) with this unit in <Application Mode>. Selecting the playback modes For JVC Drive Smart operations, visit JVC web Not applicable under <iPod Mode/...
-
Page 20: Listening To The Other External Components
• When operating an iPod/iPhone, some operations may iPhone 3GS not be performed correctly or as intended. In this case, iPhone 3G visit the following JVC web site: <http://www.jvc. iPhone co.jp/english/car/index.com> (English website only). <iPod Mode/ Application Mode> are not available. -
Page 21: Selecting A Preset Sound Mode
Selecting a preset sound mode You can select a preset sound mode suitable Storing your own sound mode for the music genre. You can store your own adjustments in memory. FLAT = NATURAL = DYNAMIC = VOCAL [Hold] = BASS = USER = (back to the beginning) While listening, you can adjust the subwoofer level and tone level of the selected sound ] <PRO EQ>... -
Page 22: Menu Operations
Menu operations Repeat step 2 if necessary. [Hold] • To return to the previous menu, press BACK. If no operation is done • To exit from the menu, press for about 60 seconds, the MENU. operation will be canceled. Menu item Selectable setting, [ Initial: Underlined ] DEMO On : Display demonstration will be activated automatically if no operation is done for... - Page 23 Menu item Selectable setting, [ Initial: Underlined ] Dimmer Set Auto : Changes the display and button illumination between the Day/Night adjustments in <Brightness>/<Color Setup> setting when you turn off/on the car headlights * . / Time Set : Sets the start/end timer for dimmer. Turn the control dial to adjust the start time, then press the control dial to confirm.
- Page 24 Menu item Selectable setting, [ Initial: Underlined ] Subwoofer LOW 55Hz / MID 85Hz / HIGH 120Hz : Frequencies lower than 55 Hz/ 85 Hz/ LPF * 120 Hz are sent to the subwoofer. / Off : Deactivates (all signals are sent to the rear speakers).
-
Page 25: Additional Information
• The Bluetooth word mark and logos are owned by the Bluetooth SIG, Inc. and any use of such marks by Victor Company of Japan, Limited (JVC) is under license. Other trademarks and trade names are those of their respective owners. -
Page 26: Troubleshooting
Troubleshooting Symptom Remedy/Cause Sound cannot be heard from the speakers. Adjust the volume to the optimum level. / Make sure the unit is not muted/paused. (page 6) / Check the cords and connections. The unit does not work at all. Reset the unit. - Page 27 Symptom Remedy/Cause The elapsed playing time is not correct. This sometimes occurs during playback. This is caused by how the tracks are recorded on the disc. “Please Eject” appears on the display. Insert a disc that contains MP3/WMA tracks. “Not Support” appears on the display Skip to the next track encoded in an appropriate format or to the and track skips.
- Page 28 “HW Error” appears on the display. Reset the unit and try the operation again. If “HW Error” appears again, consult your nearest JVC car audio dealer. The iPod does not turn on or does not Check the connecting cable and its connection. / Charge the work.
-
Page 29: Specifications
Specifications AUDIO AMPLIFIER SECTION USB SECTION Maximum Power Output : 50 W per channel USB Standard : USB 1.1, USB 2.0 Continuous Power Output (RMS) : 20 W per Data Transfer Rate (Full Speed) : Max. 12 Mbps channel into 4 Ω, 40 Hz to 20 000 Hz at no Compatible Device : Mass Storage Class more than 1% total harmonic distortion. - Page 30 The countries where you may use the Bluetooth® function nh ng qu c gia mà b n có th s d ng ch c n ng Bluetooth ®...
- Page 31 Country Country Country Andorra Ísland Türkiye Italia United States of America Australia Lichtenstein Venezuela Österreich Lietuva Vietnam Bosna i Hercegovina Vi t Nam Luxemburg Belgien South Africa Luxembourg Belgique ENingizimu Afrika Lëtzebuerg България Suid-Afrika Latvija Canada Monaco Schweiz Crna Gora Suisse Македонија...
- Page 32 Having TROUBLE with operation? Please reset your unit Refer to page of How to reset your unit EN, TH © 2011 Victor Company of Japan, Limited 0111DTSMDTJEIN...
-
Page 33: Removing The Unit
หากท่ า นมี ค ำถามหรื อ ต้ อ งการข้ อ มู ล เกี ่ ย วกั บ ชุ ด ติ ด ตั ้ ง โปรดปรึ ก ษาตั ว แทนจำหน่ า ยเครื ่ อ งเสี ย งติ ด รถยนต์ • If you have any questions or require information regarding installation kits, consult your JVC car audio •... -
Page 34: Electrical Connections
การเชื ่ อ มต่ อ ไฟฟ้ า ELECTRICAL CONNECTIONS / ไปยั ง ซั บ วู ฟ เฟอร์ SW : To subwoofer / JVC Amplifier / ไปยั ง ลำโพงหน้ า แอมพลิ ฟ ลายเออร์ ข อง FRONT : To front speakers / ไปยั ง ลำโพงหลั ง... - Page 35 ENGLISH / WARNINGS / • You need the installation kits which corresponds to your car. • • If you have any questions or require information regarding installation kits, consult your JVC car audio • dealer or a company supplying kits. •...
- Page 36 ELECTRICAL CONNECTIONS / SW : To subwoofer / JVC Amplifier / FRONT : To front speakers / REAR : To rear speakers / Signal cord / Connecting the microphone unit / Secure using cord cramps * necessary / (Microphone input terminal / Adjust the angle / USB cable (approx.