
Related Manuals for Siemens HG193510ME


Summary of Contents for Siemens HG193510ME
- Page 1 Installation instructions Instructions for use HG193510ME HG195510ME HG196510ME HG197510ME HG198210ME HG198510ME HG199210ME HG199510ME...
- Page 2 ...
-
Page 3: Table Of Contents
Installation instructions 1-22 Instructions for use 23-90 Installation instructions Safety precautions ___________________________________________ 3 Before installing _____________________________________________ 4 Appliance......................4 Guideline for ventilation.................. 6 Installation __________________________________________________ 7 Fitting the adjustable feet ................7 Fitting the splash guard .................. 8 Electrical connection _________________________________________ 9 Gas connection _____________________________________________ 11 Converting the gas type ______________________________________ 15 Hotplate burners................... -
Page 5: Safety Precautions
Safety precautions This manual is valid for several models. Variations in details for each cooker are possible. The safe operation of this appliance can only be guaranteed if it has been professionally assembled and installed in accordance with these instructions. The individual who assembled and installed the appliance is liable for damage or faults resulting from incorrect assembly or installation. -
Page 6: Before Installing
Before installing Read the following information about the appliance and the guidelines for ventilation. Appliance Unpacking Check the condition of the appliance after unpacking it. Do not connect the appliance if it has been damaged in transport. Dispose of packaging in an environmentally-friendly manner. - Page 7 Appliance dimensions Note the specified dimensions. HG193510ME, HG196510ME, HG197510ME, HG195510ME HG198210ME, HG198510ME, HG199210ME, HG199510ME A = 95-160 mm (HG193510ME, HG197510ME, HG198210ME, HG199210ME: A= 90-145 mm) B = 820-885 mm (HG193510ME, HG197510ME, HG198210ME, HG199210ME: B= 815-870 mm) Adjacent units Adjacent units must be made of non-combustible material.
-
Page 8: Guideline For Ventilation
Rating plate The technical data for the appliance can be found on the rating plate on the inside of the storage compartment flap. Never remove the rating plate from the appliance. The setting values are specified on a label on the appliance packaging. -
Page 9: Installation
Installation This appliance is always supplied with a set of adjustable feet and, depending on the model, with a splash guard. The appliance may also be used without the splash guard. Fitting the adjustable feet Beforehand: • Remove all parts that are not permanently fixed, especially the pan supports and burners. -
Page 10: Fitting The Splash Guard
Fitting the splash guard Depending on the model. Proceed as follows: • Remove the packaging and the protective film from the splash guard. • Screw the splash guard onto the rear of the appliance using the 2 bolts, each with a washer, retaining washer and nut. -
Page 11: Electrical Connection
Electrical connection Only a licensed expert may connect the appliance. The appliance must be installed according to the most recent IEE regulations (Institute of Electrical Engineers). The appliance could become damaged if incorrectly connected. Make sure the voltage of the power supply corresponds to the specified value on the rating plate. - Page 12 Connecting the mains Where the appliance is directly connected to the cable power supply, an all-pole isolating switch with a contact gap is required. Complete disconnection in compliance with the conditions specified in overvoltage category III must be guaranteed. The earth cable is excluded from this. Replacing the mains cable The mains cable is replaced via the terminal block.
-
Page 13: Gas Connection
Gas connection The appliance must be connected in accordance with the currently applicable regulations. Before installing the appliance, check that the local conditions (type of gas and pressure) are compatible with the appliance settings. The permissible appliance settings can be found on the rating plate. Connection to the gas lines and seal fitting must be carried out professionally according to the currently applicable standards. - Page 14 Country-specific connection Corrugated tube ISO 7-1 union (natural gas) (liquefied gas)
- Page 15 Connecting to liquefied gas If you connect the appliance to liquefied gas, you must always install a suitable gas pressure regulator. Use the total gas consumption of the appliance stated on the rating plate to select a suitable gas pressure regulator.
- Page 16 Flexible hose If you use flexible hoses, make sure that: • the hoses do not become trapped or squashed. • the hoses are not subject to twisting or pulling forces. • the hoses do not come into contact with sharp edges or cutting edges.
-
Page 17: Converting The Gas Type
Converting the gas type If the appliance is not already set up for the existing type of gas, the appliance must be converted. The conversion to a different type of gas must be carried out by an authorised expert in accordance with the applicable regulations. - Page 18 • Place each burner cup (B) on the burner (C). • Position the relevant burner cap (A) exactly on top of the cup. • Refit the pan supports. Adjusting the low flame Proceed as follows: • Switch on the burner and turn the control knob towards the small flame setting.
-
Page 19: Oven Burner
Oven burner Replacing the nozzles Proceed as follows: • Remove the removable floor of the oven by undoing the 2 screws at the front and pulling the floor out upwards and towards the front. • Undo the 2 screws on the right and the screw on the left of the oven burner and pull the burner upwards and towards the front slightly. - Page 20 Adjusting the low flame Proceed as follows: • Open the appliance door. Press the control knob for the oven in and turn it anti-clockwise to the maximum setting 250. The gas burner will light. Hold the control knob depressed for around 15 seconds and then release it.
- Page 21 Regulating the primary air The primary air is correctly set when the flame is stable and blue/green. Proceed as follows: • Undo the screw. • Turn the cover clockwise or anticlockwise. The table below shows the correct setting for the cover.
-
Page 22: Grill Burner
Grill burner Replacing the nozzles Proceed as follows: • Undo the 2 screws on the left and the 2 screws on the right of the grill burner and pull the burner downwards and towards the front slightly. • Unscrew the nozzle and replace it with a nozzle which is suitable for the new type of gas (see "General nozzle table"... -
Page 23: General Nozzle Table
Regulating the primary air The primary air is correctly set when the flame is stable and blue/green. Proceed as follows: • Undo the screw. • Slide the inner cover forwards or backwards. The table below shows the correct setting for the cover. -
Page 24: Positioning And Levelling
Positioning and levelling Positioning the appliance When installing the appliance, make sure that there is enough space in the final installation location to pull the appliance forwards for cleaning and maintenance work. The ground underneath must be hard and stable. The wall immediately behind the appliance must be made from non-flammable material, e.g. - Page 25 The hob ......................38 The oven ...................... 40 The minute minder ..................43 The storage compartment ................43 Your new appliance: HG193510ME _______________________________________________ 44 The control panel..................44 The hob ......................45 The oven ...................... 47 The minute minder ..................50 The storage compartment ................
- Page 26 How to operate your oven: HG193510ME _______________________________________________ 64 Operating the oven gas burner..............65 Operating the grill gas burner............... 66 Using the rotary spit ..................67 Operating the minute minder __________________________________ 70 Cleaning and care ___________________________________________ 71 Catalytic cooking compartment panels............71 Using the correct cleaning agent..............
-
Page 27: Installation Instructions 1-22 | Instructions For Use
Important information Read the instructions for use carefully. This will enable you to operate your appliance safely and correctly. This manual is valid for several models. Variations in details for each cooker are possible. Please keep the instruction manual, installation instructions and the various accessories in a safe place. -
Page 28: Safety Precautions
Safety precautions This appliance is intended for domestic use only. This appliance must only be used for food preparation. Adults and children must not operate the appliance without supervision if: • they do not have the physical or mental ability; •... - Page 29 High-proof alcohol Be careful with food that is prepared using drinks with a high alcohol content (e.g. cognac, rum). Alcohol evaporates at high temperatures. In unfavourable circumstances, the alcoholic vapours could catch fire in the appliance. Risk of burns. Only use small quantities of drinks with a high alcohol content and open the appliance door carefully.
-
Page 30: Property Damage
Faults with the gas If you can smell gas or identify faults with the gas installation/gas smell installation, you must • shut off the gas supply and/or valve on the gas cylinder immediately • put out naked flames and cigarettes immediately •... - Page 31 Damage to the oven Never cook meals on the floor of the cooking compartment. Do not leave the baking tray on the cooking compartment floor. Do not cover it with aluminium foil. Do not place oven or cookware on the oven floor. This will cause heat accumulation.
-
Page 32: Your New Appliance
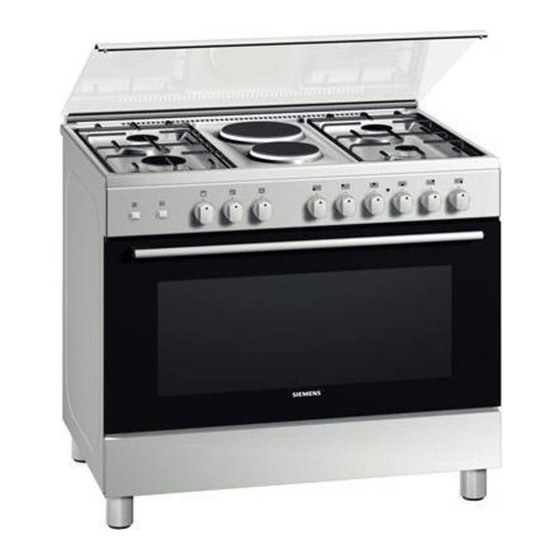
Your new appliance HG197510ME, HG198210ME, HG198510ME, HG195510ME, HG199210ME, HG199510ME Get to know your appliance. You will find information about the control panel and hob, as well as the oven, types of heating and accessories. For the HG197510ME/HG198210ME/HG198510ME/ HG199210ME/HG199510ME model: Hob cover Steam outlet Control panel Oven... -
Page 33: The Control Panel
The control panel Control knob Control knob Control knobs Gas burners Grill Oven Function button Control knob Rotary spit Minute minder Function button Oven lighting The hob Standard burner (1.75 kW) Steam outlet Pan support Economy burner (1.0 kW) High output burner Wok burner (3.0 kW) (3.6 kW) - Page 34 Control knobs for gas Adjust the heat setting of the gas burners using the burners control knobs. The symbol above the control knob shows you to which gas burner the control knob belongs. Setting Meaning > Gas supply open, the burner ignites. J - Ÿ...
-
Page 35: The Oven
The oven Gas burners Grill gas burner (2.0 kW) Oven gas burner (4.3 kW) Control knob for oven Use this control knob to set the heat output of the oven gas burner. Setting Meaning 140 - 250 Oven gas burner on, temperature range in °C There is a limit stop between settings 250 and 0. - Page 36 Function button for oven This function button is used to switch the oven lighting lighting on and off. Setting Meaning Function button for rotary This function button is used to switch the rotary spit spit on and off. Setting Meaning...
- Page 37 Accessories The accessories can be inserted in the oven in 5 different shelf positions. You can pull the accessories two-thirds of the way out without them tipping. This allows meals to be removed easily. You can buy accessories from the after-sales service or from specialist retailers.
-
Page 38: The Minute Minder
The minute minder The minute minder is a countdown timer which emits an audible signal when the cooking time has elapsed. The minute minder runs independently of the oven. Control knob for minute Use this control knob to set the cooking time. minder Setting Meaning... -
Page 39: Your New Appliance
Your new appliance HG196510ME Get to know your appliance. You will find information about the control panel and hob, as well as the oven, types of heating and accessories. Hob cover Steam outlet Control panel Oven Storage The control panel Control knob Control knobs Oven... -
Page 40: The Hob
The hob Large hotplate Standard burner (1.5 kW) (1.75 kW) Steam outlet Standard burner (1.75 kW) Pan support Economy burner (1.0 kW) High output burner Medium hotplate (3.0 kW) (1.0 kW) Gas burners Gas burners Pot or pan diameter Economy burner 8-16 cm Standard output burner 12-20 cm... - Page 41 Electric hotplates Hotplate Diameter Large hotplate 18.5 cm Medium hotplate 15 cm Control knobs for electric The control knobs are used to adjust the heat setting hotplates of the hotplates. The symbol above the control knob shows you to which gas burner the control knob belongs. Setting Meaning 1 - 6...
-
Page 42: The Oven
The oven Gas burners Grill gas burner (2.0 kW) Oven gas burner (4.3 kW) Control knob for oven Use this control knob to set the heat output of the oven gas burner. Setting Meaning 140 - 250 Oven gas burner on, temperature range in °C There is a limit stop between settings 250 and 0. - Page 43 Function button for oven This function button is used to switch the oven lighting lighting on and off. Setting Meaning Function button for rotary This function button is used to switch the rotary spit spit on and off. Setting Meaning...
- Page 44 Accessories The accessories can be inserted in the oven in 5 different shelf positions. You can pull the accessories two-thirds of the way out without them tipping. This allows meals to be removed easily. You can buy accessories from the after-sales service or from specialist retailers.
-
Page 45: The Minute Minder
The minute minder The minute minder is a countdown timer which emits an audible signal when the cooking time has elapsed. The minute minder runs independently of the oven. Control knob for minute Use this control knob to set the cooking time. minder Setting Meaning... -
Page 46: Your New Appliance
Your new appliance HG193510ME Get to know your appliance. You will find information about the control panel and hob, as well as the oven, types of heating and accessories. Hob cover Steam outlet Control panel Control knob Control knobs Oven... -
Page 47: The Hob
The hob Standard burner (1.75 kW) Steam outlet Pan support Economy burner (1.0 kW) High output burner Wok burner (3.0 kW) (3.6 kW) Gas burners Gas burners Pot or pan diameter Economy burner 8-16 cm Standard output burner 12-20 cm High output burner 20-23 cm Wok burner... - Page 48 Accessory Accessory Description Espresso attachment Attachment for an espresso pot, for attaching to the economy burner. Steam outlet Risk of burns. Hot air from the oven escapes out of the steam outlet on the hob. Never touch the steam outlet. Please note that, in the case of appliances with a hob cover, the burners in the oven may also only be switched on if the hob cover is open.
-
Page 49: The Oven
The oven Gas burners Grill gas burner (2.0 kW) Oven gas burner (4.3 kW) Control knob for oven Use this control knob to switch on the grill gas burner and to set the heat output of the oven gas burner. Setting Meaning 140 - 250... - Page 50 Function button for oven This function button is used to switch the oven lighting lighting on and off. Setting Meaning Function button for rotary This function button is used to switch the rotary spit spit on and off. Setting Meaning...
- Page 51 Accessories The accessories can be inserted in the oven in 5 different shelf positions. You can pull the accessories two-thirds of the way out without them tipping. This allows meals to be removed easily. You can buy accessories from the after-sales service or from specialist retailers.
-
Page 52: The Minute Minder
The minute minder The minute minder is a countdown timer which emits an audible signal when the cooking time has elapsed. The minute minder runs independently of the oven. Control knob for minute Use this control knob to set the cooking time. minder Setting Meaning... -
Page 53: Before Using For The First Time
Before using for the first time Please read the following instructions before using your appliance for the first time. Remove the appliance packaging and dispose of this appropriately. Baking out the oven Cooking compartment Remove the accessories from the cooking initial cleaning compartment. - Page 54 After 30 minutes, switch the grill off by turning the control knob anti-clockwise to position 0 . For the HG193510ME model: Open the appliance door. Press the control knob for the oven in, turn it clockwise to x and hold the control knob pressed in for a few seconds until the flame has stabilised.
-
Page 55: Cleaning The Burner Lids And Cups
Cleaning the burner lids and cups Proceed as follows: Clean the burner lids (A) and cups (B) with water and washing-up liquid. Dry the parts off well. Place the burner cup in question (B) on the burner (C). Place the burner lid (A) exactly on top of the burner cup (B). -
Page 56: How To Operate Your Hob
How to operate your hob Please note that, in the case of appliances with a hob cover, the burners may only be switched on if the hob cover is open. Operating gas burners Make sure that the burner lid always sits exactly on top of the burner cup. -
Page 57: Operating Electric Hotplates
If the flame goes out Switch off the control knob. Wait for one minute and repeat steps 1 to 3. If the flame goes out, gas will escape. Never leave the gas burner unattended during operation. Ensure that food does not boil over and that there are no draughts when cooking. -
Page 58: How To Operate Your Oven
How to operate your oven HG196510ME, HG197510ME, HG198210ME, HG198510ME, HG195510ME, HG199210ME, HG199510ME Please note that, in the case of appliances with a hob cover, the burners in the oven may only be switched on if the hob cover is open. Switching on the oven Press down the function button for the oven lighting lighting... -
Page 59: Operating The Oven Gas Burner
Operating the oven gas burner If you wish to heat your oven in the conventional way, use the oven gas burner. Switching on the oven gas Open the appliance door. burner Press the control knob for the oven, turn it anti- clockwise to position 250 °C and hold the control knob pressed for a few seconds until the flame has stabilised. -
Page 60: Operating The Grill Gas Burner
Operating the grill gas burner Please note that the appliance door must be closed during grilling. Switching on the grill gas Open the appliance door. burner Press the control knob for the grill and turn it anti- clockwise to position J . The gas burner ignites. -
Page 61: Using The Combination Mode
Using the combination mode Tips on using the Please note the following points when using the combination mode combination mode: • The temperature range marked on the control knob for the oven only applies to conventional heating. When the combination mode is used, the temperature in the oven is higher than the temperature which was set on the control knob. - Page 62 Turning on the grill When using conventional heating, you can briefly turn on the grill at the end of the cooking time for food and baked goods which require more intense browning or a crisped finish (e.g. crackling). To turn on the grill, proceed as follows: Carefully open the appliance door.
-
Page 63: Using The Rotary Spit
Using the rotary spit The rotary spit can be used to cook joints such as rolled joints and poultry with excellent results. The meat is roasted thoroughly and evenly. Use the rotary spit in conjunction with the grill or combination mode. Preparing joints Place the joint as centrally as possible on the rotary spit and secure it at both ends with the retaining clips. - Page 64 Inserting the rotary spit Insert the rotary spit as follows: Hook the spit holder into the bracket on the ceiling of the cooking compartment. If you require to preheat the oven, hook in the holder before preheating. Risk of burns Never touch the hot surfaces of the cooking compartment or the heating elements.
- Page 65 Removing the rotary spit Risk of burns. Never touch the hot surfaces of the cooking compartment or the heating elements. Children must be kept at a safe distance from the appliance at all times. Open the appliance door carefully. Hot steam may escape.
-
Page 66: How To Operate Your Oven
How to operate your oven HG193510ME Please note that, in the case of appliances with a hob cover, the burners in the oven may only be switched on if the hob cover is open. Switching on the oven Press down the function button for the oven lighting lighting until it locks into place. -
Page 67: Operating The Oven Gas Burner
Operating the oven gas burner If you wish to heat your oven in the conventional way, use the oven gas burner. Switching on the oven gas Open the appliance door. burner Press the control knob for the oven, turn it anti- clockwise to position 250 °C and hold the control knob pressed for a few seconds until the flame has stabilised. -
Page 68: Operating The Grill Gas Burner
Operating the grill gas burner Please note that the appliance door must be closed during grilling. Switching on the grill gas Open the appliance door. burner Press the control knob for the oven in, turn it clockwise to x and hold the control knob pressed in for a few seconds until the flame has stabilised. -
Page 69: Using The Rotary Spit
Using the rotary spit The rotary spit can be used to cook joints such as rolled joints and poultry with excellent results. The meat is roasted thoroughly and evenly. Use the rotary spit in conjunction with the grill. Preparing joints Place the joint as centrally as possible on the rotary spit and secure it at both ends with the retaining clips. - Page 70 Inserting the rotary spit Insert the rotary spit as follows: Hook the spit holder into the bracket on the ceiling of the cooking compartment. If you require to preheat the oven, hook in the holder before preheating. Risk of burns Never touch the hot surfaces of the cooking compartment or the heating elements.
- Page 71 Removing the rotary spit Risk of burns. Never touch the hot surfaces of the cooking compartment or the heating elements. Children must be kept at a safe distance from the appliance at all times. Open the appliance door carefully. Hot steam may escape.
-
Page 72: Operating The Minute Minder
Operating the minute minder The minute minder runs independently of the oven. Setting a cooking time Turn the control knob once round clockwise, as far as the limit stop, and then turn it anti-clockwise to set it to the required time. The cooking time has A signal sounds once the time has elapsed. -
Page 73: Cleaning And Care
Cleaning and care Never use high-pressure cleaners or steam jets. Risk of short circuit. Never use caustic or abrasive cleaning agents. These could damage the surface. If such an agent gets on the front of the appliance, wipe it off immediately with water. -
Page 74: Using The Correct Cleaning Agent
Using the correct cleaning agent Do not use cleaning agents that contain abrasive substances or acids, or cleaning aids such as steel wool or stainless steel sponges. These could damage the surfaces. Appliance parts Cleaning agent and cleaning aid Appliance door glass panel •... - Page 75 Appliance parts Cleaning agent and cleaning aid Accessory • Soak in hot soapy water. Clean with a brush or sponge.
-
Page 76: Removing And Fitting The Appliance Door
Removing and fitting the appliance door You can remove the appliance door for easier cleaning. The hinges of the appliance door are each secured by a locking lever. When the locking lever is folded in (A), the appliance door is secured. It cannot be unhinged. If the locking lever is open (B), only the hinge is secured, and you can remove the appliance door. - Page 77 Fitting the appliance door Proceed as follows: Hold the appliance door at an angle. Insert both hinges, left and right, into the supports. Position the door so that the hinge grooves engage on both sides. Open the appliance door. Fold in the locking levers on both sides. Close the appliance door.
-
Page 78: Removing And Inserting The Hook-In Racks
Removing and inserting the hook-in racks You can remove the hook-in racks in order to clean them separately. The hook-in racks are all fixed to the walls of the cooking compartment at four points. Removing the hook-in To remove the hook-in racks, proceed as follows: racks Take hold of the bottom of the hook-in rack and pull it slightly forward. - Page 79 Inserting the hook-in rack To reinsert the hook-in racks, proceed as follows: Insert the upper hooks into the drill holes in the side panel. Pull the hook-in rack slightly downwards and insert the lower hooks into the drill holes.
-
Page 80: Faults And The After-Sales Service
Faults and the after-sales service Malfunctions often have simple explanations. Please read the following notes before calling the aftersales service. Fault Possible cause Remedial action The door panel steams up when Normal occurrence; Not possible; this has no the oven is hot. caused by the effect on oven performance. -
Page 81: Replacing The Oven Light Bulb
Replacing the oven light bulb If the oven light bulb fails, it must be replaced. Replacement heat-resistant bulbs can be obtained from the after-sales service or from specialist retailers. Please specify the E number and FD number of your appliance. Do not use any other type of bulb. -
Page 82: Aftersales Service
Aftersales service Our after-sales service is there for you if your appliance needs to be repaired. You will find the address and telephone number of your nearest after- sales service centre in the phone book. The after- sales service centres listed will also be happy to give you the details of an after-sales service point near you. -
Page 83: Tips And Tricks
Tips and tricks The following are tips and tricks to help you when cooking food in your appliance. Tips for saving energy Here are a few tips for saving energy when using the hob and oven. Tips on using the hob Suitable cookware Make sure that the diameter of the cookware is diameter... -
Page 84: Tips On Using The Oven
Tips on using the oven Several cakes It is best to bake several cakes one after the other. The oven is still warm. This reduces the baking time for the second cake. You can also place two cake tins next to each other. Using residual heat Where longer cooking times are used, you can switch the oven off 10 minutes before the end of the cooking... -
Page 85: Tips For Using Your Appliance
Tips for using your appliance The following tips relate to ovenware and cooking and explain what to do if something goes wrong. General tips Since a lower temperature allows more even browning. Clean the appliance and accessories after each use, once they have cooled down. -
Page 86: Baking
Baking Baking tins Use light-coloured baking tins and trays wherever possible. Notes on tables Temperature and baking time depend on the amount and composition of the ingredients. Application examples More information can be found in the “Baking tips” section which follows the baking tables. ð... -
Page 87: Baking Tips
Baking tips How to confirm whether your Approximately 10 minutes before the end of the sponge cake is cooked baking time stated in the recipe, pierce the highest through. point of the cake with a wooden skewer. If no cake mixture sticks to the wood, the cake is ready. -
Page 88: Roasting And Grilling
Roasting and grilling Ovenware You can use ovenware made from enamel, fireproof glass, clay or cast iron. The baking tray is also suitable for large roasts. Optimum grilling surface You will achieve the best results if you use the grill zone. - Page 89 Place the food to be grilled in the centre of the wire rack. Pour a little bit of water into the enamelled baking tray and insert this into the shelf position underneath the grill to collect the run-off fat. Never place it on the cooking compartment floor.
- Page 90 Application examples For the HG193510ME model: ð x Shelf posi- Preheating Cooking tion time time Dish Minutes Minutes Toast Beef rissoles, 6 x 100 g Steak, 5 x 150 g Veal ragout, 700 g * Turn halfway through the cooking time.
- Page 91 Roasting tips The table below contains additional information on how to be successful at roasting. How can you tell when the Use a meat thermometer (available from specialist roast is ready? retailers) or carry out a "spoon test". Press down on the roast with a spoon. If it feels firm, it is ready.
- Page 94 Siemens-Electrogeräte GmbH Carl-Wery-Str. 34 D-81739 München 07.2009...