Table of Contents
Advertisement
Quick Links
Advertisement
Table of Contents

Related Manuals for Asus TS mini


Summary of Contents for Asus TS mini
- Page 1 E5045 First Edition V1 October 2009 Home Server TS mini User Manual TS mini...
-
Page 2: Table Of Contents
Setting.up.your.server..........20 Connecting to the home network ............20 Connecting to the power supply ............20 Powering on the server ................21 Home network diagram ...............21 System requirements ................22 Installing the Windows Home Server Connector on the first computer ....................23 HOME SERVER TS mini... - Page 3 Sync .......................69 ASUS WebStorage ...................71 Initializing ASUS WebStorage ............71 Using My Web Backup ..............72 Viewing My Web Sync ..............73 Configuring the ASUS WebStorage settings ......74 ASWM ......................75 The main page ...................76 Banner ....................76 Inventory and configuration menus ........77 System health menus ..............77...
- Page 4 Passwords ...................83 Windows Media Center ..............84 Media Sharing ...................85 Remote Access ..................86 Enabling remote access .............87 Accessing the TS mini home page .........92 Add-ins ....................95 ASUS WebStorage ................97 Resources ....................98 Performing a Server Recovery or Factory Reset ......99 Recovering Windows Home Server ...........99 Restoring Factory Defaults............
-
Page 5: Notices
• Consult the dealer or an experienced radio/TV technician for help. Any changes or modifications not expressly approved by the grantee of this device could void the user’s authority to operate the equipment. HOME SERVER TS mini... -
Page 6: Canadian Department Of Communications Statement
This class B digital apparatus complies with Canadian ICES-003. REACH.Notice Complying with the REACH (Registration, Evaluation, Authorisation, and Restriction of Chemicals) regulatory framework, we published the chemical substances in our products at ASUS REACH website at http://green.asus.com/english/REACH.htm. Macrovision.Corporation.Product.Notice This product incorporates copyright protection technology that is protected by method claims of certain U.S. -
Page 7: Ic Radiation Exposure Statement For Canada
• Protection requirements for electromagnetic compatibility in [Article 3.1b] • Testing for electromagnetic compatibility in [EN 301 489-1] & [EN 301 489-17] • Effective use of the radio spectrum as in [Article 3.2] • Radio test suites according to [EN 300 328-2] HOME SERVER TS mini... -
Page 8: Ce Mark Warning
CE marking for devices without wireless LAN/Bluetooth The shipped version of this device complies with the requirements of the EEC directives 2004/108/EC “Electromagnetic compatibility” and 2006/95/EC “Low voltage directive” . HOME SERVER TS mini... -
Page 9: Ul Safety Notices
• DO NOT use the TS mini near water, for example, near a bath tub, wash bowl, kitchen sink or laundry tub, in a wet basement or near a swimming pool. -
Page 10: Class 1 Laser Product
NO.DISASSEMBLY. The.warranty.does.not.apply.to.the.products.that. have.been.disassembled.by.users DO.NOT throw the HOME SERVER TS mini in municipal waste. This product has been designed to enable proper reuse of parts and recycling. This symbol of the crossed out wheeled bin indicates that the product (electrical, electronic equipment, and mercury- containing button cell battery) should not be placed in municipal waste. -
Page 11: Safety Information
Safety information Your TS mini is designed and tested to meet the latest standards of safety for information technology equipment. However, to ensure your safety, it is important that you read the following safety instructions. Setting.up.your.server • Read and follow all instructions in the documentation before you operate your server. -
Page 12: Notes For This Manual
WARNING: Vital information that you MUST follow to prevent injury to yourself. IMPORTANT: Instructions that you MUST follow to complete a task. TIP:.Tips and useful information that help you complete a task. NOTE: Additional information for special situations. HOME SERVER TS mini... -
Page 13: Welcome
Welcome Congratulations on your purchase of the HOME SERVER TS mini. The following illustration displays the package contents of your new TS mini. If any of the below items is damaged or missing, contact your retailer. Package contents TS.mini AC.Adapter Power.Cord... -
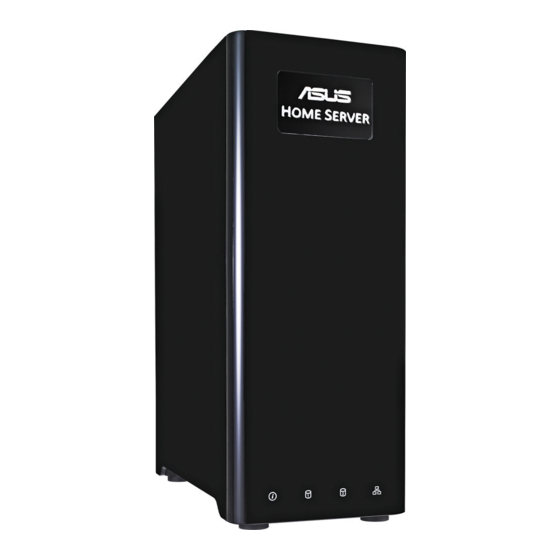
Page 14: Knowing.your.ts.mini
Knowing your TS mini Front view . System.status.LED.indicator . Hard.disk.drive.1.(HDD1).status.LED.indicator Hard.disk.drive.2.(HDD2).status.LED.indicator . Network.LED.indicator HOME SERVER TS mini... -
Page 15: Rear View
ATA devices originally designed for use inside the computer. It is up to six times faster than existing USB 2.0, & 1394 for external storage solutions and also supports hot plug using shielded cables and connectors up to two meters. HOME SERVER TS mini... - Page 16 The Kensington® lock port allows the TS mini to be secured using Kensington® compatible security products. These security products usually include a metal cable and lock that prevent the TS mini to be removed from a fixed object. HOME SERVER TS mini...
-
Page 17: Top View
OFF the TS mini. . Power.Indicator The power indicator lights when the TS mini is turned ON. This indicator is OFF when the TS mini is turned OFF. Air.Vents The air vents allow cool air to enter and warm air to exit the TS mini. -
Page 18: System Led Indicators
ASUS CrashFree mode. Note: Copy the BIOS file from the Recovery DVD to a USB device, and then insert the USB device to your home server before entering ASUS CrashFree. Purple System is booting from a USB / eSATA device... - Page 19 Purple HDD1/2 is unknown or is not being initialized by Windows Home Server Orange HDD1/2 failure Network. Blue System is linked to the network Blue Blinking During data transmitting or receiving activity Orange Network is disconnected HOME SERVER TS mini...
-
Page 20: Setting.up.your.server
Connecting to the power supply Connect the supplied power cord to the supplied AC adapter. Then, plug the AC adapter to the DC.IN jack on the TS mini rear panel and the power cord to an electrical outlet. E-SATA... -
Page 21: Powering On The Server
Powering on the server Press the power.switch on the top panel to turn on the TS mini. Home network diagram The following diagram illustrates the entire home network connection to help you understand the relationship between the connected devices. Home.computers Router TS.mini... -
Page 22: System Requirements
• Windows Vista Home N ( European Union only) • Windows Vista Home Premium • Windows Vista Business • Windows Vista Business N ( European Union only) • Windows Vista Enterprise • Windows Vista Ultimate Windows.7.(X86.and.X64) • Windows 7 HOME SERVER TS mini... -
Page 23: Installing The Windows Home Server Connector On The First Computer
Installing the Windows Home Server Connector on the first computer After setting up your TS mini, you must install the Windows Home Server Connector on your first computer to connect to Windows Home Server. Insert the Software Installation CD into the computer that is connected to your home network. - Page 24 Read the End User License Agreement. If you agree with the terms of the agreement, select the option “I accept the terms of the license agreement” and then click Next. Click Install to begin the installation process. HOME SERVER TS mini...
- Page 25 The Welcome window appears. Click Next. Click Next. HOME SERVER TS mini...
- Page 26 The Windows Home Server Connector installation starts to find and connect to your home server. Click Next to start the Windows Home Server Setup. HOME SERVER TS mini...
- Page 27 Connector software for the first time. Click the Next arrow to start the initialization. 10. Wait while Windows Home Server completes configuring your hardware, recovering your data, and starting Windows Home Server. Click the Next arrow when the initialization done. HOME SERVER TS mini...
- Page 28 11. Enter a name for your home server. The name of your home server contain up to 15 characters (including letters, numbers, and hyphens) with no spaces. 12. Click the Next arrow. HOME SERVER TS mini...
- Page 29 Windows Home Server Console and manage your home server. A strong password must be at least 7 characters and must contain at least 3 of following sets: uppercase letters, lowercase letters, numbers and symbols, e.g. Tsmini200. HOME SERVER TS mini...
- Page 30 14. Choose if you want Windows Home Server to continue automatically downloading updates from Windows Update after Setup, and then click the Next arrow. 15. Choose if you want join the Customer Experience Improvement Program and then click the Next arrow. HOME SERVER TS mini...
- Page 31 16. Choose if you want Windows Home Server to automatically report errors to Microsoft, and then click the Next arrow. HOME SERVER TS mini...
- Page 32 Windows Home Server updates. The update process will take some time to complete but will not require additional information from you. Do not restart or turn off your home server during the update process. HOME SERVER TS mini...
- Page 33 18. When the setup is complete, the Windows Home Server window is displayed. Click the Next arrow. 19. The Windows Home Server Console logon window appears. Enter the administrator password, and then click the Next arrow to start using the Windows Home Server Console. HOME SERVER TS mini...
-
Page 34: Installing The Windows Home Server Connector On The Other Home Computers
The Windows Home Server Connector wizard starts. If Autorun is NOT enabled in your computer, browse the contents of the Software Installation CD to locate the Install.exe file. Double-click the Install.exe to run the CD. Click Next. HOME SERVER TS mini... - Page 35 Home Server. Click Next and follow the onscreen instructions to complete the installation. The Shared Folders shortcuts icon appears on your desktop and the Windows Home Server icon appears in the system tray after the complete installation. HOME SERVER TS mini...
- Page 36 Click the Download Now button. In the Filde Download dialog box, click Run. Follow the onscreen instructions to complete the installation. HOME SERVER TS mini...
-
Page 37: Logging Onto The Windows Home Server Console
On the Windows system tray, right-click the Windows Home Server icon and then select Windows Home Server Console; or, double-click the Windows Home Server icon to bring up the logon window. Enter the administrator password, and then click the Next arrow. HOME SERVER TS mini... -
Page 38: Windows.home.server.console.configuration
• Add, view, and manage the backups of your home computers • Configure user accounts • Configure shared folders • Configure server storage • Configure ASUS WebStorage • Configure ASUS Xtor Manager • Configure ASWM • Review network health • Configure Windows Home Server settings Click.to.display.items. -
Page 39: Computers & Backup
From the Computer & Backup tab, you can perform the following tasks for your home computers: • Viewing Backups • Backing up Now • Configuring Backup • Removing a Computer • Turning On Backups / Turning Off Backups • Canceling Backup HOME SERVER TS mini... -
Page 40: Configuring A Home-Computer Backup
To do this: Log on to the Windows Home Server Console. Click Settings and then Backup. In Automatic Backup Management, specify the number of months, weeks, and days. Click OK to complete the setting. HOME SERVER TS mini... -
Page 41: Restoring Files From A Backup
When you open the backup, browse and drag the files and folders that you want to a folder on your home computer. Close the window when you are done copying the files and folders that you want to restore. HOME SERVER TS mini... -
Page 42: User Accounts
From the User Accounts tab, you can perform the following tasks for your home computers: • Adding a user account • Viewing and changing user account properties • Removing a user account from the home server • Enabling / disabling the Guest account HOME SERVER TS mini... -
Page 43: Creating User Accounts
Log on to the Windows Home Server Console. Click the User Accounts tab, and then the User Accounts Setup window appears. On the User Accounts Setup window, click Set Policy to bring up the Passwords setting page. HOME SERVER TS mini... - Page 44 From the Passwords setting page, configure the user accounts password complexity and then click OK. HOME SERVER TS mini...
- Page 45 Click the “Enable Remote Access for this user” check box if you allows the user to connect to your server through the Internet . Click Next. A strong password is required if Remote Access is enabled. HOME SERVER TS mini...
- Page 46 • shared folder. Read – the user can only read the files in the shared folder. • • None – the user cannot read, create, change, and delete files in the shared folder. 10. Click Finish. HOME SERVER TS mini...
- Page 47 11. Click Done to exit the wizard. HOME SERVER TS mini...
-
Page 48: Enabling The Guest Account
Right-click Guest, and then click Enable Guest Account. Complete the Enable Guest Account Wizard. Disabing.the.Guest.account Open the Windows Home Server Console. Click the User Accounts tab,. Right-click Guest, and then click Disable Account. A confirmation message appears. Click Yes. HOME SERVER TS mini... -
Page 49: Shared Folders
A personal shared folder is created each time you add a new user account by using the Add User Account Wizard. By default, only that user account can access the files in the personal shared folder. HOME SERVER TS mini... -
Page 50: Adding A Shared Folder
You must add more than one hard drive to the server storage before you can enable Folder Duplication, and there must be enough storage space available for duplication to take place. HOME SERVER TS mini... - Page 51 Set the level of access that each user account can have to a shared folder. Click Done to exit the wizard. HOME SERVER TS mini...
-
Page 52: Accessing Shared Folders On The Home Server
To access individual shared folder from the Windows Home Server Console Log on to the Windows Home Server Console. Click the Shared Folders tab. Select a shared folder to which you have access privilege, and then click Open to open it. HOME SERVER TS mini... - Page 53 To access the shared folders from the Windows Home Server icon On the Windows system tray, right-click the Windows Home Server icon and then select Shared Folders to display the shared folders on your home server. Double-click a shared folder to open it. HOME SERVER TS mini...
- Page 54 \\homeservername (e.g. \\TSMINI) in the Run search box to display the shared folders. • Under Windows Win7 / Vista OS, click Start, and then type \\homeservername (e.g. \\TSMINI) in the Start Search box to display the shared folders. HOME SERVER TS mini...
- Page 55 • Under Windows Win7 / Vista OS, go to Network, and then type \\homeservername.(e.g. \\TSMINI)..You.are.prompted.to. enter the account and password which you use to log on to the Windows Home Server Console, and the shared folders are displayed. HOME SERVER TS mini...
- Page 56 Refer to the section Accessing.the.TS.mini. home.page.for more details. Click the Shared Folder tab, and then click a shared folder to open it and download or upload files to the shared folder on your home server. HOME SERVER TS mini...
-
Page 57: Server Storage
Click the Server Storage tab to view all the hard drives installed on your home server. You can also use the Server Storage tab to add, repair, and remove external USB 2.0 hard drives, external SATA hard drives, or internal hard drives. HOME SERVER TS mini... -
Page 58: Adding A Hard Disk Drive
(c) Use a coin to loosen the three screws and put the screws at a visible place in case they are lost. (d) Hold the plastic grip, and then lift up the HDD cage horizontally. HOME SERVER TS mini... - Page 59 (g) Hold the plastic grip and align the two pins on the cage as shown to the mounting holes. Push down the HDD cage to the right side case. (h) Fasten the three screws which were removed and put aside at the beginning. HOME SERVER TS mini...
- Page 60 (a) Log on to the Windows Home Server Console. (b) Click the Server Storage tab. (c) Select the newly added hard drive (either internal or external) and then click Add to bring up the Add a Hard Drive Wizard. Click Next. HOME SERVER TS mini...
- Page 61 (e) For detailed instructions, refer to the Windows Home Server Console Help. Ensure that the newly installed hard drive must have 36GB capacity at least or else the HOME SERVER cannot recognize the hard drive. HOME SERVER TS mini...
-
Page 62: Removing A Hard Disk Drive
(a) Log on to the Windows Home Server Console. (b) Click the Server Storage tab. (c) Select the hard drive you want to remove, and then click Remove to run the Remove a Hard Drive Wizard. (d) Click Next. (e) Click Finish. HOME SERVER TS mini... - Page 63 (c) Use a coin to loosen the three screws and put the screws at a visible place in case they are lost. (d) Hold the plastic grip, and then lift up the HDD cage horizontally. HOME SERVER TS mini...
- Page 64 (h) Hold the plastic grip and align the two pins on the HDD cage as shown to the mounting holes. Push down the HDD cage to the right side case. (i) Fasten the three screws which were removed and put aside at the beginning. HOME SERVER TS mini...
-
Page 65: Asus Xtor Manager
ASUS Xtor Manager ASUS Xtor Manager is an add-in tool that helps you easily and directly back up, synchronize, and manage files and folders on external USB/eSATA storage devices attached to the home server. Click the ASUS Xtor Manager tab enter the main page. -
Page 66: File Manager
Folders.and.files.in.the.selected.directory. Root.directory.and.sub-directories To.manage.folders.and.files • To add a new folder, right-click a folder from the root-/sub-directories and select Create New Folder. • To delete a folder or a file, right-click a folder/file and then select Delete. HOME SERVER TS mini... - Page 67 Select Copy.to.Home.Server to copy the selected folder/file to the home server. You can also copy folders/files from the home server to the external storage device by right-clicking the folders/files from the home server and then select.Copy.to.External.Storage. HOME SERVER TS mini...
-
Page 68: Backup
Backup page. To.back.up.files.to.the.home.server Click to select the folder paths for the external storage and the home server. Click Backup to start the backup task. The files are listed when the backup task is done. HOME SERVER TS mini... -
Page 69: Sync
Newer.Files.on.External – the files found on the external • storage device are newer than the same files previously backed up on the home server. HOME SERVER TS mini... - Page 70 If you click the tab Not.found.on.Server, click • to synchronize the selected files from the external storage device to the home server . To.delete.selected.files. You can remove the selected files from the external storage device or the home server by simply clicking HOME SERVER TS mini...
-
Page 71: Asus Webstorage
With Internet connection, you can access and share any files whenever you want and wherever you are. Initializing.ASUS.WebStorage Click the ASUS WebStorage tab to bring up the first-time startup page. Click See EULA to read the End User License Agreement. If you accept the agreement, check the box before Please check the box before if.you.accept.ASUS.WebStorage’s.end-user.license. -
Page 72: Using My Web Backup
My Web Backup allows you to enable the backup of the shared folders on the home server. From the ASUS.WebStorage tab, click My.Web.Backup. From the Backup.Service, click Disable, and then select the shared folders that you want to back up to the online space. -
Page 73: Viewing My Web Sync
MySyncFolder folder is automatically created on the Windows desktop. The files you place to the MySyncFolder folder from any of the computers with the ASUS WebStorage utility installed will be synchronized. From the ASUS.WebStorage tab, click My.Web.Sync, and then enable the SyncService to view the details on the MySyncFolder. -
Page 74: Configuring The Asus Webstorage Settings
Configuring.the.ASUS.WebStorage.settings From the ASUS.WebStorage tab, click Settings to bring up the ASUS WebStorage settings page. Under the Login heading, you can modify the User ID and the password which you use to log into the ASUS WebStorage website. Under the Account heading, check the box before Low.speed. -
Page 75: Aswm
ASWM ASWM (ASUS System Web-based Management software) is an interface that allows you to conveniently manage your home server status via Windows Home Server Console. Click the ASWM tab to maintain the system stability with ASWM. HOME SERVER TS mini... -
Page 76: The Main Page
Discovery - This discovers and manages hosts connected to • specified subnets. • Help - Displays the on-line help for ASWM. About - Displays copyright and version information for ASWM • and the version number of each component in ASWM. HOME SERVER TS mini... -
Page 77: Inventory And Configuration Menus
This is the main area of the page, where information gathered by all modules are displayed. Move the mouse pointer over the server icon (left) to display general information about the server. Click Help for more detailed instructions. HOME SERVER TS mini... -
Page 78: Bios Update
BIOS.update You are able to update the system BIOS from ASWM. Download the latest BIOS file (.ROM file) from the ASUS website. Open the BIOS folder from the Shared Folders on your home server. The BIOS folder is under the Software folder (Shared. -
Page 79: Avast! Antivirus Program
Viewing the scan history • Manually inserting a license key into your home server to run avast! professional or avast! home edition. Click Help on the upper right corner of the Console for more deatiled insturctions. HOME SERVER TS mini... -
Page 80: Windows Home Server Settings
The categories include General, Backup, Passwords, Windows. Media.Center, Media.Sharing, Remote.Access, Add-ins,.ASUS. WebStorage,.and Resources. To enter the setting window, click the Settings button on the upper right corner of the Windows Home Server Console window. HOME SERVER TS mini... -
Page 81: General
Windows Update settings, Customer Experience Improvement Program, and Windows Error Reporting. Click the Help button on the lower right corner for detailed information about how to perform the tasks on the General settings page. HOME SERVER TS mini... -
Page 82: Backup
Click the Help button on the lower right corner for detailed information about how to perform the tasks on the Backup settings page. HOME SERVER TS mini... -
Page 83: Passwords
The Passwords settings page allows you to change the home server password and adjust the user accounts password policy. Click the Help button on the lower right corner for detailed information about how to perform the tasks on the Passwords settings page. HOME SERVER TS mini... -
Page 84: Windows Media Center
Windows Media Center settings page to install the necessary applications and run Windows Media Center. Click the Help button on the lower right corner for detailed information on the Windows Media Center settings page. HOME SERVER TS mini... -
Page 85: Media Sharing
Sharing to stream music, photos, and videos from shared folders on your Windows Home Server devices on your home network. Click the Help button on the lower right corner for detailed information on the Media Sharing settings page. HOME SERVER TS mini... -
Page 86: Remote Access
Windows Home Server Console, and remotely administer the home computers in your home network. Click the Help button on the lower right corner for detailed information about how to perform the tasks on the Remote Access settings page. HOME SERVER TS mini... -
Page 87: Enabling Remote Access
Web site requests to your home server. Your router must support Universal Plug and Play (UPnP) and UPnP must be enabled on your router for Windows Home Server to automatically configure it. HOME SERVER TS mini... - Page 88 Wherever you are, you can open a Web browser and type the domain name in the address text box to connect to your home server from the Internet. In this way, you don’t have to remember your IP address at home. HOME SERVER TS mini...
- Page 89 Windows Home Server includes a free dynamic DNS service that binds your domain name to the IP address assigned by your Inter service provider (ISP). Click Next. 10. Click the option “I accept” , and then click Next. HOME SERVER TS mini...
- Page 90 12. Enter a domain name and select a subdomain name from the list after the period (“.”). 13. Click Confirm to ensure your domain name is not being used by others. 14. Click Finish. HOME SERVER TS mini...
- Page 91 Web site headline that appears on your home server Web site. 16. Click OK. 17. Test if the remote access is available by getting online anywhere outside of your home and entering your Internet domain name in a Web browser. HOME SERVER TS mini...
-
Page 92: Accessing The Ts Mini Home Page
Accessing the TS mini home page Open the Internet Explorer Web browser. Ensure to use the Internet Explorer to access the home page. When you use other Web browsers, you may not use some features like Remote Access to Computers or Connect to your Home Server. - Page 93 On the Computers tab, click Connect.to.your.Home. Server and enter the administrator password, and then the Windows Home Server Console interface appears. On the Computers tab, click the name of the home computer under the Remote.Access.to.Computers heading to access your home computers. HOME SERVER TS mini...
- Page 94 On the Shared Folders tab, click a shared folder, and then you can upload and download files to and from the shared folder over the Internet. You can also create subfolders in the selected folder. HOME SERVER TS mini...
-
Page 95: Add-Ins
Windows Home Server Console that enables you to manage a new service or feature. Click the Help button on the lower right corner for detailed information about how to perform the tasks on the Add-ins settings page. HOME SERVER TS mini... - Page 96 On the Installed tab, click Uninstall on the Add-in that you want to uninstall. Click OK on the Uninstallation succeeded dialog box to restart the console. Reconnect to the console. If the Add-in includes a console tab, the tab is now removed from the console. HOME SERVER TS mini...
-
Page 97: Asus Webstorage
ASUS.WebStorage The ASUS WebStorage settings page allows you to configure the settings for the ASUS WebStorage feature. Refer to the section Configuring.the.ASUS.WebStorage.settings for detailed instructions. Click the Help button on the lower right corner for detailed information on the ASUS WebStorage settings page. -
Page 98: Resources
The Resources settings page displays the information about your home server, including Microsoft Windows, Home Server, Version Information, Additional Windows Home Server links, and Support. Click the Help button on the lower right corner for detailed information on the Resources settings page. HOME SERVER TS mini... -
Page 99: Performing A Server Recovery Or Factory Reset
Factory Reset If the operating system of your home server is corrupted or the main system hard drive is failed, use the bundled ASUS HOME SERVER TS mini Recovery DVD to recover your home server or to restore the home server to its factory default. - Page 100 Read the End User License Agreement. If you agree with the terms of the agreement, select the option “I accept the terms of the license agreement” and then click Next. 100 HOME SERVER TS mini...
- Page 101 Check the status of the system status indicator. If the indicator blinks orange, select the option “System light is blinking orange”; if not, select the option “System light is not blinking orange” . Click Next. HOME SERVER TS mini 101...
- Page 102 (a) If you select the option “System light is blinking orange” , you need to uninstall the Windows Home Server Connector from your computer. Click Next when the task is done. 102 HOME SERVER TS mini...
- Page 103 3. Press the power button to turn on the server. 4. Press and hold the Recovery button at the rear panel of the server using a paperclip until the system status indicator is blinking orange. 5. Click Next. HOME SERVER TS mini 103...
- Page 104 Click Next once the home server is found. Select the option “ Re-install Windows Home Server software” to reload Windows Home Server operating system software into the existing hard drive. Click Next. 104 HOME SERVER TS mini...
- Page 105 Selecting the recovery option will delete all user accounts, server settings, and computer backups while all data in shared folders will still exist. Click the check box before I.understand and then Next. HOME SERVER TS mini 105...
- Page 106 Follow the onscreen instructions and click Finish to complete the recovery process. Then, install the Windows Home Server Connector on your computer. Refer to the section “Windows Home Server Connector software on the administrator computer” for help. 106 HOME SERVER TS mini...
-
Page 107: Restoring Factory Defaults
Restoring.Factory.Defaults To.perform.Factory.Reset Repeat step 1-5 in the previous section “To perform Server Recovery” . Select the option “ Return my server to the default factory state” and then click Next. HOME SERVER TS mini 107... - Page 108 Confirm the option you have selected by clicking the check box before I.understand. Click Next to continue. Follow the onscreen instruction to complete the restore process. 108 HOME SERVER TS mini...
-
Page 109: Replacing The Main Hard Drive In Your Home Server
Always install the hard disk drive in which the OS is or will be installed to the HDD1 bay. Repeat step 1-5 in the previous section “To perform Server Recovery” . Select the option “Replace the main hard drive in my server” , and then click Next. HOME SERVER TS mini 109... - Page 110 It may take 3-5 minutes to restart your home server in recovery mode. Wait until the system light is in solid blue and then place the Connector CD to install the Windows Home Server Connector. 110 HOME SERVER TS mini...
-
Page 111: Restoring An Entire Home Computer
Restore CD to restore all of the files on your home computer from a backup on your home server. To.restore.a.home.computer Place the ASUS Restore CD in the drive of the home computer that you want to restore. Restart the computer and boot from the CD. - Page 112 USB flash drive the necessary drivers from the Support CD that came with your computer package; or, go to http://www.microsoft.com/windows/products/ winfamily/windowshomeserver/support.mspx for more information. (h) Remove the USB flash drive, and then insert it into the computer that is being restored. 112 HOME SERVER TS mini...
-
Page 113: Copyright.declaration
DAMAGES (INCLUDING DAMAGES FOR LOSS OF PROFITS, LOSS OF BUSINESS, LOSS OF USE OR DATA, INTERRUPTION OF BUSINESS AND THE LIKE), EVEN IF ASUS HAS BEEN ADVISED OF THE POSSIBILITY OF SUCH DAMAGES ARISING FROM ANY DEFECT OR ERROR IN THIS MANUAL OR PRODUCT. -
Page 114: Limitation Of Liability
ASUS will only be responsible for or indemnify you for loss, damages or claims based in contract, tort or infringement under this Warranty Statement. This limit also applies to ASUS’ suppliers and its reseller. It is the maximum for which ASUS, its suppliers, and your reseller are collectively responsible.