Table of Contents
Advertisement
Advertisement
Table of Contents

Related Manuals for Toshiba Projector


Summary of Contents for Toshiba Projector
- Page 1 English...
- Page 2 Declaration of Conformity Manufacturer: Toshiba Corporation 1-1, Shibaura 1-Chrome, Minato-ku, Tokyo, Japan We declare under our sole responsibility that the TDP-MT100 projector conform to the following directives and norms: EMC Directive 89/336/EEC, Amended by 93/68/EEC EMC: EN 55022 EN 55024...
-
Page 3: Table Of Contents
Important Operating Considerations Video connections Video device connections Do not place the projector on a tablecloth or other soft coverings that may Composite video connection block the front or back vents. Do not use a non-approved ceiling mount. In S-video connection... -
Page 4: Introduction
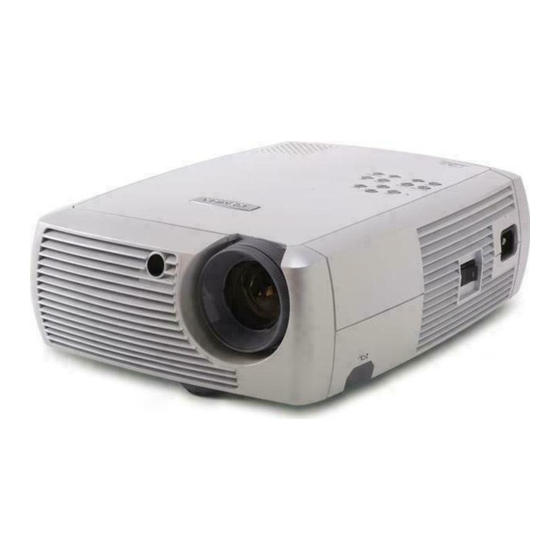
Introduction speaker keypad Your new digital projector is easy to connect, use, and maintain. The TDP- MT100 is compatible with a wide variety of video devices and computers, power cord including: connector • Most standard VCRs, DVD players (progressive and interlaced), HDTV... -
Page 5: Positioning The Projector
Here are some general guide- lines: • Position the projector on a flat surface at a right angle to the screen. The projector must be at least 4.9 feet (1.49m) from the projection screen. 19 ft. -
Page 6: Connecting A Video Device
HDTV receivers, and TV tuners to the projector. There is also an audio input. You can connect the audio directly to the projector to get sound from the onboard speaker, or you can connect it to your stereo’s receiver to get sound from your own speakers. -
Page 7: Video Connections
Connector Projector lowed by S-video, then composite video. Standard Broadcast Composite video Video In If you are connecting the projector to HDTV, the projector’s computer con- TV (not HDTV), via nector should be used. cable, digital cable, S-video S-video Keep in mind that HDTV and progressive sources can only be handled satellite TV, DVD, through the projector’s VGA connector. -
Page 8: Video Device Connections
If your video device uses a round, four-prong S-video connector, plug an S- video cable (sold separately) into the S-video connector on your video device and into the S-video connector on the projector. Use the audio cable and the audio adapter as described above. -
Page 9: Component Video Connection
Computer In connector on the projector. Use the audio adapter as described on the previous page. Connect the power cord to the Power connector on the side of the projector connect power cable and to your electrical outlet. -
Page 10: Displaying Video
Remove the lens cap. toggle Power switch Toggle the Power switch on the side of the projector to the On position. The LED flashes green and the fans start to run. When the lamp comes on, the start-up screen is displayed and the LED is steady green. It can take a minute for the image to achieve full brightness. - Page 11 Adjust the zoom and focus. adjust zoom and focus focus zoom (thin ring) (thick ring) If the image is not square, adjust the keystone using the buttons on the key- adjust keystone pad. Press the top Keystone button to reduce the upper part of the image, and press the bottom Keystone button to reduce the lower part.
-
Page 12: Connecting A Computer Source
Connect one end of the computer cable (see page 6 for connecting video devices) to the dark blue Computer In connector on the projector. Connect the other end to the video port on your computer. If you are using a desktop computer, you will need to disconnect the monitor cable from the com- puter’s video port first. -
Page 13: Displaying A Computer Source Image
Displaying a computer source image remove lens cap Remove the lens cap. Toggle the Power switch on the side of the projector to the On position. toggle Power switch The LED flashes green and the fans start to run. When the lamp comes on, the start up screen displays and the LED is steady green. -
Page 14: Adjusting The Image
Adjusting the image adjust height Adjust the height of the projector, if necessary, by pressing the release but- ton to extend the foot. rotate Rotate the leveling foot located at the rear of the projector, if necessary. leveling foot elevator... -
Page 15: Using The Projector With Windows 98 For The First Time
Using the projector with Windows 98 for the first time The first time you connect a computer running Windows 98 to the projector, the computer recognizes the projector as “new hardware” and the Add New Hardware Wizard appears. Follow these instructions to use the Wiz- ard to load the correct driver (which was installed with your Windows operating system). -
Page 16: Shutting Down The Projector
The image returns when an active source is detected or a remote or The LED on top of the projector indicates the state of the projector and can keypad button is pressed. help you troubleshoot. - Page 17 Problem Solution Result plug power cord in projector’s left side no start up screen correct image remove lens cap toggle power switch toggle power switch on side press the Computer button only start up screen appears computer image projected activate laptop’s external port...
- Page 18 Problem Solution Result press the Auto Image button on keypad computer image projected no computer image, just the words “Signal out of range” adjust computer refresh rate in Control Panel>Display>Settings>Advanced>Adapter (location varies by operating system) you may also need to set a different resolution on your computer, as shown in the following problem, “image fuzzy or cropped”...
- Page 19 Problem Solution Result set your computer’s display resolution to image fuzzy or cropped image clear and not cropped the native resolution of the projector (Start>Settings>Control Panel>Display>Settings tab) select 800x600 For a laptop, disable laptop monitor or turn-on dual- display mode...
- Page 20 Problem Solution Result square image image not square adjust Keystone on keypad adjust Sharpness (video sources only) in the image not sharp correct image Picture>Advanced menu change aspect ratio to 4:3 or 16:9 in correct image image does not fit 4:3 or 16:9 screen Picture>Aspect ratio menu...
- Page 21 Problem Solution Result correct image image upside down turn off ceiling in Settings>System menu image reversed left to right turn off rear in Settings>System menu correct image adjust color, tint, color temperature, projected colors don’t match source brightness, contrast in the menus correct image COLOR COLOR...
- Page 22 Problem Solution Result make sure vents aren’t blocked, turn off the projector and allow it to cool for a minute lamp won’t turn on, LED blinking red lamp turns on lamp turns on if lamp hours > 3,000, lamp must be “Change lamp”...
- Page 23 Problem Solution Result press the Auto Image button on keypad no video image video image projected Still need assistance? If you need assistance, please contact your authorized Toshiba dealer.
-
Page 24: Using The Remote Control
To operate, point the remote at the projection screen or at the projector (not at the video device or computer). The range of optimum operation is 0 to 30 feet (9.14m). Press the remote’s Menu button to open the projector’s menu system. Use the arrow buttons to navigate, and the Select button to select features and adjust values in the menus. -
Page 25: Using The Audio
Using the audio To use the projector’s speaker, connect your source to the Audio In connec- connect audio cable tor on the projector. See page 8 regarding using the audio adapter. To adjust the volume, press the Volume buttons on the keypad. -
Page 26: Optimizing Video Images
Customizing the projector After your video device is connected properly and the image is on the You can customize the projector for your specific setup and needs. See screen, you can optimize the image using the onscreen menus. For general page 32 to page 34 for details on these features. -
Page 27: Optimizing Computer Images
Two options, Power Save and Screen Save, are provided to automati- • Adjust the Color Temperature in the Advanced menu (page 31). cally shut down the projector after several minutes of inactivity or dis- • Adjust the phase, Tracking, or Horizontal or Vertical position in the play a black screen. -
Page 28: Using The Menus
For example, if the projector is set to a video source but the source, such as a DVD player, is turned off video menu options are grayed out. -
Page 29: Picture Menu
TV screens are usually 4:3. HDTV and most DVDs are 16:9. The default is 4:3. Select Native to see the unmodified input with no resizing by the projector. Select 16:9 to watch enhanced widescreen DVDs. For more information regarding Aspect Ratio, see page 6. - Page 30 Presets: Presets are provided that optimize the projector for displaying computer presentations, photographs, film images, and video images. Film input is material originally captured on a film camera, like a movie; video input is material originally captured on a video camera, like a TV show or Presets sporting event.
- Page 31 Color Control Video Standard: when it is set to Auto, the projector attempts to automati- cally pick the video standard based on the input signal it receives. (The video standard options may vary depending on your region of the world.) If the projector is unable to detect the correct standard, the colors may not look right or the image may appear “torn.”...
-
Page 32: Settings Menu
If no source is found, a blank screen displays. When Auto- source is checked, the projector checks the last-used source first at power Sources up. If no signal is present, the projector checks the sources in order until a source is found or until power down. Power-up... - Page 33 Startup Logo: allows you to display a blank screen instead of the default screen at startup, and when no source is detected. Startup Logo Blank Screen: determines what color is displayed when you press the Blank Screen Blank button on the remote. Note: An Effect Key submenu is displayed under the Settings menu.
- Page 34 Lamp Reset: resets the lamp hours used counter in the About menu to zero. Do this only after changing the lamp. Service Code: only used by authorized service personnel. About: provides information about the projector and the active source. About menu...
-
Page 35: Maintenance
Turn off the projector and unplug the power cord. Wait 60 minutes to allow the projector to cool thoroughly. Turn the projector on its side so that the lamp door is facing you. Using a flat-blade screwdriver, gently pry the lamp door from the projector by... - Page 36 Replace the lamp door. Plug in the power cord and toggle the Power switch to turn the projector back on. To reset the lamp hour timer, navigate to the Settings>Service menu and select Lamp Reset. See page 34 for details.
-
Page 37: Cleaning The Lamp Housing Screens
Cleaning the Lamp Housing Screens In dirty or dusty environments, the two dust filter screens in the lamp hous- lamp housing ing can become clogged, causing high temperatures and premature lamp failure. Routine maintenance to remove dust from the screens lowers the lamp operating temperature and prolongs lamp life. -
Page 38: Appendix
Appendix Accessories Standard Accessories Specifications (ship with the projector) Shipping Box (with packaging) ° ° Temperature 50 to 104 F (10 to 40 C) at sea level Computer Cable 6 ft (1.8 m) ° ° Operating 50 to 95 F (10 to 35 C) at 10,000 feet Audio Cable 6 ft (1.8 m) -
Page 39: For Assistance With This Projector
Range of distance to the screen for a given screen size for TDP-MT100 For assistance with this projector Distance to screen Diagonal Maximum Minimum For assistance with your Toshiba projector in the United States, please visit Screen Size Image Width distance Distance www.toshiba.com/tacp or contact by phone at 800-846-6672. -
Page 40: Red Led Behavior And Projector Errors
Red LED Behavior and Projector Errors If the projector is not functioning properly and the LED is blinking red, con- sult Table 3 to determine a possible cause. There are two-second pauses between the blinking cycles. Table 3: Red LED Behavior... - Page 41 Computer In connector 12 Numerics connecting 16x9 vs 4x3 screen aspect 6 video device 6 800x600 resolution 4 connectors on projector 7 Contrast 29 About 34 customizing the projector 26 Accessories optional 39 Display Messages 32 standard 38 DVDs 29...
- Page 42 16 leveling foot 10 Rear 32 Macintosh computers Red LED behavior 40 compatibility 4 replacing the lamp 35 maintaining the projector 35 Menu button 28 Screen Aspect 6 menu usage 28 Screen Save 16 Monitor Out connector 12 Service 34...
- Page 43 vents 3 Vertical 31 Video In connector 8 video optimizing 26 Video Standard 31 volume adjustment 11 Volume button 25 Windows 98 15 zoom 11, 14...