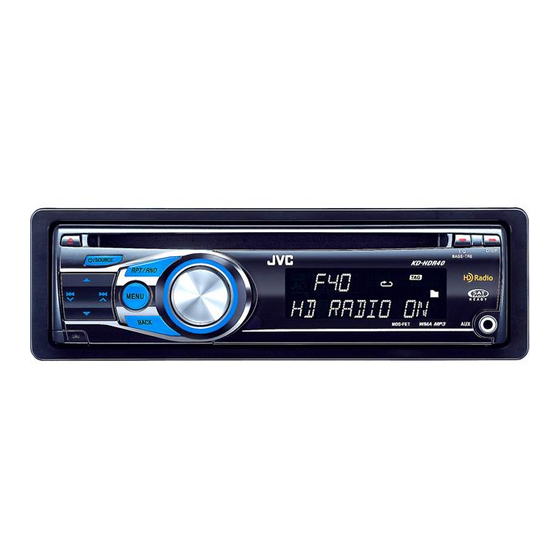
JVC KD-HDR40 Instructions Manual
Cd hd radio receiver
Hide thumbs
Also See for KD-HDR40:
- Installation & connection manual (4 pages) ,
- Instruction manual (100 pages) ,
- Specification (2 pages)
Table of Contents
Advertisement
CD RECEIVER
RECEPTOR CON CD
RÉCEPTEUR CD
KD-HDR40
For canceling the display demonstration, see page 4.
Para cancelar la demostración en pantalla, consulte la página 4.
Pour annuler la démonstration des affichages, référez-vous à la page 4.
For installation and connections, refer to the separate manual.
Para la instalación y las conexiones, refiérase al manual separado.
Pour l'installation et les raccordements, se référer au manuel séparé.
MANUEL D'INSTRUCTIONS
INSTRUCTIONS
MANUAL DE INSTRUCCIONES
For customer Use:
Enter below the Model
No. and Serial No. which
are located on the top or
bottom of the cabinet. Retain
this information for future
reference.
Model No.
Serial No.
LVT2088-001B
[J]
Advertisement
Table of Contents

Related Manuals for JVC KD-HDR40


Summary of Contents for JVC KD-HDR40
- Page 1 CD RECEIVER RECEPTOR CON CD RÉCEPTEUR CD KD-HDR40 For customer Use: INSTRUCTIONS MANUAL DE INSTRUCCIONES MANUEL D’INSTRUCTIONS LVT2088-001B...
- Page 2 INFORMATION (For U.S.A.) Caution: IMPORTANT FOR LASER PRODUCTS CAUTION: CAUTION: For safety... Warning: Temperature inside the car...
-
Page 3: Table Of Contents
Detaching the control panel Attaching the control panel How to reset your unit How to forcibly eject a disc Caution on volume setting:... -
Page 4: Canceling The Display Demonstration
Turn on the power. Select “ .” Call up the SET menu. Finish the procedure. Turn on the power. Call up the SET menu. Select “ .” Select “ .” Adjust the hour. Adjust the minute. Finish the procedure. -
Page 5: Operations
Using the control panel FM/AM SIRIUS/XM BT PHONE/BT AUDIO FM/AM/SIRIUS/XM BT PHONE/BT AUDIO Other source OPERATIONS... -
Page 6: Using The Remote Controller (Rm-Rk50)
Display window Using the remote controller (RM-RK50) Before using the remote controller: Caution: Replacing the lithium coin battery (CR2025) If the effectiveness of the remote controller decreases, replace the battery. - Page 7 Warning (to prevent accidents and damage): OPERATIONS...
-
Page 8: Changing The Display Information
Changing the display information FM/AM SIRIUS/XM TAG DISPLAY TAG OFF What is HD Radio™ broadcasting? - Page 9 Select “FM” or “AM.” Search for a station to listen—Auto Search. When receiving HD Radio Improving the FM reception multicast channels... Call up the SET menu. Select “ .” Select your desired channel. Select “ .” Searching for HD Radio stations only Select “...
-
Page 10: Storing Stations In Memory
Changing HD Radio reception Storing stations in memory mode Automatic presetting — SSM (Strong-station Sequential Memory) While listening to an HD Radio station... While listening to a radio... TUNER = BLEND HOLD TUNER = SSM = AUTO DIGITAL ANALOG Select the preset number range you want to store. -
Page 11: Disc Operations
Manual presetting Selecting preset station/channel Tune in to the station or channel you want to preset. Select a preset number. 5 ∞ Turn on the power. Insert a disc. OPERATIONS... -
Page 12: Selecting The Playback Modes
Stop playing and ejecting the disc Selecting the playback modes Prohibiting disc ejection Select the desired mode. REPEAT Ô RANDOM To cancel the prohibition, Selecting a track/folder REPEAT TRACK RPT FOLDER RPT RANDOM FOLDER RND ALL RND RPT OFF RND OFF... -
Page 13: External Devices
Registering using “OPEN” Bluetooth adapter Preparation Select “BT PHONE” or “BT AUDIO.” Select “NEW DEVICE.” Select “OPEN.” Enter a PIN (Personal Identification Number) code to the unit. Registering a Bluetooth device Registration (Pairing) methods OPEN SEARCH EXTERNAL DEVICES... - Page 14 Use the Bluetooth device to search and For available devices... connect. For special device... Use “OPEN” or “SEARCH” to connect. Connecting/disconnecting/deleting a registered device Connecting a device Select “BT PHONE” or “BT AUDIO.” Select “BT PHONE” or “BT AUDIO.” Select a registered device you want to Select “NEW DEVICE.”...
-
Page 15: Using The Bluetooth Mobile Phone
Using the Bluetooth mobile phone Select “BT PHONE.” Enter the Bluetooth menu. Make a call or setting using the Bluetooth setting menu. (See the following and page 21.) When a call comes in... Making a call When “AUTO ANSWER” is activated... Enter the “DIAL”... -
Page 16: Using The Bluetooth Audio Player
Direct dialing: Using the Bluetooth audio player Select “BT AUDIO.” Voice dialing:... -
Page 17: Listening To The Satellite Radio
JVC SIRIUS Satellite Radio System XM Satellite Radio System GCI (Global Control Information) update Activate your SIRIUS subscription after Activate your XM subscription after connection connection Check your SIRIUS ID (see page 23). Check your XM Satellite Radio ID labelled... -
Page 18: Storing Channels In Memory
Select “SIRIUS” or “XM.” Select a category. Select a channel to listen. Storing channels in memory Checking the XM Satellite Radio ID While selecting “XM,” select “Channel 0.” Tune in to a channel you want to store (see steps 1 – 3 above). Select preset number. -
Page 19: Listening To The Other External Components
EXT INPUT KS-U57 KS-U58 SELECT SRC = EXT IN EXT ON Preparation: AUX IN SELECT SRC = AUX IN AUX ON Preparation: Select “EXT INPUT” or “AUX IN.” Turn on the connected component and start playing the source. Adjust the volume. Adjust the sound as you want (see page 20). -
Page 20: Adjusting The Sound
Pro mode ( 7 Band ) Selecting a preset sound mode Select “ .” Customizing sound mode While “ ” is shown on the display... EASY mode ( 3 Band ) Select your desired tone. Adjust the tone level (–10 to +10). Adjust the tone level (–10 to +10). -
Page 21: Bluetooth Settings
Setting menu AUTO CNNCT Select “BT PHONE” or “BT AUDIO.” OFF: Enter the Bluetooth menu. LAST: ORDER: Select “SETTINGS.” AUTO ANSWER Select a setting item. OFF: REJECT: MSG INFO AUTO: MANUAL: Change the setting accordingly. MIC SETTING LEVEL 01/02/03 VERSION SETTINGS... -
Page 22: Set Menu Operations
Call up the SET menu. Select the desired item. Repeat step 2 if necessary. Underlined Category Menu items Selectable settings, [reference page] DEMO DEMO ON DEMO OFF CLOCK SET CLOCK ADJ AUTO TIME ZONE* EASTERN, ATLANTIC, NEWFOUND, ALASKA, PACIFIC, MOUNTAIN, CENTRAL DST* DST ON DST OFF... - Page 23 Category Menu items Selectable settings, [reference page] DIMMER DIMMER OFF DIMMER ON SCROLL* SCROLL ONCE SCROLL AUTO SCROLL OFF TAG DISPLAY TAG ON TAG OFF SSM 01-06, SSM 07-12, SSM 13-18 SSM 01-06 AREA AREA US AREA EU AREA SA MONO MONO ON MONO OFF...
- Page 24 Category Menu items Selectable settings, [reference page] FADER FADER R12 — FADER F12 BALANCE BALANCE L12 — BALANCE R12 VOL ADJUST VOL ADJ –10 — VOL ADJ +10 SUB.W FREQ HIGH SUB.W LEVEL SUB.W 00 — SUB.W 08 BEEP BEEP OFF BEEP ON AMP GAIN LOW POWER...
-
Page 25: References
Tuner operations Storing stations in memory Listening to a preset station Disc operations Caution for DualDisc playback Playing an MP3/WMA disc General • • • Playing a CD-R or CD-RW • REFERENCES... -
Page 26: Bluetooth Operations
• • Warning messages for Bluetooth operations ERROR CNNCT • ERROR • UNFOUND LOADING PLEASE WAIT • Ejecting a disc RESET 8 Bluetooth operations Satellite Radio operation General... -
Page 27: Troubleshooting
Symptoms Remedies/Causes SELECT SRC = AUX IN SELECT SRC = AM DIGITAL ANALOG ANALOG DIGITAL AUTO DIGITAL ANALOG AUTO CLOCK ADJ REFERENCES... - Page 28 Symptoms Remedies/Causes...
- Page 29 Symptoms Remedies/Causes REFERENCES...
- Page 30 Symptoms Remedies/Causes...
-
Page 31: Maintenance
How to clean the connectors To keep discs clean To play new discs Moisture condensation To remove these rough spots Do not use the following discs: How to handle discs When removing a disc from its case When storing a disc in its case REFERENCES... -
Page 32: Specifications
AUDIO AMPLIFIER SECTION Power Output: 20 W RMS × 4 Channels at 4 Ω and ≤ 1% THD+N TUNER SECTION... - Page 33 CD PLAYER SECTION GENERAL REFERENCES...
- Page 34 ® nh ng qu c gia mà b n có th s d ng ch c n ng Bluetooth...
- Page 35 ndorra uxemburg uxembourg ëtzebuerg ustralia atvija Österreich onaco osna i ercegovina rna ora elgien Македонија elgique alta България ederland anada orge chweiz ew Zealand uisse olska Κύπρος ıbrıs ortugal Česká republika omânia eutschland rbija anmark Россия esti verige spaña ingapore uomi ingapura inland...
- Page 36 Having TROUBLE with operation? Please reset your unit Refer to page of How to reset your unit Still having trouble?? Call 1-800-252-5722 http://www.jvc.com We can help you! EN, SP, FR © 2009 Victor Company of Japan, Limited 1109KMMMDWJEIN...
-
Page 37: Localizacion De Averias
KD-HDR40 Installation/Connection Manual Manual de instalación/conexión Manuel d’installation/raccordement 1109KMMMDWJEIN LVT2089-001A EN, SP, FR © 2009 Victor Company of Japan, Limited WARNINGS ADVERTENCIAS AVERTISSEMENTS TROUBLESHOOTING LOCALIZACION DE AVERIAS EN CAS DE DIFFICULTES... - Page 38 INSTALLATION INSTALACION (MONTAJE EN EL INSTALLATION (MONTAGE DANS LE (IN-DASH MOUNTING) TABLERO DE INSTRUMENTOS) TABLEAU DE BORD)
-
Page 39: Electrical Connections
ELECTRICAL CONNECTIONS CONEXIONES ELECTRICAS RACCORDEMENTS ELECTRIQUES JVC Amplifier JVC Amplifier JVC Amplificateur JVC Amplificateur... - Page 40 CAUTION: PRECAUTION: Nombre del Adaptateur/ Nom du Component Adapter/System Model name Componente Adaptador/Sistema Appareil modelo Système modèle...
- Page 42 • CAUTI0 N 1.\, CONNECT BLACK WIRE GNO) TO GROUND FIRST. L.l.i '" V> ::> OTHERWISE, DAMAGE TO YOUR UNIT MAY OCCUR. ::> INCORRECT CONNECTION CAUSES SERIOUS DAMAGE TO THIS UNIT ;:::: PLEASE READ INSTAlLATIONfCONNECTION MANUAL CAREFULLY. V> ::> CONNECT OTHER WIRES CONNECT GROUND FIRST <..>...
- Page 43 This form is for Product Registration purposes only. Failure to return this form does not diminish your rights during the warranty period. THANK YOU FOR PURCHASING THIS JVC PRODUCT REGISTER ONLINE AT: REGISTER.JVC.COM...
- Page 44 Zip Code: Phone Number: E-Mail Address: 1) Would you like to receive the JVC Community e-mail newsletter? 2) Would you like to receive special offers from JVC? 3) Have you purchased an extended warranty for this product? Date of Purchase...
- Page 45 JVC distribue au Canada par JVC Owner's Address by an authorized JVC dealer. et vendu par un detaillant JVC autorise. Adresse du Proprietaire· JVC warrants that this JVC product is free, under JVC vous garantit que ce produit est degage, sous Street Apt. App.
- Page 46 I'acheteur doit assumer la responsabilite et les couts pour un emballage adequat, I'expedition, ainsi que tous les couts associes la livraison de I'equipement chez et depuis Ie detaillant JVC autorise Ie plus pres pour un service d'entretien. Receivers and Home Speakers purchased separately, Front Plaeestamp here Projection and Car Audio "ARSENAL"...
- Page 47 TO OUR VALUED CUSTOMER - - THANK YOU FOR PURCHASING THIS JVC PRODUCT. WE WANT TO HELP YOU ACHIEVE A PERFECT EXPERIENCE. NEED HELP ON HOW TO HOOK UP? NEED ASSISTANCE ON HOW TO OPERATE? NEED TO LOCATE A JVC SERVICE CENTER? LIKE TO PURCHASE ACCESSORIES? JVC®IS...
- Page 48 : WHAT WE WILL DO: : If this product is found to be defective within the warranty period, JVC will repair or replace defective parts with new or : * rebuilt equivalents at no charge to the original owner. Such repair and replacement services shall be rendered by JVC * * during normal business hours at JVC authorized service centers.