Table of Contents
Advertisement
Advertisement
Table of Contents

Related Manuals for Asus ET1620I Series


Summary of Contents for Asus ET1620I Series
- Page 1 User Manual ET1620I Series...
- Page 2 INCIDENTAL, OR CONSEQUENTIAL DAMAGES (INCLUDING DAMAGES FOR LOSS OF PROFITS, LOSS OF BUSINESS, LOSS OF USE OR DATA, INTERRUPTION OF BUSINESS AND THE LIKE), EVEN IF ASUS HAS BEEN ADVISED OF THE POSSIBILITY OF SUCH DAMAGES ARISING FROM ANY DEFECT OR ERROR IN THIS MANUAL OR PRODUCT.
- Page 3 ASUS. In each such instance, regardless of the basis on which you are entitled to claim damages from ASUS, ASUS is liable for no more than damages for bodily injury (including death) and damage to real property and tangible personal property;...
-
Page 4: Table Of Contents
Right side view .......................15 Chapter 2: Using your All-in-One PC Positioning your ASUS All-in-One PC ..............16 Setting up your ASUS All-in-One PC ...............17 Connecting the wired keyboard and mouse............17 Connecting a wireless keyboard and mouse ............17 Mounting your All-in-One PC to a wall ..............18 Powering on the system .....................20... - Page 5 Chapter 4: Connecting to the Internet Wireless connection .....................42 Wired connection ......................43 Chapter 5: Recovering your system Entering the BIOS Setup ....................45 Quickly enter the BIOS ....................45 Recovery options on Windows® 8.1 ................46 Removing everything and reinstalling Windows..........46 Appendices Notices ..........................47 ASUS All-in-One PC ET1620I...
-
Page 6: About This Manual
This chapter provides information on connecting your PC to a wired or Wi-Fi network. Chapter 5: Recovering your system This chapter provides recovery options for your PC. Appendices This section includes notices and safety statements for your PC. ASUS All-in-One PC ET1620I... -
Page 7: Conventions Used In This Manual
Typography Bold This indicates a menu or an item that must be selected. Italic This indicates sections that you can refer to in this manual. ASUS All-in-One PC ET1620I... -
Page 8: Safety Information
Spray a small amount of household glass cleaner on the bundled cleaning cloth and gently wipe the surface of the screen. Do not spray the cleaner directly on the screen. Do not use an abrasive cleaner or a coarse cloth when cleaning the screen. ASUS All-in-One PC ET1620I... -
Page 9: Sound Pressure Warning
DC Fan Warning Please note that the DC fan is a moving part and can cause harm when used improperly. Keep away from the fan when using the product. ASUS All-in-One PC ET1620I... -
Page 10: Package Contents
Package contents ASUS All-in-One PC ET1620I Wall mount screws AC Power adapter Power cord Quick Start Guide Warranty card Keyboard (Optional) Mouse (Optional) NOTES: • If any of the items is damaged or missing, contact your retailer. • The keyboard, mouse, and power supply illustrations are for reference only. -
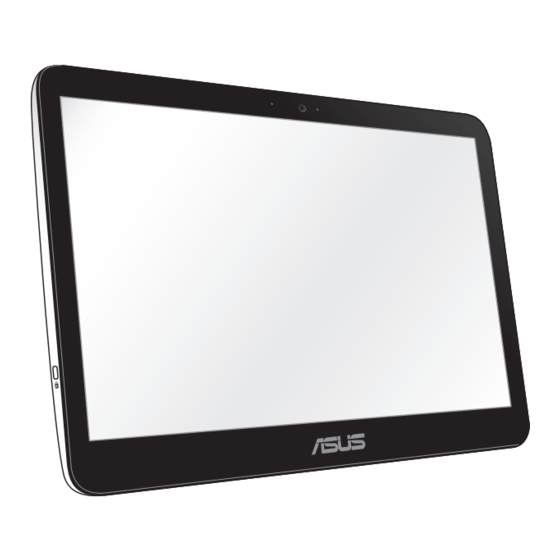
Page 11: Chapter 1: Hardware Setup Getting To Know Your All-In-One Pc
Indicates that the built-in webcam is enabled. LCD display (Touch-enabled) The 15.6-inch multi-touch panel LCD display provides excellent viewing features for photos, videos, and other multimedia files. It also allows you to operate your All-in-One PC using touch gestures. ASUS All-in-One PC ET1620I... -
Page 12: Rear View
Press to decrease the volume. Turn off display Press this button to turn off the display. Serial port (COM port) These 9-pin D-sub serial port supports native serial devices such as serial drawing tablets, serial mouse, or serial modem. ASUS All-in-One PC ET1620I... - Page 13 To use the NFC tag, put the other NFC-enabled device near your AiO PC’s NFC tag. NOTE: The NFC sticker on the rear panel of your All-in-One PC indicates the location of the NFC tag. ASUS All-in-One PC ET1620I...
-
Page 14: Top View
Top view NOTE: The descriptions of these items are in the section Rear View. Hard Disk Drive LED White light indicates that data is being read/written from/to the HDD. Power LED Indicates that system power is On. ASUS All-in-One PC ET1620I... -
Page 15: Left Side View
These Universal Serial Bus 3.0 (USB 3.0) ports connect to USB 3.0 devices such as a mouse, printer, scanner, camera, and others. 6-in-1 Memory card reader This All-in-One PC has a built-in memory card reader slot that supports MMC, SD, SDHC, SDXC, MS, and MS PRO cards. ASUS All-in-One PC ET1620I... -
Page 16: Chapter 2: Using Your All-In-One Pc Positioning Your Asus All-In-One Pc
Chapter 2: Using your All-in-One PC Positioning your ASUS All-in-One PC Place your ASUS All-in-One PC on a flat surface such as a table or desk then pull the stand open until it locks into place. Gently push the display panel until the hinge makes a “click” sound to adjust your All-in-One PC from a 15º... -
Page 17: Setting Up Your Asus All-In-One Pc
Setting up your ASUS All-in-One PC Connecting the wired keyboard and mouse Connect the keyboard and the mouse to the USB ports on the rear panel. Connecting a wireless keyboard and mouse 1. Install batteries into the wireless keyboard and mouse. -
Page 18: Mounting Your All-In-One Pc To A Wall
To install your All-in-One PC to the wall: NOTE: The optional wall mount should comply with VESA 75 standards. 1. Pull the stand of your All-in-One PC until it locks into place. 2. Remove the four plastic caps from the rear panel holes. ASUS All-in-One PC ET1620I... - Page 19 NOTE: Ensure that the wall mount kit is stable and fixed firmly on the wall. 5. Attach the wall mount screws and All-in-One PC assembly to the wall mount kit. ASUS All-in-One PC ET1620I...
-
Page 20: Powering On The System
• The input voltage of the adapter is 100 Vac – 240 Vac. • It is recommended that the power socket is in close proximity to the All-in-One PC. • The keyboard, mouse, and power supply illustrations are for reference only. Actual product specifications may vary with territories. ASUS All-in-One PC ET1620I... - Page 21 2. Press the Power button on the rear panel to power on the system. NOTE: For details on turning off your All-in-One PC, refer to the section Turning off your All-in-One PC on Chapter 3: Working with Windows® 8.1. ASUS All-in-One PC ET1620I...
-
Page 22: Using The Touch Screen
All-in-One PC faster and easier. IMPORTANT: Do not use sharp objects such as scissors or ballpoint pens on the touch screen to prevent dents and scratches which may cause the touchscreen to become unresponsive. ASUS All-in-One PC ET1620I... -
Page 23: Gestures
All Apps bar. the screen left or right. • In a running app, swipe from the top edge of the screen to view its menu. ASUS All-in-One PC ET1620I... - Page 24 On Desktop mode, double-tap location. an item to launch it. • To close an app, tap and hold the top side of the running app and drag it down to the bottom of the screen to close it. ASUS All-in-One PC ET1620I...
-
Page 25: Configuring The Audio Output Using An Hdmi Device
2. Right-click the Volume Mixer icon Right-click the Volume Mixer icon on the Windows® taskbar and click Playback devices. Volume Mixer 3. From the Playback screen, select Digital Audio (HDMI). 4. Click Configure and the Speaker Setup window pops up. ASUS All-in-One PC ET1620I... - Page 26 5. Select Stereo and click Next. 6. Tick the Front left and right option, and click Next. 7. Click Finish to exit the speaker setup. ASUS All-in-One PC ET1620I...
-
Page 27: Chapter 3: Working With Windows® 8.1
5. After configuring the basic items, Windows® 8.1 proceeds with the installation of your apps and preferred settings. IMPORTANT! Do not turn-off your All-in-One PC during the setup process. 6. Once the setup process is complete, the Start screen of Windows® 8.1 appears. ASUS All-in-One PC ET1620I... -
Page 28: Windows® Ui
Actual apps shown onscreen may vary per model. The screenshot is for reference only. Windows® apps These are apps pinned on the Start screen and displayed on tiled-format for easy access. NOTE: Some apps require signing in to your Microsoft account before they are fully launched. ASUS All-in-One PC ET1620I... - Page 29 Hotspots Onscreen hotspots allow you to launch programs and access the settings of your PC. The functions in these hotspots can be activated using your mouse. Hotspots on a running app Hotspots on the Start screen ASUS All-in-One PC ET1620I...
- Page 30 Snap feature. For more details, refer to Snap feature under Working with Windows® apps. upper and lower right Hover your mouse pointer to launch the Charm corner bar. ASUS All-in-One PC ET1620I...
-
Page 31: Start Button
The actual color of your Start button varies depending on the display settings you chose for your Start screen. Hover your mouse pointer over the left corner of your Start screen or any opened app to call out the Start button. ASUS All-in-One PC ET1620I... - Page 32 The context menu appears as a box filled with quick access to some of the programs inside Windows® 8.1 when you right-click on the Start button. The context menu also includes the following shut down options for your PC: sign out, sleep, shut down, restart. ASUS All-in-One PC ET1620I...
-
Page 33: Customizing Your Start Screen
2. Right-click anywhere on the taskbar, except on the Start button, to launch the Taskbar and Navigation properties window. 3. Select the Navigation tab then tick the options you want to use. 4. Click Apply to save the new settings then exit. ASUS All-in-One PC ET1620I... -
Page 34: Working With Windows® Apps
Right-click the app to activate its settings bar then tap and select an app tile size. Unpinning apps To unpin an app from the Start screen, right-click on the app to activate its settings bar then tap ASUS All-in-One PC ET1620I... -
Page 35: Closing Apps
Aside from the apps already pinned on your Start screen, you can also open other applications through the Apps screen. NOTE: Actual apps shown onscreen may vary per model. The following screenshot is for reference only. Horizontal scroll bar ASUS All-in-One PC ET1620I... - Page 36 Pinning more apps on the Start screen 1. Launch the All Apps screen. 2. Right-click on the apps that you want to pin on the Start screen. 3. Click on the icon to pin the selected apps on the Start screen. ASUS All-in-One PC ET1620I...
-
Page 37: Charm Bar
The image above shows how the Charm bar looks like once activated. Use your PC’s mouse or keyboard to launch the Charm bar: • Move your mouse pointer on the upper or lower right corner of the screen. • Press ASUS All-in-One PC ET1620I... -
Page 38: Inside The Charm Bar
This tool allows you to access and share files with the devices attached to your PC such as an external display or printer. Settings This tool allows you to access the PC settings of your PC. ASUS All-in-One PC ET1620I... -
Page 39: Snap Feature
3. Once the pointer changes to a hand icon, drag then drop the app to the left or right side of the display panel. 4. Launch another app. This app is automatically placed on the available pane. ASUS All-in-One PC ET1620I... -
Page 40: Other Keyboard Shortcuts
Switches between the Start screen and the last running Launches the desktop Launches the This PC window on Desktop mode Opens the File option from the Search charm Opens the Share charm Opens the Settings charm ASUS All-in-One PC ET1620I... - Page 41 Opens Ease of Access Center Opens the Settings option from the Search charm Opens a context menu of the Start button Launches the magnifier icon and zooms in your screen Zooms out your screen Opens the Narrator Settings ASUS All-in-One PC ET1620I...
-
Page 42: Turning Off Your Pc
Press the Power button once. • To put your PC to sleep mode using Desktop mode, launch the desktop then press alt + f4 to launch the Shut Down window. Select Sleep from from the drop-down list then select OK. ASUS All-in-One PC ET1620I... -
Page 43: Chapter 4: Connecting To The Internet
You may be prompted to enter a security key to connect to a secured wireless network. 5. (Optional) To enable sharing between your PC and other wireless-enabled systems, click Yes. Click No if you do not want to enable the sharing function. ASUS All-in-One PC ET1620I... -
Page 44: Wired Connection
Proceed to step 8. 8. Return to the Network and Sharing Center window then click Set up a new connection or network. 9. Select Connect to the Internet then click Next. 10. Click Broadband (PPPoE). ASUS All-in-One PC ET1620I... - Page 45 Connect. 12. Click Close to finish the configuration. 13. Click on the taskbar then click the connection you just created. 14. Key-in your user name and password then click Connect to start connecting to the Internet. ASUS All-in-One PC ET1620I...
-
Page 46: Chapter 5: Recovering Your System Entering The Bios Setup
Quickly enter the BIOS To access the BIOS: • When your ASUS All-in-One PC is off, press the power button for at least four (4) seconds to access the BIOS directly. • Press the power button to turn on your ASUS All-in-One PC then press <F2>... -
Page 47: Recovery Options On Windows 8.1
2. Click Settings > Change PC Settings > Update and Recovery > Recovery. 3. From the Remove everything and reinstall Windows option, click Get Started. 4. Follow the onscreen instructions to complete the reinstallation and reset process. ASUS All-in-One PC ET1620I... -
Page 48: Appendices
This device complies with Industry Canada licence-exempt RSS standard(s). Operation is subject to the following two conditions: (1) this device may not cause interference, and (2) this device must accept any interference, including interference that may cause undesired operation of the device ASUS All-in-One PC ET1620I... -
Page 49: Rf Exposure Warning
This device has also been evaluated and shown compliant with the IC RF Exposure limits under mobile exposure conditions. (Antennas are greater than 20 cm from a person’s body). ASUS All-in-One PC ET1620I... - Page 50 (meaning they have priority) of 5250-5350 MHz and 5650-5850 MHz and these radars could cause interference and/or damage to LE-LAN devices. The Country Code Selection feature is disabled for products marketed in the US/Canada. ASUS All-in-One PC ET1620I...
-
Page 51: Ce Mark Warning
CE marking for devices with wireless LAN/ Bluetooth This equipment complies with the requirements of Directive 1999/5/EC of the European Parliament and Commission from 9 March, 1999 governing Radio and Telecommunications Equipment and mutual recognition of conformity. is for class II device. ASUS All-in-One PC ET1620I... -
Page 52: Wireless Operation Channel For Different Domains
Check local regulations for disposal of electronic products. DO NOT throw the battery in municipal waste. The symbol of the crossed out wheeled bin indicates that the battery should not be placed in municipal waste. ASUS All-in-One PC ET1620I... -
Page 53: Coating Notice
Declaration ASUS follows the green design concept to design and manufacture our products, and makes sure that each stage of the product life cycle of ASUS product is in line with global environmental regulations. In addition, ASUS disclose the relevant information based on regulation requirements. -
Page 54: Energy Star Complied Product
All ASUS products with the ENERGY STAR logo comply with the ENERGY STAR standard, and the power management feature is enabled by default. The monitor and computer are automatically set to sleep after 10 and 30 minutes of user inactivity.