Dell XPS 18 User Manual
Hide thumbs
Also See for XPS 18:
- User manual (46 pages) ,
- Quick start manual (2 pages) ,
- Owner's manual (119 pages)
Table of Contents
Advertisement
Quick Links
Download this manual
See also:
User Manual
Advertisement
Table of Contents

Related Manuals for Dell XPS 18


Summary of Contents for Dell XPS 18
- Page 1 Dell XPS 18 ™ User’s Manual Computer Model: XPS 1820 Regulatory Type : W01A Regulatory Model: W01A002...
- Page 2 U.S. and international copyright and intellectual property laws. Dell ™ and the Dell logo are trademarks of Dell Inc. in the United States and/or other jurisdictions. All other marks and names mentioned herein may be trademarks of their respective companies.
-
Page 3: Table Of Contents
Contents Features � � � � � � � � � � � � � � � � � � � � � � � � � � � 5 Accessories � � � � � � � � � � � � � � � � � � � � � � � � � 9 Setting Up Your Computer �... - Page 4 Powered Stand � � � � � � � � � � � � � � � � � � � � � � 27 Features ......27 Using the Powered Stand .
-
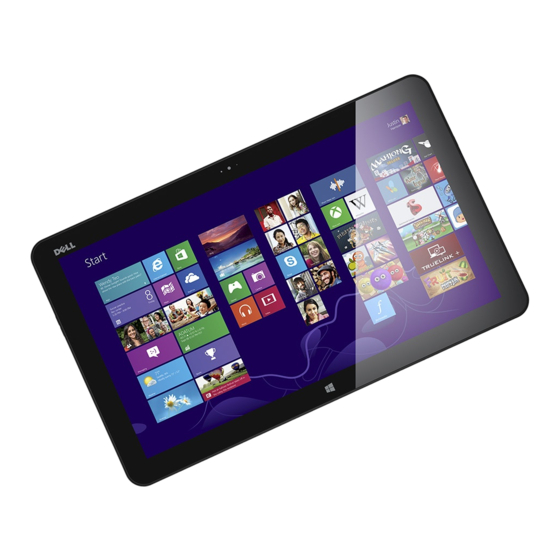
Page 5: Features
Features This section provides information about the features available on your computer. Feature Functionality 1 Ambient-light sensor Detects the ambient light and automatically adjusts the display brightness. 2 Front-facing camera Capture a front-view picture or record videos. Make video calls with web applications, such as Skype. - Page 6 Feature Functionality 7 Headset/speaker port Connect a headphone, a headset (headphone and microphone combo), or speakers. 8 USB 3.0 ports (2) Connect peripherals such as storage devices, printers, and so on. Provides data transfer speeds up to 5 Gbps. 9 Power-adapter port Connect a power adapter to provide power to your computer and charge the battery.
- Page 7 Connect a security cable to prevent unauthorized movement of your computer. 5 Touchscreen display Touch the display to use on-screen controls including buttons, menu items, and the on-screen keyboard 6 Docking port Connect to a Dell Powered-Stand (sold separately). │ Features...
- Page 8 Feature Functionality Left and right feet Fold the feet outward to allow your computer to stand upright in landscape mode. Fold inward to allow your computer to lay flat. CAUTION: Do not place or use the computer in portrait mode. │...
-
Page 9: Accessories
Accessories Power adapter and cable ∞ — Provides power to your computer and charges the battery. ∞ USB to ethernet adapter (sold separately) — Allows you to connect a RJ45 (network) cable to your computer using a USB port. ∞ Powered stand (sold separately) — Allows your computer to be placed upright. - Page 10 ∞ Wireless keyboard and mouse (sold separately) - Inputs text and controls the cursor. NOTE: If you order the keyboard and mouse along with your computer, they are already paired when you receive them. If you purchase the keyboard and mouse separately, or if you need to pair them again, see “Pairing the wireless keyboard and mouse”.
-
Page 11: Setting Up Your Computer
WARNING: Before you begin any of the procedures in this section, read the safety information that shipped with your computer. For more best practices information, see dell.com/regulatory_compliance. NOTE: You receive your computer in shipping mode to prevent it from accidentally turning on during shipping. To turn on your computer for the first time, connect the power adapter and then press the power button. - Page 12 Battery-status light: You can check the charge/power status of your computer by checking the battery-status light on the side of your computer or the icon on the screen when your computer is turned on. Solid white light Power adapter is connected to the computer and the battery is being charged.
-
Page 13: Turning On Your Computer
Turning On Your Computer CAUTION: Use your computer in an ambient temperature between 0°C and 35°C (32°F and 95°F). 1 Press and release the Power and Sleep/Wake button NOTE: After the button is pressed, there is a slight delay before your computer turns on or off. -
Page 14: Enabling/Disabling Wi-Fi
c. Sign in to your computer. Your computer is ready for use when the Windows Start screen is displayed. NOTE: A lock screen may be displayed when your computer wakes up from a sleep state. NOTE: If the login screen is not enabled, the Start screen appears after you swipe-up on the lock screen. -
Page 15: Inserting A Memory Card (Sold Separately) - Optional
Inserting a Memory Card (Sold Separately) — Optional 1 Orient the SD card so that the pins on the card are facing the rear when inserted. 2 Push the slot cover down. 3 Push the SD card into the slot until it clicks into place. in Specifications. -
Page 16: Removing The Memory Card
Removing the Memory Card CAUTION: To avoid data loss, ensure all read/write operations to the memory card are complete before removing it from the computer. 1 Tap the Desktop tile to access the Desktop mode. 2 In the notification area at the bottom-right corner of the screen , tap the safely remove hardware icon NOTE: If you don not see Safely Remove Hardware , tap... -
Page 17: Using Your Computer
Using Your Computer Screen Orientation For optimal viewing experience, the screen orientation changes automatically to portrait or landscape mode depending on your computer’s orientation. Automatic screen rotation is enabled by default. NOTE: Some applications may not support automatic screen rotation. Disabling or enabling automatic screen rotation: 1 Swipe from the right edge of the display to access Charms. -
Page 18: Gestures
Getting more information on Windows You can get more information on Windows and the new features using any of the following resources: ∞ dell.com/windows8 ∞ dell.com/support ∞ Help+Tips tile Gestures Your computer has a multi-point touch display that allows you to perform common tasks using gestures. - Page 19 Finger gestures Allows you to: Zoom Place two fingers on the touchscreen and then move them apart to zoom-in. Place two fingers on the touchscreen and then move them apart to zoom-out. Flick Move a finger quickly in the desired direction to flip through content in the active window like pages in a book.
- Page 20 Finger gestures Allows you to: Rotate Rotate clockwise — Keeping a finger or thumb in place, move the other finger in an arched direction to the right Rotate counter-clockwise — Keeping a finger or thumb in place, move the other finger in an arched direction to the left You can also rotate the active content by moving both the fingers in a circular...
- Page 21 Using Keyboard and Mouse If you purchased a wireless keyboard and mouse with your computer, they will be already paired. To use the keyboard and mouse, make sure the batteries are installed in both devices and they are powered on. │ Using Your Computer...
- Page 22 Pairing the wireless keyboard and mouse If the keyboard and mouse do not work automatically or if the pairing is lost for some reason, manually pair them with your computer. To pair the keyboard and mouse: 1 Swipe from the right edge of the display to access Charms. →...
-
Page 23: Using Headphone/Microphone
Using Headphone/Microphone Your computer has a headset port that supports a headphone, a microphone, or a headset device to listen to music, record audio, or make voice calls. WARNING: Listening to loud music for extended periods of time can lead to hearing loss. NOTE: It is recommended to keep the volume level low before connecting the headphones to your computer. -
Page 24: Turning Off The Screen
Turning Off the Screen Using the power button: Press and release the Power and Sleep/Wake button to turn off the screen. Using Charms: Swipe from the right edge of the display to access Charms. → Power → Sleep to turn off the screen. Touch Settings NOTE: If your computer is in a sleep state (computer is on, but screen is off), press the Power and Sleep/Wake button... - Page 25 ∞ LCD BIST menu — Launches the Built-in Self Test (BIST) that allows you to diagnose a display-related problem. NOTE: For more information on the tools available to keep your computer running properly, see dell.com/support. │ Using Your Computer...
-
Page 26: Synchronizing Your Computer Using A Microsoft Account
Synchronizing Your Computer using a Microsoft account When you sign-in to your computer using a Microsoft account, you can automatically synchronize your settings, such as installed apps, theme, wallpaper, internet browser history, application settings, personal files, and so on, with other Windows 8/8.1 computers that use the same Microsoft account. -
Page 27: Powered Stand
Powered Stand Features Feature Functionality 1 Docking-status light Turns on when your computer is successfully docked (if the power adapter is attached to the powered stand). 2 Docking connector Connects the computer to the docking port to provide power to your computer and charge the battery. - Page 28 Feature Functionality 1 Hinge Allows you to adjust the angle of your computer between 10 degrees and 70 degrees. 2 Power-adapter port Connect the power adapter to provide power to the computer, and charge the battery. 3 Cable clip Holds the power-adapter cable in place.
-
Page 29: Using The Powered Stand
Using the Powered Stand Connecting the Power Adapter to the Stand CAUTION: Use only the supplied power adapter and power cable. Using unauthorized adapters or cables may severely damage your computer and stand. 1 Connect the power adapter to the power-adapter port on the stand. -
Page 30: Docking Your Computer
Docking Your Computer 1 Connect power adapter to the stand. 2 Connect the power adapter to an electrical outlet. 3 Align the docking port on your computer to the docking connector on the powered stand. 4 Place your computer on the powered stand. NOTE: The docking status light turns on when your computer is correctly seated on the powered stand and the powered stand is connected to a power source. -
Page 31: Undocking Your Computer
Undocking Your Computer Lift the computer from the powered stand. │ Powered Stand... -
Page 32: Cleaning Your Computer
Cleaning Your Computer CAUTION: Disconnect all cables from your computer before cleaning it. Clean your computer with a soft cloth slightly moistened with water or an approved display cleaner. Do not use liquid or aerosol cleaners that may contain flammable substances. -
Page 33: Troubleshooting
Troubleshooting Windows Troubleshooting and Recovery Refreshing your computer Refreshing your computer restores Windows to the original factory settings without deleting any of your personal files, installed applications, or personalization settings. CAUTION: Refreshing your computer removes all third-party applications. 1 Swipe from the right edge of the display to access Charms. →... - Page 34 Using advanced startup Use advanced startup if you have problems starting up your computer or if you want to change the computer’s startup settings, such as allowing your computer to start up from a USB device or an optical media. 1 Swipe from the right edge of the display to access Charms.
-
Page 35: Battery Problems
Charge the battery in an temperature is lower ambient temperature than 0 °C or higher between 0°C and 35°C. than 35°C. The battery or power Contact Dell or the adapter is damaged. manufacturer to replace the damaged parts. │ Troubleshooting... -
Page 36: System Problem
Turning Off Your or behaving or locked state. Computer Turning unexpectedly On Your Computer. 2 Refresh your computer. See Refreshing your computer. 3 Reset your computer. Resetting your computer. 4 Contact Dell’s support service. Go to dell. com/support dell.com/ContactDell. │ Troubleshooting... -
Page 37: Touchscreen Problem
Problems Possible causes Possible solution Software or The application or Software updates may feature is not feature could be in an have been downloaded working as unresponsive state. in the background. expected Restart your computer. Touchscreen problem Problems Possible causes Possible solution Touchscreen The display may be... -
Page 38: Network Problem
Network problem Problems Possible causes Possible solution No wireless Your computer is 1 Check if the wireless connection not able to properly radio is on. See access a wireless Enabling/Disabling signal. Wi-Fi. 2 Move closer to the wireless access point. 3 Reset the wireless router if using a private network. -
Page 39: Locating Your Service Tag And Express Service Code
Locating Your Service Tag and Express Service Code You need your computer’s Service Tag/Express Service Code when you contact Dell for technical support or other queries. The Express Service Code helps the automated telephone support system redirect your call to the appropriate support department. -
Page 40: Specifications
Specifications System Information Computer model XPS 1820 Physical dimensions Height 283.70 mm (11.17 in) Width 463.60 mm (18.25 in) Depth 17.70 mm (0.70 in) Weight: Weight (maximum) 2.41 kg (5.31 lb) Stand weight 2.05 kg (4.52 lb) Hardware • Intel Core i3 ULV (4 Processor generation) • Intel Core i5 ULV (4... -
Page 41: Ports And Connectors
Display Type 18.4-inch full-HD with multi-point capacitive touch Resolution (maximum) 1920 × 1080 Aspect ratio 16:9 Brightness (maximum) 350 nits Viewing angle 89 degrees Contrast ratio 1000:1 Color depth 262.144 bits Ports and connectors Audio One 3.5 mm headset port Dock One docking port • Two USB 3.0 ports... -
Page 42: Power Adapter
Power Adapter Input voltage 90 VAC-240 VAC Input current (maximum) 1.60 A Input frequency 50 Hz-60 Hz Output power 65 W Output current 3.34 A (maximum) Rated output voltage 19.5 VDC Temperature range: Operating 0°C to 35°C (32°F to 104°F) Storage -40°C to 65°C (-40°F to 149°F) Computer Environment...