Zanussi ZNM11X User Manual
Hide thumbs
Also See for ZNM11X:
- Specifications (3 pages) ,
- User manual (36 pages) ,
- Specifications (7 pages)
Table of Contents
Advertisement
Advertisement
Table of Contents

Related Manuals for Zanussi ZNM11X


Summary of Contents for Zanussi ZNM11X
- Page 1 User Manual Microwave Oven ZNM11X...
-
Page 3: Table Of Contents
CONTENTS Important safety instructions ......... . .2 - 3 Oven &... -
Page 4: Important Safety Instructions
IMPORTANT SAFETY INSTRUCTIONS IMPORTANT SAFETY INSTRUCTIONS: READ CAREFULLY AND KEEP FOR FUTURE REFERENCE To avoid the danger of fire. To avoid the possibility of injury WARNING: The microwave oven should not be left Do not operate the oven if it is damaged or unattended during operation. - Page 5 IMPORTANT SAFETY INSTRUCTIONS To avoid the possibility of explosion and To avoid misuse by children sudden boiling: WARNING: Only allow children to use the oven without supervision when adequate WARNING: Liquids and other foods must not instructions have been given so that the child is be heated in sealed containers since they are able to use the oven in a safe way and liable to explode.
-
Page 6: Oven & Accessories
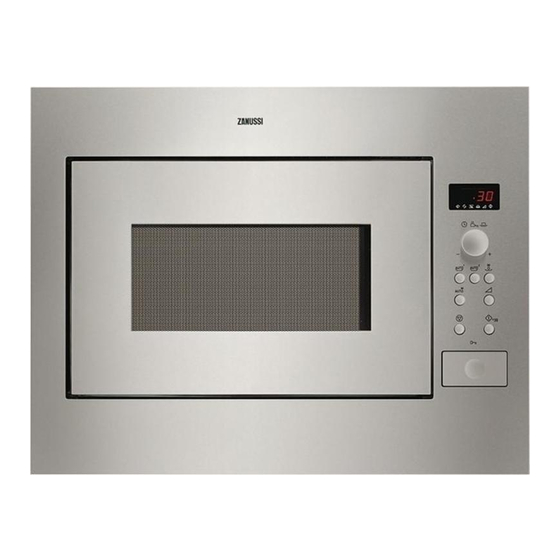
OVEN & ACCESSORIES Front trim Oven lamp Control panel Door opening button Waveguide cover Oven cavity Seal packing Door seals and sealing surfaces Fixing points (4 points) 10. Ventilation openings 11. Outer cover 12. Rear cabinet 13. Power supply cord support clip 14. -
Page 7: Control Panel
CONTROL PANEL 1 Digital Display 2 Indicators The appropriate indicator will flash or light up, just above each symbol according to the instruction. When an indicator is flashing, press the appropriate button (having the same symbol) or carry out the necessary operation. Stir Turn over Weight... -
Page 8: Before Operation
BEFORE OPERATION Using the STOP button Plug in the oven. 1. The oven display will flash: Use the STOP button to: 1. Erase a mistake during programming. 2. Stop the oven temporarily during cooking. 2. Touch the STOP button the display will show: 3. -
Page 9: Microwave Cooking Advice
MICROWAVE COOKING ADVICE Microwaves are energy waves, similar to those used for A variety of cookware can be used as listed on page 8. Water, sugar and fat in food absorb microwaves which TV and radio signals. Electrical energy is converted into microwave energy, cause them to vibrate. -
Page 10: Microwave Safe Cookware
MICROWAVE COOKING ADVICE USING A FOOD THERMOMETER TO DETERMINE COOKING TIME Once cooked, every drink and every foodstuff has a cooked. The internal temperature can be ascertained certain internal temperature at which the cooking with a food thermometer. The most important process can be switched off and the food will be temperatures are specified in the temperature table. -
Page 11: Microwave Power Levels
MICROWAVE POWER LEVELS Your oven has 5 power levels. To choose the power 450W - for dense foods which require a long level for cooking, follow the advice given in the cooking time when cooked conventionally, eg. beef recipe section. Generally the following dishes, it is advisable to use this power setting to recommendations apply: ensure the meat will be tender. -
Page 12: Microwave Cooking
MICROWAVE COOKING Your oven can be programmed for up to 90 minutes. Cooking time Increasing unit (90.00) The input unit of cooking (defrosting) time 0-5 minutes 10 seconds varies from 10 seconds to five minutes. It depends on 5-10 minutes 30 seconds the total length of the cooking (defrosting) time as 10-30 minutes... -
Page 13: Other Convenient Functions
OTHER CONVENIENT FUNCTIONS 1. MULTIPLE SEQUENCE COOKING A maximum of 3 sequences can be input, consisting of manual cooking time and mode. Example: To cook: 5 minutes on 900 W power (Stage 1) 16 minutes on 270 W power (Stage 2) STAGE 1 1. -
Page 14: Other Convenient Functions
OTHER CONVENIENT FUNCTIONS 2. ADD 30 SECONDS FUNCTION The START/+30 button allows you to operate the two following functions: a. Direct start You can directly start cooking on 900W microwave power level for 30 seconds by pressing the START/+30 button. NOTE: To avoid the misuse by children the START/+30 button can be used only within 3 minute after preceding operation, i.e., closing the door, pressing the STOP button or cooking completion. -
Page 15: Auto Cook, Cook From Frozen & Auto Defrost Operation
AUTO COOK, COOK FROM FROZEN & AUTO DEFROST OPERATION AUTO COOK, COOK FROM FROZEN and AUTO DEFROST automatically work out the correct cooking mode and cooking time. You can choose from 4 AUTO COOK, 3 COOK FROM FROZEN and 5 AUTO DEFROST menus. What you need to know when using this automatic function: For example: Menu number 1a. -
Page 16: Auto Cook, Cook From Frozen & Auto Defrost Operation
AUTO COOK, COOK FROM FROZEN & AUTO DEFROST OPERATION Example 1 for AUTO COOK: To cook 1,5 kg (3 units) of Fish Fillet with Sauce using Auto Cook 2 (A2-1). 1. Select the menu required 2. Enter the quantity by rotating 3. -
Page 17: Auto Cook, Cook From Frozen & Auto Defrost Charts
AUTO COOK, COOK FROM FROZEN & AUTO DEFROST CHARTS BUTTON AUTO COOK WEIGHT (Increasing PROCEDURE Unit) / UTENSILS A1-1 Cook 0,5 - 1,5 kg* (1 - 3) • See recipe for “Chicken Pan with Chicken Pan Gratin dish with Vegetables” on page 18. with Vegetables microwave cling film * Total weight of all ingredients... - Page 18 AUTO COOK, COOK FROM FROZEN & AUTO DEFROST CHARTS BUTTON COOK FROM WEIGHT (Increasing PROCEDURE FROZEN Unit) / UTENSILS FC-1 Cook 0,1 - 0,6 kg (100 g) • Add 1tbsp water per 100 gand salt as Frozen Bowl & lid desired.
- Page 19 AUTO COOK, COOK FROM FROZEN & AUTO DEFROST CHARTS BUTTON AUTO WEIGHT (Increasing PROCEDURE DEFROST Unit) / UTENSILS Ad-1 Defrost 0,2 - 1,0 kg (100 g) • Place the food on a plate in the centre of the Steak and Flan dish turntable.
-
Page 20: Recipes For Auto Cook
AUTO COOK, COOK FROM FROZEN & AUTO DEFROST CHARTS NOTE: Auto Defrost 1. Steaks and Chops should be frozen in one layer. 2. Minced meat should be frozen in a thin shape. 3. After turning over, shield the defrosted portions with small, flat pieces of aluminium foil. 4. -
Page 21: Recipes For Auto Cook
RECIPES FOR AUTO COOK FISH FILLET WITH SAUCE (A2-1) 1. Mix ingredients for the sauce. Fish fillet with piquant sauce 2. Place the fish fillet in a round gratin dish with the thin ends toward the centre and sprinkle with salt. 0,5 kg (1) 1,0 kg (2) 1,5 kg (3) 3. -
Page 22: Cooking Charts
COOKING CHARTS ABBREVIATIONS USED tbsp = tablespoon Cup = cupful g = gram ml = millilitre min = minutes tsp = teaspoon kg = kilogram l = litre cm = centimetre TABLE : HEATING FOOD & DRINK Food / Drink Quantity Power Time Hints -g/ml-... -
Page 23: Recipes
COOKING CHARTS TABLE: COOKING MEAT, FISH, POULTRY & VEGETABLES Food Quantity Power Time Hints Standing time -Level- -Min- -Min- Roasts 630 W 17-22 season to taste, place in a shallow flan dish (pork, 1000 630 W 34-38 turn over halfway through cooking time veal, lamb) 1500 630 W... - Page 24 RECIPES SOLE FILLETS 1. Wash the fish and pat them dry. Remove Utensils: Shallow, oval oven dish with any bones. microwave cling film 2. Cut the lemon and the tomatoes into thin (approx. 26 cm long) slices. Ingredients 3. Grease the dish with butter. Place the 400 g sole fillets fish fillets in the dish and drizzle the lemon, whole...
- Page 25 RECIPES STUFFED HAM 1. Mix the spinach with the cheese and fromage frais, season to taste. Utensils: Bowl with lid (2 l capacity) 2. Place a tablespoon of the filling on top Oval gratin dish of each slice of cooked ham, and roll (approx.
- Page 26 RECIPES BACON RISOTTO 1. Grease the dish. Place the onions and Utensils: Bowl with a lid (2 l capacity) bacon in the dish, cover, and cook. Ingredients 2-3 min. 900 W 50 g streaky bacon, chopped 2. Add the rice, meat stock and cook. 20 g butter or margarine 1.
-
Page 27: Recipes
RECIPES 1. In a bowl, mix together the flour, cocoa, CHEESECAKE 12 portions baking flour and sugar. Utensils: Spring form tin 2. Add the egg and butter and mix in a (approx. 26 cm diameter) food processor. Ingredients 3. Grease the tin. Roll out the dough and Base: line the tin, leaving 2 cm around the 300 g flour... -
Page 28: Care & Cleaning
CARE & CLEANING CAUTION: DO NOT USE COMMERCIAL Oven Interior O V E N C L E A N E R S , S T E A M C L E A N E R S , 1. For cleaning, wipe any spatters or spills with a ABRASIVE, HARSH CLEANERS, ANY THAT soft damp cloth or sponge after each use while C O N TA I N... -
Page 29: What To Do If
WHAT TO DO IF... SYMPTOM POSSIBLE SYMPTOMS/REMEDIES ... the microwave appliance is not Check that working properly? the fuses in the fuse box are working, there has not been a power outage. If the fuses continue to blow, please contact a qualified electrician. -
Page 30: Service & Spare Parts
Please note that a valid purchase receipt or guarantee documentation is required for in-guarantee service calls. CUSTOMER CARE For general enquiries concerning your Zanussi appliance or for further information on Zanussi products, please contact our Customer Care Department by letter or telephone at the address below or visit our website at www.zanussi.co.uk. -
Page 31: Guarantee Conditions
GUARANTEE CONDITIONS Standard Guarantee conditions European Guarantee We, Zanussi, undertake that if within 12 months of If you should move to another country within the date of the purchase this Zanussi appliance or Europe then your guarantee moves with you to... -
Page 32: Specifications
Ecologically responsible disposal of packaging materials and old appliances Packaging materials Zanussi microwave ovens require effective packaging to protect them during transportation. Only the minimum packaging necessary is used. Packaging materials (e.g. foil or styrofoam) can place children at risk. -
Page 33: Installation
INSTALLATION INSTALLING THE APPLIANCE 1. Remove all packaging and check carefully for 3. Fit the appliance into the kitchen cupboard any signs of damage. slowly, and without force, until the front frame of the oven seals against the front opening of the 2. -
Page 34: Installation
INSTALLATION CONNECTING THE APPLIANCE TO THE POWER SUPPLY • The electrical outlet should be readily accessible so that the unit can be unplugged easily in an emergency. Or it should be possible to isolate the oven from the supply by incorporating a switch in the fixed wiring in accordance with the wiring rules. - Page 36 Subject to change without notice TINS-A571URR0...