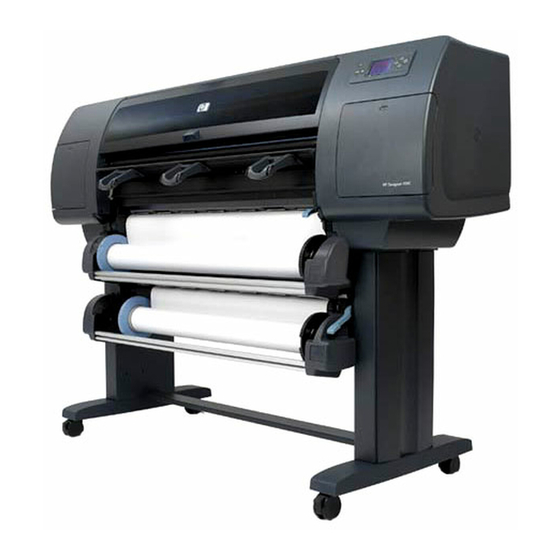
Summary of Contents for HP Designjet 4500 Series
- Page 1 installation guide and warranty manual d’installation et garantie C4197A *C4197-90903* *C4197-90903*...
- Page 2 Byt ut fixeringssatsen när meddelandet: FIXERING SLUT BYT UT SATSEN visas på skrivarens kontrollpanel. Turn the printer off. Wait 10 minutes for the fans to stop running, and unplug the power cord. Then wait 30 minutes for the printer to cool.
- Page 3 If the printer has a duplex printing accessory, see step 5. Otherwise, skip to step 6. Hvis printeren har duplexudskrivningsudstyr, se da trin 5. Gå ellers videre med trin 6. Wenn der Drucker über Duplexdruck- Zubehör verfügt, führen Sie Schritt 5 aus.
- Page 4 30 minuti per il raffreddamento della stampante. WAARSCHUWING! Voorkom brandwonden door het netsnoer uit het stopcontact te nemen en de printer 30 minuten te laten afkoelen. ADVARSEL! Unngå mulig forbrenning. Kontroller at strømledningen er trukket ut, og at skriveren har stått til avkjøling i 30...
- Page 5 Käännä kahta sinistä salpaa 90 astetta ylöspäin. Vrid de två blå spärrarna 90 grader uppåt. Grasp the finger holds on the fuser and pull the used fuser out of the printer. Tag fat i fingerholdepunkterne på fikseringsenheden og træk den brugte fikseringsenhed ud af printeren.
- Page 6 Lås fast fixeringsenheten genom att vrida de två blå spärrarna nedåt. Remove the two used air filters from the rear of the printer. Then use the hand wipe to clean the fan areas. Fjern de to brugte luftfiltre fra printerens bagside.
- Page 7 Remove the new air filters from the bag. Place the used air filters in the bag for recycling. Tag de nye luftfiltre ud af posen. Anbring de brugte luftfiltre i posen, således at de kan sendes til genbrug. Nehmen Sie die neuen Luftfilter aus der Folienverpackung.
- Page 8 Close the upper rear door of the printer. If a duplex printing accessory is installed, close the accessory’s rear cover. Luk den øverste bageste låge på printeren. Hvis der er installeret duplexudskrivnings- udstyr, luk da det bageste dæksel på udstyret.
- Page 9 Inside the tray cavity on the printer, locate the paper roller in the top of the tray cavity. Inde i bakkeåbningen på printeren finder du papirvalsen øverst i bakkeåbningen. Machen Sie die Papierrolle oben in der Fachaufnahme des Druckers ausfindig.
- Page 10 On Tray 2, locate the paper roller with a blue hub and the cover next to the roller. På bakke 2 finder du papirvalsen med en blå muffe og dækslet ved siden af valsen. Machen Sie im Fach 2 die Papierrolle mit der blauen Nabe und die Abdeckung neben der Rolle ausfindig.
- Page 11 Sluit de klep. Lukk dekselet. Feche a tampa. Sulje kansi. Stäng luckan. Insert Tray 2 into the printer. Sæt bakke 2 i printeren. Setzen Sie das Fach 2 wieder in den Drucker ein. Inserte la bandeja 2 en la impresora.
- Page 12 After you have replaced all the used paper rollers, plug the power cord in and turn the printer on. If FUSER LIFE OUT does not appear on the control panel, skip to step 36. Efter du har udskiftet alle de brugte papirvalser, sætter du igen netledningen i stikkontakten og...
- Page 13 Wait until the printer control panel displays READY. Then, to reset the printer for the new fuser kit, push [Menu] on the control panel until RESETS MENU appears. Vent indtil printerens kontrolpanel viser KLAR. Nulstil derefter printeren til det nye fikseringsenhedssæt ved at trykke på...
- Page 14 L'installation est terminée. Pour toute aide complémentaire, consultez le site http://www.hp.com/cposupport. L'installazione è così completata. Per ulteriori informazioni, consultare la guida all'uso in linea al sito http://www.hp.com/cposupport. De installatie is voltooid. Ga naar http://www.hp.com/cposupport als u verdere hulp nodig heeft. Installasjonen er fullført. Gå til http://www.hp.com/cposupport hvis du...
- Page 16 FUSER LIFE OUT REPLACE KIT FUSER LIFE OUT REPLACE KIT FUSER LIFE OUT REPLACE KIT FUSER FUSER tŽkq–•|–{–u og|^rkn•t{px–sj FUSER...
- Page 18 FUSER...
- Page 19 FUSER FUSER FUSER FUSER...
- Page 20 FUSER FUSER...
- Page 26 21 30 FUSER FUSER LIFE OUT FUSER LIFE FUSER LIFE OUT FUSER tŽkq–•|–{–u og|^rkn•t{px–sj...
- Page 27 READY RESETS MENU [Menu] READY [Menu] RESETS MENU READY ETS MENU – vg|Š~eh Š~eh FUSER NEW FUSER KIT, SELECT IF DONE [Item [Select [Item] NEW FUSER KIT, SELECT IF DONE [Select] NEW FUSER KIT, SELECT IF DONE – t•oÈFUSER og| n•fkr–v•xp READY [Go] [Go]...
- Page 28 http://www.hp.com/cposupport...
- Page 29 Qu'est-ce que cette garantie couvre ? Ce kit de fusion HP est garanti être exempt de tout défaut de matériau et de fabrication jusqu'à expiration de sa durée de vie. La garantie couvre toute anomalie ou fonctionnement défectueux de votre nouveau kit de fusion HP.
- Page 30 Che cosa è compreso nella garanzia Viene garantita l'assenza di difetti nei materiali e nella fabbricazionfe del kit del fusore HP, per tutto il periodo della sua utilizzabilità. La garanzia comprende ogni difetto o cattivo funzionamento di un kit del fusore HP nuovo.
- Page 31 ¿Qué cubre esta garantía? Este conjunto de fusor HP está garantizado contra defectos en los materiales y la mano de obra hasta que acabe su vida útil. La garantía cubre cualquier defecto o avería que se produzca en el conjunto de fusor HP nuevo.
- Page 32 O que é coberto pela garantia? Garante-se que o Kit de Fusor HP está livre de defeitos materiais e de fabricação até o fim da sua vida útil. A garantia cobre quaisquer defeitos ou mau funcionamento do seu novo Kit de Fusor HP.


