Panasonic SC-PT350W Operating Instructions Manual
Dvd home theater sound system
Hide thumbs
Also See for SC-PT350W:
- Operating instructions manual (44 pages) ,
- Operating instructions manual (13 pages)
Table of Contents
Advertisement
Before connecting, operating or adjusting this product,
please read the instructions completely. Please keep this
manual for future reference.
Your unit may not look exactly the same as illustrated.
Note
.
"EB" on the packaging indicates the United Kingdom.
The player plays DVD-Video marked with labels containing
the region number "2" or "ALL".
Example:
2
Wireless system
Wireless surround speaker connection.
USB connection for MP3 players
EB
RQTX0059-B_Out_new6.indd 1
RQTX0059-B_Out_new6.indd 1
DVD Home Theater Sound System
2
3
ALL
5
page
page
Operating Instructions
SC-PT350W
Model No.
9
35
RQTX0059-B
3/5/07 3:26:36 PM
3/5/07 3:26:36 PM
Advertisement
Table of Contents

Related Manuals for Panasonic SC-PT350W


Summary of Contents for Panasonic SC-PT350W
- Page 1 Operating Instructions DVD Home Theater Sound System SC-PT350W Model No. Before connecting, operating or adjusting this product, please read the instructions completely. Please keep this manual for future reference. Your unit may not look exactly the same as illustrated. Note “EB”...
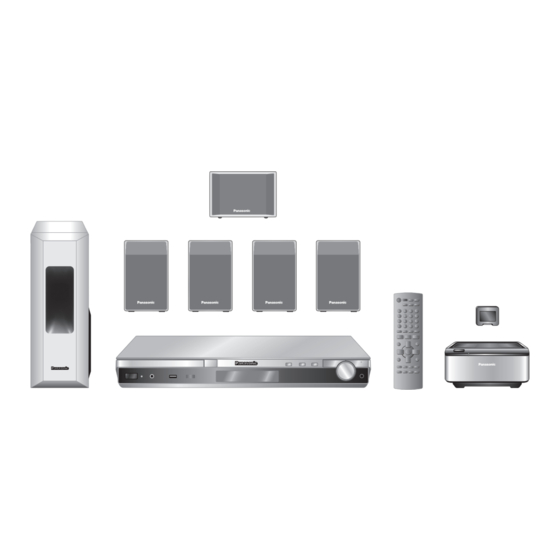
- Page 2 For optimum performance and safety, please read these instructions carefully. Operations in these instructions are described mainly with the remote control, but you can perform the operations on the main unit if the controls are the same. System SC-PT350W Main unit SA-PT350 Front speakers...
-
Page 3: Caution For Ac Mains Lead
Caution for AC Mains Lead For your safety, please read the following text WARNING: DO NOT CONNECT EITHER WIRE TO carefully. THE EARTH TERMINAL WHICH IS MARKED WITH THE LETTER E, BY THE EARTH SYMBOL This appliance is supplied with a moulded three pin COLOURED GREEN OR GREEN/YELLOW. -
Page 4: Safety Precautions
R&TTE products from our DoC server: covered in these instructions occurs, http://www.doc.panasonic.de disconnect the AC mains lead and Contact in the EU: Panasonic Services Europe, a contact your dealer or an authorized Division of Panasonic Marketing Europe GmbH, service center. Electric shock or... -
Page 5: Table Of Contents
Table of contents GETTING STARTED Caution for AC Mains Lead ................3 Safety precautions ..................4 Accessories ....................6 Preparing the remote control .................6 Placement of speakers .................7 Other speaker setup options ....................8 Wireless system connection ................9 Connect the surround speaker cables to the wireless system ..........9 Connecting the wireless system to the power supply / Connecting the digital transmitter ..9 Simple setup .................. -
Page 6: Accessories
Accessories Please check and identify the supplied accessories. 1 Remote control 1 FM indoor antenna 2 AC mains leads (RSA0007-L) (K2CT3CA00004) (N2QAYB000093) 2 Remote control batteries 1 Antenna plug adaptor (K1YZ02000013) 1 Sheet of speaker cable stickers Preparing the remote control Do not: •... -
Page 7: Placement Of Speakers
Placement of speakers Setup example Place the front, center, and surround speakers at approximately the same distance from the seating position. The angles in the diagram are approximate. FRONT SURROUND CENTER (L, R) (L, R) Main unit (with digital transmitter) SUBWOOFER WIRELESS SYSTEM... -
Page 8: Other Speaker Setup Options
Placement of speakers (continued) • Use only supplied speakers Note Using other speakers can damage the unit, and • You can damage your speakers and shorten their sound quality will be negatively affected. useful life if you play sound at high levels over •... -
Page 9: Wireless System Connection
Wireless system connection Connect the surround speaker cables to the wireless system Do not insert the wires beyond the wire Click! insulation (\ page 10). +: White −: Blue 4 SURROUND (R) SURROUND 3 SURROUND (L) SURROUND Rear panel of this unit Connecting the wireless system to the power supply Conserving power The wireless system consume... -
Page 10: Simple Setup
Simple setup Making the connections Connect the AC mains lead only after all other connections have been made. • Ensure that you have the complete accessories before making the connections. Conserving power The main unit consumes a small amount of power, even when it is standby mode (approx. 0.8 W). To save power when the unit is not to be used for a long time, unplug it from the household mains socket. - Page 11 • Make the extra audio connection (\ page 34) when you compatible. Consult the use “HDAVI Control” function. manufacturer if you have another • It is recommended that you use Panasonic’s HDMI cable. brand of television. [Recommended part number: RP-CDHG15 (1.5 m), RP-CDHG30 (3.0 m), RP-CDHG50 (5.0 m), etc.] •...
-
Page 12: Performing Quick Setup
Performing QUICK SETUP The QUICK SETUP screen assists you to make necessary settings. To display the picture from this main unit, switch on the television and change the television’s input mode which is connected to this main unit (example: VIDEO 1, AV 1, etc.). To change your television’s input mode, refer to its operating instructions. -
Page 13: Disc Information
Disc information Discs that can be played 7 Commercial discs Indicated in Disc Logo these Remarks instructions by DVD-Video High quality movie and music discs. Music discs with video. Video CD Including SVCD (Conforming to IEC62107). Music discs 7 Recorded discs ‡... -
Page 14: Overview Of Controls
Disc information (continued) 7 Disc handling precautions Note about using a DualDisc • Do not attach labels or stickers to discs. This may The digital audio content side of a DualDisc cause disc warping, rendering it unusable. does not meet the technical specifi cations of the •... -
Page 15: Remote Control
Overview of controls (continued) Remote control Television operations (38) Adjust the television volume (38) Switch the main unit on or off (16) Select the source DVD: DVD/CD (12) FM (30) EXT-IN: USB (35), AV (38), AUX (34), D-IN (38), MUSIC P. (35) Change the television’s video input mode (38) Start up and play a disc automatically,... -
Page 16: Disc - Basic Play
Disc — Basic play Using the main unit Select “DVD/CD”. Power on. Load a disc in the tray. Adjust the volume and start playback. • Load double-sided discs so the label for the side you want to play is facing up. •... - Page 17 Stop Enter numbers The position is memorised while (while stopped) “RESUME” is on the display. • Press [3, PLAY] to resume. Example: To select 12, • Press [7, STOP] again to clear the position. with Playback control (PBC) Pause Press [7, STOP] and then press •...
-
Page 18: Advanced Play
Advanced play Displaying current playback condition Program play (up to 32 items) Functions Menu Basics Details Press the numeric buttons to select the item. (\ page 21) Press [ENTER] to register Off (No on-screen display) the selection.) 7 Basics • Repeat this step to program other items. Example: Example: Current playback number... -
Page 19: Playing Data Discs Using Navigation Menus
Playing data discs using navigation menus 7 Using the submenu Playing data discs While the Navigation Menu is displayed Selecting “Play as Data Disc” in Other Menu (\ page 24) will be effective if the following functions are not available to play WMA, MP3, or To select an item. -
Page 20: Playing Highmat™ Discs / Playing Ram And Dvd-R/-Rw (Dvd-Vr) Discs
Playing data discs using navigation menus (continued) Playing HighMAT™ discs Playing RAM and DVD-R/-RW (DVD-VR) discs • Titles appear only if the titles are recorded on the disc. • You cannot edit programs, playlists and disc titles. Playing the programs To select the item. -
Page 21: Using On-Screen Menus
Using on-screen menus Select the menu. Make the settings. Go to the Select next menu Select Return to the Confi rm previous menu Confi rm Example: Example: Functions Title 1 English Functions Chapter 3/10 2 French Title 1 English Time 0:24:31 3 Spanish Chapter... -
Page 22: Other Settings
(\ see below) displayed. Settings • “On” or “Off” appears only with discs that contain subtitle on/off information (Subtitle on/off information cannot be recorded using Panasonic DVD Recorders). Other Settings Play Advanced (Except +R/+RW) Speed Disc (Except still picture part) - Page 23 Other Settings (continued) Picture Menu (continued) Transfer If you have chosen “xxx p” Picture Adjustment Mode (progressive) or “1080i” (interlace) Contrast : Increases the ( see left, “Video Output Mode), contrast between select the method of conversion for light and dark progressive output to suit the type of parts of the material.
-
Page 24: Confi Rming Hdmi Information
Using on-screen menus (continued) Other Settings (continued) 7 Audio Menu Just Fit Dolby Pro (\ page 32 , Dolby Pro Logic II) Zoom To select the appropriate screen Logic II size to fi t your television screen Auto American Vista Dialogue To make the dialogue in movies 4:3 Standard... -
Page 25: Changing The Player Settings
Changing the player settings Display the Make the settings. Setup menu. HDMI Select (Press and hold) Confi rm Item Setting • If you have not Select the tab. performed QUICK SETUP (\ page 12), Select Go to item the QUICK SETUP screen appears. - Page 26 Changing the player settings (continued) QUICK SETUP enables successive settings of the items in the shaded area. Player settings (continued) 7 “Video” tab TV Aspect • 4:3 Pan&Scan : Regular aspect television (4:3) Choose the setting to suit your The sides of the widescreen picture are cut off so it fi lls the television and preference.
- Page 27 QUICK SETUP enables successive settings of the items in the shaded area. Player settings (continued) 7 “HDMI” tab RGB Range • Standard Set “HDMI Colour Space” to • Enhanced: When the black and white images are not distinct. “RGB” (\ page 23, Picture Menu). Video Mode •...
-
Page 28: Changing The Delay Time Of The Speakers
Changing the player settings (continued) Changing the delay time of the speakers : Actual speakers Effective when playing multi-channel audio position (Center and surround speakers only) : Ideal speakers For optimum listening with 5.1-channel sound, all the position speakers, except for the subwoofer, should be the Circle of : Primary same distance from the seating position. -
Page 29: Tips For Making Data Discs
Tips for making data discs • When there are more than eight groups, the eighth group onwards will be displayed on one vertical line in the menu screen. • There may be differences in the display order on the menu screen and computer screen. •... -
Page 30: Using The Radio
Using the radio Manual tuning Automatic presetting To select “FM”. To select “FM”. (main unit) (remote control) (main unit) (remote control) To select “MANUAL”. Press and hold. Release the button when (main unit) “FM AUTO” (main unit) (remote control) To select the frequency. is displayed. -
Page 31: Using Sound Effects
Using sound effects Note Enhancing the surround sound effect: • The following sound effects may not be available Surround Enhancer or have no effect depending on the type of source, disc as well as recording format or, when Automatically adjusts each speaker to enhance headphones are used. -
Page 32: Enhancing The Stereo Sound: Dolby Pro Logic Ii
Using sound effects (continued) Enhancing the stereo sound: Dolby Pro Logic II To adjust speaker level during play [Effective when playing multi-channel audio or Dolby Pro Logic II is an advanced decoder that when Dolby Pro Logic II is on.] derives 5-channel surround (Left and Right Front, Center, Left and Right Surround) from 1. -
Page 33: Operating Other Equipment
Operating other equipment Optional antenna connection Use the outdoor antenna if radio reception is poor. FM outdoor antenna • Disconnect the FM indoor antenna. (Using a television antenna) • The outdoor antenna should be installed by a competent technician. FM outdoor antenna (not included) Note Rear panel of... -
Page 34: Connecting With Your Hdmi-Compatible Television And Set Top Box
Operating other equipment (continued) Connecting with your HDMI-compatible television and set top box • Do not use the SCART cable when the HDMI cable is being used for connection. • When the HDMI cable is connected, there will be no video output from the SCART and COMPONENT VIDEO OUT terminals of the main unit. -
Page 35: Optional Music Port Connection And Operation / Optional Usb Connection And Operation
Optional Music Port connection and operation The Music Port allows you to connect and enjoy To select “MUSIC P.”. music from an external device (example: MP3 player) through your home theater system. Preparation To avoid distorted sound, make sure that any equalizer function of your external device is turned off. -
Page 36: Using The Viera Link "Hdavi Control Tm
Panasonic television (VIERA) under “HDAVI Control”. You can use this function by connecting the equipment with the HDMI cable. See the operating... - Page 37 Using the VIERA Link “HDAVI Control ” (continued) Speaker control VIERA Link Control only with TV’s remote control (for “HDAVI Control 2”) You can select whether audio is output from the You can control the disc menus of the home theater home theater system or the television speakers by system with the TV’s remote control when using the using the television menu settings.
-
Page 38: Operating The Television
Operating other equipment (continued) Operating the television You can use the remote control to operate a To play audio from your television through your Panasonic television. home theater system Aim the remote control at the television. Preparation To switch the television on or off Connect your equipment referring to “Connect to the... -
Page 39: Changing The Main Unit And Remote Control
Changing the main unit and remote control The remote control and main unit are factory-set to To return to “REMOTE 1” mode “REMOTE 1” mode. Perform steps 1 and 2 but use [1] instead of [2] for If your remote control affects other equipment during both steps. -
Page 40: Troubleshooting Guide
Troubleshooting guide Before requesting service, make the following checks. If you are in doubt about some of the check points, or if the solutions indicated in the chart do not solve the problem, consult your dealer for instructions. 7 Power Page No power. - Page 41 7 Specifi c operation undesirable or unexpected Page It takes time before play • Play may take time to begin when an MP3 track has still picture — starts. data. Even after the track starts, the correct play time will not be displayed.
- Page 42 Troubleshooting (continued) 7 Menus Page The Setup menu cannot be • Select “DVD/CD” as the source. — accessed. • Cancel program and random play. 7 Picture abnormal or unviewable The picture on the television • The unit and television are using different video systems. Use a —...
- Page 43 7 Progressive video Page There is ghosting when • This problem is caused by the editing method or material used on progressive or HDMI output DVD-Video, but should be corrected if you use interlaced output. is on. Set “Video Output Mode” in Picture Menu to “480i” or “576i”. (Alternatively, press and hold [CANCEL] to switch to “480i”...
-
Page 44: Maintenance
Troubleshooting (continued) 7 Television displays Page “ ” • The operation is prohibited by the unit or disc. — “Cannot play group xx, • You are trying to display an incompatible group or content. — content xx” “Cannot display group xx, content xx”... -
Page 45: Glossary
Glossary Decoder I/P/B A decoder restores the coded audio signals on DVDs MPEG 2, the video compression standard adopted to normal. This is called decoding. for use with DVD-Video, codes frames using these 3 picture types. I: Intra coded picture Dolby Digital This picture has the best quality and is the best to This is a method of coding digital signals developed... -
Page 46: Specifi Cations
Specifi cations RGB video output AMPLIFIER SECTION R output level 0.7 Vp-p (75 ) RMS Output Power: Dolby Digital Mode G output level 0.7 Vp-p (75 ) B output level 0.7 Vp-p (75 ) Front Ch Terminal Scart jack (1 system) 85 W per channel (4 ), 1 kHz, 10 % THD HDMI AV output Surround Ch... - Page 47 SPEAKER SECTION WIRELESS TRANSMITTER AND RECEIVER Power supply AC 230 to 240 V, 50 Hz Front speakers SB-HF350 Power consumption Type 1 way, 1 speaker system (Bass refl ex) Tx (SH-FX65T) 1.5 W Speaker unit(s) Impedance 4 Rx (SE-FX65) 43 W Full range 6.5 cm Cone type Dimensions (W x H x D)
- Page 48 • Most major credit and debit cards accepted. • All enquiries transactions and distribution facilities are provided directly by Panasonic UK Windows Media, and the Windows logo are Ltd. trademarks, or registered trademarks of Microsoft •...