Table of Contents
Advertisement
Quick Links
Advertisement
Table of Contents

Related Manuals for Lenovo S440


Summary of Contents for Lenovo S440
-
Page 1: User Guide
User Guide ThinkPad S440... - Page 2 Notes: Before using this information and the product it supports, be sure to read and understand the following: • Safety, Warranty, and Setup Guide • Regulatory Notice • “Important safety information” on page vi • Appendix D “Notices” on page 135 The Safety, Warranty, and Setup Guide and the Regulatory Notice have been uploaded to the Web site.
-
Page 3: Table Of Contents
Special keys ....Chapter 5. Recovery overview ..55 Using the ThinkPad pointing device ..Recovery overview for the Windows 7 operating Power management . - Page 4 Windows 7) ....Wireless related information ..ThinkPad Setup ....Location of the UltraConnect wireless antennas .
- Page 5 Appendix C. ENERGY STAR model Eurasian compliance mark ..information ... . . Appendix B. WEEE and recycling statements ... . . Appendix D.
- Page 6 User Guide...
-
Page 7: Read This First
Read this first Be sure to follow the important tips given here to get the most use and enjoyment out of your computer. Failure to do so might lead to discomfort or injury, or cause your computer to fail. Protect yourself from the heat that your computer generates. When your computer is turned on or the battery is charging, the base, the palm rest, and some other parts may become hot. -
Page 8: Important Safety Information
Protect your computer and data when moving it. Before moving a computer equipped with a hard disk drive, do one of the following, and ensure that the power button is off or is blinking: • Turn it off. • Put it in sleep mode. •... -
Page 9: Conditions That Require Immediate Action
Conditions that require immediate action Products can become damaged due to misuse or neglect. Some product damage is serious enough that the product should not be used again until it has been inspected and, if necessary, repaired by an authorized servicer. As with any electronic device, pay close attention to the product when it is turned on. -
Page 10: Power Cords And Power Adapters
that the power is turned off and that the product is unplugged from any power source. If you have any questions or concerns, contact the Customer Support Center. Although there are no moving parts in your computer after the power cord has been disconnected, the following warnings are required for your safety. -
Page 11: Extension Cords And Related Devices
To prevent possible overheating, do not cover the power adapter with clothing or other objects when the power adapter is plugged into an electrical outlet. Extension cords and related devices Ensure that extension cords, surge protectors, uninterruptible power supplies, and power strips that you use are rated to handle the electrical requirements of the product. -
Page 12: External Devices
Hazardous voltage, current, and energy levels are present inside any component that has this label attached. There are no serviceable parts inside these components. If you suspect a problem with one of these parts, contact a service technician. External devices CAUTION: Do not connect or disconnect any external device cables other than USB cable while the computer power is on;... -
Page 13: Lithium Coin Cell Battery Notice
Lithium coin cell battery notice DANGER Danger of explosion if battery is incorrectly replaced. When replacing the lithium coin cell battery, use only the same or an equivalent type that is recommended by the manufacturer. The battery contains lithium and can explode if not properly used, handled, or disposed of. -
Page 14: Electrical Current Safety Information
For your safety, always follow these basic precautions with your computer: • Keep the cover closed whenever the computer is plugged in. • Regularly inspect the outside of the computer for dust accumulation. • Remove dust from vents and any perforations in the bezel. More frequent cleanings might be required for computers in dusty or high-traffic areas. -
Page 15: Using Headphones Or Earphones
Liquid crystal display (LCD) notice CAUTION: The liquid crystal display (LCD) is made of glass, and rough handling or dropping the computer can cause the LCD to break. If the LCD breaks and the internal fluid gets into your eyes or on your hands, immediately wash the affected areas with water for at least 15 minutes;... - Page 16 Save these instructions. User Guide...
-
Page 17: Chapter 1. Product Overview
This section introduces the computer hardware features to give you the basic information you need to start using the computer. Front view Figure 1. Front view Camera NFC logo (on some models) Microphones ThinkPad trackpad Power button M.2 solid-state drive Fingerprint reader Fan louvers © Copyright Lenovo 2013... - Page 18 “Using the ThinkPad pointing device” on page 26. NFC logo (on some models) If your computer comes with the Near Field Communication (NFC) card, the NFC logo is on the ThinkPad trackpad. For more information about the NFC feature, see “Using NFC” on page 33.
-
Page 19: Right-Side View
M.2 solid-state drive An M.2 solid-state drive is available in some models. Fan louvers The fan louvers and the internal fan enable air to circulate in the computer to ensure proper cooling, especially the cooling of the microprocessor. Notes: • The fan louvers are located behind the hinge. •... - Page 20 • Secure Digital (SD) card • Secure Digital eXtended-Capacity (SDXC) card • Secure Digital High-Capacity (SDHC) card Combo audio jack Connect headphones or a headset that has a 3.5-mm (0.14-inch) 4-pole plug to the combo audio jack to listen to the sound from the computer. Notes: •...
-
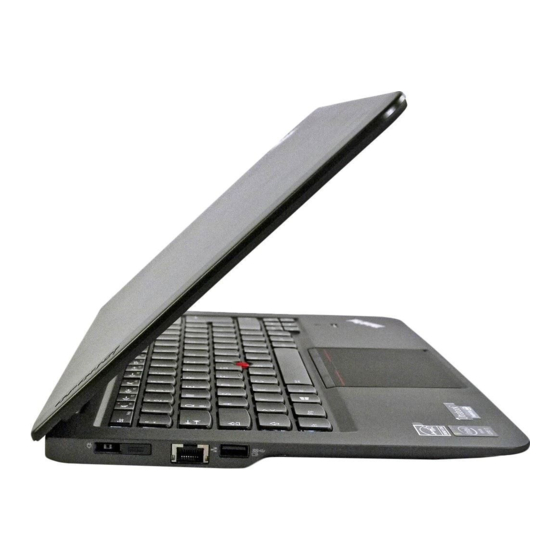
Page 21: Left-Side View
When the ac power adapter is connected to the ac power connector, it provides ac power to the computer and charges the battery. When a supported ThinkPad OneLink Dock is connected to the Lenovo OneLink connector, it can not only extend the computer capabilities but also provide ac power to the computer and charge the battery. -
Page 22: Bottom View
The Ethernet connector has two indicators that show the status of the network connection. When the upper-left indicator is solid green, it indicates that the computer connects to a LAN and a session with the network is available. When the upper-right indicator blinks yellow, it indicates that data is being transmitted. Always On USB connector (USB 3.0) By default, the Always On USB connector enables you to charge some mobile digital devices and smartphones when your computer is in sleep or hibernation mode, or is turned off with ac power adapter... -
Page 23: Status Indicators
Note: The hidden service partition is the reason why there is less free space than expected on your hard disk drive or solid-state drive. This reduction is more noticeable on the solid-state drive because of its smaller capacity. Mini PCI ExpressCard slot for wireless LAN card Your computer might have a wireless LAN card in the Mini PCI ExpressCard slot for you to establish wireless LAN connections. -
Page 24: Locating Important Product Information
When the Camera status indicator is on, the camera is in use. System status indicators The illuminated dots in the ThinkPad logo on the outer lid of your computer and on the palm rest show the system status of your computer: •... -
Page 25: Fcc Id And Ic Certification Number Label
The following figure shows the location of the machine type and model of your computer: FCC ID and IC Certification number label There is no FCC ID or IC Certification number for the wireless communication card shown on the enclosure of the computer. The FCC ID and IC Certification number label is affixed on the card installed in the wireless communication card slot of the computer. -
Page 26: Certificate Of Authenticity Label
To remove the wireless LAN card for repair or replacement, see “Replacing a Mini PCI ExpressCard for wireless LAN connection” on page 70. Note: Use only Lenovo-authorized wireless communication card for the computer. If you install an unauthorized wireless communication card that is not approved for use in your computer, an error message will be displayed and the computer will beep when you turn on the computer. -
Page 27: Features
• Integrated camera • Multi-touch technology (on some models) Keyboard • 6-row keyboard • Fn key • ThinkPad pointing device (TrackPoint pointing device and ThinkPad trackpad) Interface • 4-in-1 media card reader • Combo audio jack • HDMI port • RJ45 Ethernet connector •... -
Page 28: Specifications
Wireless features • Integrated wireless LAN • Integrated Bluetooth • NFC (on some models) Security features Fingerprint reader Specifications This section lists the physical specifications for your computer. Size • Width: 333 mm (13.11 inches) • Depth: 225 mm (8.86 inches) •... -
Page 29: Lenovo Programs
– At altitudes above 2438 m (8000 ft) – Maximum temperature when operating under the unpressurized condition: 31.3°C (88°F) Note: When you charge the battery pack, its temperature must be at least 10°C (50°F). • Relative humidity: – Operating: 8% to 80% –... - Page 30 Table 1. Programs in the Lenovo ThinkVantage Tools program (continued) Program Icon name Lenovo Solution Center System Health and Diagnostics Password Manager Password Vault Power Manager Power Controls Recovery Media Factory Recovery Disks ® Rescue and Recovery Enhanced Backup and Restore SimpleTap SimpleTap Update and Drivers...
-
Page 31: Accessing Lenovo Programs On The Windows 8 Operating System
Table 2. Programs in Control Panel (continued) Program Control Panel section Green text in Control Panel SimpleTap Programs Lenovo - SimpleTap Lenovo - Update and Drivers System Update System and Security Rescue and Recovery System and Security Lenovo - Enhanced Backup and Restore Accessing Lenovo programs on the Windows 8 operating system If your computer is preinstalled with the Windows 8 operating system, you can access Lenovo programs by... - Page 32 • Active Protection System The Active Protection System program protects your hard disk drive when the shock sensor inside your computer detects a condition that could damage the drive, such as system tilt, excessive vibration, or shock. The hard disk drive is less vulnerable to damage when it is not operating. This is because when the hard disk drive is not operating, the system stops it from spinning, and might also move the read and write heads of the drive to areas that do not contain data.
- Page 33 • Message Center Plus The Message Center Plus program automatically displays messages to inform you about important notices from Lenovo, such as alerts on system updates and alerts on conditions that require your attention. • Password Manager The Password Manager program automatically captures and fills in authentication information for Windows programs and Web sites.
- Page 34 User Guide...
-
Page 35: Chapter 2. Using Your Computer
“Registering your computer” on page 19 • “Frequently asked questions” on page 19 • “Special keys” on page 24 • “Using the ThinkPad pointing device” on page 26 • “Power management” on page 27 • “Connecting to the network” on page 31 •... - Page 36 Can I get my user guide in another language? • To download the user guide in another language, go to: http://www.lenovo.com/support. Then follow the instructions on the screen. How to use the battery power more effectively? • To conserve power, or to suspend operation without exiting applications or saving files, see “Power-saving modes”...
-
Page 37: Using The Multi-Touch Screen
• “Installing a new operating system” on page 77 • “Computer stops responding” on page 101 • “Power problems” on page 114 Using the multi-touch screen This topic provides instructions on how to use the multi-touch screen that is available on some models. Tap on the screen with your fingertip to launch an application, select an item, or open a menu. - Page 38 Tasks Touch gestures (touch models only) Mouse actions To display the charms that contain Move the pointer to the lower-right or Swipe in from the right edge. system commands, such as Start, upper-right corner of your screen. Settings, Search, Share, and Devices To display the open applications and Swipe in from the left edge.
- Page 39 Tasks Touch gestures (touch models only) Mouse actions Move the desired icon downward Right-click the desired icon. To enlarge or reduce the size of an icon, remove an icon from the Start until a tick icon ( ) is displayed, then screen, or remove an application release your finger.
-
Page 40: Special Keys
Tasks Touch gestures (touch models only) Mouse actions To zoom in Move two fingers farther apart. Press the Ctrl key while scrolling the mouse wheel forward. To rotate an item Put two or more fingers on an If the application supports rotation, item, and then rotate your fingers click the rotation icon. - Page 41 • : Decreases the speaker volume. • : Increases the speaker volume. • : Mutes or unmutes the microphones. When the microphones are muted, the microphone mute indicator turns on. If you mute the microphones and turn off your computer, the microphones will remain muted when you turn on your computer again.
-
Page 42: Using The Thinkpad Pointing Device
Using the ThinkPad trackpad The ThinkPad trackpad of your computer supports multi-touch with which you can zoom in, zoom out, scroll, or rotate on the screen while browsing the Internet or reading or editing a document. -
Page 43: Power Management
Spend more time unplugged with ThinkPad batteries. Mobility has revolutionized business by enabling you to take your work wherever you go. With ThinkPad batteries, you will be able to work longer without being tied to an electrical outlet. -
Page 44: Using The Ac Power Adapter
Using the ac power adapter The power to run your computer can come either from the lithium-ion (Li-ion) battery pack of your computer, or from ac power through the ac power adapter. While you use ac power, the battery charges automatically. The ac power adapter that comes with your computer has two basic components: •... -
Page 45: Managing The Battery Power
• Recharge the battery completely before using it. You can see whether the battery is fully charged from the battery status icon in the Windows notification area. • Always use power management features such as power-saving modes. Managing the battery power To achieve the best balance between performance and power saving, adjust your power plan settings. - Page 46 3. Under 30 Day Standby, move the slider to the right. • Lenovo Instant On mode Lenovo Instant On is available on the Windows 8 operating system. With the Lenovo Instant On feature enabled, the computer enters low power state when you close the computer lid. When you open the computer lid, the computer resumes normal operation quickly.
-
Page 47: Connecting To The Network
• Wireless off When you are not using the wireless features, such as Bluetooth or wireless LAN, turn them off. This will help conserve power. To turn off the wireless features, press F8. Enabling the battery alarm on the Windows 7 operating system For the Windows 7 operating system, you can program your computer so that when the battery power falls below a certain level, three events occur: the alarm goes off, a message is displayed, and the LCD is turned off. -
Page 48: Using Bluetooth
Your computer comes with a built-in wireless network card and a configuration utility to help you make wireless connections and monitor the status of your connection, so that you can stay connected to your network while you are in the office, in a meeting room, or at home, with no need for a wired connection. Tips for using the wireless LAN feature To achieve the best connection, use the following guidelines: •... - Page 49 2. Click Hardware and Sound. 3. Click Devices and Printers. To send data to a Bluetooth-enabled device, do the following: 1. Right-click the data that you want to send. 2. Select Send To ➙ Bluetooth Devices. Note: If you use the wireless feature (the 802.11 standard) of your computer simultaneously with a Bluetooth option, the data transmission speed can be delayed and the performance of the wireless feature can be degraded.
-
Page 50: Presentations And Multimedia
– Power to the wireless radio is on. The signal strength of the wireless connection is marginal. – Power to the wireless radio is on. The signal strength of the wireless connection is excellent. Access Connections status icon The Access Connections status icon displays general connection status. •... -
Page 51: Changing Display Settings
Changing display settings You can change the display settings, such as the display resolution, font size, and so on. To change the display settings, do the following: 1. Open Control Panel and click Appearance and Personalization. 2. Click Display for further configuration. Using an external monitor Note: When you connect an external monitor, a video interface cable with a ferrite core is required. -
Page 52: Using The Extend Desktop Function
8. Click Properties. If you are prompted for an administrator password or confirmation, type the password or provide confirmation. 9. Click the Driver tab. 10. Click Update Driver. 11. Click Browse my computer for driver software, and then click Let me pick from a list of device drivers on my computer. -
Page 53: Setting Up A Presentation
(commercially available). Using the Switchable Graphics feature Some ThinkPad notebook computers support the Switchable Graphics feature. To achieve the best balance between the computer performance and a long battery life, depending on the... -
Page 54: Using The Camera
• Built-in microphone • Built-in speakers • Combo audio jack, 3.5 mm (0.14 inch) in diameter Your computer also has an audio chip that enables you to enjoy various multimedia audio features, such as the following: • Compliant with Intel High Definition Audio •... -
Page 55: Using A Media Card
• For Windows 7: Press F9 to open Control Panel. Click Lenovo - Web Conferencing and configure the camera settings as desired. • For Windows 8, do one of the following: – Configure the camera settings directly from the program that is using the camera. For more information, see the help information system of the program. - Page 56 4. Remove the card from your computer and store it safely for future use. Note: If you do not remove the card from your computer after you eject the card from the Windows operating system, the card can no longer be accessed. To access the card, you must remove it once, then insert it again.
-
Page 57: Chapter 3. You And Your Computer
Chapter 3. You and your computer This chapter provides information about accessibility, comfort, and travelling with your computer. Accessibility and comfort Good ergonomic practice is important to get the most from your personal computer and to avoid discomfort. Arrange your workplace and the equipment you use to suit your individual needs and the kind of work that you perform. -
Page 58: Comfort
Many ThinkPad product solutions are available to help you modify and expand your computer to best suit your needs. You can find some of these options at http://www.lenovo.com/accessories/services/index.html. -
Page 59: Traveling With Your Computer
• When taking off, remember to turn off your computer or put it into hibernate mode. Travel accessories The following is a checklist of items to consider packing when you are going to travel: • ThinkPad ac power adapter • ThinkPad AC/DC Combo Adapter Chapter 3... - Page 60 • External mouse, if you are accustomed to using one • Ethernet cable • Extra battery, charged • A quality carrying case that provides adequate cushion and protection • External storage device If you are traveling to another country, you might also want to consider the following items: •...
-
Page 61: Chapter 4. Security
1. Turn off your computer. Wait for about five seconds, and then turn on the computer again. 2. When the logo screen is displayed, press F1 to start the ThinkPad Setup program. 3. Select Security ➙ Password ➙ Power-on Password by using the directional keys. -
Page 62: Hard Disk Passwords
1. Turn off your computer. Wait for about five seconds, and then turn on the computer again. 2. When the logo screen is displayed, press F1 to start the ThinkPad Setup program. 3. Select Security ➙ Password ➙ Hard disk 1 Password by using the directional keys. - Page 63 1. Follow steps 1 through 6 in “Setting a hard disk password” on page 46, typing your password to start the ThinkPad Setup program. 2. Type the current user hard disk password in the Enter Current Password field and press Enter.
-
Page 64: Supervisor Password
It provides the following security features: • If only a supervisor password is set, a password prompt is displayed when you try to start the ThinkPad Setup program. Unauthorized users cannot access the ThinkPad Setup program without the password. -
Page 65: Hard Disk Security
Note: You might want to record your password and store it in a safe place. The next time you open the ThinkPad Setup program, you will be prompted to type your supervisor password to proceed. If you forget your supervisor password, Lenovo cannot reset your password. You must take your computer to a Lenovo reseller or a Lenovo marketing representative to have the system board replaced. -
Page 66: Setting The Security Chip
• Strengthen access controls • Secure communications Setting the security chip The choices offered on the Security Chip submenu under the Security menu of ThinkPad Setup are as follows: • Security Chip: Activate, inactivate, or disable the security chip. • Security Reporting Options: Enable or disable each security reporting option. -
Page 67: Using The Fingerprint Reader
Then follow the instructions on the screen. Tips on using the security chip • Ensure that the supervisor password has been set in ThinkPad Setup. Otherwise anyone can change the settings for the security chip. • If you are using Client Security Solution, handle the security chip by doing the following: –... - Page 68 1. Place the ball of your finger (the central part of the fingerprint) on the small circle above the reader. Ensure that the entire top joint of the finger is on the reader. 2. Apply light pressure and swipe your finger across the reader in one smooth motion. Maintaining the fingerprint reader The following actions could damage the fingerprint reader or cause it not to work properly: •...
-
Page 69: Notice On Deleting Data From Your Hard Disk Drive Or Solid-State Drive
The data encrypted with the old key is not physically erased but remains on the drive; however, it cannot be decrypted without the old key. This feature is enabled by ThinkPad Setup Menu Extension Utility and is available as a menu item in ThinkPad Setup. -
Page 70: Using Firewalls
Using firewalls If your system is preinstalled with a firewall program, it protects against computer Internet security threats, unauthorized access, intrusions, and Internet attacks. It also protects your privacy. For more information about how to use the firewall program, refer to the help information system that comes with the program. -
Page 71: Chapter 5. Recovery Overview
Chapter 5. Recovery overview This chapter provides information about the recovery solutions provided by Lenovo on the Windows 7 operating system and the Push Button Reset program on the Windows 8 operating system. Recovery overview for the Windows 7 operating system This section provides information about the recovery solutions provided by Lenovo on the Windows 7 operating system. -
Page 72: Performing Backup And Recovery Operations
To create recovery media on the Windows 7 operating system, click Start ➙ All Programs ➙ Lenovo ThinkVantage Tools ➙ Factory Recovery Disks. Then, follow the instructions on the screen. Using recovery media This section provides instructions on how to use recovery media on different operating systems. •... -
Page 73: Using The Rescue And Recovery Workspace
• In a protected area of your hard disk drive • On the secondary hard disk drive if a secondary hard disk drive is installed in your computer • On an attached external USB hard disk drive • On a network drive •... -
Page 74: Creating And Using A Rescue Medium
If you have backed up your hard disk drive using the Rescue and Recovery program, you can restore the hard disk drive from a Rescue and Recovery backup, even if you cannot start the Windows operating system. • Restore your hard disk drive to the factory default settings The Rescue and Recovery workspace enables you to restore the complete contents of your hard disk drive to the factory default settings. -
Page 75: Reinstalling Preinstalled Applications And Device Drivers
• To create a rescue medium on the Windows 7 operating system, do the following: 1. From the Windows desktop, click Start ➙ All Programs ➙ Lenovo ThinkVantage Tools ➙ Enhanced Backup and Restore. The Rescue and Recovery program opens. 2. -
Page 76: Solving Recovery Problems
You must first make sure that your rescue device is set as the first boot device in the startup device sequence in the ThinkPad Setup program. For detailed information on how to temporarily or permanently change the startup device sequence, see “Startup menu” on page 89. -
Page 77: Refreshing Your Computer
You can create recovery media as backups or replacement for the Windows recovery image. With the recovery media, you can troubleshoot and fix the problems on your computer even if you cannot start the Windows 8 operating system. It is recommended that you create recovery media as early as possible. For more information, see “Creating and using recovery media”... -
Page 78: Recovering Your Operating System If Windows 8 Fails To Start
Recovering your operating system if Windows 8 fails to start The Windows recovery environment on your computer is capable of operating independently from the Windows 8 operating system. This enables you to recover or repair the operating system even if the Windows 8 operating system fails to start. - Page 79 Using recovery media If you cannot start your computer, or if you cannot start the Windows recovery image on your computer, use recovery media to recover your computer. To use recovery media, do the following: Note: Ensure that your computer is connected to ac power. 1.
- Page 80 User Guide...
-
Page 81: Chapter 6. Replacing Devices
Chapter 6. Replacing devices This chapter provides instructions on how to replace devices for your computer. This chapter contains the following items: • “Static electricity prevention” on page 65 • “Disabling the built-in battery” on page 65 • “Replacing the hard disk drive or solid-state drive” on page 67 •... -
Page 82: Replacing The Base Cover Assembly
1. Turn off your computer and disconnect the ac power adapter and all cables from the computer. 2. Turn on your computer. Press F1 to enter ThinkPad Setup when the ThinkPad logo appears. 3. Select Config ➙ Power. The Power submenu is displayed. -
Page 83: Replacing The Hard Disk Drive Or Solid-State Drive
4. Install the new base cover assembly and install the screws 5. Turn the computer over again. Connect the ac power adapter and all cables. Replacing the hard disk drive or solid-state drive Before you start, print these instructions. Attention: The hard disk drive is very sensitive. Incorrect handling can cause damage and permanent loss of data. - Page 84 4. Remove the screws that secure the hard disk drive or solid-state drive. Note: Depending on the model, your hard disk drive or solid-state drive might look different from the illustrations in this topic. 5. Lift the tab to remove the hard disk drive or solid-state drive out of the computer. 6.
-
Page 85: Replacing A Memory Module
7. Install the screws to secure the hard disk drive or solid-state drive. 8. Reinstall the base cover assembly. See “Replacing the base cover assembly” on page 66. 9. Turn the computer over again. Connect the ac power adapter and all cables. Replacing a memory module Before you start, print these instructions. -
Page 86: Replacing A Mini Pci Expresscard For Wireless Lan Connection
4. If the memory module already is in the memory slot, open the latches on both sides of the slot at the same time , and then remove the memory module . Save the removed memory module for future use. 5. - Page 87 DANGER During electrical storms, do not connect the cable to or disconnect it from the telephone outlet on the wall. DANGER Electric current from power, telephone, and communication cables is hazardous. To avoid shock hazard, disconnect the cables before opening the cover of this slot. Attention: Before you start installing a Mini PCI ExpressCard, touch a metal table or a grounded metal object.
-
Page 88: Replacing The Backup Battery
6. Align the contact edge of the new PCI Express Mini Card with the corresponding socket. Then insert the new PCI Express Mini Card into the PCI Express Mini Card slot . Secure the card with the screw 7. Connect the antenna cables to the new card as shown in the drawing. 8. - Page 89 • Do not drop, crush, puncture, or subject to strong forces. Battery abuse or mishandling can cause the battery to overheat, which can cause gasses or flame to “vent” from the battery pack or coin cell. To replace the backup battery, do the following: 1.
- Page 90 User Guide...
-
Page 91: Chapter 7. Enhancing Your Computer
ThinkPad OneLink Dock Depending on the model, your computer might support the ThinkPad OneLink Dock (hereafter referred to as the dock). Attach your computer to the dock to expand the working capability. This topic provides basic information about the dock. For detailed information about using the dock, refer to the documentation that comes with the dock. - Page 92 Combo audio jack: Used to connect headphones or a headset that has a 3.5-mm (0.14-inch), 4-pole plug. Power indicator (illuminated ThinkPad logo): The illuminated ThinkPad logo functions as a power indicator for the dock.
-
Page 93: Chapter 8. Advanced Configuration
If you install a new operating system on your computer, you need to install the supplement files and ThinkPad device drivers for it at the same time. • If you install a new Windows 7 operating system, the necessary files are located in the following directories on your solid state-drive or hard disk drive: –... -
Page 94: Installing The Windows 7 Operating System
– After the operating system installation, you should not change the initial UEFI/Legacy Boot setting in ThinkPad Setup. The UEFI/Legacy Boot setting must be the same as it was when the Windows operating system image was installed. Otherwise, the operating system will not boot properly. -
Page 95: Installing The Windows 8 Operating System
Before you start, print these instructions. To install the Windows 8 operating system and its related software on your computer, do the following: 1. Start ThinkPad Setup. 2. Select Startup ➙ Boot. 3. Change the boot priority order to boot your computer from the drive that contains the Windows 8 operating system installer. -
Page 96: Installing The Thinkpad Monitor File For Windows 2000/Xp/Vista/7/8 (For Windows 7)
The ThinkPad monitor file for Windows 2000/XP/Vista/7/8 is in the following directory: C:\SWTOOLS\DRIVERS\MONITOR Note: If you cannot find this directory on your hard disk drive or solid-state drive, download the ThinkPad monitor file for Windows 2000/XP/Vista/7/8 from the ThinkPad Web site at: http://www.lenovo.com/Drivers... -
Page 97: Main Menu
1. Turn on the computer. When the logo screen is displayed, press the F1 key. the ThinkPad Setup program main menu opens. If you have set a supervisor password, the ThinkPad Setup program main menu will be displayed after you enter the password. You can start ThinkPad Setup by pressing Enter instead of entering the supervisor password. - Page 98 • Default values are in boldface. The default settings are already optimized for you. If you consider changing the computer configuration, proceed with extreme caution. Setting the configuration incorrectly might cause unexpected results. • On each submenu, press Enter to show selectable options and select a desired option, or type desired values from the keyboard directly.
- Page 99 Table 4. Config menu items (continued) Menu item Submenu item Selection Comments USB UEFI BIOS Support • Disabled Enable or disable boot support from USB storage devices. • Enabled Always On USB • Disabled If you select Enable and the system is connected with the •...
- Page 100 Table 4. Config menu items (continued) Menu item Submenu item Selection Comments Display Boot Display Device • ThinkPad LCD Select the display device to be activated at boot time. This • HDMI selection is effective for boot time, password prompt, and ThinkPad Setup.
-
Page 101: Date/Time Menu
• Enabled processor core. Date/Time menu If you need to set the current date and time of your computer, select Date/Time from the ThinkPad Setup program main menu. The following submenu is displayed: • System Date • System Time To change the date and time, do the following: 1. - Page 102 By default, this is set to Disabled. If you set the supervisor password and enable this function, no one but you can change the items in the ThinkPad Setup program. Password at unattended • Disabled If you select and enable Password...
- Page 103 Table 5. Security menu items (continued) Menu item Submenu item Selection Comments Security Chip Security Chip • Active If you select Active, the security chip is functional. If you select • Inactive Inactive, the Security Chip option • Disabled is visible, but the security chip is not functional.
- Page 104 Table 5. Security menu items (continued) Menu item Submenu item Selection Comments Virtualization Intel (R) Virtualization • Disabled If you select Enabled, a Virtual Technology Machine Monitor (VMM) can utilize • Enabled the additional hardware capabilities provided by Virtualization Technology. Intel VT-d Feature •...
-
Page 105: Startup Menu
Windows 8 operating system. Startup menu To change the computer startup settings, select Startup from the ThinkPad Setup main menu. Attention: • After you change the startup sequence, you must be extremely careful not to specify a wrong device during a copy, save, or format operation. - Page 106 To change the startup sequence temporarily so that the system starts up from a different drive, do the following: 1. Turn off the computer. 2. Turn on the computer, then, while the ThinkPad logo is displayed at the lower-left of the screen, press F12. 3. Select the device you want to start first.
-
Page 107: Restart Menu
Restart menu If you need to close the ThinkPad Setup program and restart the system, select Restart from the ThinkPad Setup program main menu. The following submenu options are displayed: • Exit Saving Changes: Restart the system after saving the changes. -
Page 108: Using System Management
Setting management features To enable the network administrator to control your computer remotely, you must configure the network interface by setting the system-management features in the ThinkPad Setup program. You can configure the following functions in the program: User Guide... - Page 109 Network Boot setting, and then follow the boot order list on the Boot menu. To define a sequence, do the following: 1. On the ThinkPad Setup program menu, select Startup. The submenu is displayed. 2. Select Network Boot and press the Enter key. The boot device list is displayed.
- Page 110 User Guide...
-
Page 111: Chapter 9. Preventing Problems
Chapter 9. Preventing problems An important part of owning a ThinkPad notebook computer is maintenance. With proper care, you can avoid common problems. The chapter provides information that can help you keep your computer running smoothly. • “General tips for preventing problems” on page 95 •... -
Page 112: Making Sure Device Drivers Are Current
– Restart the computer and start the recovery operation. – If your computer uses discs as the recovery media, do not remove the disc from the drive until prompted to do so. • For suspected hard disk drive issues, refer to “Diagnosing problems” on page 101 and run a diagnostic test for the drive before you call the Customer Support Center. -
Page 113: Taking Care Of Your Computer
For more information about how to use the System Update program, refer to the help information system of the program. Taking care of your computer Although your computer is designed to function reliably in normal work environments, you need to use common sense in handling it. -
Page 114: Cleaning The Cover Of Your Computer
“Registering your computer” on page 19. Be sure not to modify your computer • Only an authorized ThinkPad repair technician should disassemble and repair your computer. • Do not modify or tape the latches to keep the display open or closed. - Page 115 7. Wipe the cover with the clean sponge. 8. Wipe the surface again with a dry, soft, lint-free cloth. 9. Wait for the surface to dry completely and remove any fibers from the cloth. Cleaning your computer keyboard To clean the computer keyboard, do the following: 1.
- Page 116 User Guide...
-
Page 117: Chapter 10. Troubleshooting Computer Problems
Computer stops responding Print these instructions now and keep the instructions with your computer for reference later. If your computer is completely unresponsive (you cannot use the ThinkPad pointing device or the keyboard), do the following: 1. Press and hold the power button to turn off the computer. -
Page 118: Spills On The Keyboard
• Message: 0251: System CMOS checksum bad. Solution: The system CMOS might have been corrupted by an application program. The computer uses the default settings. Run ThinkPad Setup to reconfigure the settings. If you still see the same error code, have the computer serviced. - Page 119 • Message: 0271: Date and time error. Solution: Neither the date nor the time is set in the computer. Enter ThinkPad Setup to set the date and time. • Message: 0177: Bad SVP data, stop POST task. Solution: Checksum of the supervisor password in the EEPROM is not correct. The system board should be replaced.
-
Page 120: Errors Without Messages
Solution: The hard disk drive is not working. Have the hard disk drive serviced. • Message: 2101: Detection error on HDD1 (Ultrabay HDD) Solution: The Ultrabay hard disk drive is not working. Have the Ultrabay hard disk drive serviced. • Message: 2102: Detection error on HDD2 (Mini SATA) Solution: The Mini SATA device is not working. -
Page 121: Beep Errors
Solution: Your screen saver or power management might have been enabled. Do either of the following: – Touch the TrackPoint pointing device or the ThinkPad trackpad, or press a key to exit the screen saver. – Press the power button to resume from sleep or hibernation. -
Page 122: Networking Problems
It might be necessary to remove all added memory modules to test the computer with only the factory-installed memory modules, and then reinstall the memory module one at a time to ensure a proper connection. 2. Check for error messages during startup. Follow the appropriate corrective actions for power-on self-test (POST) error messages. -
Page 123: A Wireless Lan Problem
Solution: – Ensure that Wake On LAN is enabled in ThinkPad Setup. – If it has been enabled, check with your LAN administrator for the necessary settings. • Problem: If your computer is a Gigabit Ethernet model, it cannot connect to the network at 1000 Mbps. -
Page 124: Problems With The Keyboard And Other Pointing Devices
– When the TrackPoint pointing device is kept pressed for a long time – When the temperature changes • Problem: The TrackPoint pointing device or ThinkPad trackpad does not work. Solution: Make sure that the TrackPoint pointing device or ThinkPad trackpad is enabled in the ThinkPad Device Setting window. Keyboard problems •... - Page 125 – If your computer is in sleep mode, press any key to resume from the sleep mode. – If the problem persists, follow the solution for the following problem. • Problem: The screen is unreadable or distorted. Solution: Ensure that: –...
- Page 126 Solution: To bring up the image, press F7 and select the desired monitor. If the problem persists, do the following: 1. Connect the external monitor to another computer to ensure that it works. 2. Reconnect the external monitor to your computer. 3.
- Page 127 13. Select your monitor manufacturer and model. 14. After updating the driver, click Close. 15. Set Resolution. Note: To change the color settings, select the Monitor tab, then set Colors. 16. Click OK. • Problem: The screen is unreadable or distorted. Solution: Ensure that: –...
-
Page 128: Audio Problems
• Problem: If you use the Extend desktop function, you cannot set a higher resolution or higher refresh rate on the secondary display. Solution: Change the resolution and the color depth to lower settings for the primary display. Refer to the solution to the above problem. •... -
Page 129: Fingerprint Reader Problems
Solution: It is normal for the sliders to change position when certain sound applications are used. The applications are aware of the settings in the Volume Mixer window and are allowed to change the settings themselves. An example is the Windows Media Player. Usually the application has sliders available to control the sound from within the application. -
Page 130: Battery Problems
Battery problems • Problem: The battery pack cannot be fully charged in the standard charge time when the computer is powered off. Solution: The battery pack might be over-discharged. Do the following: 1. Turn off the computer. 2. Ensure that the over-discharged battery pack is in the computer. 3. -
Page 131: Boot Problems
2. Inspect the ac power adapter. Check for any physical damage, and ensure that the power cable is firmly attached to the adapter brick and the computer. 3. Verify the ac power source is working by attaching another device to the outlet. 4. -
Page 132: Problems With Drives And Other Storage Devices
Connect the ac power adapter to the computer; then press Fn. – If the system status indicator (illuminated ThinkPad logo) is off, your computer is in power-off state or in hibernation mode. Connect the ac power adapter to the computer; then press the power button to resume operation. -
Page 133: A Software Problem
Solution: On the Boot menu of ThinkPad Setup, ensure that the hard disk drive is on the Boot priority order list. If it is on the Excluded from boot order list, it is disabled. Select the entry for it on the list and press the Shift+1 key. - Page 134 User Guide...
-
Page 135: Chapter 11. Getting Support
Chapter 11. Getting support This chapter provides information about getting help and support from Lenovo. • “Before you contact Lenovo” on page 119 • “Getting help and service” on page 119 • “Purchasing additional services” on page 121 Before you contact Lenovo Often, you can solve your computer problems by referring to the information in the explanations of error codes, running diagnostic programs, or by consulting the Lenovo Web site. -
Page 136: Using Diagnostic Programs
ThinkPad notebook computers come with a set of diagnostic programs that you can use to help you identify hardware problems. See “Diagnosing problems” on page 101 for instructions on using the diagnostic programs. -
Page 137: Purchasing Additional Services
The following items are not covered: • Replacement or use of parts not manufactured for or by Lenovo or non-warranted parts Note: All warranted parts contain a 10-character identification in the format FRU XXXXXXXXXX. • Identification of software problem sources •... - Page 138 User Guide...
-
Page 139: Appendix A. Regulatory Information
Appendix A. Regulatory information Wireless related information Wireless interoperability The Wireless LAN PCI Express Mini Card is designed to be interoperable with any wireless LAN product that is based on DSSS, CCK, and/or OFDM radio technology, and is compliant to: •... -
Page 140: Location Of The Ultraconnect Wireless Antennas
Location of the UltraConnect wireless antennas ThinkPad notebook computers feature an integrated UltraConnect™ wireless antenna system built into the display for optimal reception, enabling wireless communication wherever you are. Wireless LAN antenna (auxiliary) -
Page 141: Locating Wireless Regulatory Notices
EAR E1 country list. Electronic emission notices The following information refers to the ThinkPad S440, machine type 20AY and 20BB. Federal Communications Commission Declaration of Conformity This equipment has been tested and found to comply with the limits for a Class B digital device, pursuant to Part 15 of the FCC Rules. -
Page 142: European Union - Compliance To The Electromagnetic Compatibility Directive
European Union - Compliance to the Electromagnetic Compatibility Directive This product is in conformity with the protection requirements of EU Council Directive 2004/108/EC on the approximation of the laws of the Member States relating to electromagnetic compatibility. Lenovo cannot accept responsibility for any failure to satisfy the protection requirements resulting from a non-recommended modification of the product, including the installation of option cards from other manufacturers. -
Page 143: Korea Class B Compliance Statement
Korea Class B compliance statement Japan VCCI Class B compliance statement Japan compliance statement for products which connect to the power mains with rated current less than or equal to 20 A per phase Lenovo product service information for Taiwan Eurasian compliance mark Appendix A. - Page 144 User Guide...
-
Page 145: Appendix B. Weee And Recycling Statements
Appendix B. WEEE and recycling statements Lenovo encourages owners of information technology equipment to responsibly recycle their equipment when it is no longer needed. Lenovo offers a variety of programs and services to assist equipment owners in recycling their IT products. Information on product recycling offerings can be found on Lenovo's Internet site at http://www.lenovo.com/social_responsibility/us/en/. -
Page 146: Recycling Information For Brazil
Disposing of Lenovo computer components Some Lenovo computer products sold in Japan may have components that contain heavy metals or other environmental sensitive substances. To properly dispose of disused components, such as a printed circuit board or drive, use the methods described above for collecting and recycling a disused computer or monitor. Disposing of disused lithium batteries from Lenovo computers A button-shaped lithium battery is installed on the system board of your Lenovo computer to provide power to the computer clock while the computer is off or disconnected from the main power source. -
Page 147: Battery Recycling Information For Taiwan
Batteries or packaging for batteries are labeled in accordance with European Directive 2006/66/EC concerning batteries and accumulators and waste batteries and accumulators. The Directive determines the framework for the return and recycling of used batteries and accumulators as applicable throughout the European Union. - Page 148 User Guide...
-
Page 149: Appendix C. Energy Star Model Information
Appendix C. ENERGY STAR model information ® ENERGY STAR is a joint program of the U.S. Environmental Protection Agency and the U.S. Department of Energy aimed at saving money and protecting the environment through energy efficient products and practices. Lenovo is proud to offer our customers products with the ENERGY STAR qualified designation. Lenovo computers of the following machine type, if the ENERGY STAR mark is affixed, have been designed and tested to conform to the ENERGY STAR program requirements for computers. - Page 150 5. Click the Power Management tab. 6. Clear the Allow this device to wake the computer check box. 7. Click OK. User Guide...
-
Page 151: Appendix D. Notices
Appendix D. Notices Lenovo may not offer the products, services, or features discussed in this document in all countries. Consult your local Lenovo representative for information on the products and services currently available in your area. Any reference to a Lenovo product, program, or service is not intended to state or imply that only that Lenovo product, program, or service may be used. -
Page 152: Trademarks
The following terms are trademarks of Lenovo in the United States, other countries, or both: Lenovo Access Connections Active Protection System Rescue and Recovery ThinkPad ThinkVantage TrackPoint UltraConnect AMD is a registered trademark of Advanced Micro Devices, Inc. Intel and Intel SpeedStep are trademarks or registered trademarks of Intel Corporation or its subsidiaries in the United States and other countries. -
Page 153: Appendix E. Restriction Of Hazardous Substances Directive (Rohs)
Appendix E. Restriction of Hazardous Substances Directive (RoHS) European Union RoHS Lenovo products sold in the European Union, on or after 3 January 2013 meet the requirements of Directive 2011/65/EU on the restriction of the use of certain hazardous substances in electrical and electronic equipment (“RoHS recast”... -
Page 154: Ukraine Rohs
Ukraine RoHS India RoHS RoHS compliant as per E-Waste (Management & Handling) Rules, 2011. User Guide...