D-Link DIR-600 User Manual
Wireless n 150 home router
Hide thumbs
Also See for DIR-600:
- User manual (102 pages) ,
- Quick installation manual (65 pages) ,
- Specifications (2 pages)
Table of Contents
Advertisement
Advertisement
Table of Contents

Related Manuals for D-Link DIR-600


Summary of Contents for D-Link DIR-600
-
Page 2: Preface
Preface D-Link reserves the right to revise this publication and to make changes in the content hereof without obligation to notify any person or organization of such revisions or changes. Manual Revisions Revision Date Description December 10, 2010 DIR-600 Revision B5... -
Page 3: Table Of Contents
Firewall Settings ..............48 Setup ....................14 Firewall Rules ..............49 Internet ...................14 Routing ...................51 Internet Connection Setup Wizard .......15 Advanced Wireless Settings ..........52 Manual Internet Connection Setup ......22 802.11n/b/g (2.4GHz) ...........52 Static IP ................23 Wi-Fi Protected Setup (WPS) ..........53 D-Link DIR-600 User Manual... - Page 4 Using Windows® 7 ..............96 IPv6 Routing .................72 Conigure WPS ..............99 Tools ....................73 ® Using Windows Vista ............103 Admin ..................73 Conigure Wireless Security ......... 104 Time ..................74 ® Using Windows XP ..............106 Email Settings ..............75 System ..................76 D-Link DIR-600 User Manual...
- Page 5 Troubleshooting ............109 Wireless Basics ...............113 What is Wireless? ..............114 Tips ....................116 Wireless Modes ................. 117 Networking Basics ............118 Check your IP address ............118 Statically Assign an IP address ..........119 Technical Speciications ..........120 D-Link DIR-600 User Manual...
-
Page 6: Product Overview
Ethernet Cable CD-ROM WIRELESS N QUADBAND HOME ROUTER DIR-815 ver1.00(E) Note: Using a power supply with a diferent voltage rating than the one included with the DIR-600 will cause damage and void the warranty for this product. D-Link DIR-600 User Manual... -
Page 7: System Requirements
Visit ww.java.com to download the latest version. ¡ Computer with the following: ® CD Installation Wizard • Windows 7/ Vista® / XP with Service Pack 3 Requirements • An installed Ethernet adapter • CD-ROM drive D-Link DIR-600 User Manual... -
Page 8: Features
• Compatible with 802.11b and 802.11g Devices - The DIR-600 is still fully compatible with the IEEE 802.11b and IEEE 802.11g standard, so it can connect with existing 802.11b and IEEE 802.11g PCI, USB and Cardbus adapters. -
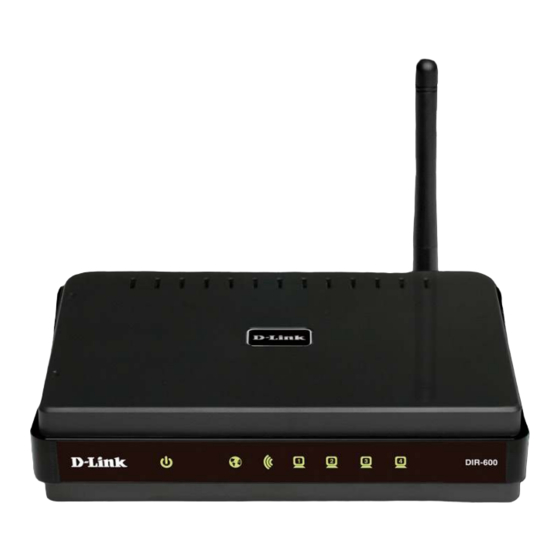
Page 9: Hardware Overview
Receptor for the Power Adapter. The Auto MDI/MDIX WAN LAN Ports port is the connection for Connect Ethernet devices such as the Ethernet cable to the computers, switches, and hubs. Cable or DSL modem. D-Link DIR-600 User Manual... -
Page 10: Leds
Power LED Local Network LEDs A solid light indicates a proper A solid light indicates a connection to an connection to the power supply. Ethernet-enabled computer on ports 1-4. This LED blinks during data transmission. D-Link DIR-600 User Manual... -
Page 11: Installation
WinPoet, Broadjump, or Enternet 300 from your computer or you will not be able to connect to the Internet. • When running the Setup Wizard from the D-Link CD, make sure the computer you are running the CD from is connected to the Internet and online or the wizard will not work. -
Page 12: Wireless Installation Considerations
1. Keep the number of walls and ceilings between the D-Link router and other network devices to a minimum - each wall or ceiling can reduce your adapter’s range from 3-90 feet (1-30 meters.) Position your devices so that the number of walls or ceilings is minimized. -
Page 13: Wall Mounting Your Device
Section 2 - Installation Wall Mounting Your Device You can mount the DIR-600 to a wall or a partition for easy and convenient placement of your device. To wall mount your device, A. Screw the provided screws with the equipment to the wall or partition where the device to be placed. -
Page 14: Connect To Cable/Dsl/Satellite Modem
7. Use the power switch to power on the router. Wait about 30 seconds for the router to boot. 8. Turn on your computer. 9. Refer to “Getting Started” on page 12 to conigure your router. D-Link DIR-600 User Manual... -
Page 15: Connect To Another Router
Section 2 - Installation Connect to Another Router If you are connecting the D-Link router to another router to use as a wireless access point and/or switch, you will have to do the following before connecting the router to your network: •... - Page 16 7. Connect an Ethernet cable in one of the LAN ports of the router and connect it to your other router. Do not plug anything into the Internet (WAN) port of the D-Link router. 8. You may now use the other 3 LAN ports to connect other Ethernet devices and computers. To conigure your wireless network, open a web browser and enter the IP address you assigned to the router.
-
Page 17: Getting Started
Section 2 - Installation Getting Started The DIR-600 includes a Setup Wizard CD. Follow the simple steps below to run the Setup Wizard to guide you quickly through the installation process. Insert the Setup Wizard CD in the CD-ROM drive. The step-by-step instructions that follow are shown in Windows ®... -
Page 18: Coniguration
Section 3 - Coniguration Coniguration This section will show you how to conigure your new D-Link wireless router using the web-based coniguration utility. Web-based Coniguration Utility To access the coniguration utility, open a web-browser such as Internet Explorer and enter the IP address of the router (192.168.0.1). -
Page 19: Setup
Connection you want to enter your Internet settings without running Option: the Internet Connection Setup Wizard. Refer to “Manual Internet Connection Setup” on page 22 for more information on how to conigure your Internet settings manually. D-Link DIR-600 User Manual... -
Page 20: Internet Connection Setup Wizard
Section 3 - Coniguration Internet Connection Setup Wizard Click the Internet Connection Setup Wizard button to start the Internet Connection Setup Wizard. D-Link DIR-600 User Manual... - Page 21 The following window appears, summarizing the steps required to complete the Internet Connection Setup Wizard: Click Next to continue. Create a new password and then click Next to continue. Select your time zone from the drop-down menu and then click Next to continue. D-Link DIR-600 User Manual...
- Page 22 Clone Your PC’s MAC Address and then click Next to continue. The Host Name is optional but may be required by some ISPs. The default host name is the device name of the router and may be changed. D-Link DIR-600 User Manual...
- Page 23 The software is no longer needed and will not work through a router. If you selected PPTP, enter your PPTP username and password. Select Static if your ISP assigned you the IP address, subnet mask, gateway, and PPTP server addresses. Click Next to continue. D-Link DIR-600 User Manual...
- Page 24 Select Static if your ISP assigned you the IP address, subnet mask, gateway, and L2TP server addresses. Click Next to continue. If you selected Static, enter your network settings supplied by your Internet provider. Click Next to continue. D-Link DIR-600 User Manual...
- Page 25 IP Address, Subnet Mask, Gateway, and DNS Server Addresses in their respective ields. Click Next to continue. Note: Make sure to remove your PPPoE software from your computer. The software is no longer needed and will not work through a router. D-Link DIR-600 User Manual...
- Page 26 When the Router has inished saving all the changes, the Setup> Internet window will open. Close your browser window and reopen it to test your Internet connection. It may take a few tries to initially connect to the Internet. D-Link DIR-600 User Manual...
-
Page 27: Manual Internet Connection Setup
NAT on the router and turn it into an Access Point. Internet Use the My Internet Connection is drop-down menu to Connection select the mode that the router should use to connect to Type: the Internet. D-Link DIR-600 User Manual... -
Page 28: Static Ip
ISP. You can use the Clone Your PC’s MAC Address button to replace the Internet port’s MAC address with the MAC address of your Ethernet card. Click the Save Settings button to save any changes made. D-Link DIR-600 User Manual... -
Page 29: Dynamic Ip (Dhcp)
ISP. You can use the Clone Your PC’s MAC Address button to replace the Internet port’s MAC address with the MAC address of your Ethernet card. Click the Save Settings button to save any changes made. D-Link DIR-600 User Manual... -
Page 30: Pppoe (Username/Password)
Maximum Idle Enter a maximum idle time during which the Internet Time: connection is maintained during inactivity. To disable this feature, enable Auto-reconnect. DNS Servers: Enter the Primary and Secondary DNS Server Addresses (Static PPPoE only). D-Link DIR-600 User Manual... - Page 31 MAC address unless required by your ISP. You can use the Clone Your PC’s MAC Address button to replace the Internet port’s MAC address with the MAC address of your Ethernet card. Click the Save Settings button to save any changes made. D-Link DIR-600 User Manual...
-
Page 32: Pptp
Tools> Schedules window. To create a new schedule, click the New Schedule button to open the Tools> Schedules window. Refer to “Schedules” on page 82 for more information. D-Link DIR-600 User Manual... - Page 33 MAC address unless required by your ISP. You can use the Clone Your PC’s MAC Address button to replace the Internet port’s MAC address with the MAC address of your Ethernet card. Click the Save Settings button to save any changes made. D-Link DIR-600 User Manual...
-
Page 34: L2Tp
Tools> Schedules window. To create a new schedule, click the New Schedule button to open the Tools> Schedules window. Refer to “Schedules” on page 80 for more information. D-Link DIR-600 User Manual... - Page 35 MAC address unless required by your ISP. You can use the Clone Your PC’s MAC Address button to replace the Internet port’s MAC address with the MAC address of your Ethernet card. Click the Save Settings button to save any changes made. D-Link DIR-600 User Manual...
-
Page 36: Russia Pptp (Dual Access)
Tools> Schedules window. To create a new schedule, click the New Schedule button to open the Tools> Schedules window. Refer to “Schedules” on page 80 for more information. D-Link DIR-600 User Manual... - Page 37 MAC address unless required by your ISP. You can use the Clone Your PC’s MAC Address button to replace the Internet port’s MAC address with the MAC address of your Ethernet card. Click the Save Settings button to save any changes made. D-Link DIR-600 User Manual...
-
Page 38: Russia Pppoe (Dual Access)
Maximum Idle Enter a maximum idle time during which the Internet connection Time: is maintained during inactivity. To disable this feature, enable Auto- reconnect. DNS Addresses: Enter the Primary and Secondary DNS Server Addresses (Static PPPoE only). D-Link DIR-600 User Manual... - Page 39 If your ISP requires you to manually specify the WAN Physical IP settings, click the Static IP radio button and enter the required IP Settings: Address, Subnet Mask, Gateway, and DNS Server Addresses in their respective ields. Click the Save Settings button to save any changes made. D-Link DIR-600 User Manual...
-
Page 40: Wireless Settings
Wi-Fi Protected Setup (WPS) and refer to “Add Wireless Device with WPS Wizard” on page 92. If you want to manually conigure the wireless settings on your router click Manual Wireless Connection Setup and refer to the next page. D-Link DIR-600 User Manual... -
Page 41: Manual Wireless Settings
This feature is not available in 802.11n conigurations. Enable Hidden Check this box if you do not want the SSID of your wireless network to be broadcast by the DIR-600. If the SSID is hidden, the SSID Wireless of the DIR-600 will not be seen by Site Survey utilities so your wireless clients will have to know the SSID of your DIR-600 in order to connect to it. -
Page 42: Network Settings
This section will allow you to change the local network settings of the router and to conigure the DHCP settings. Router Use this section to conigure the Router’s local network Settings: settings. DHCP Server Use this section to conigure the DIR-600’s built-in DHCP Settings: server settings. DHCP Displays information about the devices that have a DHCP Reservations reservation from the DIR-600. -
Page 43: Router Settings
Enter the Subnet Mask. The default subnet mask is Mask: 255.255.255.0. Host Name: Enter a Host Name to identify the DIR-600. Local Domain: Enter the Domain name (Optional). Enable DNS Relay: Uncheck the box to transfer the DNS server information from your ISP to your computers. -
Page 44: Dhcp Server Settings
DHCP Server Settings DHCP stands for Dynamic Host Control Protocol. The DIR-600 has a built-in DHCP server. The DHCP Server will automatically assign an IP address to the computers on the LAN/private network. Be sure to set your computers to be DHCP clients by setting their TCP/IP settings to “Obtain an IP Address Automatically. -
Page 45: Dhcp Reservation
MAC Address: Enter the MAC address of the computer or device. When you have inished coniguring the new DHCP Reservation, click the Save Settings button at the top or bottom of the window to activate your reservations. D-Link DIR-600 User Manual... -
Page 46: Advanced
Advanced Virtual Server The DIR-600 can be conigured as a virtual server so that remote users accessing Web or FTP services via the public IP address can be automatically redirected to local servers in the LAN (Local Area Network). The DIR-600 irewall feature ilters out unrecognized packets to protect your LAN network so all computers networked with the DIR-600 are invisible to the outside world. - Page 47 Menu: set to Always, which will allow the particular service to always be enabled. You can create your own times in the Tools > Schedules section. Click the Save Settings button to save any changes made. D-Link DIR-600 User Manual...
-
Page 48: Port Forwarding
Always, which will allow the particular service to always be enabled. You can create your own times in the Tools > Schedules section. Click the Save Settings button to save any changes made. D-Link DIR-600 User Manual... -
Page 49: Application Rules
These applications have diiculties working through NAT (Network Address Translation). Special Applications makes some of these applications work with the DIR-600. If you need to run applications that require multiple connections, specify the port normally associated with an application in the “Trigger Port” ield, select the protocol type as TCP or UDP, then enter the irewall (public) ports associated with the trigger port to open them for inbound traic. -
Page 50: Qos Engine
Detected xDSL or When Connection Type is set to auto-detect, the automatically detected connection type is displayed here. Other Frame Relay Network: Click the Save Settings button to save any changes made. D-Link DIR-600 User Manual... -
Page 51: Network Filter
The schedule may be set to Always, which will allow the particular service to always be enabled. Click the New Schedule button to create your own times in the Tools > Schedules section. Click the Save Settings button to save any changes made. D-Link DIR-600 User Manual... -
Page 52: Website Filter
The schedule may be set to Always, which will allow the particular service to always be enabled. Click the New Schedule button to create your own times in the Tools > Schedules section. Click the Save Settings button to save any changes made. D-Link DIR-600 User Manual... -
Page 53: Firewall Settings
Firewall Settings A irewall protects your network from the outside world. The DIR-600 ofers a irewall type functionality. The SPI feature helps prevent cyber attacks. Sometimes you may want a computer exposed to the outside world for certain types of applications. -
Page 54: Firewall Rules
IP addresses of the irewall rule. Enter the irst destination IP address in the range in the adjacent top IP Address ield. Enter the last destination IP address in the range in the IP Address ield below. D-Link DIR-600 User Manual... - Page 55 Click the New Schedule button to create your own times in the Tools > Schedules section. When you have inished coniguring the irewall rules, click the Save Settings button at the top or bottom of the window to save any changes made. D-Link DIR-600 User Manual...
-
Page 56: Routing
Enter the subnet mask to specify the subnet of the IP packets that will take this route. Gateway: Enter the next hop that will be taken if this route is used. Click the Save Settings button to save any changes made. D-Link DIR-600 User Manual... -
Page 57: Advanced Wireless Settings
Check this box to reduce the guard interval time therefore increasing the data capacity. However, it’s less reliable and may create Guard Interval: higher data loss. Click the Save Settings button to save any changes made. D-Link DIR-600 User Manual... -
Page 58: Wi-Fi Protected Setup (Wps)
Click this button to restore the default PIN of the router. Default: Generate New Click this button to create a random number that is a PIN: valid PIN. This becomes the router’s PIN. You can then copy this PIN to the user interface of the registrar. D-Link DIR-600 User Manual... - Page 59 PIN, or pressed a special Wi-Fi Protected Setup button on the device. The router acts as a registrar for the network, although other devices may act as a registrar as well. Click the Save Settings button to save any changes made. D-Link DIR-600 User Manual...
-
Page 60: Advanced Network
Enabled. UPNP provides compatibility with networking equipment, software and peripherals. Enable WAN Ping Unchecking the box will not allow the DIR-600 to Response: respond to pings. Blocking the Ping may provide some extra security from hackers. Check the box to allow the Internet port to be “pinged”. -
Page 61: Ipv6
Section 3 - Coniguration IPv6 Use the IPv6 window to conigure the mode that the Router will use to access an IPv6 Internet connection. My Internet Use the drop-down menu to select the IPv6 Connection is: Internet Connection mode. D-Link DIR-600 User Manual... -
Page 62: Static Ipv6
Enter the LAN (local) IPv6 address for the router. LAN IPv6 Displays the Router’s LAN Link-Local Address. Link-Local Address: LAN Address Use this section to conigure the IPv6 autoconiguration Autoconiguration settings. Settings: Click the Save Settings button to save any changes made. D-Link DIR-600 User Manual... -
Page 63: Link-Local Only
Select Link-local Only from the My IPv6 Connection is drop-down menu if your Router will use the IPv6 link local method to connect to the Internet. LAN IPv6 Address Displays the LAN IPv6 Link-Local address of the router. Settings: Click the Save Settings button to save any changes made. D-Link DIR-600 User Manual... -
Page 64: Static Ipv6 (Stateless)
Check to enable the Autoconiguration feature. Autoconiguration: Autoconiguration Select the Stateless option from the drop-down menu. Type: Router Enter the Router Advertisement Lifetime (in minutes). Advertisement Lifetime: Click the Save Settings button to save any changes made. D-Link DIR-600 User Manual... -
Page 65: Static Ipv6 (Stateful)
IPv6 Address Range Enter the end IPv6 Address for the DHCPv6 range for your End: local computers. IPv6 Address Enter the IPv6 Address Lifetime (in minutes). Lifetime: Click the Save Settings button to save any changes made. D-Link DIR-600 User Manual... -
Page 66: Autoconiguration(Stateless/Dhcpv6)
Select DHCP-PD to acquire the IPv6 preix for the Router. LAN IPv6 Address: Enter the LAN (local) IPv6 address for the router. Displays the Router’s LAN Link-Local Address. LAN IPv6 Link-Local Address: LAN Address Use this section to conigure the IPv6 autoconiguration settings. Autoconiguration Settings: D-Link DIR-600 User Manual... -
Page 67: Autoconiguration(Stateless/Dhcpv6)- (Stateless)
Check to enable the Autoconiguration feature. Autoconiguration: Autoconiguration Select the Stateless option from the drop-down menu. Type: Router Enter the Router Advertisement Lifetime (in minutes). Advertisement Lifetime: Click the Save Settings button to save any changes made. D-Link DIR-600 User Manual... -
Page 68: Autoconiguration(Stateless/Dhcpv6)- (Stateful)
IPv6 Address Range Enter the end IPv6 Address for the DHCPv6 range for your (End): local computers. Router Enter the Router Advertisement Lifetime (in minutes). Advertisement Lifetime: Click the Save Settings button to save any changes made. D-Link DIR-600 User Manual... -
Page 69: Pppoe
Enable DHCP-PD: LAN IPv6 Address: Enter the LAN (local) IPv6 address for the router. Displays the Router’s LAN Link-Local Address. LAN IPv6 Link-Local Address: LAN Address Use this section to conigure the IPv6 autoconiguration Autoconiguration settings. Settings: D-Link DIR-600 User Manual... -
Page 70: Ipv6 In Ipv4 Tunnel
Use thefollowing DNS Address. LAN IPv6 Address: Enter the LAN (local) IPv6 address for the router. LAN IPv6 Link-Local Displays the Router’s LAN Link-Local Address. Address: LAN Address Use this section to conigure the IPv6 autoconiguration Autoconiguration settings. Settings: D-Link DIR-600 User Manual... -
Page 71: Ipv6 In Ipv4 Tunnel(Stateless)
Check to enable the Autoconiguration feature. Autoconiguration: Select the Stateless option from the drop-down menu. Autoconiguration Type: Router Enter the Router Advertisement Lifetime (in minutes). Advertisement Lifetime: Click the Save Settings button to save any changes made. D-Link DIR-600 User Manual... -
Page 72: Ipv6 In Ipv4 Tunnel (Stateful)
Enter the end IPv6 Address for the DHCPv6 range for your IPv6 Address Range (End) : local computers. Router Enter the Router Advertisement Lifetime (in minutes). Advertisement Lifetime : Click the Save Settings button to save any changes made. D-Link DIR-600 User Manual... -
Page 73: 6To4
LAN IPv6 Address: Enter the LAN (local) IPv6 address for the router. LAN IPv6 Link- Displays the Router’s LAN Link-Local Address. Local Address: LAN Address Use this section to con gure the IPv6 autocon guration Autoconiguration settings. Settings: D-Link DIR-600 User Manual... -
Page 74: 6To4(Stateless) Autoconiguration
Check to enable the Autoconiguration feature. Autoconiguration: Autoconiguration Select the Stateless option from the drop-down menu. Type: Router Enter the Router Advertisement Lifetime (in minutes). Advertisement Lifetime: Click the Save Settings button to save any changes made. D-Link DIR-600 User Manual... -
Page 75: 6To4(Stateful) (Dhcpv6) Autoconiguration
IPv6 Address Range Enter the end IPv6 Address for the DHCPv6 range for your End: local computers. IPv6 Address Enter the IPv6 Address Lifetime (in minutes). Lifetime: Click the Save Settings button to save any changes made. D-Link DIR-600 User Manual... -
Page 76: 6Rd
(ISP). LAN IPv6 Address: Enter the LAN (local) IPv6 address for the router. LAN IPv6 Link-Local Displays the Router’s LAN Link-Local Address. Address: LAN Address Use this section to conigure the IPv6 autoconiguration Autoconiguration settings. Settings: D-Link DIR-600 User Manual... -
Page 77: Ipv6 Routing
WAN or LAN interface to transit out of the Router. Destination IPv6 Enter the LAN (local) IPv6 address for the router and Preix / Preix Length: Length. Gateway: Enter the next hop that will be taken if this route is used. D-Link DIR-600 User Manual... -
Page 78: Tools
Enable Remote Remote management allows the DIR-600 to be conigured Management: from the Internet by a web browser. A username and password is still required to access the Web-Management interface. -
Page 79: Time
NTP carry out the following: 1. Check the Automatically synchronize with D-Link’s Internet Time Server box. 2. Choose the D-Link NTP server that you would like to synchronize with from the NTP Server Used drop-down menu. 3. Click the Update Now button to update the time on the Router clock so that it is synchronized with the D-Link Internet Time Server. -
Page 80: Email Settings
Send Mail Now: Click this button to send a test email from the Router to verify that the email settings have been conigured correctly. Click the Save Settings button to save any changes made. D-Link DIR-600 User Manual... -
Page 81: System
Click to reboot the router. Clear Language If you previously installed a language pack and want to Pack: revert all the menus on the Router interface back to the default language settings, click the Clear button. D-Link DIR-600 User Manual... -
Page 82: Firmware
If you want to install a new language pack, make sure that you have the language pack available. Please check the D-Link support site for irmware updates at http:// support.dlink.com. -
Page 83: Dynamic Dns
Enter the Password for your DDNS account. DDNS Account Click this button to verify that the DDNS account Testing: user name and password have been entered correctly. Click the Save Settings button to save any changes made. D-Link DIR-600 User Manual... -
Page 84: System Check
Internet. Enter the IPv6 Address that you wish to Ping, and click Ping. Click Stop to stop sending IPv6 Ping packets Ping Results: The results of your Ping/IPv6 Ping attempts will be displayed here. D-Link DIR-600 User Manual... -
Page 85: Schedules
Click Add to save your schedule. You must click the Add button for your schedules to go into efect. Schedule Rules The list of schedules will be listed here. Click the Edit icon List: to make changes or click the Delete icon to remove the schedule. D-Link DIR-600 User Manual... -
Page 86: Status
Device Info This page displays the current information for the DIR-600. It will display the LAN, WAN (Internet), and Wireless information. If your Internet connection is set up for a Dynamic IP address then a Release button and a Renew button will be displayed. Use Release to disconnect from your ISP and use Renew to connect to your ISP. -
Page 87: Logs
Click this button to view the next page of the Router logs. Clear: Clears all of the log contents. Link to Log Click this button to open the Tools > Email Settings Settings: screen so that you can change the Email coniguration for sending logs. D-Link DIR-600 User Manual... -
Page 88: Statistics
Statistics The screen below displays the Traic Statistics. Here you can view the amount of packets that pass through the DIR-600 on both the WAN, LAN ports and the 802.11n/g (2.4GHz) wireless bands. The traic counter will reset if the device is rebooted. -
Page 89: Internet Sessions
The Internet Sessions page displays full details of active Internet sessions through your router. An Internet session is a conversation between a program or application on a LAN-side computer and a program or application on a WAN-side computer. D-Link DIR-600 User Manual... -
Page 90: Wireless
Section 3 - Coniguration Wireless The wireless client table displays a list of current connected wireless clients. This table also displays the connection time and MAC address of the connected wireless clients. D-Link DIR-600 User Manual... -
Page 91: Ipv6
Section 3 - Coniguration IPv6 The IPv6 page displays a summary of the Router’s IPv6 settings and lists the IPv6 address and host name of any IPv6 clients. D-Link DIR-600 User Manual... -
Page 92: Support
Section 3 - Coniguration Support D-Link DIR-600 User Manual... -
Page 93: Wireless Security
Section 4 - Security Wireless Security This section will show you the diferent levels of security you can use to protect your data from intruders. The DIR-600 ofers the following types of security: • WPA2 (Wi-Fi Protected Access 2) • WPA2-PSK (Pre-Shared Key) •... -
Page 94: Wireless Connection Setup Wizard
Section 4 - Security Wireless Connection Setup Wizard To run the Wireless Connection Setup Wizard, click the Wireless Connection Setup Wizard button in the Setup>Wireless Settings window. D-Link DIR-600 User Manual... -
Page 95: Wireless Security Setup Wizard
Manually: Select this option to manually enter your network key and click Next. If you selected Automatically, the summary window will display your settings. Write down the security key and enter this on your wireless clients. Click Save to save your settings. D-Link DIR-600 User Manual... - Page 96 Next to proceed to the next window. The summary window will display your settings. Write down the security key and enter this on your wireless clients. Click Save to save your settings. D-Link DIR-600 User Manual...
-
Page 97: Add Wireless Device With Wps Wizard
PIN: Select this option to use PIN method. In order to use this method you must know the wireless client’s 8 digit PIN and click Connect. PBC: Select this option to use PBC (Push Button) method to add a wireless client. Click Connect. D-Link DIR-600 User Manual... -
Page 98: Conigure Wep
8. Click Save Settings to save your settings. If you are coniguring the router with a wireless adapter, you will lose connectivity until you enable WEP on your adapter and enter the same WEP key as you did on the router. D-Link DIR-600 User Manual... -
Page 99: Conigure Wpa/Wpa2-Personal (Psk)
8. Click Save Settings to save your settings. If you are coniguring the router with a wireless adapter, you will lose connectivity until you enable WPA-PSK on your adapter and enter the same passphrase as you did on the router. D-Link DIR-600 User Manual... -
Page 100: Conigure Wpa/Wpa2-Enterprise (Radius)
8. Next to Port, enter the port you are using with your RADIUS server. 1812 is the default port. 9. Next to Shared Secret, enter the security key. 10. Click Save Settings to save your settings. D-Link DIR-600 User Manual... -
Page 101: Connect To A Wireless Network
If you are joining an existing network, you will need to know the security key or passphrase being used. 1. Click on the wireless icon in your system tray (lower-right corner). Wireless Icon 2. The utility will display any available wireless networks in your area. D-Link DIR-600 User Manual... - Page 102 If you get a good signal but cannot access the Internet, check your TCP/IP settings for your wireless adapter. Refer to the Networking Basics section in this manual for more information. 4. The following window appears while your computer tries to connect to the router. D-Link DIR-600 User Manual...
- Page 103 It may take 20-30 seconds to connect to the wireless network. If the connection fails, please verify that the security settings are correct. The key or passphrase must be exactly the same as on the wireless router. D-Link DIR-600 User Manual...
-
Page 104: Conigure Wps
7. Carry out the following steps to use Windows ® 7 to conigure the WPS feature of the router: 1. Click the Start button and select Computer from the Start menu. 2. Click the Network option. D-Link DIR-600 User Manual... - Page 105 Section 5 - Connecting to a Wireless Network 3. Double-click the DIR-600. 4. Input the WPS PIN number (displayed in the WPS window on the Router’s LCD screen or in the Setup > Wireless Setup menu in the Router’s Web UI) and click Next.
- Page 106 Section 5 - Connecting to a Wireless Network 5. Type a name to identify the network. 6. To conigure advanced settings, click the icon. Click Next to continue. D-Link DIR-600 User Manual...
- Page 107 7. The following window appears while the Router is being conigured. Wait for the coniguration to complete. 8. The following window informs you that WPS on the DIR-600 has been setup successfully. Make a note of the security key as you may need to provide this security key if adding an older wireless device to the network in the future.
-
Page 108: Using Windows Vista
Click on a network (displayed using the SSID) and click the Connect button. If you get a good signal but cannot access the Internet, check you TCP/IP settings for your wireless adapter. Refer to the Networking Basics section in this manual for more information. D-Link DIR-600 User Manual... -
Page 109: Conigure Wireless Security
Wireless Utility by right-clicking on the wireless computer icon in your system tray (lower right corner of screen). Select Connect to a network. 2. Highlight the wireless network (SSID) you would like to connect to and click Connect. D-Link DIR-600 User Manual... - Page 110 It may take 20-30 seconds to connect to the wireless network. If the connection fails, please verify that the security settings are correct. The key or passphrase must be exactly the same as on the wireless router. D-Link DIR-600 User Manual...
-
Page 111: Using Windows Xp
(displayed using the SSID) and click the Connect button. If you get a good signal but cannot access the Internet, check you TCP/ IP settings for your wireless adapter. Refer to the Networking Basics section in this manual for more information. D-Link DIR-600 User Manual... -
Page 112: Conigure Wpa-Psk
XP Wireless Utility by right-clicking on the wireless computer icon in your system tray (lower-right corner of screen). Select View Available Wireless Networks. 2. Highlight the wireless network (SSID) you would like to connect to and click Connect. D-Link DIR-600 User Manual... - Page 113 It may take 20-30 seconds to connect to the wireless network. If the connection fails, please verify that the WPA-PSK settings are correct. The WPA-PSK passphrase must be exactly the same as on the wireless router. D-Link DIR-600 User Manual...
-
Page 114: Troubleshooting
1. Why can’t I access the web-based coniguration utility? When entering the IP address of the D-Link router (192.168.0.1 for example), you are not connecting to a website nor do you have to be connected to the Internet. The device has the utility built-in to a ROM chip in the device itself. Your computer must be on the same IP subnet to connect to the web-based utility. - Page 115 • Close your web browser (if open) and open it. • Access the web management. Open your web browser and enter the IP address of your D-Link router in the address bar. This should open the login page for your web management.
- Page 116 NT, 2000, and XP users type in cmd) and press Enter (or click OK). • Once the window opens, you’ll need to do a special ping. Use the following syntax: ping [url] [-f] [-l] [MTU value] Example: ping yahoo.com -f -l 1472 D-Link DIR-600 User Manual...
- Page 117 • To change the MTU enter the number in the MTU ield and click Save Settings to save your settings. • Test your email. If changing the MTU does not resolve the problem, continue changing the MTU in increments of ten. D-Link DIR-600 User Manual...
-
Page 118: Wireless Basics
D-Link wireless products are based on industry standards to provide easy-to-use and compatible high-speed wireless connectivity within your home, business or public access wireless networks. Strictly adhering to the IEEE standard, the D-Link wireless family of products will allow you to securely access the data you want, when and where you want it. You will be able to enjoy the freedom that wireless networking delivers. -
Page 119: What Is Wireless
D-Link is the worldwide leader and award winning designer, developer, and manufacturer of networking products. D-Link delivers the performance you need at a price you can aford. D-Link has all the products you need to build your network. How does wireless work? Wireless works similar to how cordless phone work, through radio signals to transmit data from one point A to point B. - Page 120 Who uses wireless? Wireless technology as become so popular in recent years that almost everyone is using it, whether it’s for home, oice, business, D-Link has a wireless solution for it. Home • Gives everyone at home broadband access •...
-
Page 121: Tips
The wireless connection in public places is usually called “hotspots”. Using a D-Link Cardbus Adapter with your laptop, you can access the hotspot to connect to Internet from remote locations like: Airports, Hotels, Cofee Shops, Libraries, Restaurants, and Convention Centers. -
Page 122: Wireless Modes
• Ad-Hoc – Directly connecting to another computer, for peer-to-peer communication, using wireless network adapters on each computer, such as two or more DIR-600 wireless network Cardbus adapters. An Infrastructure network contains an Access Point or wireless router. All the wireless devices, or clients, will connect to the wireless router or access point. -
Page 123: Networking Basics
Check your IP address After you install your new D-Link adapter, by default, the TCP/IP settings should be set to obtain an IP address from a DHCP server (i.e. wireless router) automatically. To verify your IP address, please follow the steps below. -
Page 124: Statically Assign An Ip Address
Set Primary DNS the same as the LAN IP address of your router (192.168.0.1). The Secondary DNS is not needed or you may enter a DNS server from your ISP. Step 5 Click OK twice to save your settings. D-Link DIR-600 User Manual... -
Page 125: Technical Speciications
1 Maximum wireless signal rate derived from IEEE Standard 802.11b, 802.11g and 802.11n speciications. Actual data throughput will vary. Network conditions and environmental factors, including volume of network traic, building materials and construction, and network overhead, lower actual data throughput rate. Environmental factors will adversely afect wireless signal range. 2 Frequency Range varies depending on country’s regulation D-Link DIR-600 User Manual...