Table of Contents

Related Manuals for Philips CED1910BT


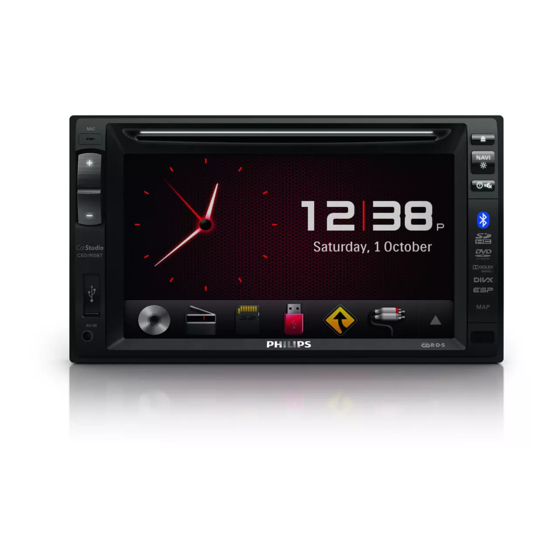
Summary of Contents for Philips CED1910BT
- Page 1 Always there to help you Register your product and get support at www.philips.com/welcome CED1910BT Question? Contact Philips User manual Mode d’emploi Benutzerhandbuch Manual del usuario Gebruiksaanwijzing Manuale utente...
-
Page 2: Table Of Contents
Contents 1 Safety 7 Use the navigation system Insert the map data card Navigate your road trip 2 Your car entertainment system Introduction 8 Use Bluetooth devices What's in the box Overview of the main unit Activate the Bluetooth function Overview of the remote control Pair a device Play audio from a connected device... - Page 3 14 Others Play external audio/video input Use rear monitors Use buttons on the steering wheel Reset the system Replace the fuse Upgrade the firmware 15 Product information 16 Troubleshooting General About the Bluetooth device 17 Notice Compliance Care of the environment Trademark notice Copyright...
-
Page 4: Safety
1 Safety • Risk of swallowing batteries! A coin type battery is bundled, which can be swallowed. Keep the battery out of reach of children at all times! Read and understand all instructions before you use the device. If damage is caused by failure to follow instructions, the warranty does not apply. -
Page 5: Your Car Entertainment System
Check and identify the contents of the package: system Congratulations on your purchase, and welcome to Philips! To fully benefit from the support that Philips offers, register your product at www.philips.com/welcome. Introduction With the car entertainment system, you can •... -
Page 6: Overview Of The Main Unit
LCD screen • Press to access the navigation system. • Access the the Smart Phone Mirror k +/- Box (not supplied by Philips) via Smart • Press to increase or decrease the Connect Link (refer to Chapter 10). volume. l MIC •... -
Page 7: Overview Of The Remote Control
i DVD AUDIO Overview of the remote • Select an audio language or audio control channel. j DBB • Enable or disable the DBB (Dynamic Bass Boost) sound effect. k EQ • Select a preset sound equalizer. l MUSIC ZONE •... -
Page 8: Install The Car Entertainment System
3 Install the car • Press to turn on the system. entertainment • Press and hold to turn off the system. • Press to mute the speakers or release system them from mute status. y NAVI • Press to access the navigation system. Always follow the instructions in this chapter in sequence. -
Page 9: Connect Wires
Connect other wires if necessary. Connect wires Note • Make sure that all loose leads are insulated with electrical tape. • Consult a professional to connect wires as instructed below. • Before connection, check the car's wiring carefully. Connect the ISO male connectors. Connectors and External sockets or sockets on rear panel... - Page 10 Connectors and External sockets or sockets on rear panel connectors OE SWC IR OE SWC remote REMOTE IN (Brown wire) OE SWC IR Ground REMOTE IN (Black wire) OE SWC AD LEARN OE SWC AD (White wire) Learn line 1 OE SWC AD LEARN OE SWC AD (White wire)
- Page 11 (Not Supplied) b c d e...
-
Page 12: Mount Into The Dashboard
Slide the unit into the dashboard until a Mount into the dashboard click sound is heard. Note • Make sure that wires are correctly connected before you mount the main unit into a car. • If preset radio stations are lost when the ignition key is turned OFF and then back ON, reconnect the red leads crosswise to the yellow ones. -
Page 13: Get Started
Risk of car accidents! Never watch video or operate Turn on this system while driving. Press » PHILIPS logo and a progress bar are displayed while boot-up. Prepare the remote control • To turn off the system, press and hold for 3 seconds. -
Page 14: Use The Home Menu
[Settings]: Access the system menu. • [Car Mirror]: Access the the Smart • Phone Mirror Box (not supplied by Philips) via Smart Connect Link (refer to Chapter 10). • To access the full menu with all feature icons displayed, tap . -
Page 15: Set The Date And Time
Tap [Clock mode] to select a time format. Customize the home menu [24hr]: 24-hour time format • [12hr]: 12-hour time format • Tap [Date] to display the interface for setting the date. Tap and hold an icon until it is movable. Drag it to the target place, and then release your finger. -
Page 16: Switch Display Designs
5 Play from hard Switch display designs media Select a preset display design. , and then [Display In any mode, tap Design]. You can use this system to listen to audio, watch » The [Display Design] interface is videos, and view photos that are stored on a displayed. -
Page 17: Connect A Usb Storage Device
Connect a USB storage device Note • Make sure that the USB storage device contains compatible files. • NTFS (New Technology File System) file system is not supported. Remove the SD/SDHC card Push the USB socket cover upwards to open it. Switch system to another source. - Page 18 PBC: For VCD/SVCD only, enable or • Audios disable the PBC (Playback Control) feature. • : Skip to the previous or next title, chapter, track, or file. • To search forward fast or rewind the track, tap on the progress bar. •...
-
Page 19: Browse Recorded Files
• : Return to the home menu. • : Zoom in or out of the picture. • : Rotate the picture clockwise or anti- clockwise by 90 degrees. • : Return to the list of files or folders (see 'Browse recorded files' on page 18). •... -
Page 20: Listen To Radio
6 Listen to radio Note • If no DivX Player is installed on your computer, download it from www.divx.com for free. • If you have no DivX Account, create one for free through DivX Player that is installed on your computer. Switch to radio mode On your computer through DivX Player After the boot-up at the first time, the system... -
Page 21: Tune To A Radio Station
Tap FM or AM to select a band. Select a radio range FM bands: FM1, FM2, FM3 • AM bands: AM1, AM2 • Tap [Radio Range]. repeatedly until the frequency of target radio station is displayed. • To tune to a radio station automatically, tap and hold until the frequency digits start change. -
Page 22: Tune To A Preset Radio Station
Tap the name of a program type to start Tune to a preset radio station search. » Once an RDS station that transmits Select a band. programs of the selected type is found, the RDS station is broadcast Tap one of the preset channels (1 to 6) to automatically. -
Page 23: Use The Navigation System
7 Use the Item Program Description type navigation NATION M National Music OLDIES Oldies Music system FOLK M Folk Music DOCUMENT Documentary TEST Alarm Test Insert the map data card ALARM Alarm Note Use alternate frequencies • The map data card is not included in the packaging. •... -
Page 24: Use Bluetooth Devices
Pair a device Note In the device list, tap the name of your • Philips does not guarantee the compatibility with all Bluetooth device, and then tap behind Bluetooth devices. the name. • Before pairing a device with this system, read its user manual for Bluetooth compatibility. - Page 25 On your device, enable or permit the Pair more devices connection with CED1910BT. • If a player is connected, the music Activate the Bluetooth function on this playback interface is displayed on this system. system. » One of the following interfaces is displayed.
-
Page 26: Play Audio From A Connected Device
Note • • If you want to manually reconnect a device after the You can connect a music player and a mobile phone connection is interrupted, disable the function of simultaneously. automatic connection (see 'Adjust Bluetooth settings' on page 41). Manage paired devices Activate the Bluetooth function. -
Page 27: Make A Call
Make a call Note • Keep the Bluetooth connection active between the system and your mobile phone. Locate the external microphone Tap number icons to enter the phone number. You can connect an external microphone for • To clear the last digit, tap better communication quality. - Page 28 to answer the call. Tap the name of a contact from the list, and then tap to send a call. • To reject or end the call, tap Manage the phone book Transfer a phone call to mobile phone Tap the name of a contact from the list. By default, the voice comes from the »...
-
Page 29: Play From An Ipod/Iphone
9 Play from an Edit the favorite call list iPod/iPhone Save the number of a contact into the favorite call list, and then you can send a call quickly. Note • During play, no audio signals are transferred through the headphone socket of your iPod/iPhone. Compatible iPod/iPhone to display the favorite call list. -
Page 30: Control Play
» The system starts playing tracks that • : Tap to switch back to the on-screen are stored on your iPod/iPhone. control mode, and then you can control play on this system. • : Tap to access the music menu. Search for a track You can select a track quickly through the music menu. -
Page 31: Smart Connect Link
(TV box, smart devices, etc) and Philips’s car charging smart devices. entertainment system. Smart Connect Link The current required for recharging phone brings the attached peripheral’s function into... -
Page 32: Adjust Sound
When you listen to radio, enjoy music, or watch video, follow the instructions below to adjust sound. Philips FullSound restores the audio details that are lost due to compression. It enriches the music signals so that what you hear is the full... -
Page 33: Others
[80 Hz]/[120 Hz]/[160 Hz]: Tap to select a low pass filter range for the sub-woofer. Select a listening zone Philips’ innovative Zone technology enables the driver or passengers to enjoy music with the : Tap to display the [Music zone] •... -
Page 34: Adjust Settings
13 Adjust settings Access system setup menus > to display all feature icons. Tap a gray point to switch the listening zone. » The highlighted area indicates the current listening zone. [Settings]. » The [General] menu is displayed. Tap an icon on the left. : Access the [General] menu to •... -
Page 35: Adjust General Settings
[Demo] [On]/[Off] Enable it to Adjust general settings (Auto start demonstrate after power features after off) the system is power off. View system information Settings Options Description [Radio Select a Region] radio region that matches your location. [Beep] [On] Turn the beep sound on. -
Page 36: Adjust Navigation Settings
Bluetooth Options Description Adjust Navigation settings settings [New Search for new Pairing] devices. [Auto [On] When a paired Connect] device is within effective range, the system reconnects with the device automatically. [Off] Reconnect manually. [Auto [On] Answer phone calls [Navigation Program Path]: Tap [Enter] to •... -
Page 37: Others
14 Others Use rear monitors If one or two monitors are connected for backseat passengers, you can select different sources for front and backseat passengers. Play external audio/video Note input • Make sure that rear monitors are correctly connected to this system. You can connect an external audio/video player •... -
Page 38: Use Buttons On The Steering Wheel
Use buttons on the steering wheel You can assign a function to a button on the steering wheel, and then control the system with that button. > to access the full menu with all feature icons displayed. Tap . Tap to select an available source to start »... -
Page 39: Reset The System
If there is no power, check the fuse and replace Web page. it if it is damaged. • If you have no account for Club Philips, Detach the main unit from dashboard. create one first on this Web page. Check the electric connection. -
Page 40: Product Information
General page 40). Power supply 12 V DC (11 V - 16 V), Go to www.philips.com/support. negative ground Login with your account for Club Philips. Fuse 15 A » Support information about your Suitable speaker 4 - 8 registered product is displayed. -
Page 41: Usb Playability Information
Radio USB playability information Frequency range 87.5 - 108.0 MHz (50 kHz Compatible USB devices: - FM per step) • USB flash memory (USB 2.0 or USB1.1) Frequency range 522 - 1620 kHz (9 kHz per • USB flash players (USB 2.0 or USB1.1) - AM(MW) step) •... -
Page 42: Troubleshooting
If the problem remains • DivX DRM protected files cannot be unsolved, go to the Philips Web page (www. played if they are saved on an SD/SDHC philips.com/support). When you contact Philips, card or USB storage device. Transfer it to a make sure that the product is nearby and the compatible disc instead. -
Page 43: About The Bluetooth Device
Any changes or modifications made to this device that are not expressly approved by • The device cannot be used with the Philips Consumer Lifestyle may void the user’s system to play music. authority to operate the equipment. The audio quality is poor after connection with a Bluetooth-enabled device. -
Page 44: Trademark Notice
Please visit www.recycle.philips.com for the use of this accessory with iPod or iPhone additional information on a recycling center in may affect wireless performance. your area. iPod and iPhone are trademarks of Apple Inc., registered in the U.S. and other countries. - Page 45 Specifications are subject to change without notice 2013 © WOOX Innovations Limited. All rights reserved. Philips and the Philips’ Shield Emblem are registered trademarks of Koninklijke Philips N.V. and are used by WOOX Innovations Limited under license from Koninklijke Philips N.V.