LG LDE3037SB Owner's Manual
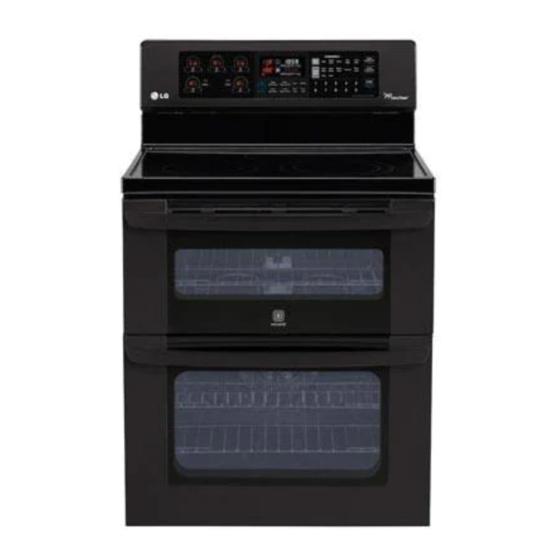
Electric double oven range
Hide thumbs
Also See for LDE3037SB:
- Owner's manual (93 pages) ,
- Specification (2 pages) ,
- Installation manual (28 pages)
Table of Contents
Advertisement
Available languages
Available languages
Quick Links
Advertisement
Chapters
Table of Contents

Related Manuals for LG LDE3037SB


Summary of Contents for LG LDE3037SB
- Page 1 OWNER’S MANUAL ELECTRIC DOUBLE OVEN RANGE Please read this guide thoroughly before operating and keep it handy for reference at all times. LDE3037ST LDE3035ST LDE3031ST LDE3037SB LDE3035SB LDE3037SW LDE3035SW www.lg.com (REV.02 2013-05-07)
-
Page 2: Table Of Contents
TABLE OF CONTENTS TABLE OF CONTENTS 23 Recommended convection roast guide iMPORTANT SAFETY iNSTRUCTiONS (on some models) 24 Recommended baking and roasting guide OVERViEW 25 Broil 25 Speed broil (on some models) Accessories 26 Recommended broiling guide Range overview Warm Control panel overview Proof 28 Kids meal (on some models) -
Page 3: Important Safety Instructions
Always contact your service agent or manufacturer about problems that you do not understand. Download this owner's manual at: http://www.lg.com. This is the safety alert symbol. This symbol alerts you to potential hazards that can result in property damage and/or serious bodily harm or death. -
Page 4: Safety Precautions
IMPORTANT SAFETY INFORMATION Anti-tip Wall plate • Be certain that your appliance is bracket Screw must properly installed and grounded by a enter wood qualified technician. approximately or concrete 0.65”(16.5mm) • Do not repair or replace any part of the appliance unless specifically recommended in the manual. -
Page 5: Electrical Safety
IMPORTANT SAFETY INFORMATION WARNING • DO NOT step or sit on the oven door. Install the anti-tip brackets packed with range. - The range could be tipped and injury might result from spilled hot liquid, food, or the range itself. - If the range is pulled away from the wall for cleaning, service, or any other reason, ensure that the anti-tip brackets are properly re-engage when the range is pushed back against the wall. -
Page 6: Pan Placement
IMPORTANT SAFETY INFORMATION • Do Not allow aluminum foil or the temperature probe to contact heating elements. • Before replacing your oven light bulb, switch off the electrical power to the oven at the main fuse or circuit breaker panel. Failure to do so can result in severe personal injury, death, or electrical shock. -
Page 7: Child Safety
IMPORTANT SAFETY INFORMATION • Should an oven fire occur, DO NOT put water or flour on the fire. Flour may be explosive and water can cause a grease fire to spread and cause personal injury. • DO NOT use the broiler pan without the grid. DO NOT cover the grid with aluminum foil. - Page 8 IMPORTANT SAFETY INFORMATION • Let hot utensils cool in a safe place, out of reach of small children. • Children should not be allowed to play with controls or other parts of the appliance. GLASS/CERAMIC COOKING SURFACES Stand to the side of the range when opening the oven door. The hot air and steam that escape can cause burns to hands, face and eyes.
-
Page 9: Safety When Cleaning
IMPORTANT SAFETY INFORMATION • When warming foods do not use containers that seal. Allow venting for heated air to escape. • Some cleaners can produce dangerous fumes if applied to a hot surface. • DO NOT use a steel-wool pad. - It will scratch the surface. -
Page 10: Overview
Quick Reference Guide NOTE • Contact LG Customer Service if any accessories are missing. • For your safety and for extended product life, only use authorized components. • The manufacturer is not responsible for product malfunction or accidents caused by the use of separately purchased, unauthorized components or parts. -
Page 11: 1 Range Overview
OVERVIEW RANGE OVERVIEW Make sure to understand the names and function of each part. * Throughout this manual, the features and appearance may vary depending on your model. For model : LDE3037 Warming Zone Element Single element Single element Double element Double element Ceramic glass Automatic oven light switch... - Page 12 OVERVIEW RANGE OVERVIEW For model : LDE3031 Single element Single element Single element Single element Automatic oven light switch Ceramic glass Gasket Name & Rating label Racks Warning label Upper oven door Racks Anti-tip bracket Lower oven door...
-
Page 13: Control Panel Overview
OVERVIEW CONTROL PANEL OVERVIEW For model : LDE3037 Cooktop Element Control Features Oven Controls Clear Off Button Start/ Lockout Button For model : LDE3035 Number Buttons For model : LDE3031 NOTE Cooktop Element Controls are set up in the same order as the corresponding elements. -
Page 14: Features
FEATURES FEATURES Minimum & Maximum default settings All of the features listed have a minimum and a maximum time or temperature setting that may be entered into the SETTINGS control. An entry acceptance beep will sound each time a control key is pressed. Use the SETTING button to set Convection Auto Conversion (on some models), Language (on some An entry error tone (two short tones) will sound if the... -
Page 15: Timer On/Off
FEATURES TIMER ON/OFF CONVECTION AUTO CONVERSION (ON SOME MODELS) The UPPER or LOWER TIMER ON/OFF serves as an extra timer in the kitchen that will beep when the set time has When cooking using convection cycle (Conv. bake and run out. It does not start or stop cooking. roast), the oven temperature is automatically reduced by The UPPER or LOWER TIMER ON/OFF feature can be 25°F. -
Page 16: Language (On Some Models)
FEATURES LANGUAGE (ON SOME MODELS) OVEN LIGHT The default language of the display is English. It can be The interior oven light automatically turns ON when the changed to Spanish or French. door is opened. The oven light may also be manually turned ON or OFF by pressing the OVEN LIGHT button. -
Page 17: Start Time (Delayed Timed Cook)
FEATURES START TIME (Delayed timed COOK) COOK TIME (TIMED COOK) The automatic timer of the DELAYED TIMED COOK The TIMED COOK feature allows you to set the oven to function will turn the oven ON and OFF at the time you cook for a specific length of time. -
Page 18: Using The Cooktop
USING THE COOKTOP USiNG THE COOKTOP Hot surface indicator HS (Hot Surface) will appear in the display once the element is turned off or during the self clean cycle. The COOKiNG AREAS HS indicator will stay on until the surface has cooled to approximately 150°F (66°C) or when the self clean cycle The cooking areas on your range are identified by ends. - Page 19 USING THE COOKTOP To turn on a DUAL element (on some model) To turn on the Warming Zone (on some models) WARM DUAL ZONE You are able to adjust the dual element according to the Use the Warming Zone to keep food warm after it has pot/pan size that you are using.
-
Page 20: Using The Proper Cookware
USING THE COOKTOP Recommended surface cooking settings USING THE PROPER COOKWARE Element Temp. Recommended Use Using the proper cookware can prevent many problems, such as food taking longer to cook or achieving 8.5-Hi • Bring liquid to a boil inconsistent results. Proper pans will reduce cooking •... -
Page 21: Using The Oven
USING THE OVEN USING THE OVEN OVEN CONTROLS SABBATH MODE BEFORE USING THE OVEN Sabbath mode is typically used on the Jewish Sabbath NOTE and Holidays. When the SABBATH mode is activated, the oven does not turn off until the SABBATH mode is •... -
Page 22: Bake
USING THE OVEN BAKE CONVECTION BAKE (ON SOME MODELS) BAKE is used to prepare foods such as pastries, breads, casseroles. The oven can be programmed to bake at any The convection system uses a fan to circulate the heat temperature from 170°F (77°C) to 550°F (288°C). The evenly within the oven. -
Page 23: Convection Roast (On Some Models)
USING THE OVEN CONVECTION ROAST RECOMMENDED CONVECTION (ON SOME MODELS) ROAST GUIDE (ON SOME MODELS) The CONVECTION ROAST feature is designed to give When preparing meats for convection roasting, use the optimum roasting performance. CONVECTION ROAST broiler pan, grid and roasting rack. The broiler pan will combines cooking with the convection fan to roast meats catch grease spills and the grid will help prevent grease and poultry. -
Page 24: Recommended Baking And Roasting Guide
USING THE OVEN RECOMMENDED BAKING AND For model : LDE3037 ROASTING GUIDE Baking results will be better if baking pans are centered in the oven as much as possible. If cooking on multiple racks, place the oven racks in positions AS SHOWN BELOW FIGURE. -
Page 25: Broil
USING THE OVEN BROIL Smoking Due to the intense heat associated with broiling, it is The Broil function uses intense heat from the upper normal to experience smoke during the cooking process. heating element to cook food. BROIL works best for This smoke is a natural byproduct of searing and should tender cuts of meats, fish, and thinly cut vegetables. -
Page 26: Recommended Broiling Guide
USING THE OVEN RECOMMENDED BROILING GUIDE The size, weight, thickness, starting temperature, and your preference of doneness will affect broiling times. This guide is based on meats at refrigerator temperature. For best results when broiling, use a pan designed for broiling (refer to the Fig.1) Fig.1 NOTE... -
Page 27: Warm
USING THE OVEN Broiling Tips To set the WARM function after timed cooking: 1. Select the cooking function. Beef 2. Enter the oven temperature using the number • Steaks and chops should always be allowed to rest for buttons. five minutes before cutting into them and eating. This allows the heat to distribute evenly through the food 3. -
Page 28: Kids Meal (On Some Models)
USING THE OVEN KIDS MEAL (ON SOME MODELS) FAVORITES (ON SOME MODELS) This function is specially designed to cook popular kids The FAVORITES function is used to record and recall your foods such as regular crust pizza, rising crust pizza, fresh favorite recipe settings. -
Page 29: Pizza (On Some Models)
USING THE OVEN PIZZA (ON SOME MODELS) Setting the PIZZA function 1. Press PIZZA once. P1 will appear in the display. Pizza is used when cooking pizza especially. Pizza Whenever you touch PIZZA one more time, the adds the oven from top to bottom to give more evenly display will appear P1, P2, P1, P2, …... -
Page 30: Care And Cleaning
CARE AND CLEANING CARE AND CLEANING Burned-on Residue 1. While the cooktop is still hot, remove any burnt- on deposits or spilled food from the glass/ceramic CLEANING THE GLASS/CERAMIC cooking surface with a suitable metal razor scraper COOKTOP (similar to scraping paint off of a windowpane - it will not damage the decorated cooking surface). -
Page 31: Self Clean
CARE AND CLEANING Metal Marks and Scratches CAUTION 1. Be careful not to slide pots and pans across the • DO NOT leave small children unattended near the cooktop. Doing so will leave metal markings on the appliance. During the Self Clean cycle, the outside cooktop surface. - Page 32 CARE AND CLEANING Setting Self Clean During Self Clean • The self clean cycle uses extremely hot temperatures The Self- Clean function has cycle times of 3, 4, or 5 hours. to clean the oven cavity. While running the Self Clean cycle, you may notice smoking or an odor.
-
Page 33: Easyclean
- Can allow shorter Self Clean time Compared to the more intense Self Clean process, your LG oven gives you the option of cleaning with LESS HEAT, LESS TIME, and virtually NO SMOKE OR FUMES. WHEN TO USE EasyClean™... - Page 34 CARE AND CLEANING EasyClean™ INSTRUCTION GUIDE 7. A tone will sound at the end of the 20-minute cycle. Press the CLEAR OFF button to clear the display and 1. Remove oven racks and accessories from the oven. end the tone. 2.
-
Page 35: Cleaning The Exterior
CARE AND CLEANING CLEANING THE EXTERIOR Broiler Pan and Grid Painted and Decorative Trim For general cleaning, use a cloth with hot soapy water. For more difficult soils and built-up grease, apply a liquid • Do not store a soiled broiler pan or grid anywhere in detergent directly onto the soil. -
Page 36: Removing & Replacing The Lift-Off Oven Door
CARE AND CLEANING REMOVING & REPLACING THE To replace the door: LIFT-OFF OVEN DOOR 1. Be sure both hinges are in a 30 degree position. CAUTION 2. Slide the door back onto the hinges until you hear a solid click and the release buttons have engaged. •... -
Page 37: Door Care Instructions
CARE AND CLEANING LOWER OVEN To replace the door: 1. Firmly grasp both sides of the door at the top. To remove the door: 1. Fully open the door. 2. With the door at the same angle as the removal 2. -
Page 38: Faqs
FAQs FAQs What types of cookware are recommended During convection cooking the fan stops to use with my cook top? when I open the door. Is that normal? • The pans must have a flat bottom and straight sides. Yes, this is normal. When the door is opened, the •... - Page 39 FAQs Why aren't the function buttons working? Is it safe for my convection fan, broil burner or heater element to get wet during Make sure that the range is not in Lockout mode. The lock EasyClean™? symbol will show in the display if Lockout is activated. To deactivate Lockout, press and hold the START button Yes.
-
Page 40: Troubleshooting
TROUBLESHOOTING TROUBLESHOOTING BEFORE CALLING FOR SERVICE Before you call for service, review this list.It may save you time and expense. The list includes common occurrences that are not the result of defective workmanship or materials in this appliance. Problem Possible Causes / Solutions Range is not level. - Page 41 TROUBLESHOOTING Problem Possible Causes / Solutions Oven will not work • Plug on range is not completely inserted in the electrical outlet. - Make sure electrical plug is plugged into a live, properly grounded outlet. • A fuse in your home may be blown or the circuit breaker tripped. - Replace the fuse or reset the circuit breaker.
- Page 42 TROUBLESHOOTING Problem Possible Causes / Solutions Food does not broil • Aluminum foil used on the the broiling pan and grid has not been fitted properly and slit properly as recommended. - See the Using the Oven section. • In some areas the power voltage may be low. - Preheat the broil element for 5-7 minutes - See the Broiling Guide.
- Page 43 TROUBLESHOOTING Problem Possible Causes / Solutions Excessive smoking • Excessive soil. during a self clean cycle - Press the CLEAR OFF button. Open the windows to rid the room of smoke. Wait until the self clean mode is cancelled. Wipe up the excess soil and reset the clean. Oven door do not open •...
-
Page 44: Warranty
WARRANTY (USA) LG Electronics Inc. will repair or replace your product, at LG’s option, if it proves to be defective in material or workmanship under normal use, during the warranty period set forth below, effective from the date of original consumer purchase of the product. - Page 45 MANUAL DE PROPIETARIO ESTUFA ELÉCTRICA DE DOBLE HORNO Lea detenidamente estas instrucciones antes utilizar y guárdelas como referencia para el futuro. LDE3037ST LDE3035ST LDE3031ST LDE3037SB LDE3035SB LDE3037SW LDE3035SW www.lg.com P/No.: MFL63291204...
- Page 46 ÍNDICE ÍNDICE 24 Guía recomendada para asado por convección IMPORTANTES INSTRUCCIONES DE (en algunos modelos) SEGURIDAD 25 Guía de Recomendaciones para Hornear y Asar 26 Asado a la parrilla DESCRIPCIÓN GENERAL 26 Asado a la parrilla rápido (en algunos modelos) Guía de asado recomendado Accesorios 28 Calentar...
- Page 47 Usted puede descargar el manual de usuario en http://www.lg.com. Este es el símbolo de alerta de seguridad. Este símbolo lo alerta sobre los posibles riesgos que pueden causar daños a la propiedad y/o lesiones físicas...
- Page 48 IMPORTANTES INSTRUCCIONES DE SEGURIDAD Soporte Anti-vuelco • Asegúrese de que un técnico calificado Pared Debe introducirse realice la instalación y puesta a tierra el tornillo en la madera o en el de este electrodoméstico en forma hormigón Aproximadamente adecuada. 0,65” (16,5mm) •...
- Page 49 IMPORTANTES INSTRUCCIONES DE SEGURIDAD PRECAUCIÓN • NO cubra las paredes del horno, estantes, parte inferior, o cualquier otra parte del horno con papel de aluminio o cualquier otro material. Hacerlo alterará la distribución del calor, producirá malos resultados en la cocción y provocará un daño permanente en el interior del horno (el papel de aluminio se derretirá...
- Page 50 IMPORTANTES INSTRUCCIONES DE SEGURIDAD • Use prendas adecuadas. No lleve prendas sueltas o colgantes que pueden encenderse si entran en contacto con superficies calientes y causen quemaduras graves. • Los objetos metálicos como latas sin abrir no se deben dejar en la superficie de la unidad o ser calentados en el horno.
- Page 51 IMPORTANTES INSTRUCCIONES DE SEGURIDAD SEGURIDAD DURANTE SU USO • No toque los estantes del horno cuando estén calientes. • Si el bastidor debe ser movido mientras el horno está caliente, no permita que la agarradera en contacto con el elemento de calentamiento en el horno caliente. •...
- Page 52 IMPORTANTES INSTRUCCIONES DE SEGURIDAD SEGURIDAD DE LOS NIÑOS ADVERTENCIA • Mantenga a los niños y a las mascotas lejos del horno. • Nunca permita que un niño se cuelgue de la puerta del horno. • No permita que los niños se arrastren hacia adentro del horno. •...
- Page 53 IMPORTANTES INSTRUCCIONES DE SEGURIDAD • Limpie la estufa con Precaución. No utilice esponjas o paños para limpiar derrames en una superficie de cocción caliente. Utilice una espátula metálica adecuada. • NO utilice la superficie de vidrio de la estufa como tabla de cortar. •...
- Page 54 IMPORTANTES INSTRUCCIONES DE SEGURIDAD SEGURIDAD AL LIMPIAR PRECAUCIÓN • Abra una ventana y encienda un ventilador o extractor antes de realizar la auto-limpieza. • No Utilizar Limpiadores de Horno. No debe utilizarse ningún limpiador de hornos o protector de recubrimiento del horno comercial de ningún tipo dentro o alrededor de alguna parte del horno.
-
Page 55: Descripción General
EasyClean™ NOTA • Comuníquese con el Centro de Atención al Cliente de LG en caso de que falte algún accesorio. • Por su seguridad y para lograr una óptima durabilidad del producto, utilice únicamente componentes autorizados. • El fabricante no será responsable por el mal funcionamiento del producto o por accidentes causados por el uso de componentes o piezas no autorizadas, compradas por separado. - Page 56 DESCRIPCIÓN GENERAL DESCRIPCIÓN GENERAL DE LA COCINA Asegúrese de entender los nombres y función de cada pieza. * A lo largo de este manual, las características y apariencia del producto pueden variar dependiendo de su modelo. Para el modelo LDE3037 Elemento de zona de calentamiento Elemento único...
- Page 57 DESCRIPCIÓN GENERAL DESCRIPCIÓN GENERAL DE LA COCINA Para el modelo LDE3031 Elemento único Elemento único Elemento doble Elemento doble Interruptor automático de la luz del horno Vidrio cerámica Junta Nombre y etiqueta de características Rejillas Etiqueta de advertencia Puerta superior del horno Rejillas Soporte Puerta del horno inferior...
- Page 58 DESCRIPCIÓN GENERAL DESCRIPCIÓN GENERAL DEL PANEL DE CONTROL Para el modelo LDE3037 Control de la Hornalla de la Estufa Características Controles del Horno Botón Clear Off (Borrar) Botón Start/ Lockout (Inicio/Bloqueo) Para el modelo LDE3035 Botones Numéricos Para el modelo LDE3031 NOTA Los Controles de las Hornallas de la Estufa están ubicados en el mismo orden que las hornallas correspondientes.
- Page 59 CARACTERÍSTICAS CARACTERÍSTICAS Configuraciones Predeterminadas Mínimas y Máximas Todas las características enumeradas tienen una CONFIGURACIÓN configuración de tiempo o temperatura máxima que puede ingresarse en el control. Un tono de aceptación Utilice el botón SETTING para configurar la Conversión de la entrada sonará cada vez que presione una tecla del Automática de Convección (en algunos modelos), el control.
-
Page 60: Ajustes Para La Temperatura Del Horno
CARACTERÍSTICAS TEMPORIZADOR ENCENDIDO/ CONVERSIÓN AUTOMÁTICA DE APAGADO CONVECCIÓN (EN ALGUNOS MODELOS) TIMER ON/OFF SUPERIOR o INFERIOR sirve como temporizador adicional en al cocina y emitirá una señal Al cocinar con “ciclo de convección” (Conv. bake and acústica cuando se haya agotado el tiempo. No se inicia o roast), la temperatura del horno se reduce deja de cocinar. -
Page 61: Luz Del Horno
CARACTERÍSTICAS IDIOMA (EN ALGUNOS MODELOS) FAHRENHEIT O CELSIUS La temperatura del horno se puede configurar en El idioma predeterminado de la pantalla es el inglés. grados Fahrenheit o Celsius. El horno muestra en forma Puede cambiarse a español o francés. predeterminada grados Fahrenheit salvo que sea 1. - Page 62 CARACTERÍSTICAS HORA DE INICIO (COCCIÓN TIEMPO DE COCCIÓN (COCCIÓN temporizada retardada) TEMPORIZADA) El temporizador automático de la función COCCIÓN La función COCCIÓN TEMPORIZADA le permite configurar TEMPORIZADA RETARDADA ENCENDERÁ y APAGARÁ el el horno para que cocine durante un período de tiempo horno en el horario que usted seleccione.
-
Page 63: Uso De La Estufa
USO DE LA ESTUFA USO DE LA ESTUFA Indicador HS (Superficie Caliente) Aparecerá HS en la pantalla cuando se haya apagado la hornalla o durante el ciclo de auto-limpieza. El indicador ÁREAS DE COCCIÓN HS permanecerá encendido hasta que la superficie se haya enfriado hasta aproximadamente 150˚F/66˚C o Las áreas de cocción de su cocina están identificadas por cuando finalice el ciclo de auto-limpieza. - Page 64 USO DE LA ESTUFA Encender una hornalla DUAL (en algunos modelos) Encender la Zona de Calentamiento (en algunos modelos) DUAL WARM ZONE Usted puede ajustar las hornallas duales de acuerdo al tamaño de la olla/sartén que está usando. Use la Zona de Calentamiento para mantener la comida caliente luego de que ya haya sido cocinada.
- Page 65 USO DE LA ESTUFA Configuración de cocción de superficie USO DE LOS RECIPIENTES DE recomendada COCCIÓN ADECUADOS El uso de los recipientes de cocción adecuados puede evitar muchos Hornalla Temp. Uso Recomendado problemas, tales como que la comida tarde más tiempo en cocinarse 8,5-Hi •...
-
Page 66: Uso Del Horno
USO DEL HORNO USO DEL HORNO PRECAUCIÓN • Volver a colocar los estantes del horno antes de encender el horno para evitar quemaduras. SACAR Y VOLVER A COLOCAR LOS • NO cubra los estantes con papel de aluminio o ESTANTES DEL HORNO cualquier otro material, ni coloque nada sobre el fondo del horno. - Page 67 USO DEL HORNO BAKE (HORNEADO) CONVECTION BAKE (HORNEADO POR CONVECCIÓN) BAKE se usa para preparar alimentos tales como (EN ALGUNOS MODELOS) pastelería panes, cazuelas. Puede programarse el horno para que hornee a cualquier temperatura desde El sistema de convección utiliza un ventilador para hacer 170°...
- Page 68 USO DEL HORNO CONVECTION ROAST (ASADO POR GUÍA RECOMENDADA PARA CONVECCIÓN) ASADO POR CONVECCIÓN (EN ALGUNOS MODELOS) (EN ALGUNOS MODELOS) The CONVECTION ROAST feature is designed to give Al preparar las carnes para asarlas por convección, utilice optimum roasting performance. CONVECTION ROAST la asadera, la rejilla y la parrilla asadora.
- Page 69 USO DEL HORNO GUÍA DE RECOMENDACIONES Para el modelo LDE3037 PARA HORNEAR Y ASAR Los resultados de horneado seran mejores si los moldes para hornear se centran en el horno. Si cocina con múltiples bandejas, coloque las bandejas en la posicion COMO SE INDICA EN LA DIBUJO.
- Page 70 USO DEL HORNO BROIL (ASADO A LA PARRILLA) Humo Debido al calor intenso relacionado con el asado, es La función Asado a la parrilla utiliza el calor intenso de normal notar humo durante el proceso de cocción. Este la hornalla superior para cocinar la comida. El ASADO A humo es un resultado natural del sellado y no debería LA PARRILLA funciona mejor con cortes tiernos de carne, preocuparle.
- Page 71 USO DEL HORNO GUÍA DE ASADO RECOMENDADO El tamaño, peso, grosor, temperatura inicial y el punto de cocción preferido afectarán los tiempos de asado. Esta guía está basada en carnes a temperatura de refrigerador. Para mejores resultados durante el asado, utilice un recipiente diseñado para asar (ver Fig.
- Page 72 USO DEL HORNO Consejos para el Asado a la Parrilla Para configurar la función CALENTAR luego de la cocción temporizada: Carne vacuna 1. Seleccione la función para cocinar. • Siempre debe dejarse descansar el lomo y las costillas 2. Ingrese la temperatura del horno usando los botones durante cinco minutos antes de cortarlos y comerlos.
- Page 73 USO DEL HORNO KIDS MEAL (ALIMENTOS PARA FAVORITOS NIÑOS) (EN ALGUNOS MODELOS) (EN ALGUNOS MODELOS) Esta función está especialmente diseñada para cocinar los La función FAVORITOS se usa para grabar y recuperar alimentos más populares entre los niños como la pizza de la configuración de sus recetas favoritas.
-
Page 74: Pizza (En Algunos Modelos)
USO DEL HORNO PIZZA (EN ALGUNOS MODELOS) Configuración de la función PIZZA 1. Pulse PIZZA una vez. Se mostrará en la pantalla El modo de pizza se usa cuando se va a preparar P1. Cada vez que pulse el botón PIZZA, la pantalla especificamente una pizza. -
Page 75: Cuidado Y Limpieza
CUIDADO Y LIMPIEZA CUIDADO Y LIMPIEZA Residuos Carbonizados 1. Mientras la estufa esté todavía caliente, quite todos los depósitos carbonizados o comida derramada de LIMPIEZA DE LA ESTUFA DE la superficie de la estufa de vitrocerámica con una espátula metálica (similar a las que se usan para sacar VITROCERÁMICA la pintura de una ventana - no dañará... - Page 76 CUIDADO Y LIMPIEZA Marcas de Metal y Rayones PRECAUCIÓN 1. Tenga cuidado de no deslizar ollas y sartenes por • NO deje a niños pequeños sin supervisión cerca la estufa. Si lo hace, dejará marcas de metal sobre del electrodoméstico. Durante el ciclo de auto- la superficie de la estufa.
- Page 77 CUIDADO Y LIMPIEZA Configuración de la Auto-limpieza Durante La Auto-Limpieza • El ciclo de auto - limpieza utiliza temperaturas La función de Auto-Limpieza tiene ciclos que pueden extremadamente elevadas para limpiar la cavidad del durar 3, 4, o 5 horas. horno.
- Page 78 CUIDADO Y LIMPIEZA EasyClean™ El nuevo horno de LG con tecnología EasyClean™ le otorga Cuando sea necesario, su estufa sigue ofreciendo la dos opciones de limpieza para el interior de su estufa. La opción de auto-limpieza (Self Clean) durante más tiempo, función EasyClean™...
- Page 79 CUIDADO Y LIMPIEZA GUÍA DE INSTRUCCIÓN EasyClean™ 7. Un tono sonará al final del ciclo de 20 minutos. Presione el botón Clear / Off para borrar la pantalla y el tono. 1. Retire bandejas y accesorios del horno. 8. Después del ciclo de limpieza y durante la limpieza 2.
-
Page 80: Limpieza Exterior
CUIDADO Y LIMPIEZA LIMPIEZA EXTERIOR Asadera y Rejilla Revestimiento Pintado y Decorativo Para la limpieza general, utilice un paño con agua caliente jabonosa. Para suciedades más difíciles y grasa • No guarde una asadera o rejilla sucia en ninguna parte acumulada, aplique detergente líquido directamente del horno. - Page 81 CUIDADO Y LIMPIEZA CÓMO QUITAR Y REEMPLAZAR LA To replace the door: PUERTA DEL HORNO DESMONTABLE 1. Asegúrese de que las dos bisagras estén en una posición de 30 grados. PRECAUCIÓN 2. Deslice la puerta hacia atrás en las bisagras hasta •...
-
Page 82: Horno Inferior
CUIDADO Y LIMPIEZA HORNO INFERIOR 3. Abra la puerta completamente. Si la puerta está completamente abierta, la hendidura no asentará Para retirar la puerta: correctamente en el borde inferior de la ranura. 1. Abra la puerta completamente. 4. Presione los cierres de las bisagras hacia abajo contra 2. - Page 83 PREGUNTAS FRECUENTES PREGUNTAS FRECUENTES ¿Qué tipo de recipientes de cocción se Durante la cocción por convección el ventilador recomiendan para usar con mi estufa? se detiene cuando abro la puerta. ¿Es eso normal? • Los recipientes deben tener base plana y lados rectos. •...
- Page 84 PREGUNTAS FRECUENTES ¿Por qué no funcionan los botones de funciones? ¿Es seguro que mi ventilador de convección, asador o elemento de calentamiento se moje Asegúrese de que la cocina no esté en el modo Lockout durante EasyClean™? (Bloqueo). El símbolo de bloqueo se mostrará...
- Page 85 IDENTIFICACIÓN Y SOLUCIÓN DE PROBLEMAS IDENTIFICACIÓN Y SOLUCIÓN DE PROBLEMAS ANTES DE LLAMAR AL SERVICIO TÉCNICO Antes de llamar al servicio técnico, examine esta lista. Puede ahorrarle tiempo y dinero. La lista incluye situaciones comunes que no son el resultado de mano de obra o materiales defectuosos del aparato. Problema Causas / Soluciones posibles La estufa está...
- Page 86 IDENTIFICACIÓN Y SOLUCIÓN DE PROBLEMAS Problema Causas / Soluciones posibles El horno no funciona • El enchufe de la estufa no está introducido del todo en el tomacorriente. - Verifique que el enchufe eléctrico esté conectado a un tomacorriente con tensión y adecuada conexión a tierra.
- Page 87 IDENTIFICACIÓN Y SOLUCIÓN DE PROBLEMAS Problema Causas / Soluciones posibles Los alimentos no • El papel de aluminio usado en la asadera y la rejilla no se ha colocado de manera correcta y se asan de manera no se han realizado los cortes recomendados. adecuada - Ver la sección “Cómo usar el horno”.
- Page 88 IDENTIFICACIÓN Y SOLUCIÓN DE PROBLEMAS Problema Causas / Soluciones posibles Humo excesivo durante • Suciedad excesiva. el ciclo de autolimpieza - Pulse el botón CLEAR OFF. Abra la ventana para ventilar el humo de la estancia. Espere hasta que el modo de autolimpieza sea cancelado. Limpie el exceso de suciedad y reinicie el proceso de limpieza.
- Page 89 GARANTÍA GARANTÍA (EE. UU.) LG Electronics Inc. reparará o reemplazará su producto, a discreción de LG, si se comprueba que los materiales o su confección presentaban defectos con el uso normal, durante el período de garantía establecido a continuación, vigente a partir de la fecha de compra del producto por parte del comprador original.
- Page 90 NOTAS...
- Page 91 NOTAS...
- Page 92 LG Customer Information Center 1-800-243-0000 USA, Consumer User 1-888-865-3026 USA, Commercial User 1-888-542-2623 CANADA Register your product Online! www.lg.com Printed in Mexico...