Philips FW- FW-C399 User Manual
Mini hi-fi system
Hide thumbs
Also See for FW- FW-C399:
- Service manual (77 pages) ,
- Owner's manual (30 pages) ,
- User manual (30 pages)
Table of Contents
Advertisement
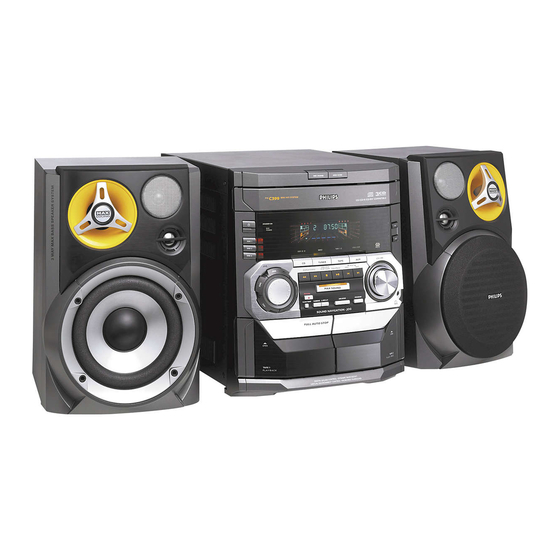
C399
C399
Mini Hi-Fi System
FW-
FW-
Read this manual first!
Return
Congratulations on purchasing this Philips product.
your Warranty
We've included everything you need to get started.
Registration Card
If you have any problems, Philips Representatives can
within 10 days
help you get the most from your new product by explaining:
• Hookups,
• First Time Setup, and
• Feature Operation.
Do not attempt to return this product to the store.
For fast help, call us first!
1-800-531-0039
Thank you for making Philips a part of your home!
1
3139 115 21071
pg 001-031/C399/37-Eng
1
11/28/01, 1:33 PM
Advertisement
Table of Contents

Related Manuals for Philips FW- FW-C399


Summary of Contents for Philips FW- FW-C399
- Page 1 • First Time Setup, and • Feature Operation. Do not attempt to return this product to the store. For fast help, call us first! 1-800-531-0039 Thank you for making Philips a part of your home! 3139 115 21071 pg 001-031/C399/37-Eng 11/28/01, 1:33 PM...
- Page 2 CAUTION Canada Use of controls or adjustments or English: performance of procedures other This digital apparatus does not exceed than herein may result in hazardous the Class B limits for radio noise radiation exposure or other unsafe emissions from digital apparatus as set operation.
- Page 3 § TAPE 1/2 TUNER INC.SURR. CD DIRECT ∞ REPEAT SLEEP SHUFFLE £ ≤ VOLUME É Å í ë Ç à á DBB 1/2/3 ¡ DISC CHANGE OPEN • CLOSE MINI HIFI SYSTEM C H A N G E R CD / CD - R / CD - RW COMPATIBLE ™...
- Page 4 Return your Warranty Registration card today to ensure you receive all the benefits you’re entitled to. • Once your Philips purchase is registered, • So complete and return the Warranty you’ r e eligible to receive all the privileges Registration Card enclosed with your of owning a Philips product.
- Page 5 As a member of the Philips “family,” you’re entitled to protection by one of the most comprehensive warranties and outstanding service networks in the industry.
-
Page 6: Important Safety Instructions
IMPORTANT SAFETY INSTRUCTIONS Read these instructions. Use only with the cart, stand, tripod, bracket, or table specified Keep these instructions. by the manufacturer or sold with Heed all warnings. the apparatus.When a cart is used, use caution when moving Follow all instructions. the cart/apparatus combination Do not use this apparatus near to avoid injury from tip-over. - Page 7 Index English ------------------------------------------------ 8 Français -------------------------------------------- 35 Español --------------------------------------------- 62 3139 115 21071 pg 001-031/C399/37-Eng 11/28/01, 1:34 PM...
-
Page 8: Table Of Contents
Contents General Information Radio Reception Supplied accessories ..........9 Tuning to radio stations ........20 Environmental information ........ 9 Storing preset radio stations ....20–21 Automatic preset programming Safety information ..........9 Manual preset programming Tuning to preset radio stations ....... 21 Preparations Rear connections ........ -
Page 9: General Information
General Information This system complies with the FCC rules, Safety information Part 15 and with 21 CFR 1040.10. Before operating the system, check that the Operation is subject to the following two operating voltage indicated on the typeplate (or conditions: the voltage indication beside the voltage –... -
Page 10: Preparations
Preparations FM wire antenna AM loop antenna AUX/ FM ANTENNA speaker speaker AM ANTENNA (right) (left) MAINS — — SPEAKERS 6Ω AC power cord Rear connections Antennas Connection Connect the supplied AM loop antenna and FM The type plate is located at the rear of the antenna to the respective terminals. -
Page 11: Speakers Connection
Preparations FM Antenna Optional connection The optional equipment and connecting cords are not supplied. Refer to the operating instructions of the connected equipment for details. Connecting other equipment to your system For better FM stereo reception, connect an Use a cinch cable to connect AUX/CDR IN to outdoor FM antenna to the FM ANTENNA the analogue audio out terminals of an external terminal. -
Page 12: Control
Controls (illustrations on page 3) ÉÅ PLAY•PAUSE Controls on the system and for CD ....to start or interrupt playback. remote control for Tape ....to start playback. for Plug & Play…(on the system only) to initiate STANDBY ON y and start plug &... -
Page 13: Controls
Controls Notes for remote control: DIM MODE – First select the source you wish to control – to select different brightness for the display screen : DIM 1, DIM 2, DIM 3 or DIM OFF. by pressing one of the source select keys on the remote control (for example CD or # OPEN TUNER). -
Page 14: Basic Functions
Basic Functions STANDBY-ON TAPE 1/2 TUNER POWER MUTE NEWS TITLE DISC 1 INC.SURR. DISC 2 CD DIRECT DISC 3 CD1 • 2 • 3 FM•AM TAPE 1 • 2 VIDEO/ CDR REPEAT SLEEP SHUFFLE TUNER TAPE VOLUME VOLUME DEMO STOP PRESET SEARCH •TUNING STOP•... -
Page 15: Switching The System On
Basic Functions Switching the system on Dim mode You can select the desired brightness for the In standby/demonstration mode display. Press STANDBY ON to switch on the last In any source mode (except Eco Power standby selected source. or standby mode), press DIM MODE Press CD, TUNER, TAPE (TAPE 1/2), or repeatedly to select DIM 1, DIM 2, DIM 3 or AUX. -
Page 16: Sound Navigation
Basic Functions Sound navigation DSC (Digital Sound Control) The DSC feature enables you to enjoy special For optimal sound listening, select only one sound effects that have preset equalizer settings, of the following navigation sound controls providing the best music reproduction. at a time : DSC, VEC or MAX SOUND. -
Page 17: Cd Operation
CD Operation DISC CHANGE OPEN • CLOSE MINI HIFI SYSTEM C H A N G E R TAPE 1/2 TUNER CD / CD - R / CD - RW COMPATIBLE INC.SURR. CD DIRECT STANDBY-ON POWER MUTE NEWS TITLE REPEAT SLEEP SHUFFLE DISC 1 VOLUME... -
Page 18: Playing Discs
CD Operation Replacing discs during playback Playing discs Press DISC CHANGE. To play all discs on the disc tray The disc tray will open without interrupting PressÉ Å . current playback. All the available discs will play once, then stop. During playback, the selected disc tray, track To change the inner disc, press DISC number and elapsed playing time of the current... -
Page 19: Programming The Disc Tracks
CD Operation To review the program Programming the disc tracks Stop playback and press í or ë repeatedly. Programming tracks is possible when playback is stopped. Up to 40 tracks can be stored in the To exit review mode, press Ç. memory in any order. -
Page 20: Radio Reception
Radio Reception STANDBY-ON TAPE 1/2 TUNER POWER MUTE NEWS TITLE DISC 1 INC.SURR. DISC 2 CD DIRECT DISC 3 CD1 • 2 • 3 FM•AM TAPE 1 • 2 VIDEO/ CDR REPEAT SLEEP SHUFFLE TUNER TAPE VOLUME VOLUME PRESET DEMO STOP SEARCH •TUNING STOP•... -
Page 21: Manual Preset Programming
Radio Reception To stop storing the automatic preset Tuning to preset radio stations Press PROGRAM or Ç on the system. Once you’ve programmed the radio stations, press í or ë to select the desired preset Note: number. – If no preset number is selected, automatic preset The preset number, radio frequency, and will begin from preset (1) and all your former waveband are displayed. -
Page 22: Tape Operation/Recording
Tape Operation / Recording STANDBY-ON POWER MUTE NEWS TITLE DISC 1 DISC 2 DISC 3 CD1 • 2 • 3 FM•AM TAPE 1 • 2 VIDEO/ CDR TAPE 1/2 TUNER INC.SURR. TUNER TAPE VOLUME DEMO STOP PRESET SEARCH •TUNING STOP• CLEAR PLAY•... -
Page 23: Playing Tapes
Tape Operation / Recording Playing tapes General information on recording To playback a selected tape deck For recording, use only tape of IEC type I Press TAPE (or TAPE 1/2 on the remote (normal tape). control) repeatedly to select tape deck 1 or 2. The recording level is set automatically, Press É... -
Page 24: Preparation For Recording
Tape Operation / Recording Preparation for recording CD Synchronized start recording Press TAPE to select TAPE 2. Press CD to select the disc. Press í or ë to select the desired track to Load a recordable tape into tape deck 2 with full spool to the left. -
Page 25: Clock/Timer
Clock/Timer STANDBY-ON POWER MUTE NEWS TITLE TAPE 1/2 TUNER DISC 1 INC.SURR. DISC 2 CD DIRECT DISC 3 C D 1 • 2 • 3 FM•AM TAPE 1 • 2 VIDEO/ CDR REPEAT SLEEP SHUFFLE TUNER TAPE VOLUME VOLUME PRESET DEMO STOP SEARCH •TUNING STOP•... -
Page 26: Deactivating The Timer
Clock/Timer Press and hold CLOCK•TIMER for more than Activating the timer (for the same preset two seconds to select timer mode. time and source) "AM12:00" or "00:00" or the last timer Press and hold CLOCK•TIMER for more than setting starts flashing. two seconds. -
Page 27: External Sources
After prolonged use, dirt or dust may accumulate at the disc lens. To ensure good Demagnetizing the heads playback quality, clean the disc lens with Philips Use a demagnetizing tape available at your CD Lens Cleaner or any commercially available dealer. -
Page 28: Specifications
Specifications SPEAKERS AMPLIFIER System ....3-way; double port bass reflex Output power ......240 W total power Impedance ................ 6 Ω ......2 x 120 W RMS / 2 x 100 W FTC Signal-to-noise ratio ......≥ 67 dBA (IEC) Woofer .............. -
Page 29: Troubleshooting
Troubleshooting WARNING Under no circumstances should you try to repair the system yourself, as this will invalidate the warranty. Do not open the system as there is a risk of electric shock. If a fault occurs, first check the points listed below before taking the system for repair. If you are unable to solve a problem by following these hints, consult your dealer or service center. - Page 30 Troubleshooting GENERAL The system does not react when buttons – Remove and reconnect the AC power plug and are pressed. switch on the system again. Sound cannot be heard or is of poor – Adjust the volume. quality. – Disconnect the headphones. –...
-
Page 31: Limited Warranty
This warranty gives you specific legal rights. You may have other rights which vary from state/province to state/province. Philips Service Solutions Group, P.O. Box 2976, Longview,Texas 75606, USA, (903) 242-4800 EL4965E006 / MAC 4110 / 12-98 3139 115 21071...