Panasonic KX-DT343 Quick Reference Manual
Digital proprietary telephones
Hide thumbs
Also See for KX-DT343:
- Brochure & specs (4 pages) ,
- Quick reference manual (64 pages) ,
- User manual (11 pages)

Related Manuals for Panasonic KX-DT343


Summary of Contents for Panasonic KX-DT343
- Page 1 Digital Proprietary Telephones Quick Quick Refer Reference G uid G uide M O D E L S M O D E L S K X - D T 3 4 3 K X - D T 3 4 3 K X - D T 3 4 3 K X - D T 3 4 6 K X - D T 3 4 6 K X - D T 3 4 6...
-
Page 2: Important Information
• If there is any problem, unplug the extension line and connect a known working phone. If the known working phone operates properly, have the defective phone repaired by a specified Panasonic Factory Service Centre. If the known working phone does not operate properly, check the Panasonic Phone System series Business Telephone Systems and the internal extension wiring. -
Page 3: Table Of Contents
Settings on the Programming Mode..10 Before Initial Use Thank you for purchasing a Panasonic Digital Proprietary Telephone (DPT). Please read this manual carefully before using this product and save this manual for future use. For more details, please refer to the manuals of the PBX. -
Page 4: Features For The Digital Proprietary Telephones
*3 When connecting DPTs via Digital XDP, this optional device cannot be used. Trademark: The Bluetooth word mark and logos are owned by the Bluetooth SIG, Inc. and any use of ® such marks by Panasonic Corporation is under licence. -
Page 5: Icon Meanings
Features List Icon Meanings Features List = Flexible button = Off-hook = On-hook (CO) = Feature number = Talk = Confirmation Tone C. Tone Making Calls Calling To an extension To an outside party outside phone no. extension no. (CO) Redial REDIAL Quick Dialing... -
Page 6: During A Conversation
Features List System Speed Dialling To dial AUTO DIAL system speed dialing no. (3 digits) STORE Doorphone Call doorphone no. (2 digits) C. Tone During a Conversation Call Hold To hold To retrieve a call at the holding extension INTERCOM HOLD (CO) C. -
Page 7: Using The Display Proprietary Telephone
Using the Display Proprietary Telephone Using the Call Log or Directories You can make a call with the call log or directories as follows: Outgoing Call Log Incoming Call Log Extension Number Directory System Speed Dialling Directory Personal Speed Dialling Directory Calling with a call log or directory While on-hook Press Left or Right... -
Page 8: Accessing The System Features
Using the Display Proprietary Telephone Storing names and numbers for the Personal Speed Dialing Directory While on-hook AUTO DIAL AUTO DIAL EXIT STORE STORE name phone no. PAUSE Enter phone Enter name number (max. 20 Press STORE Press STORE Press “EXIT” or (max. - Page 9 Accessing Features Using the Display Table 1 (Standard mode) Times Buttons " ’ (space) — < > & £ Table 2 (Option mode) Times Buttons " ä ö ü À Á Â Ã Ä Å Æ Ç Ð È É Ê...
-
Page 10: Settings On The Programming Mode
Selection & Parameter Input Yes–ON in use [Automatic] Would you like to turn on the display backlight of the Yes–always ON [Always On] KX-DT343/KX-DT346? (Display Backlight Selection) [Backlight] No–always OFF [Always Off] Ringing [Tone Call] How do you prefer to Directly–The party's voice is heard... -
Page 11: Do Not Disturb
Settings on the Programming Mode Programming Item Selection & Parameter Input No-Off [Absent Msg Off] Would you like to show a message on the caller's telephone message no. (1-8) Yes–Shows the selected message. display? [Absent Msg] (Absent Message) Yes–Shows your personal message. [Fwd/DND Off] Do Not Disturb (DND) [Do Not Disturb]... -
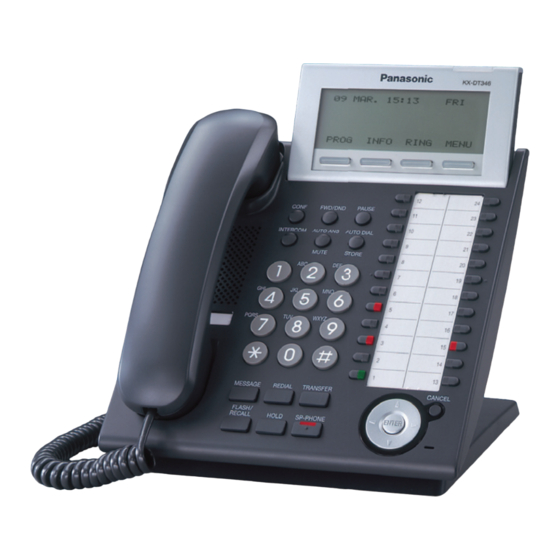
Page 12: Location Of Controls
Location of Controls Location of Controls } q w <KX-DT346> Q LCD (Liquid Crystal T INTERCOM: Used to make Display) or receive intercom calls. W PAUSE: Used to insert a Y AUTO ANS (Auto Answer)/ MUTE: Used to receive an pause when storing a telephone number. - Page 13 Location of Controls TRANSFER: Used to Navigator Key: Used to transfer a call to another adjust the volume and the party. display contrast or select desired items. REDIAL: Used to redial the CANCEL: Used to cancel last dialed number. the selected item. MESSAGE: Used to leave a Flexible Buttons: Used to message waiting indication...
-
Page 14: Setting
Settings Settings Speaker volume While in a hands-free conversation Handset/Headset While using the handset or volume headset Press Up to increase Ringer volume While on-hook or receiving a call or Down to decrease the volume. LCD Contrast While on-hook PAUSE PAUSE Ring Tone (CO) -
Page 15: Connection
Connection Connection <Back view> Connect to: a digital proprietary telephone — Digital XDP connection single line telephone XDP or parallel connection — The telephone line cord (included) Connect to a PBX. Clamp Headset Recommended: RP-TCA86, RP-TCA91, RP-TCA92 • Consult your dealer for more details about XDP and Digital XDP. CAUTION: When connecting a headset •... -
Page 16: Wall Mounting
Wall Mounting Wall Mounting 1. Remove the wall mounting adaptor from the unit as shown. 2. Set the operation board to level 1, then connect and secure the telephone line cords. • The cords can also be run from the top of the unit. 3. -
Page 17: Installing The Kx-Dt301/Kx-Nt303
Installing KX-DT301/KX-NT303 CAUTION: Installing KX-DT301/KX-NT303 • To prevent damage to the telephone, be sure to unplug the extension line before you set up or remove the KX-DT301 (USB Module) or the KX-NT303 (Add-on 12 Key Module). • Connect the KX-NT303 first when installing both the KX-DT301 and the KX-NT303. - Page 18 Installing KX-DT301/KX-NT303 KX-DT301 The USB Module can be connected between the DPT and the personal computer through USB interface to implement personal CTI (Computer Telephony Integration). 1. Open the cover. 2. Plug the flat cable into the connector as shown. 3.
- Page 19 Installing KX-DT301/KX-NT303 5. Insert the protrusions on the 6. Attach the KX-DT301 to your KX-DT301 into the 2 holes in unit with the screws (included the unit. with KX-DT301). 7. Install the USB driver. Refer to Installation Manual on the CD-ROM included with KX-DT301.
- Page 20 Panasonic Canada Inc. 5770 Ambler Drive, Mississauga, ON L4W 2T3 www.panasonic.ca PSQX46842A KK1208YHO© 04/09...