
Related Manuals for Toshiba Surveillix XVSv16-240-X


Summary of Contents for Toshiba Surveillix XVSv16-240-X
-
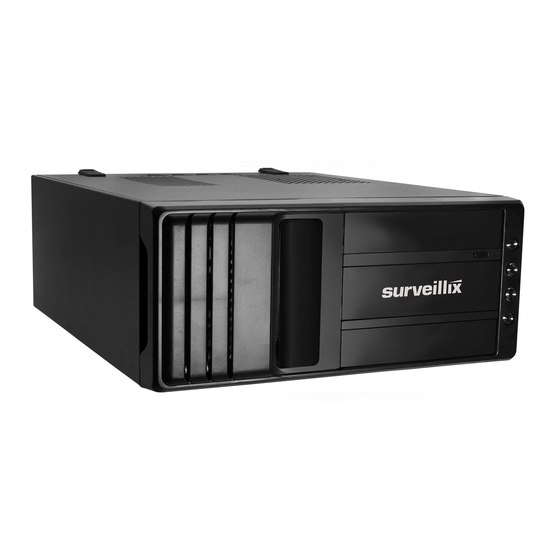
Page 1: Digital Video Recorder
XVSv Digital Video Recorder User Manual XVSv16-240-X model no. Please carefully read these instructions before using this product. Save this manual for future use. - Page 2 32861AA...
- Page 3 This software and documentation are copyrighted. All other rights, including ownership of the software, are reserved to DVR Support Center. TOSHIBA, and Surveillix are registered trademarks of TOSHIBA CORPORATION in the United States and elsewhere; Windows, and Windows 7 are registered trademarks of Microsoft Corporation. All other brand and product names are trademarks or registered trademarks of the respective owners.
-
Page 4: Limited Warranty
(3) years from the date of original retail purchase by the end-user. The first year of the three year warranty period will cover advance replacement of a defective unit and the remaining two years will be repaired by the Surveillix DVR Support Center factory. -
Page 5: Important Safeguards
IMPORTANT SAFEGUARDS Read Owner’s Manual – After unpacking this product, read the owner’s manual carefully, and follow all the operating and other instruction Power Sources – This product should be operated only from the type of power source indicated on the label. If you are not sure of the type of power supply to your home or business, consult your product dealer or local power company Ventilation –... -
Page 6: Battery Explosion Caution Statement
IMPORTANT SAFEGUARDS, continued Damage Requiring Service – Unplug the unit from the outlet and refer servicing to qualified service personnel under the following conditions: a. When the power-supply cord or plug is damaged. b. If liquid has been spilled, or objects have fallen into the unit. c. -
Page 7: Avoid Volatile Liquid
AVOID VOLATILE LIQUID Do not use volatile liquids, such as an insect spray, near the unit. Do not leave rubber or plastic products touching the unit for a long time. They will leave marks on the finish. Do not use a chemically saturated cloth NOTES ON MAINTENANCE To keep the recorder always operational we recommend regular inspection maintenance (cleaning parts or replacement). - Page 8 WARNING TO REDUCE THE RISK OF ELECTRICAL SHOCK, DO NOT EXPOSE THIS APPLIANCE TO RAIN OR MOISTURE. DANGEROUS HIGH VOLTAGES ARE PRESENT INSIDE THE ENCLOSURE. DO NOT OPEN THE CABINET. REFER SERVICING TO QUALIFIED PERSONNEL ONLY. CAUTION C A U T I O N RISK OF ELECTRIC SHOCK DO NOT OPEN CAUTION: TO REDUCE THE RISK OF ELECTRIC SHOCK,...
-
Page 9: Rack Mount Instructions
RACK MOUNT INSTRUCTIONS Elevated Operating Ambient – If installed in a closed or multi-unit rack assembly, the operating ambient temperature of the rack environment may be greater than room ambient. Therefore, consideration should be given to installing the equipment in an environment compatible with the maximum ambient temperature (Tma) specified by the manufacturer. -
Page 10: Usage Limitation
Disclaimer We disclaim any responsibility and shall be held harmless for any damages or losses incurred by the user in any of the following cases: Fire, earthquake or any other act of God; acts by third parties; misuse by the user, whether intentional or accidental; use under extreme operating conditions. -
Page 11: Table Of Contents
Table of Contents PREFACE ................................15 About this Guide ............................15 Technician Notes ............................15 INTRODUCTION ..............................16 Product Description ............................16 Features ................................. 17 CONTROLS AND CONNECTIONS ........................18 Front Panel Controls ............................19 XVSv ............................... 19 Rear Panel Connectors..........................20 XVSv ............................... - Page 12 Network Camera Setup..........................41 Connecting a Network Device ......................41 Assigning Dual Streams ........................43 Removing a Camera ........................43 Assigning Audio Channels to a Network Device ................44 Alarm Recording Mode ........................45 Camera Status and Information ....................... 46 DVR Registration and Upgrade .......................
- Page 13 Connecting to a Recorder Using Web Viewer ................111 Closing the Web Viewer ........................ 111 Included Software Setup ............................112 The Surveillix App Overview ........................113 Emergency Agent Overview ........................113 Configuring the Recorder ......................113 Configuring the Client PC ......................114 Setup Window ..........................
- Page 14 Emergency Agent Window ......................115 Search Alarm Window ........................116 Remote Software Overview ......................... 117 Remote Software Setup ........................ 118 Digital Verifier Overview ..........................120 Installing the Digital Verifier ......................120 Using the Digital Verifier ........................ 120 Backup Viewer Overview ..........................121 Installing Backup Viewer .......................
-
Page 15: Preface
PREFACE ABOUT THIS GUIDE This manual is a setup and maintenance guide that can be used for reference when setting up the recorder and for troubleshooting when a problem occurs. Only authorized personnel should attempt to repair this unit. Toshiba reserves the right to make changes to the DVRs represented by this manual without notice. The following text and symbols mark special messages throughout this guide: Note Text set off in this manner indicates topics of interests that can help the user understand the product better. -
Page 16: Introduction
PRODUCT DESCRIPTION A Surveillix XVSv is a DVR, a server that performs as a High Definition Digital Recorder. By utilizing the many features of a computer, including processing power, storage capacity, graphics compression, and security features, the DVR is more powerful than the analog recorders of the past. -
Page 17: Features
FEATURES Toshiba’s Surveillix DVRs include the following new features: Optimized and Designed for Microsoft ® Windows 7 Embedded ® Up to 16 Camera Inputs Supports up to 4 Relay Outputs on Alarm Activation Supports up to 16 Sensor Inputs for Alarm Control ... -
Page 18: Controls And Connections
CONTROLS AND CONNECTIONS This chapter includes the following information: Input / Output Connector Locations Front Panel Controls and LEDs Rear Panel Connectors... -
Page 19: Front Panel Controls
FRONT PANEL CONTROLS The front panel of the recorder contains the devices that will be commonly used for data removal, retrieval, and backup replacement. The most common components and buttons are shown below. XVSv DVD±RW Drive USB ports Power button Audio ports 32861AA... -
Page 20: Rear Panel Connectors
REAR PANEL CONNECTORS The rear panel of the recorder contains the connectors used to attach cameras, sensors, and relays to the recorder. Below are diagrams that outline the location and description of each connector. XVSv 16 Channel (240V) AC Power Sensor inputs / Control output RCA video out Network... -
Page 21: Card Configurations
CARD CONFIGURATIONS 240V PPS 16 Channel RCA video out Audio Video in 32861AA... -
Page 22: Getting Started
GETTING STARTED This chapter includes the following information: Included Components Setting up the DVR Hardware Optional Components... -
Page 23: Identifying Included Components
Identify the following components to make sure Surveillix recorder everything has been properly included with the new DVR. If any of the following items are missing, contact the dealer to arrange a replacement. -
Page 24: Optional Components
OPTIONAL COMPONENTS To fully utilize the recorder’s potential; several optional Surveillix components are listed below. Contact the dealer for more information. UPS UPS Power Backup UPS Power Backups allow your DVR to remain fully functional even in the event of a power failure. UPS Power Backups also even the fluctuating power current out to provide a consistent, reliable power flow. -
Page 25: Keyboard Setup
KEYBOARD SETUP To attach the keyboard to the recorder, plug the end of the Keyboard into a USB port located on the back of the machine. MOUSE SETUP To attach the mouse to the recorder, plug the end of the mouse into a USB port located on the back of the machine. The mouse uses a cursor called a pointer. -
Page 26: Monitor Setup
MONITOR SETUP The recorder has the following connections available to attach a monitor. HDMI Output To TV / Digital Monitor DVI -D Output To TV / Digital Monitor VGA Output To VGA Monitor. Display Port Output To Digital Monitor Attach the monitor or monitors to the rear of the recorder using the cable supplied by the monitor manufacturer. Refer to the monitor manual for detailed information on how to setup and use it. -
Page 27: Connecting A Ptz Camera
Connecting a PTZ Camera Setting up a PTZ Camera is simple. The recorder comes preassembled with an internal PTZ adapter. The cabling may be run up to 4,000 ft using 22 Gauge Twisted Pair. It is important to understand how the PTZ connects to the recorder. The recorder outputs an RS-232 signal and converts in to an RS-485 signal which is then sent to the PTZ camera. -
Page 28: Turning On The Recorder
(adding a Printer, Monitor, etc for the first time) follow the instructions carefully. After this finishes, the Surveillix recorder software should load automatically and bring you to the main screen. TURNING OFF THE RECORDER To turn off the recorder, select the Exit button on the main screen and select Power Off. -
Page 29: Dvr Basics
DVR BASICS This chapter includes the following information: Becoming familiar with the Display screen Defining Screen Divisions 32861AA... -
Page 30: Setting The Time And Date
Exit to Windows by clicking Exit on the Display screen then and select Restart in Windows Mode. Click the Start button > All Programs > Surveillix > vFormat. Click Export in the System Setting tool section. Select a location to save the settings file and click Save. The DVR Utility will export the recorder settings and automatically close. -
Page 31: Display Screen
DISPLAY SCREEN Each time the recorder starts, the program defaults to the Display screen. The following diagram outlines the buttons and features used on the Display screen. You should become familiar with these options as this is the screen that will be displayed the majority of the time. Current Date / Time CPU meter Opens:... -
Page 32: Live Camera Options
Live Camera Options Right-click a camera on the Display screen to display these options: Full Screen – Expand the camera window to the full size of the screen. Instant Recording – Begin Instant Recording for the selected camera channel. ... -
Page 33: Camera View
CAMERA VIEW Recording Status INSTAN Camera Number and Name Recording Status Indicator The camera status for each camera is displayed in the upper right corner on the Video Display Area. The following are the different states for each camera: Recording Displayed when the camera is currently being recorded to the recorder. -
Page 34: Edit Live View Channels
The live view display will switch to 16 channel mode. To return the recorder to 4 channel mode, repeat steps 2 and 3. Double-click Surveillix Server to restart the recorder software. The live view display will switch to 16 channel mode. To return the recorder to 4 channel mode, run the utility again using the same instructions. -
Page 35: Custom Live View Divisions
Custom Live View Divisions Customize your Live View screen by changing the order of the cameras. Each screen division can be individually customized but a camera can only be displayed once in each group view. Create custom live view divisions: On the Display screen, click Setup, and then click General Setup. -
Page 36: Setup Options
SETUP OPTIONS This chapter includes the following information: Setup Overview Camera Setup Network Video Motion General Frame Setup Schedule Sensor Network Administrative Information ... -
Page 37: Setup Overview
SETUP OVERVIEW The Setup options allow you to optimize your recorder by adjusting things like camera names, restart schedules, recording schedules and more. It is extremely important that you setup your recorder correctly for several reasons. Recording Schedules – Increase the amount of pertinent recorded video that is saved on the recorder by optimizing the recording schedule. -
Page 38: Analog Camera Setup
ANALOG CAMERA SETUP Define camera name Selected camera display Adjust Brightness Hue Connect selected Contrast camera to associated sensors Apply current settings to all cameras Apply system defaults Apply system defaults to all to selected camera cameras Select Channel Select the camera channel to be edited. -
Page 39: Frame Setup
FRAME SETUP The Frame Setup menu allows configuration of the Frames Per Second (FPS), resolution, quality, and sensitivity of camera channels. When configuring the FPS sliders, the blue slider represents the FPS the recorder will record during intensive recording and have available for transmitting to remotely-connected systems. - Page 40 Note The software will not allow the maximum available frames to be exceeded. Note Using H.264 software compression significantly increases the processing load on the Surveillix DSVe and XVSe platforms. If maximum analog PPS is desired in addition to IP video recording or multiple remote clients, Surveillix engineering recommends the addition of the upgraded system CPU (DVR-CPU UPG).
-
Page 41: Network Camera Setup
NETWORK CAMERA SETUP Connect IP cameras to your recorder using a network switch, which is connected to the network port on your recorder. By default, your recorder can display 4 IP camera channels in the Display screen. To change this setting, see the Edit Live View Channels section. Connecting a Network Device Use Global Camera Setup –... -
Page 42: Connecting Manually
Double-click in the Channel field, and then select the Channel you want to assign this camera to. Click Apply. Naming Camera Channels Surveillix recommends assigning a descriptive name to each camera channel for easy identification of where the camera is located. To name your IP camera channels, follow these instructions. On the Display screen, click Setup. -
Page 43: Assigning Dual Streams
Assigning Dual Streams Dual stream support enables you to take advantage of two different streams from an IP camera. One stream can be high definition forensic video, while the other stream can be a lower resolution for live display. This allows SCS or Remote Viewer software to display more cameras while utilizing lower bandwidth and less CPU usage. -
Page 44: Assigning Audio Channels To A Network Device
Assigning Audio Channels to a Network Device In the Display screen, click Setup. Click IP Cameras. Click the Camera Setup tab. Click the Advanced Camera Setup tab. Select the camera you want to record audio from in the Network Cameras Currently in Use field. Select Record Network Audio. -
Page 45: Alarm Recording Mode
Alarm Recording Mode Set your camera to trigger Intensive Recording via Motion detection, Sensor Alarms, or user-instigated Instant Alarm. On the Display screen, click Setup. Click Motion Detection, and then click the Etc. tab. Select your desired camera channel from the Select Channel list. Select Enable Motion Detection on Continuous Recording. -
Page 46: Camera Status And Information
Camera Status and Information The Camera Status and Information tab displays information on all cameras connected to the recorder. In the Display screen, click Setup. Click IP Cameras. Click the Camera Status and Information tab. -
Page 47: Dvr Registration And Upgrade
DVR Registration and Upgrade Have the following information available before registering the DVR upgrade. Product Serial Number: This may be the Product Serial Number displayed on the product sticker on the left side of the recorder; or the unique Product Serial Number provided with the purchase of additional channel licenses. System ID: The System ID is a number that is generated by the recorder. -
Page 48: Unlocking Additional Network Devices
Unlocking the Upgrade Return to Setup > Network Cameras > License. Enter the Unlock Code generated by the Registration Site into the License Key box. Click Register and confirm that the new License Key is listed in the Channel Connection License box. Click OK. -
Page 49: Motion Detection Setup
MOTION DETECTION SETUP The recorder allows the user to adjust several different Motion Settings and create motion detection areas. Set pre-alarm recording duration Set up advanced motion area Reduce analog signal Set post-alarm recording and noise from Motion sensor duration Detection Create a Motion Area On the Display screen, click Setup. -
Page 50: Etc
Etc. Additional motion detection configuration options are found on the Etc. tab. Use this tab to set a camera channel to appear at full screen in the Display screen when a motion or sensor event is detected. You can also set your recorder to enable motion detection even during continuous recording, or play an audio warning when an alarm event is detected. -
Page 51: Ptz Camera Setup
PTZ CAMERA SETUP PTZ cameras can be configured and controlled using the Surveillix recorder software. For instructions on configuring and installing your PTZ camera, refer to the camera manual. Enabling an Analog PTZ Camera Ensure that you have properly connected your analog PTZ camera to the recorder. -
Page 52: Using The Graphical Ptz Controller
Using the Graphical PTZ Controller Arrow buttons In the Display screen, click Pan/Tilt. Click the viewing area of the PTZ camera you want to control. Use the Arrow buttons to control the direction of the PTZ camera. Current To select a new camera, click the video display of a different camera camera on the Display screen display. -
Page 53: General Setup
GENERAL SETUP To access the General Setup window, click Setup in the Live screen, and then click General Setup. Audio The Audio tab allows you to configure audio channels, audio playback, and set a voice warning. Select an audio for use with alarm or sensor event Audio channels list Control gain and live... -
Page 54: Display
Voice Warning The recorder allows users to play a sound file when either a Motion event or Sensor event occurs. This file can be a custom created sound file that is unique to the application. The selected WAV file is played through speakers attached to the recorder. Click Browse, and then locate your .wav file. -
Page 55: General
Display Options To allow the display resolution to automatically adjust to the resolution of any monitor, select Force Window to Full Screen. To manually select a resolution, clear Force Window to Full Screen, and then click Select Resolution. To change the font of your On Screen Display, click Select. Select your desired Font and Size. -
Page 56: Sequencing
Sequencing The Sequencing tab allows you to set the parameters for viewing groups of screens in sequence in the Live View. Auto Sequence Auto Sequencing is available either in the Display screen when Auto Sequencing has been enabled. Auto Sequencing conveniently displays video channels at specified intervals and sequences through each selected channel. -
Page 57: Alarms / Sensor
ALARMS / SENSOR Use the Alarms/Sensor menu to configure your alarms, sensors, and relays. To access the Alarms/Sensors Setup screen, click Setup on the Live screen, and then click Alarms/Sensor. Alarms Intensive on Recording – Enable this function to increase the frame rate and resolution for a camera if an alarm or sensor is activated, or if motion is detected. -
Page 58: Relays
Hybrid Sensor Setup This interface is used to link Hard Contact Sensor Inputs from supported Network Devices to the recorder software. Click Setup. Click Alarms/Sensor, and then click the Sensors tab. In the Hybrid Sensor Setup area, click Setup. Select a camera from the Network Device List. Double-click DVR Relay No, and then select a relay to assign to this camera. -
Page 59: Recording Schedule
RECORDING SCHEDULE The Recording Schedule window allows you to create different recording schedules based on the day, time, and type of recording desired. This window contains the System Restart options. To access the Recording Schedule window, click Setup in the Live screen, and then click Recording Schedule. -
Page 60: Day Of The Week
Day of the Week Click Single Selection Mode or Multi Selection Mode to switch between modes of scheduling by day of the week. Single Selection Mode – Set your schedule one day at a time by selecting the appropriate day. Multi Selection Mode –... - Page 61 Setting Nighttime Continuous Recording In the Schedule Number list, select Sch02. On the Sch02 row, click and drag your mouse to select the hours 0 – 8, and then click Set. Click 1 in the Camera section repeatedly, until a red C (continuous) appears. Repeat for 2 –...
-
Page 62: Creating A Sensor Schedule (Example)
Creating a Sensor Schedule (Example) Sensor inputs can be programmed to instantly trigger recording on one or more camera channels when an alarm event occurs. Note You must first associate the software sensors with the sensors. See the Hybrid Sensor Setup section of this manual for more detail. -
Page 63: Special Day Schedule
Special Day Schedule You can create unique recording schedules for specific days such as holidays or special events. Date Selector (Calendar) Special Day Mode / Normal Day Mode Configured Special Days List Creating/Editing a ‘Special Day’ Schedule Click Normal Day Mode to enable the Special Day Mode. Set a recording schedule as desired. -
Page 64: Alarm Options
Alarm Options Use the Alarm Options section to configure the alarm output for specific events. There are two Alarm Options: Sensor Event – Trigger an alarm output based on a sensor Motion Event – Trigger an alarm output based on motion detection Motion can be designated as an alarm event. -
Page 65: Setting A Restart Schedule
Setting a Restart Schedule The Power Off Options section allows you to define a schedule wherein the recorder automatically restarts according to specified parameters. Create System Restart Schedule In the Display screen, click Setup. Click Recording Schedule. Click Power Off Options. Select Enable for each day of the week that a restart is desired. -
Page 66: Network Setup
Emergency Port – Connect with the Alarm Monitor software (default port: 2001). Center Port – Connect with the Surveillix remote software (Remote, SCS, the Surveillix App). This port must be specified in the remote software to connect to the recorder (default port: 2000). -
Page 67: User Management
USER MANAGEMENT The User Management screen allows the administrator to create, edit, and delete user accounts. Each user account can be assigned different privileges to limit the usage of the recorder system. Users can be given administrator privileges by enabling all rights, however only the true administrator account can access the User Management screen. -
Page 68: Changing The Administrator Password
User Rank The User Ranking structure allows the option to assign a privilege level to users who access the recorder remotely 1-10. (1 is the highest privilege level). For example: Since only one user is allowed to use the PTZ controls at any one time, a user with a rank of 1 will take precedence over a user with a rank of 2 if both are attempting to use PTZ controls. -
Page 69: Storage Management
STORAGE MANAGEMENT Status Check / Email Use the Status Check/Email tab in Storage Management to configure settings for status checks and email recipients when status checks require attention. This function can keep you apprised of events detected by your system without requiring you to check the recorder each day. -
Page 70: Storage Check
Storage Check Set up the General and Users tabs first. Click the Storage Check tab. Select Enable. Define the frequency of storage checks (in minutes). Select an additional Alert Option if desired: Beep or Popup Message. Add a Comment that will be seen in the email message if desired. Click Apply to save your settings. -
Page 71: Smart Alert
Select the type of SMART event to trigger an action. If selecting for temperature checks, define the maximum HDD temperature. Note Surveillix recommends a temperature threshold of 150° F (65° C) if you choose to use this function. Select an Action Method: Beep Alert, Popup Message Alert, or Email Alert. -
Page 72: Smart Information
MySurveillix Set up the General and Users tabs first. Click the MySurveillix tab. Select Use MySurveillix. Enter a numeric Security Code if desired (this is an additional security measure to prevent unauthorized users from adding the recorder to their MySurveillix account). Define the Send Time to designate the time the recorder will send updates to MySurveillix. -
Page 73: Data Management
Data Management The Data Management tab displays the partition scheme and health status of the Hard Disk Drives in the recorder. Use this tab to troubleshoot a recorder, or verify the amount of Hard Drive storage installed. This function is native to the Windows operating system. For more information about Disk Management, consult a Windows 7 manual. -
Page 74: System Information
System Information The Log Management window provides you the options to overwrite log files or schedule log deletion. Basic Information The Information display allows users to define the site code necessary for connecting to remote software, save comments relative to the recorder, store tech support and contact number information, and see the currently running server software version. -
Page 75: Setting Up Ddns
Program Management Setting up DDNS Dynamic Domain Name System (DDNS) is a service that provides a static address to simplify remote connection to the recorder. This service is most useful for installations where the WAN (public) IP address is dynamic (changes from time to time). Most public IP addresses are dynamic unless a static address has been specifically ordered from the internet service provider. -
Page 76: Log Files
Performance Monitor The Performance Monitor (perfmon.exe) brings the Windows Utility Performance Monitor to the foreground. This troubleshooting tool is to be used when working with technical support to diagnose a problem with your recorder. Log Files Use the Log File tab to view logs for system, event, alarm, and drive check statuses by date. You can also export logs, and manage how the log files are stored. - Page 77 Set Up Log Management Options In the Display screen, click Setup. Click System Information, and then click the Log Files tab. Click Log Management. Select Log File Overwrite Option to enable. Select Overwrite or Do Not Overwrite. If Overwrite is selected: Enter a maximum Log File Size.
-
Page 78: Instant Recording
INSTANT RECORDING The Instant Recording feature allows users to manually initiate recording on a specific camera, overriding the current schedule. When Instant Recording is activated the recorder flags the clip as an event so Instant Recording instances can be found using the Index Search Instant Recording can be used, for example, when a suspicious object or person is detected and you want to flag that section of video for easy retrieval at a later date. -
Page 79: Search
SEARCH This chapter includes the following information: Search Overview Basic Search Printing an Image Daylight Savings Time Index Search Preview Search Status Search Object Search Motion Search Search in Live 32861AA... -
Page 80: Search Overview
SEARCH OVERVIEW The recorder has several options that allow the user to easily find recorded video. From Motion/Sensor indexing to calendar views highlighting days with recorded video; the recorder is equipped to help you quickly find a specific video or event. This chapter describes how to use the Search features. -
Page 81: Adjust The Brightness Of An Image
Adjust the Brightness of an Image Select an image to adjust by double-clicking on the desired image. Multiple images cannot be adjusted at one time. Move the Bright slide bar to the right or left to adjust the brightness. Reset the Brightness by moving the slider back to the center of the bar. Zooming in on an Image Select an image to adjust by double-clicking on the desired image. -
Page 82: Performing A Basic Search
PERFORMING A BASIC SEARCH There are several different types of searches that can be performed on the recorder. The most basic involves selecting the date, time, camera, and clicking play. Click Select Date. Select a date on the calendar. Select a time by clicking the up and down arrows to the right of the time display. Click OK. -
Page 83: Save To Jpg Or Avi
SAVE TO JPG OR AVI Your recorder can export single images in a JPG Image file format and save video clips in an AVI format. JPG and AVI file formats are the most commonly used graphical formats today. Virtually every computer offers some type of support for these file formats which make them the most ideal formats to use. -
Page 84: Bookmarks
Bookmarks Use bookmarks to mark a video clip during a search. Export bookmarked data using the Clip Backup feature. Locate your desired video using the Search screen. Stop playback at the beginning of the desired clip. Right-click the video and select BookMark Start. Click the play button to continue playback. -
Page 85: Clip Backup
Clip Backup Within the Save option, Clip Backup can also be utilized to backup a single camera or multiple channels. The Clip Backup option gives you the ability to choose a backup time frame, choose a specific camera or cameras, add memos, and even include the Backup Viewer if needed. -
Page 86: Index Search
INDEX SEARCH Using the Index Search can greatly decrease the amount of time spent searching through saved video. The Index Search allows you to perform a search based on criteria such as Sensor, Motion and Instant Record events. Performing an Index Search Click Calendar on the Search screen to select the date to search. -
Page 87: Preview Search
PREVIEW SEARCH Preview Search can be used in a number of circumstances to quickly find an exact moment where an event, such as a theft, occurred. The Preview Search gives a 24 Hour visual overview of a single camera by separating a 24 hour period (1 day) into 24 images, one image for each hour of the day. -
Page 88: Performing A Preview Search
Performing a Preview Search Select a single camera channel. Click Preview. 24 images display. If there is no recorded video during a portion of the day, “No Image” will be displayed where the image would be. Refine the search by double-clicking on an image to select it. 6 images display. If needed, return to the previous 24-image view by double-right-clicking on any image. -
Page 89: Object Search
OBJECT SEARCH Object Search is a powerful search utility that is used to search a region on the video for any motion changes. Results are neatly displayed and can be viewed quickly. Performing an Object Search Select a single camera channel. Click Object. -
Page 90: Motion Search
MOTION SEARCH The Motion Search provides a dynamic display of the levels of motion in recorded video. Adjust the level of motion to only play clips of video at or above that level. To enable motion data to be saved for Motion search, ensure that you select the following settings: On the Motion setup page under Motion Regions, select Detect Detail Motion Area. -
Page 91: Search In Live
SEARCH IN LIVE The Search in Live feature allows users to review events immediately while monitoring live video. Pause, rewind, and resume live video within seconds of an alarm event or suspicious activity. Move the mouse cursor over the desired live video display on the Live Display screen. Right-click and choose Search In Live (or click the scroll wheel on the mouse). -
Page 92: Pan / Tilt / Zoom
PAN / TILT / ZOOM This chapter includes the following information: Overview Setting up the PTZ Creating and Viewing a Preset Position Creating and Viewing a Preset Pattern... -
Page 93: Pan /Tilt / Zoom Overview
PAN /TILT / ZOOM OVERVIEW The PTZ controls within the recorder allow you to control PTZ cameras without accessing them directly. This can increase the usefulness of your recorded video. Using the PTZ controls, you can create custom preset configurations that can continuously sweep across large areas. -
Page 94: Advanced Ptz Setup
ADVANCED PTZ SETUP General The General tab in PTZ Setup allows you to reverse PTZ direction function if necessary, enable the use of Onscreen Compass for PTZ control, set the speed for your camera, and set the camera ID. Reverse PTZ controls Enable Onscreen Compass PTZ status when closing PTZ controls on recorder... -
Page 95: Ptz Presets/Tours
Since every PTZ camera is different, the function of these options can vary slightly. The Surveillix recorder provides an easy way to access the camera options. For explanations of what those options are, please refer to the user manual for the camera. -
Page 96: Using The Graphical Ptz Controller
Using the Graphical PTZ Controller Arrow buttons In the Display screen, click Pan/Tilt. Click the viewing area of the PTZ camera you want to control. Use the Arrow buttons to control the direction of the PTZ camera. Current To select a new camera, click the video display of a different camera camera on the Display screen display. -
Page 97: Understanding Tours
Understanding Tours Tour Method – Select a Tour to program. Setting: Start Pos / End Pos – Define a Mimic Tour. The Start Position button begins the recording process. The Stop Position ends it. Privacy Zone – Define an area that the camera will not view to create a Privacy Zone. -
Page 98: Backing Up Video Data
BACKING UP VIDEO DATA This chapter includes the following information: Overview Saving Video to a DVD Saving Video from a Single Camera Scheduling Regular Video Backup... -
Page 99: Backup Overview
The recorder backs up video data using a proprietary compression format that can only be read by the Surveillix Backup Viewer software. This ensures the integrity of the data. -
Page 100: General Backup Overview
General Backup Overview The General Backup screen is used for performing bulk backup of video recorded by all cameras for a selected period, or periods, to a specified storage location. Calendar Select Additional Drive/Folder Display all Hard Drives Define Drive Select Remote Network Location Priority Hour / Minutes... -
Page 101: Clip Backup Overview
Clip Backup Overview The Clip Screen is used for backing up video recorded by individual cameras for a selected period of time to a specified storage location. Performing a Clip Backup On the Display screen, click Backup. Click the Clip tab. Set the Start Time and End Time under Time Setup. -
Page 102: Scheduled Screen Overview
Note The default ID is DVR Admin, and the default Password is dvr4321. Click OK. Close the DVR Utility window, and then double-click Surveillix Server to restart your Server software. Specifying Scheduled Backup Drives In order to use the Scheduled Backup feature one or more storage drives or partitions connected to the recorder must be specified as a backup drive. -
Page 103: Performing A Scheduled Backup
Performing a Scheduled Backup Click Backup on the Display screen. Click the Schedule tab at the top of the Backup Center window. Select the blocks of time to back up using the Hour/Minute Grid. Blocks of time with recorded video are highlighted in green. Blocks of time selected for backup are highlighted in red. -
Page 104: Lan / Isdn / Pstn Connections
LAN / ISDN / PSTN CONNECTIONS This chapter includes the following information: Overview Configuring TCP/IP Settings Connecting to a LAN LAN / ISDN / PSTN Connections... -
Page 105: Lan Overview
Since connecting the recorder to a network can be extremely complex (depending on the network), this Surveillix recorder manual will cover only the basics. It is suggested that the recorder administrator consult the Vendor or IT Administrator before attempting to create or connect to a LAN. -
Page 106: Ldap Integration
LDAP INTEGRATION This chapter includes the following information: Installing LDAP... -
Page 107: Features
FEATURES The instructions below are for LDAP with Server Software version 3.6.36 and above. The recorder server does not need to be joined to the Domain. The recorder server will query the LDAP server for accounts and authorization levels. ... - Page 108 Go to the Active Directory Users and Computers application. You should now see an OU called DVR with an OU inside of it named the same as the Site Code above (example 100-000). You can now add users within Active Directory to the groups the recorder has created. When a user belongs to a group he or she will have access (or be denied access in the case of Audio or Camera channels) to that permission on any recorders with that site code.
-
Page 109: Web Viewer
WEB VIEWER This chapter includes the following information: Overview Configuring the Web Viewer 32861AA... -
Page 110: Web Viewer Overview
WEB VIEWER OVERVIEW The recorder allows you to access video using Microsoft® Internet Explorer® 7 and above. Highlights: View Live Video from most computers Username and Password protected Easy to use graphical interface Basics: 75 users can access the Web Viewer simultaneously (if network bandwidth allows). The Web Viewer is an easy, secure way to view live video from virtually any computer with an internet connection using Microsoft Internet Explorer. -
Page 111: Configuring The Recorder For Remote Connection
Note If no additional user accounts have been created the administrator account will be the only account that can connect to the recorder remotely. The recorder server is now ready to receive incoming connections from Remote Software, SCS, the Surveillix App, or the Web Viewer. -
Page 112: Included Software Setup
INCLUDED SOFTWARE SETUP This chapter includes the following information: The Surveillix App Overview Emergency Agent Overview Remote Software Overview Digital Verifier Backup Viewer... -
Page 113: The Surveillix App Overview
The Toshiba Surveillix App software, available for iPhone, Android, and Blackberry, allows you to access your Surveillix recorder from almost anywhere on your mobile device. The Toshiba Surveillix App gives you the ability to view live video from your cameras using a simple interface. -
Page 114: Configuring The Client Pc
Emergency Agent window refer to the Emergency Agent window section later in this chapter. Open the Emergency Agent window on the Client PC - Start >All Programs > Surveillix > Emergency Agent > Emergency Agent. Right-click in the DVR List and select New. Enter the DVR Code, DVR Name, and IP Address of the recorder. -
Page 115: Emergency Agent Window
Emergency Agent Window Video Display Thumbnails DVR List Event Level Event Type Event List Edit Memo Save Memo Memo Text Box Level Buttons Filter Event List Select a recorder from the DVR List in the Filter Options section. Select the Date to include. Select the type of Events to include. -
Page 116: Search Alarm Window
Search Alarm Window Video Display Play Controls Go to Next Event Alarm Go to Previous Event Event Informatio Export Quality It may be necessary to reduce the overall size of an AVI file; for example, to email to someone. AVI file sizes can be reduced by reducing the image quality. -
Page 117: Remote Software Overview
The recorder was specifically designed to be fully operated and maintained remotely. It connects using the standard TCP/IP protocol thorough connection types such as DSL, Cable Mode, T1, ISDN, LAN, and more. The Surveillix Remote software allows you to view live video, search through archived video, export images and video clips and have virtually full Setup control. -
Page 118: Remote Software Setup
Import/Export saved configurations Select Site Information Select Start > Programs > Surveillix > Remote > Surveillix Remote Center. The Surveillix Remote Software opens and the Local Connection window opens. Click New to open the Site Info window. Select the Site Type and enter a Site Name. The Site Name will be the name displayed inside the connection box to help identify the unit. - Page 119 In order to access the recorder remotely, the recorder Server must be setup to allow remote connections. Time Out Value Specifies a value (in seconds) to wait for a signal from the Surveillix Remote Client. If a signal is not received by that time, the connection is dropped. Center Port Used to transfer the connection data.
-
Page 120: Digital Verifier Overview
When the Setup Complete window appears click Finish. Installation is complete. Using the Digital Verifier Open the Digital Verification program by selecting Start > Programs > Surveillix > Digital Verifier > Digital Signature Verifier. Click the Browse button to load the JPG image. -
Page 121: Backup Viewer Overview
When the InstallShield Wizard Complete window appears click Finish. Setup is now complete. Loading Video from DVD or Hard Drive Open the Backup Viewer program: Start > Programs > Surveillix > Backup Viewer > Backup Viewer. Click Open. The Total Backup Search window will open. -
Page 122: Scs Overview
SCS Overview SCS software is Network DVR Management Software; a powerful utility that allows 100 or more recorders to be controlled using one computer. This software allows you to view live video, search saved video, edit and configure setup on each recorder, and import maps of buildings and other locations.