Table of Contents
Advertisement
Quick Links
Advertisement
Table of Contents

Related Manuals for Asus PCI-L101


Summary of Contents for Asus PCI-L101
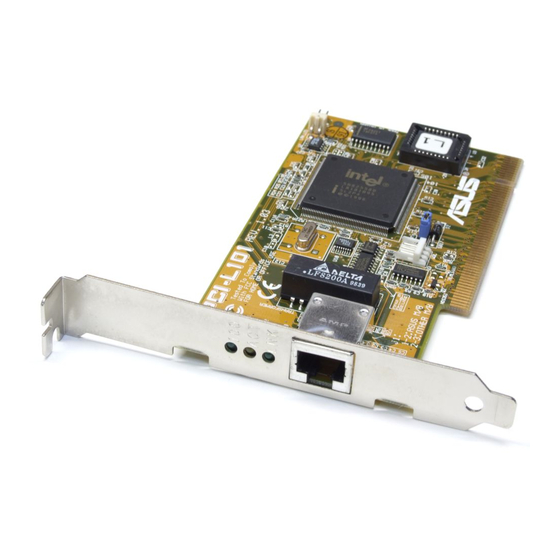
- Page 1 PCI-L101 10/100 Fast Ethernet PCI Card USER’S MANUAL...
- Page 2 Product warranty or service will not be extended if: (1) the product is repaired, modified or altered, unless such repair, modification of alteration is authorized in writing by ASUS; or (2) the serial number of the product is defaced or missing.
-
Page 3: Asus Contact Information
Technical Support BBS: +1-408-474-0569 Email: tsd-usa@asus.com.tw WWW: www.asus.com ASUS COMPUTER GmbH Marketing Info Address: Harkort Str. 25, 40880 Ratingen, BRD, Germany Telephone: 49-2102-445011 Fax: 49-2102-442066 Email: info-ger@asus.com.tw Technical Support BBS: 49-2102-448690 Email: tsd-ger@asus.com.tw Hotline: 49-2102-499712 ASUS PCI-L101 User’s Manual... -
Page 4: License Agreement
APPLICABLE LAW: This Agreement is governed by the laws of the State of California and the United States, including patent and copyright laws. Any claim arising out of this Agreement will be brought in Santa Clara County, California. ASUS PCI-L101 User’s Manual... -
Page 5: Table Of Contents
Shared hubs ................ 25 Switching hubs ..............25 V. APPENDIX ..................26 Using Wake On LAN ..............26 Question and Answer ............... 26 Pin Definitions ................27 RJ45 Connector ................ 27 Twisted-Pair Cable ..............27 Glossary ..................28 ASUS PCI-L101 User’s Manual... - Page 6 Canadian Department of Communications Statement This digital apparatus does not exceed the Class B limits for radio noise emissions from digital apparatus set out in the Radio Interference Regulations of the Canadian Department of Communications. ASUS PCI-L101 User’s Manual...
-
Page 7: Introduction
This User’s Manual ASUS Driver & Utility Diskette The ASUS PCI-L101 is a 32-bit 10/100Mbs Ethernet network interface card for PCI local bus-compliant computers. It supports the bus mastering architecture, and auto- negotiation feature which make it possible to use the common twisted-pair cabling with RJ45 connectors for both 10Mbps and 100Mbps connections. -
Page 8: Led Indicators
RJ45 port. The rate of flashing is proportional to the amount of network traffic. Green Link - This LED monitors 10Base-T and 100Base-TX connections. This LED lights to indicate a successfull network connection, and remains steady if the connec- tion is stable. ASUS PCI-L101 User’s Manual... -
Page 9: Installation
Jumper Setting If you are using the ASUS PCI-L101 on an ASUS motherboard, leave the jumper on its defaut setting of “ASUS.” If you are using another brand of motherboard, set the jumper to “Other.”... -
Page 10: Installation Procedures
9. Attach the twisted-pair cable using the RJ45 connector 10. Replace the computer’s cabinet cover. 11. Power on the computer. 12. Run the diagnostics program to check the card’s configurations. 13. Install the driver. ASUS PCI-L101 User’s Manual... -
Page 11: Connect The Network Cable
Installing the WOL Power Cable 1. Make sure your computer is completely unplugged from the power outlet. 2. Locate the WOL connector on the ASUS PCI-L101 adapter. Attach one end of the WOL cable to the adapter. Note that the connector is keyed. -
Page 12: Drivers
2. Insert the ASUS Configuration and Drivers disk in a floppy drive, switch to that drive, and at the DOS prompt, type “SETUP”. 3. If you have more than one ASUS PCI-L101 PCI adapter in your computer, an adapter selection menu appears on the screen. Select the adapter you want by not- ing the Ethernet address. - Page 13 2. Run the appropriate configuration program for the installed adapter and set it up as a responder. 3. Return to the computer with the new adapter. Run Setup and make the new adapter a sender. Test the adapter. ASUS PCI-L101 User’s Manual...
-
Page 14: Windows Nt Server Or Workstation
Automatic configuration PCI computers automatically detect and configure PCI-compliant adapters while boot- ing. The ASUS PCI-L101 PCI adapter IRQ level and I/O address are automatically set by the BIOS each time you start your computer. Start your computer to automatically configure the adapter. Configuration is complete when Windows NT starts or the DOS prompt appears. - Page 15 3. When the list of adapters appears, scroll to the end of the list and select <Other> Requires disk from manufacturer. 4. Insert the ASUS Configuration and Drivers disk in the A: drive and click OK. 5. Select the “Intel EtherExpress PRO Adapter” and click OK.
-
Page 16: Windows 95
Automatic Configuration PCI computers automatically detect and configure PCI-compliant adapters while boot- ing. The ASUS PCI-L101 PCI adapter IRQ level and I/O address are automatically set by the BIOS each time you start your computer. Start your computer to automatically configure the adapter. Configuration is complete when Windows 95 starts. - Page 17 5. Click the Driver tab, then click Change Driver. 6. Select Network Adapters and click OK. 7. Click Have Disk from the window that appears. Insert the ASUS Configuration and Drivers Disk and click OK. 8. Select the “Intel 82558-based Integrated Fast Ethernet for WfM” and click OK.
-
Page 18: Installing Multiple Lan Cards
You can correlate the PCI slot number to the adapter by using the Ethernet address that is printed on a label on the adapter. Run Setup from the ASUS disk to view the Ethernet address and slot number for each installed adapter. For more information, see the README files. - Page 19 For more information, see the README file for NetWare servers. Windows NT While running Windows NT: 1. From the Control Panel, double-click the Intel PROSet icon. 2. PROSet examines your system and displays the Adapter Setup window. ASUS PCI-L101 User’s Manual...
- Page 20 See the Adapter Installation and Special Configurations README file. “Push” Instal- lation for Windows 95 If you are a LAN Administrator setting up server-based push installation of Windows 95 as defined in Microsoft Windows 95 Resource Kit, additional steps are required for this adapter. ASUS PCI-L101 User’s Manual...
-
Page 21: Troubleshooting
Check the LED lights on the adapter. The ASUS PCI-L101 adapter has three diagnostic LEDs above the cable connector. These lights help indicate if there’s a problem with the connector, cable, or hub. The table below describes the LEDs. -
Page 22: Testing The Adapter
B (for example, E100BODI.DOS). Drivers that support previous ver- sions of the ASUS PCI-L101 PCI adapter do not support this version of the adapter. Make sure the hub port and the adapter have the same duplex setting. - Page 23 May not be using four-pair cable for TX wiring. The adapter stopped working when another adapter was added to the computer. • Make sure the cable is connected to the ASUS PCI-L101 PCI adapter. • Make sure your PCI BIOS is current.
-
Page 24: Technical Information
PCI slot #: Slot where the adapter is installed Master: ENABLED Slave: ENABLED Latency timer: 40 Interrupt: Choose an IRQ from the list Edge-level: Level The exact wording of these parameters varies with different computers. ASUS PCI-L101 User’s Manual... -
Page 25: Fast Ethernet Wiring
EIA 568 wiring standard. Fast Ethernet Hubs and Switches The two basic types of hubs are shared hubs and switching hubs. ASUS PCI-L101 adapters can be used with either type of hub for 10 Mbps. At 100 Mbps, a TX hub or switch is required. -
Page 26: Appendix
A: To enable Wake-On-LAN function, your system requires Ethernet LAN adapter card that can activate Wake-On-LAN function, a client with Wake-On-LAN capa- bility, and software such as LDCM Rev. 3.10 or up that can trigger wake-up frame. ASUS PCI-L101 User’s Manual... -
Page 27: Pin Definitions
2 OTD- 3 OTD+ 3 IRD+ 6 OTD- 6 IRD- LAN Activity Output Signal Intel Chipset Uplink 12345678 12345678 12345678 12345678 12345678 12345678 12345678 12345678 12345678 RJ45 ASUS Wake on LAN Output Signal Motherboard type Other ASUS PCI-L101 User’s Manual... -
Page 28: Glossary
This standard is intended to encompass several media types and techniques for signal rates from 1Mb/s to 100Mb/s. Interrupt (IRQ) Signal suspending a program temporarily and transfers control to the operating system when input or output is required. Light emitting diode Mbps Megabits per second ASUS PCI-L101 User’s Manual...