Table of Contents
Advertisement
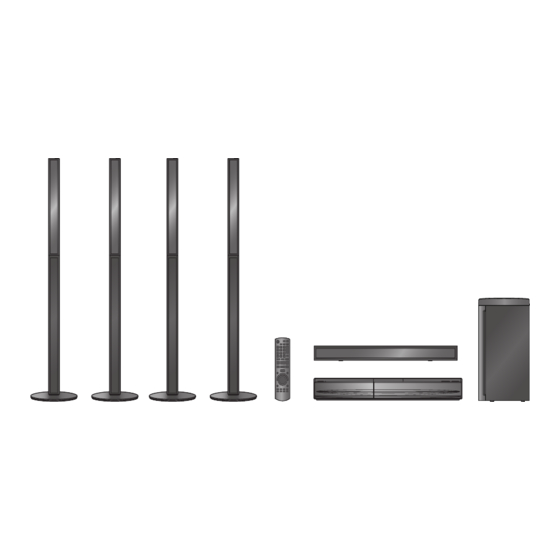
Blu-ray Disc Home Theater Sound System
Dear customer
Thank you for purchasing this product.
For optimum performance and safety, please read these instructions carefully.
Before connecting, operating or adjusting this product, please read the instructions completely.
Please keep this manual for future reference.
GN
Operating Instructions
Model No.
The illustration shows the image of the unit SC-BT737.
SC-BT737
SC-BT337
SC-BT230
VQT2Q55
Advertisement
Table of Contents

Related Manuals for Panasonic SC-BT737


Summary of Contents for Panasonic SC-BT737
-
Page 1: Operating Instructions
SC-BT737 Model No. SC-BT337 SC-BT230 The illustration shows the image of the unit SC-BT737. Dear customer Thank you for purchasing this product. For optimum performance and safety, please read these instructions carefully. Before connecting, operating or adjusting this product, please read the instructions completely. -
Page 2: Safety Precautions
Getting started Safety precautions CAUTION! THIS PRODUCT UTILIZES A LASER. USE OF CONTROLS OR ADJUSTMENTS OR Placement PERFORMANCE OF PROCEDURES OTHER THAN THOSE SPECIFIED HEREIN MAY RESULT IN Set the unit up on an even surface away from direct sunlight, HAZARDOUS RADIATION EXPOSURE. -
Page 3: Unit And Media Care
Lens cleaner: RP-CL720E ≥ This lens cleaner may not be for sale depending on the region. ≥ This lens cleaner is primarily for use on Panasonic DVD recorders (DIGA), but it is also suitable for use on this unit. R6/LR6, AA ∫... -
Page 4: Accessory
Indicates features applicable to: Getting started ≥ These operating instructions are applicable to models [BT737]: SC-BT737only SC-BT737, SC-BT337 and SC-BT230. Unless otherwise [BT337] : SC-BT337 only indicated, illustrations in these operating instructions [BT230]: SC-BT230 only are of SC-BT737. ≥ Operations in these instructions are described mainly... -
Page 5: Table Of Contents
Table of contents Safety precautions ..........2 Getting started Unit and media care .......... 3 Enjoying TV with unit’s speakers .....30 Using the remote control ........3 •Surround sound effects ..........30 •Sound modes ..............30 Accessory ............4 •Making settings for digital audio input ......30 Control reference guide ........ -
Page 6: Control Reference Guide
Control reference guide Remote control Turn the unit on and off ( Display the Home screen of VIERA CAST ( Select title numbers, etc./Enter numbers or characters [CANCEL] : Cancel Basic playback control buttons ( Select preset radio stations ( Show status messages ( MUTE Show Top Menu/DIRECT NAVIGATOR (... -
Page 7: Main Unit (Front)
Main unit (Front) e.g., [BT737] VOLUME OPEN/CLOSE iPod Pull open. SD CARD SETUP MIC SELECTOR 11 12 13 14 Standby/on switch (Í/I) ( USB port ( Press to switch the unit from on to standby mode or vice [BT737] [BT337] Connect Auto speaker setup microphone versa. -
Page 8: Playable Discs/Cards/Usb Devices
Playable discs/Cards/USB devices Type Logo examples Type detail Playable contents* BD-Video Video Video BD-RE JPEG [BD] Video BD-R DivX ® DVD-Video Video Video DVD-RAM AVCHD JPEG Video DVD-R AVCHD [DVD] DivX DVD-R DL JPEG DVD-RW Video AVCHD +R/+RW/+R DL — Music CD Music [CD-DA] DivX... -
Page 9: Region Management Information
≥ Useable memory may be slightly less than the card capacity. ∫ USB device ≥ This unit supports connecting a USB memory, digital camera and video camera produced by Panasonic, etc. It is not warranted that all USB devices will work with this unit. DVD-Video ≥... -
Page 10: Step 1: Preparing The Speakers
STEP 1: Preparing the speakers Assembling the speakers Preparation [BT737] [BT337] Caution ≥ To prevent damage or scratches, lay down a soft cloth and ≥ Do not stand on the base. Be cautious when children are perform assembly on it. near. -
Page 11: Speaker Assembly Option
Connecting the speaker cables. Insert the wire fully, Use of the speaker cable stickers is convenient taking care not to insert beyond the wire insulation. when making cable connections. e.g. Surround speaker [BT230] e.g. Front speaker (L) FRONT r: White ... -
Page 12: Step 2: Positioning
The main unit is designed to enjoy the 7.1ch surround sound. ≥ Place the wireless system within approximately 10 m By connecting 2 units of the Panasonic wireless system from the main unit, and in a horizontal position with the SH-FX71 with 4 speakers, more theatre-like effect can be top panel faced upward. -
Page 13: Step 3: Connections
STEP 3: Connections Turn off all equipment before connection and read the appropriate operating instructions. Do not connect the AC mains lead until all other connections are complete. Speaker cable connection Connect to the terminals of the same colour. [BT737] [BT337] ... -
Page 14: Connection To A Tv
(as shown on the cover). It is recommended that you ≥ After making the digital audio connection, make settings to use Panasonic’s HDMI cable. When outputting 1080p signal, suit the type of audio from your digital equipment ( 30). - Page 15 Connection for the best picture and audio OPTICAL AV IN A HDMI cable (not included) B Optical digital audio cable (not included) DIGITAL AUDIO IN DIGITAL AUDIO IN DIGITAL AUDIO IN ≥ For the TV audio, an audio cable (not included) can be also OPTICAL OPTICAL OPTICAL...
-
Page 16: Radio Antenna Connection
Radio antenna connection Using an indoor antenna Main unit A FM indoor antenna (included) B Adhesive tape Affix this end of the antenna where reception is best. FM ANT (75 ) Using an outdoor antenna Use outdoor antenna if FM radio reception is poor. e.g., ... -
Page 17: Connection To A Broadband Network
Adaptor DY-WL10 (optional) thoroughly when using it. devices. ≥ For up to date compatibility information on your Wireless ≥ Inserting any cable other than a LAN cable in the LAN router (Access Point) refer to terminal can damage the unit. http://panasonic.jp/support/global/cs/ VQT2Q55... -
Page 18: Step 4: Ac Mains Lead Connection
STEP 4: AC mains lead connection [BT737] [BT337] Wireless system AC IN AC IN Main unit A AC mains lead (included) A AC mains lead (included) B To a household mains socket B To a household mains socket ≥... -
Page 19: Step 6: Smart Setup / Easy Setup
Setup menu. ( ≥ Language and TV Aspect settings are automatically retrieved if this unit is connected to a Panasonic TV (VIERA) supporting HDAVI Control 2 or later via an HDMI cable. ≥ Keep as quiet as possible during the Auto speaker setup. Excessive background noise may lead to incorrect settings. -
Page 20: Network Easy Setting
2 Press [RETURN] and then press [OK]. Network Easy Setting Then select an item on the following screen which corresponds to the authentication type noted down in step Select “Wired” or “Wireless” and press [OK]. left). Network Easy Setting (Connection Test) Access Point Connection Setting Select a connection mode. -
Page 21: Firmware Updating
Select “Yes” and press [OK] to check network connection again. Select “No” and press [OK] to finish Network Easy Setting. Firmware updating Occasionally, Panasonic may release updated firmware for this Check the Display unit that may add or improve the way a feature operates. following These updates are available free of charge. -
Page 22: Step 7
≥ When removing the SD card, press on the centre of the card and pull it straight out. Press [3, 4] to select the code (1 or 2) and ≥ If you connect a Panasonic product with a USB connection press [OK]. cable, setup screen may be displayed on connected equipment. -
Page 23: Start Menu
START menu Playlists: You can play playlists created on DVD-VR. Major functions of this unit can be operated from the START To Others menu. Setup: ( Press [START]. Card Management: ( Press [3, 4] to select the item and press To exit the screen [OK]. -
Page 24: Enjoying Sound Effects From All Speakers
Enjoying sound effects 3 Press [3] (increase) or [4] (decrease) to adjust the speaker level for each speaker. s6 dB to r6 dB from all speakers ∫ Changing the sound modes 1 Press [SOUND] several times to select the mode. ≥... -
Page 25: Playing Video Contents
Playing video contents Playback Other operations during play These functions may not work depending on the media and [BD] [DVD] [CD] [SD] [USB] contents. Preparation Stop Turn on the television and select the appropriate video input on the television. Press [∫ STOP]. Press [Í] to turn on the unit. -
Page 26: Useful Functions
To turn on/off secondary audio Useful functions 1 Press [DISPLAY]. 2 Press [3, 4] to select the “Disc” menu and press [1]. 3 Press [3, 4] to select the “Signal Type” menu and press [OK]. Press [OPTION]. 4 Press [3, 4] to select the “Soundtrack” under “Secondary Video”... -
Page 27: Regarding Divx
Playing music Regarding DivX [DVD] [CD] [USB] ABOUT DIVX VIDEO: DivX ® is a digital video format created by DivX, Inc. This is an (DVD-R/-R DL, music CD, CD-R/RW, USB device) official DivX Certified device that plays DivX video. Visit www.divx.com for more information and software tools to convert your files into DivX video. -
Page 28: Playing Still Pictures
Playing still pictures Useful functions [BD] [DVD] [CD] [SD] [USB] (BD-RE, DVD-RAM/-R/-R DL, CD-R/RW, SD Card, Press [OPTION]. USB device) Select an item and press [OK]. While “Album View” or “Picture View” screen is displayed Insert a disc, SD card or USB device. You can display still pictures one by one at a Start If the menu is displayed, press [3, 4] to select the item... -
Page 29: Listening To The Radio
Listening to the Radio Radio Listening/confirming the preset channels Presetting stations automatically Press [RADIO] to select “FM”. Press the numbered buttons to select the Up to 30 stations can be set. channel. Press [RADIO] to select “FM”. To select a 1-digit number e.g., 1: [1] [OK]. -
Page 30: Enjoying Tv With Unit's Speakers
Enjoying TV with unit’s Making settings for digital audio input speakers Select to suit the type of audio from the DIGITAL AUDIO IN Preparation terminals on the main unit. Turn on your TV and select the appropriate audio input mode [AUX, ARC, D-IN 1 or D-IN 2] to suit the connections to this Press [EXT-IN] several times to select “D-IN 1”... -
Page 31: Linked Operations With The Tv (Viera Link "Hdavi Control Tm ")
≥ This unit supports “HDAVI Control 5” function. “HDAVI Control 5” is the newest standard (current as of December, 2009) for Panasonic’s HDAVI Control compatible equipment. This standard is compatible with Panasonic’s conventional HDAVI equipment. ≥ Please refer to individual manuals for other manufacturers’ equipment supporting VIERA Link function. -
Page 32: Easy Control Only With Viera Remote Control
Playing music continuously even after turning off the TV (When the unit is connected to a Panasonic TV (VIERA) that Main unit supports HDAVI Control 2 or later.) Select “Video”... -
Page 33: Ipod/Iphone Playback
iPod/iPhone Playback Other methods of playback Preparation Press [START]. ≥ Make sure that the “IPOD” source is selected. Press [iPod] to select the source. Press [3, 4] to select “Menu” and then ≥ To view photos/videos from the iPod/iPhone press [OK]. Operate the iPod/iPhone menu to make the appropriate Press [3, 4] to select “Play Mode”... -
Page 34: Enjoying Viera Cast
Select the subtitle style. permanently without notice. Therefore, Panasonic will make no warranty for the content or the continuity of the services. ≥ All features of websites or content of the service may not be available. - Page 35 Play Sound Repeat Play Sound Effects *1, *2 (Only when the elapsed time is being displayed on the unit’s (Discs recorded at 48 kHz or less) display.) This feature gives you brighter sound by increasing the high frequency portion of the audio. Select the item which you want to repeat.
-
Page 36: Dlna Feature
DLNA Certified media server (such as a PC with Windows 7 unit via the network installed etc.) connected to the home network with this unit. You also can enjoy viewing them with Panasonic DLNA Press [START]. compatible recorders (DIGA). Press [3, 4] to select “Network” and press ≥... -
Page 37: Setup Menu
Setup menu Useful functions for when playing back pictures Change the unit’s settings if necessary. The settings remain intact even if you switch the unit to standby. The following operations are possible when playing back pictures from connected equipment. Press [START] and press [3, 4] to select “To Others”... - Page 38 Subtitle Preference Choose the language for subtitle. BD-Video Secondary Audio Select whether to mix or not mix the primary audio and ≥ If “Automatic” is selected and the language selected for secondary audio (including the button click sound). ( “Soundtrack Preference” is not available, subtitles of that ≥...
- Page 39 FL Display HDMI Audio Output This setting selects whether or not to output audio from Changes the brightness of the unit’s display. HDMI. ≥ If “Automatic” is selected, the display is dimmed but ≥ Audio will be output through the system's speakers when brightens when you perform some operations.
-
Page 40: Network Settings
Network General Network Easy Setting ( Remote Control Change the remote control code if other Panasonic products react to this remote control. Network Settings Perform network-related settings individually. Press [OK] to show the following settings. Quick Start* Speed of startup from standby mode is increased. -
Page 41: Speaker Settings
Speaker settings B Surround / Surround back speakers Difference Setting Delay time Approx. 170 cm 5.0 ms For optimum listening with 5.1-channel sound, all the speakers, except for the subwoofer, should be the same Approx. 340 cm 10.0 ms distance from the seating position. Approx. -
Page 42: Speaker Installation Option
Speaker installation [BT737]: Centre speaker Optional speaker settings option Attaching to a wall You can attach all of the speakers (except subwoofer) to a wall. ≥ The wall or pillar on which the speakers are to be attached should be capable of supporting 10 kg per screw. -
Page 43: Troubleshooting Guide
Troubleshooting guide Reference Power Before requesting service, please perform the No power. ≥ Insert the AC mains lead securely into a household mains socket. following steps. Do you have the latest firmware installed? The unit switches to standby mode. Firmware updates may be released to correct operating irregularities ≥... - Page 44 Wireless system Sound [BT737] [BT337] (SH-FX71) No sound. Low volume. No power. Distorted sound. ≥ Ensure the AC mains lead of the wireless system is connected Cannot hear the desired audio type. properly. ≥ Check connections to speakers and other equipment. ( 11,13s18) ≥...
-
Page 45: Messages
Messages HDMI ONLY ≥ Some BD-Video discs can only be output with HDMI. The following messages or service numbers appear on the television or unit’s display when something unusual is detected ≥ Displays while VIERA CAST is starting up. during startup and use. On the television No PLAY ≥... -
Page 46: About Mp3/Jpeg/Divx/ Avchd/Mpeg2 Files
(Only titles and the names of artists) AVCHD JPEG File format AVCHD format (V1.0) used on High Definition Video Camera File format JPEG (Panasonic and some other’s) Extension Files must have the extension “.jpg” or “.JPG”. Codec MPEG-4 AVC/H.264 Picture between 34k34 and 8192k8192 pixels ≥... -
Page 47: Supplemental Information
Supplemental Structures of still picture (JPEG) folders Root in DVD-R* /DVD-R DL* information e.g., CD-R* /CD-RW* P0000001 .jpg P0000002 .jpg Files inside a folder are Folder A displayed in the order they were updated or taken. P0000003 .jpg ∫ Display languages list P0000004 .jpg P0000005... - Page 48 This product is licensed under the AVC patent portfolio license and VC-1 patent portfolio license for the personal and non-commercial use of a At least three (3) years from delivery of products, Panasonic will give to consumer to (i) encode video in compliance with the AVC Standard and any third party who contacts us at the contact information provided below, VC-1 Standard (“AVC/VC-1 Video”) and/or (ii) decode AVC/VC-1 Video...
-
Page 49: Glossary
Dolby Pro Logic II enables you to play stereo sources on 5.1 This is a processor which makes use of an exclusive channel. Panasonic algorithm. Various processing is supported, including a high-level conversion of the TV scanning format from interlace to progressive and a high-level conversion of... -
Page 50: Specifications
Specifications GENERAL FM TUNER SECTION Preset memory: 30 stations Power consumption: 100 W Frequency range: 87.50 MHz to 108.00 MHz (50 kHz step) Power consumption in standby mode Antenna terminals: 75 ≠ (unbalanced) Approx. 0.1 W [BT737] [BT337]: Approx. 0.2 W [BT230]: SPEAKER SECTION Power supply:... -
Page 51: Video Section
SURROUND SPEAKERS VIDEO SECTION [BT737] SB-HS735 Type: 2 WAY 3 SPEAKER Bass-ref. Woofer: 3.5 cm k 10 cm Signal system: PAL625/50, PAL525/60, NTSC CONE TYPEk 2 Video output Tweeter: 2.5 cm SEMI-DOME TYPE Output level: 1.0 Vp-p (75 ≠) Impedance: 3 ≠... -
Page 52: Index
Pop-up menu ....25 DTS-HD..... . .38, 49 (Inside of product) Web Site: http://panasonic.net VQT2Q55 F0210SB0...