Brother HL-2035 User Manual
Brother hl-2035 laser printer user's guide
Hide thumbs
Also See for HL-2035:
- Service manual (242 pages) ,
- Quick setup manual (18 pages) ,
- Quick setup manual (24 pages)
Table of Contents
Advertisement
Brother Laser Printer
USER'S GUIDE
For visually-impaired users
You can read this manual with Screen
Reader 'text-to-speech' software.
You must set up the hardware and install the driver before you can use the printer.
Please use the Quick Setup Guide to set up the printer. You can find a printed copy in the box.
Please read this User's Guide thoroughly before you use the printer. Keep the CD-ROM in a convenient place so you
can use it quickly if you need to.
Please visit us at http://solutions.brother.com where you can get product support, the latest driver updates and
utilities, and answers to frequently asked questions (FAQs) and technical questions.
Note: Not all models are available in all countries.
HL-2035
Version A
ENG
Advertisement
Table of Contents

Related Manuals for Brother HL-2035


Summary of Contents for Brother HL-2035
- Page 1 Please read this User’s Guide thoroughly before you use the printer. Keep the CD-ROM in a convenient place so you can use it quickly if you need to. Please visit us at http://solutions.brother.com where you can get product support, the latest driver updates and utilities, and answers to frequently asked questions (FAQs) and technical questions.
-
Page 2: Using This Guide
Using this guide Symbols used in this guide We use the following icons throughout this User’s Guide: Warnings tell you what to do to prevent possible personal injury. Electrical Hazard icons alert you to a possible electrical shock. Hot Surface icons warn you not to touch machine parts that are hot. Cautions specify procedures you must follow or avoid to prevent possible damage to the printer or other objects. -
Page 3: Safety Precautions
Safety precautions To use the printer safely Please keep these instructions for later reference and read them before attempting any maintenance. WARNING There are high voltage electrodes inside the printer. Before you clean the inside of the printer, make sure you have turned off the power switch and unplugged the printer from the AC power outlet. - Page 4 The fuser unit is marked a caution label. Please do not remove or damage the label. Do not use flammable substances, any type of spray or organic solvent/liquids containing ing alcohol/ammonia to clean the inside or outside of the machine. Doing this may cause a fire or electrical shock.
-
Page 5: Compilation And Publication Notice
Compilation and Publication Notice Under the supervision of Brother Industries Ltd., this manual has been compiled and published, covering the latest product’s descriptions and specifications. The contents of this manual and the specifications of this product are subject to change without notice. -
Page 6: Table Of Contents
Table of Contents About this printer What is in the box? ............................1 Interface cable .............................1 Front view ............................2 Back view ............................2 Positioning the printer ..........................3 Power supply ............................3 Environment ............................3 Printing Methods What kind of paper can I use? ........................4 Type and size of paper ........................4 Recommended paper ..........................5 Printable area ............................6... - Page 7 Other..............................76 System Requirements ........................76 Important information for choosing your paper..................77 Appendix (For Europe and Other Countries) Brother Numbers .............................80 Important information: Regulations......................81 Radio interference (220 to 240 volt model only)................81 IEC 60825-1 specification (220 to 240 volt model only) ..............81 Internal laser radiation ........................82...
-
Page 8: About This Printer
About this printer What is in the box? When you unpack the printer, check that you have all of the following parts. Printer CD-ROM Drum unit and toner Quick Setup Guide AC power cord cartridge assembly Note The AC power cord may be slightly different than the one in the illustration above, depending on which country you bought the printer in. -
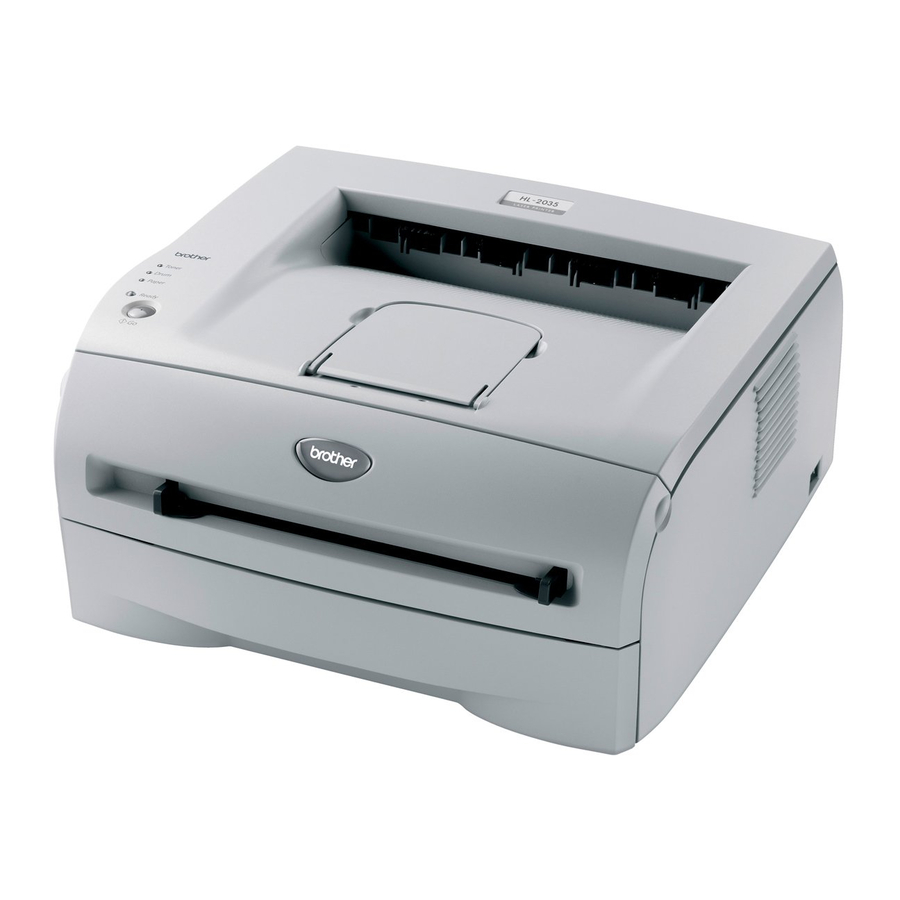
Page 9: Front View
About this printer Front view 1 Face-down Output Tray Support Flap (Support Flap) 2 Control Panel 3 Manual Feed slot 4 Manual Feed Paper Guides 5 Paper Tray 6 Power Switch 7 Front Cover 8 Face-down Output Tray Back view 1 Back Cover 2 AC Power Connector 3 Side Cover... -
Page 10: Positioning The Printer
About this printer Positioning the printer Please read the following before you use the printer. Power supply Use the printer within the recommended power range. Power source: USA and Canada: AC 110 to 120 V, 50/60 Hz Europe and Australia: AC 220 to 240 V, 50/60 Hz The power cord, including extensions, should not be longer than 5 meters (16.5 feet). -
Page 11: Printing Methods
Printing Methods What kind of paper can I use? Type and size of paper The printer loads paper from the installed paper tray, or the manual feed slot. The names for the paper trays in the printer driver and this guide are as follows: Paper tray Tray 1 Manual feed slot... -
Page 12: Recommended Paper
Printing Methods Recommended paper Europe Plain paper Xerox 4200DP 20 lb Xerox Premier 80 g/m Hammermill Laser Paper 24 lb Xerox Business 80 g/m Modo DATACOPY 80 g/m IGEPA X-Press 80 g/m Recycled paper Xerox Recycled Supreme 80 g/m Transparency 3M CG3300 3M CG3300 Labels... -
Page 13: Printable Area
Printing Methods Printable area The edges of the paper that cannot be printed on are shown below. Portrait Letter Legal B5 (ISO) Executive 4.23 mm 4.23 mm 4.23 mm 4.23 mm 4.23 mm 4.23 mm 4.23 mm 4.23 mm (0.16 in.) (0.16 in.) (0.16 in.) (0.16 in.) -
Page 14: Printing Methods
Printing Methods Printing methods Printing on plain paper, bond paper and transparencies You can print on plain paper, bond paper or transparencies from the paper tray or manual feed slot. For the paper you want to use, see What kind of paper can I use? on page 4. Printing on plain paper, bond paper or transparencies from the paper tray Note Do not put more than 10 transparencies in the paper tray, if you print on transparencies. - Page 15 Printing Methods Pull the paper tray completely out of the printer. While pressing the blue paper-guide release lever, slide the paper guides to fit the paper size. Check that the guides are firmly in the slots. Put paper in the tray.
- Page 16 Printing Methods Check that the paper is below the maximum paper mark (b). Note • Paper jams may occur if you put more than 250 sheets (80 g/m or 21 lb) of plain or bond paper in the paper tray at any one time. •...
- Page 17 Printing Methods Printing on plain paper, bond paper or transparencies from the manual feed slot Note The printer automatically turns on the Manual Feed mode when you put paper in the manual feed slot. Choose the following from the printer driver: Paper Size ......
- Page 18 Printing Methods Lift up the support flap to prevent paper from sliding off the face-down output tray. Note If you choose not to lift up the output tray support flap, we recommend that you remove printed pages as soon as they come out of the printer. Using both hands, slide the manual feed slot paper guides to the width of the paper that you are going to use.
- Page 19 Printing Methods After the printed page comes out of the printer, put in the next sheet of paper or the transparency as in Step 5 above. Repeat for each page that you want to print. Note If you print on transparencies, remove each transparency immediately after printing. Stacking the printed transparencies may cause a paper jam or the transparency to curl.
-
Page 20: Printing On Thick Paper, Labels And Envelopes
Printing Methods Printing on thick paper, labels and envelopes Note The printer automatically turns on the Manual Feed mode when you put paper in the manual feed slot. When you select the paper you want to use, see What kind of paper can I use? on page 4. If you print on envelopes, see Types of envelopes to avoid on page 16. - Page 21 Printing Methods Send the print data to the printer. Note A No paper fed manual feed slot status is shown by the control panel LEDs until you put a sheet of paper or an envelope in the manual feed slot. Lift up the support flap to prevent paper from sliding off the face-down output tray.
- Page 22 Printing Methods Using both hands, put one piece of paper or one envelope in the manual feed slot until the front edge of the paper or envelope touches the paper feed roller. When you feel the machine pull in the paper, let go. Note •...
- Page 23 Note Brother will not recommend a particular envelope because envelope manufacturers may change the envelope specifications. You are responsible for the quality and performance of the envelopes you use.
-
Page 24: Duplex Printing
Printing Methods Duplex Printing ® ® ® The supplied printer drivers for Windows 98/Me, Windows 2000/XP and Windows Vista all allow manual duplex printing. For more information about how to choose the settings, see the Help text in the printer driver. Guidelines for printing on both sides of the paper If the paper is thin, it may wrinkle. - Page 25 Printing Methods The printer will now automatically print all the odd-numbered pages on the other side of the paper. Note When you put paper in the paper tray, first empty the tray then put the printed pages in the tray, with the printed side face up.
-
Page 26: Paper Orientation For Manual Duplex Printing
Printing Methods Paper orientation for manual duplex printing The printer prints the second page first. If you print 10 pages on 5 sheets of paper, it will print page 2 then page 1 on the first sheet of paper. It will print page 4 then page 3 on the second sheet of paper. It will print page 6 then page 5 on the third sheet of paper, and so on. -
Page 27: Driver And Software
If you want to uninstall the printer driver,see Uninstalling the printer driver on page 31. ® ® ® For Windows 98/Me, Windows 2000/XP and Windows Vista ® Brother GDI printer driver for Windows ® For Macintosh ® Brother Laser driver for Macintosh For Linux GDI printer driver Note For more infomation about Generic PCL Driver and Linux printer driver, please visit our web site at http://solutions.brother.com... - Page 28 Sleep Time Status Monitor Administrator Page Protection Print Date & Time Density adjustment Error Message Printout ® These settings are not available with Brother Laser driver for Macintosh ® ® These settings are not available with Windows 2000/XP and Windows Vista...
-
Page 29: For Windows
For Windows Features in the printer driver You can download the latest printer driver or get other information by accessing the Brother Solutions Center at http://solutions.brother.com You can also change settings by clicking the illustration on the left side of the Basic tab in the Properties dialog box. -
Page 30: Advanced Tab
Driver and software Advanced tab Note ® ® If you are using Windows 2000, XP or Windows Vista , you can access the Advanced tab by clicking Printing Preferences... in the General tab of the Printer Properties screen. Change the tab settings by clicking one following icons: Print Quality (1) Duplex Printing (2) Watermark (3) - Page 31 Driver and software Print Setting You can manually change the Print setting. • Auto Selecting the Auto button will allow automatic printing with the most suitable print settings for your print job. • Manual You can change the settings manually by selecting the Manual button and clicking the Setting... button. ®...
-
Page 32: Device Options
Driver and software Device Options You can set the following Printer Function modes in this tab: (You can jump to the page for each Printer Function by clicking the function name in the list below.) Job Spooling Quick Print Setup Sleep Time Status Monitor ®... - Page 33 Driver and software Job Spooling The printer saves data that you want to reprint. You can reprint a document without sending the data again from your PC. To reprint press and hold down the Go button for about 4 seconds until all the LEDs light up in order (Toner, Drum, Error, Ready). Note •...
- Page 34 Driver and software ® Administrator (For Windows 98/Me users only) Administrators have the authority to limit the Number of copies, Scaling setting and Watermark setting functions. • Password Enter the password into this box. • Set Password Click here to change the password. •...
-
Page 35: Support Tab
, you can access the Support tab by clicking Printing Preferences... in the General tab of the Printer Properties screen. You can download the latest driver or get other product information by accessing the Brother Solutions Center at http://solutions.brother.com You can see the printer driver version. -
Page 36: For Macintosh
® This printer supports Mac OS 9.1 to 9.2 and Mac OS X 10.2.4 or greater. You can download the latest printer driver by accessing the Brother Solutions Center at http://solutions.brother.com Note ® The screens in this section are from Mac OS X 10.3. -
Page 37: Print Settings
Driver and software Print settings Set the Resolution, Media Type, Toner Save and other settings. You can change settings by selecting the setting in the Printer Settings list: Quality You can change the resolution as follows: • 300 dpi • 600 dpi •... -
Page 38: Uninstalling The Printer Driver
Click Start and select your appropriate printer from ALL Programs. Select UnInstall. Follow the instructions on the screen. ® Brother Laser driver for Macintosh ® For Mac OS 9.1 to 9.2 Open the Extensions folder located in the System Folder on the Macintosh HD. - Page 39 Click on the name of your printer in the printer list. From the Finder menu, delete the Printer. Drag the HL-MFLPro folder (from the Mac OS X 10.X > Library > Printers > Brother) into the Trash bin and then empty the trash bin.
-
Page 40: Control Panel
Control panel LEDs (Light Emitting Diodes) This section refers to the four Light Emitting Diodes (LEDs) (Toner, Drum, Error, Ready) and a control panel button (Go) on the control panel. The LED indications shown in the table below are used in the illustrations in this chapter. LED is off. - Page 41 Control panel Printer status Sleep mode The power switch is off or the printer is in Sleep mode. Pressing the Go button wakes up the printer from Sleep mode to Ready mode. Ready to print The printer is ready to print. Warming up The printer is warming up.
- Page 42 Control panel Printer status Toner life end Replace the toner cartridge with a new one. See Replacing the toner cartridge on page 44. Cartridge position error The toner cartridge is not installed correctly. Take out the toner cartridge and put it back into the printer again.
-
Page 43: Print Overrun
Control panel Printer status Back cover is open Close the back cover of the printer. Paper jam Clear the paper jam. See Paper jams and how to clear them on page 61. If the printer does not start printing, press the Go button. No paper fed manual feed slot Put the paper in the manual feed slot. -
Page 44: Service Call Indications
If you cannot clear the error and see the same service call indication after turning the printer back on, call your dealer or a Brother authorized service representative. When you press the Go button, the LEDs will light up as shown in Table 1: LED indications while pressing Go button on page 38 to identify the error. - Page 45 Drum Error Ready Make a note of the indication and report the error status to your dealer or a Brother authorized service representative by referring to the above table. Note Make sure that the front cover is fully closed before you report a service call.
-
Page 46: Control Panel Button (Go Button)
Control panel Control panel button (Go button) The control panel button has the following functions: Wake-up If the printer is in Sleep mode, press the Go button to wake the printer up and go to the Ready state. Error recovery If there is an error, the printer will recover automatically from some errors. -
Page 47: Print A Test Page
Press the Go button again. The printer will print a test page. Using the printer driver ® If you are using Brother’s Windows printer driver, click the Print Test Page button. It is in the General tab ® of the Windows... -
Page 48: Print A Printer Settings Page
Press the Go button three times within 2 seconds. The printer will print the current printer settings page. Using the printer driver ® If you are using Brother’s Windows printer driver, you can print the current printer settings page by clicking the Print Settings button in the Support tab. -
Page 49: Routine Maintenance
Routine maintenance You will need to replace certain parts and clean the printer regularly. WARNING When you replace certain parts or clean the printer regularly, pay attention to the following: • If your clothes are smeared with toner, wipe off the toner with a dry cloth and immediately wash the clothes in cold water to avoid stains. -
Page 50: Toner Cartridge
Routine maintenance Toner cartridge The life of the original toner cartridge that came with the printer may be either a starter or standard toner cartridge, and depends on the model and country you bought the printer in. The starter toner cartridge will print approximately 1,000 A4 or Letter-size single-sided pages. Approx. cartridge yield is declared in accordance with ISO/IEC 19752. - Page 51 Replacing the toner cartridge Note • To ensure high quality printing, make sure you use quality Brother toner cartridges. When you want to buy toner cartridges, call the dealer you bought the printer from or Brother Customer Service. • We recommend that you clean the printer when you replace the toner cartridge. See Cleaning on page 52.
- Page 52 Routine maintenance CAUTION We recommend that you place the drum unit and toner cartridge assembly on a piece of disposable paper or cloth in case you accidentally spill or scatter toner. To prevent damage to the printer from static electricity, do not touch the electrodes shown in the illustrations.
- Page 53 If an unpacked drum unit is put in direct sunlight or room light, the unit may be damaged. Brother strongly recommends that you do not refill the toner cartridge provided with your printer. We also strongly recommend that you continue to use only Genuine Brother Brand replacement toner cartridges.
- Page 54 Routine maintenance Pull off the protective cover. Put the new toner cartridge firmly into the drum unit until you hear it lock into place. If you put it in properly, the lock lever will lift automatically. CAUTION Make sure you insert the toner cartridge properly or it may separate from the drum unit. Clean the primary corona wire inside the drum unit by gently sliding the blue tab from right to left and left to right several times.
-
Page 55: Drum Unit
• For best performance, use only genuine Brother toner. The printer should be used only in a clean, dust- free environment with adequate ventilation. - Page 56 Routine maintenance Replacing the drum unit Note We recommend that you clean the printer when you replace the drum unit. See Cleaning on page 52. Follow these steps to replace the drum unit. Make sure that the printer is turned on and the Drum LED is blinking. Open the front cover of the printer. Press and hold down the Go button for about 4 seconds until all the LEDs light up.
- Page 57 Routine maintenance CAUTION We recommend that you place the drum unit and toner cartridge assembly on a piece of disposable paper or cloth in case you accidentally spill or scatter toner. To prevent damage to the printer from static electricity, do not touch the electrodes shown in the illustrations. Push down the blue lock lever and take the toner cartridge out of the drum unit.
- Page 58 Routine maintenance Unpack the new drum unit. CAUTION Wait to unpack a drum unit until immediately before you put it in the printer. Exposure to direct sunlight or room light may damage the drum unit. Put the toner cartridge firmly into the new drum unit until you hear it lock into place. If you put the cartridge in properly, the blue lock lever will lift automatically.
-
Page 59: Cleaning
Routine maintenance Cleaning Clean the outside and inside of the printer regularly with a dry, lint-free cloth. When you replace the toner cartridge or the drum unit, make sure you clean the inside of the printer. If printed pages are stained with toner, clean the inside of the printer with a dry, lint-free cloth. -
Page 60: Cleaning The Inside Of The Printer
Routine maintenance Wipe the outside of the printer with a soft cloth to remove dust. Remove anything that is stuck inside the paper tray. Wipe the inside of the paper tray with a soft cloth to remove dust. Put the paper tray firmly back in the printer. Plug the printer back in and turn on the printer power switch. - Page 61 Routine maintenance Open the front cover of the printer. Pull out the drum unit and toner cartridge assembly. HOT SURFACE After you have just used the printer, some internal parts of the printer are extremely hot! Wait for the printer to cool down before you touch the internal parts of the printer.
- Page 62 Routine maintenance Wipe the scanner window with a dry, lint-free cloth. Put the drum unit and toner cartridge assembly back in the printer. Close the front cover. Plug the printer back in and turn on the printer power switch.
-
Page 63: Cleaning The Corona Wire
Routine maintenance Cleaning the corona wire If you are experiencing print quality problems, please clean the corona wire as follows: Open the front cover of the printer. Pull out the drum unit and toner cartridge assembly. CAUTION We recommend that you place the drum unit and toner cartridge assembly on a piece of disposable paper or cloth in case you accidentally spill or scatter toner. - Page 64 Routine maintenance Clean the primary corona wire inside the drum unit by gently sliding the blue tab from right to left and left to right several times. Return the tab to the home position (a) (1) before you put the drum unit back in the printer.
-
Page 65: Troubleshooting
Troubleshooting You can correct most problems by yourself. If you need additional help, the Brother Solutions Center offers latest FAQs and troubleshooting tips. Visit us at http://solutions.brother.com. Identifying your problem First, check the following: The AC power cord is connected properly and the printer is turned on. -
Page 66: Error Messages In The Status Monitor
Reduce the amount of paper in the paper tray, and then try again. Make sure you use paper that meets Brother’s recommended paper specifications. See What kind of paper can I use? on page 4. -
Page 67: Error Message Printout
(The printer has printed the document at a reduced resolution) Paper handling First, make sure that you are using paper that meets Brother recommended paper specifications. See What kind of paper can I use? on page 4. Problem Recommendation The printer does not feed If there is paper in the paper tray, make sure it is straight. -
Page 68: Paper Jams And How To Clear Them
Troubleshooting Paper jams and how to clear them If a paper jam occurs, the printer will tell you by flashing the Error LED as shown below. HOT SURFACE After you have just used the printer, some parts inside the printer are extremely hot! When you open the front cover or back cover of the printer, never touch the shaded parts shown in the illustrations. - Page 69 Troubleshooting Pull the paper tray completely out of the printer. Pull the jammed paper up and out of the printer. Open the front cover.
- Page 70 Troubleshooting Pull out the drum unit and toner cartridge assembly slowly. The jammed paper will be pulled out with the drum unit and toner cartridge assembly. CAUTION To prevent damage to the printer caused by static electricity, do not touch the electrodes shown in the illustrations.
- Page 71 Troubleshooting Pull the tab toward you to open the rear chute cover (1). Pull the jammed paper out of the fuser unit. If the jammed paper cannot be pulled out easily, push down the tab with one hand as you gently pull the paper out with other.
- Page 72 Troubleshooting HOT SURFACE After you have just used the printer, some internal parts of the printer are extremely hot! Wait for the printer to cool down before you touch the internal parts of the printer. Close the back cover. Push the lock lever down and take the toner cartridge out of the drum unit. Take out the jammed paper if there is any inside the drum unit.
- Page 73 Troubleshooting Put the toner cartridge back into the drum unit until you hear it lock into place. If you put it in properly, the lock lever will lift automatically. Put the drum unit and toner cartridge assembly back in the printer. Put the paper tray firmly back in the printer.
-
Page 74: Other Problems
Troubleshooting Other problems Problem Recommendation The printer cannot print. There Check that the printer cable is not damaged or broken. was an error writing to LPT1: If you have an interface-switching device, make sure the correct printer is (or BRUSB) for the printer selected. - Page 75 Troubleshooting Examples of poor print Recommendation quality Make sure that you use paper that meets the recommended specifications. See What kind of paper can I use? on page 4. ABCDEFGH Check the printer’s environment - high temperatures and high humidity can abcdefghijk increase the amount of background shading.
- Page 76 Troubleshooting Examples of poor print Recommendation quality If the problem is not solved after printing a few pages, the drum unit may have glue from label stock on the OPC drum surface. 75 mm Clean the drum unit as follows: (3.0 in.) 75 mm Position the print sample in front of the drum unit, and find the exact position...
- Page 77 Replacing the toner cartridge on page 44. Make sure that a torn piece of paper is not inside the printer covering the scanner window. Black lines down the page The fuser unit may be smudged. Call your dealer or Brother Customer Service. Printed pages have toner stains down the page.
- Page 78 Troubleshooting Examples of poor print Recommendation quality Wipe the scanner window with a soft cloth. See Cleaning the inside of the printer on page 53. ABCDEFGH The toner cartridge may be damaged. Put in a new toner cartridge. See abcdefghijk Replacing the toner cartridge on page 44.
-
Page 79: Solving Print Problems
Troubleshooting Solving print problems Problem Recommendation The printer prints unexpectedly Make sure the printer cable is not too long. We recommend you use a parallel or or it prints garbage data. USB cable that is less than 2 meters (6.5 feet) in length. Make sure that the printer cable is not damaged or broken. -
Page 80: A Appendix
Appendix Printer specifications Engine Model HL-2035 Technology Electrophotographic Print speed Up to 18 ppm (A4 size) First print time Less than 10 sec Resolution HQ1200 ® Windows 98/Me, ® 600 dpi Windows 2000/XP, ® Windows Vista 300 dpi ® HQ1200... -
Page 81: Software
® ® GDI Driver for Windows 98/Me, Windows 2000/XP, Windows Vista ® ® Brother Laser Driver for Mac OS 9.1 to 9.2 and Mac OS X 10.2.4 or greater GDI Printer Driver for Linux Utilities Interactive Help Instructional animations for problem solving... -
Page 82: Media Specifications
Appendix Media specifications Model HL-2035 Media types Manual feed slot Plain paper, Bond paper, Recycled paper, Envelope, Labels, and Transparencies Paper tray Plain paper, Bond paper, Recycled paper, and Transparencies Media weights Manual feed slot 60 to 161 g/m (16 to 43 lb) -
Page 83: Other
Appendix Other Model HL-2035 Average 450 W at 25 °C (77 °F) Power consumption Printing Average 70 W at 25 °C (77 °F) Standby Sleep Average 5 W Noise level Sound Pressure Printing Less than 51 dB (A) Standby Less than 30 dB (A) -
Page 84: Important Information For Choosing Your Paper
Appendix Important information for choosing your paper This section provides information to help you choose paper to use with this printer. Note If you use paper other than the ones recommended, a paper jam or misfeeding may occur in the printer. See Recommended paper on page 5. - Page 85 Appendix Print surface The characteristics may differ a little between the face side and reverse side of a sheet of paper. Usually, the opening side of the ream of paper package is the print side. Follow any indication of the print side on the paper package.
- Page 86 Appendix Rough estimate of basis weight Bond Index Paper size Paper size 8.5 × 11 in. Letter 8.5 × 14 in. Legal Executive 7.25 × 10.5 in. 210 × 297 mm 148 × 210 mm 105 × 148 mm 3.875 × 7.5 in. Envelope Monarch 3.875 ×...
-
Page 87: B Appendix (For Europe And Other Countries)
Frequently asked questions (FAQs) The Brother Solutions Center is our one-stop resource for all your Printer needs. You can download the latest drivers, software and utilities, read FAQs and troubleshooting tips to learn how to get the most from your Brother product. -
Page 88: Important Information: Regulations
Appendix (For Europe and Other Countries) Important information: Regulations Radio interference (220 to 240 volt model only) This printer follows EN55022 (CISPR Publication 22)/Class B. IEC 60825-1 specification (220 to 240 volt model only) This printer is a Class 1 laser product as defined in IEC 60825-1 specifications. The label shown below is attached in countries where it is needed. -
Page 89: Internal Laser Radiation
Appendix (For Europe and Other Countries) Internal laser radiation Maximum radiation power: 5 mW Wave length: 770 - 810 nm Laser class: Class 3B EU Directive 2002/96/EC and EN50419 (European Union only) This equipment is marked with the above recycling symbol. It means that at the end of the life of the equipment you must dispose of it separately at an appropriate collection point and not place it in the normal domestic unsorted waste stream. -
Page 90: Important - For Your Safety
Appendix (For Europe and Other Countries) IMPORTANT - For Your Safety To ensure safe operation the supplied three-pin plug must be inserted only into a standard three-pin power outlet that is properly grounded through the standard electrical wiring. Extension cords used with this printer must be three-pin plug type and correctly wired to provide proper grounding. -
Page 91: Ec Declaration Of Conformity
Appendix (For Europe and Other Countries) EC Declaration of Conformity... -
Page 92: Index
Memory ..............73 Memory full ............... 36 Back view ..............2 Basic tab ..............22 No paper .............35 Brother Solutions Center ........... 20 OPC drum ..............69 Cancel printing ............39 Carton contents ............1 Cartridge position error ..........35 Cleaning .............. - Page 93 Index Trademarks ..............iv Tray settings tab ............28 Utilities ..............74 Weights ..............75...