Table of Contents
Advertisement
■ This product is eligible for the
P2HD 5 Year Warranty Repair
Program. For details, see page E-6.
1
Volume
Note that Operation Instructions Vol. 1 describes basic operations
of the Memory Card Camera-Recorder.
For instructions on advanced operations of the Memory Card
Camera-Recorder, refer to Operating Instructions Vol. 2 (pdf file)
contained in the supplied CD-ROM.
Before operating this product, please read the instructions carefully and save
this manual for future use.
M0811HO0 -FJ
Operating Instructions
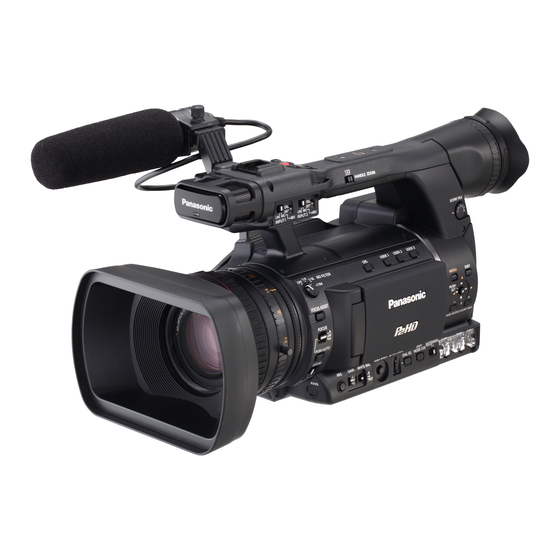
Memory Card Camera-Recorder
AG-HPX250EJ
Model No.
Vol.1
ENGLISH
VQT3T25 (E)
Advertisement
Table of Contents

Related Manuals for Panasonic AG-HPX250EJ


Summary of Contents for Panasonic AG-HPX250EJ
-
Page 1: Operating Instructions
P2HD 5 Year Warranty Repair Operating Instructions Vol.1 Program. For details, see page E-6. Memory Card Camera-Recorder AG-HPX250EJ Model No. Volume Note that Operation Instructions Vol. 1 describes basic operations of the Memory Card Camera-Recorder. For instructions on advanced operations of the Memory Card Camera-Recorder, refer to Operating Instructions Vol. -
Page 2: Read This First
Read this first! indicates safety information. WARNING: CAUTION: This equipment must be earthed. The mains plug of the power supply cord shall To ensure safe operation, the three-pin plug remain readily operable. must be inserted only into a standard three-pin The AC receptacle (mains socket outlet) shall be power point which is effectively earthed through installed near the equipment and shall be easily normal household wiring. accessible. Extension cords used with the equipment must To completely disconnect this equipment from have three cores and be correctly wired to the AC mains, disconnect the power cord plug provide connection to the earth. Wrongly wired from the AC receptacle. extension cords are a major cause of fatalities. The fact that the equipment operates CAUTION: satisfactorily does not imply that the power point is earthed or that the installation is completely Danger of explosion or fire if battery is incorrectly safe. For your safety, if you are in any doubt replaced or mistreated. about the effective earthing of the power point, • Do not disassemble the battery or dispose of it please consult a qualified electrician. in fire. • Do not store in temperatures over 60°C. • Do not expose the battery to excessive heat WARNING: such as sunshine, fire or the like. - Page 3 If you lose the fuse cover the plug must not be used until a replacement cover is Fuse obtained. A replacement fuse cover can be purchased from your local Panasonic Dealer. Note: Battery Charger / AC Adaptor The rating plate is on the underside of the Battery Charger and AC Adaptor. Disconnect the AC mains plug from the AC mains socket when not in use. EEE Yönetmeliğine Uygundur.
- Page 4 If you lose the fuse cover the plug must not be used until a replacement cover is Fuse obtained. A replacement fuse cover can be purchased from your local Panasonic Dealer.
- Page 5 Read this first! (continued) EMC NOTICE FOR THE PURCHASER/USER OF THE APPARATUS 1. Applicable standards and operating environment The apparatus is compliant with: • standards EN55103-1 and EN55103-2 2009, and • electromagnetic environments E1, E2, E3 and E4. 2. Pre-requisite conditions to achieving compliance with the above standards <1> Peripheral equipment to be connected to the apparatus and special connecting cables • The purchaser/user is urged to use only equipment which has been recommended by us as peripheral equipment to be connected to the apparatus.
- Page 6 Read this first! (continued) ■ Batteries that may be used with this product (Correct as of September 2011) Panasonic CGA-D54s batteries may be used with the AG-HPX250EJ. Recommendation for Use of Genuine Panasonic Battery (Rechargeable Battery) Thank you for using a Panasonic product. It has been found that counterfeit battery packs which look very similar to the genuine product are made available to purchase in some markets. Some of these battery packs are not adequately protected with internal protection to meet the requirements of appropriate safety standards. There is a possibility that these battery packs may lead to fire or explosion. Please be advised that we are not liable for any accident or failure occurring as a result of use of a counterfeit battery pack. To ensure that safe products are used we would recommend that a genuine Panasonic battery pack is used. • Be aware that many batteries sold at extremely cheap prices or in situations where it is difficult to verify the actual products before purchase have proven to be counterfeit. To remove the battery Main Power Battery (Refer to page E-20 for the detail.)
- Page 7 Details about user registration and the extended warranty: Please note, this is a site that is not maintained by Panasonic Canada Inc. The Panasonic Canada Inc. privacy policy does not apply and is not applicable in relation to any information submitted. This link is provided to you for convenience.
- Page 8 • SDHC Logo is a trademark of SD-3C, LLC. • HDMI, the HDMI logo, and High-Definition Multimedia Interface are trademarks or registered trademarks of HDMI Licensing LLC. • Microsoft , Windows , and Windows Vista are either registered trademarks or trademarks of Microsoft ® ® ® Corporation in the United States and/ or other countries. • Screenshots are used in accordance with Microsoft Corporation guidelines. • Apple , Macintosh , and Mac OS are trademarks of Apple Inc., registered in the United States and other ® ® ® countries. • Other model names, company names, and product names listed in these operating instructions are trademarks or registered trademarks of their respective companies. • This product is licensed under the AVC Patent Portfolio License for the personal and non-commercial use of a consumer, and no license is granted or shall be implied for any use other than the personal uses detailed below. - To encode video in compliance with the AVC standard (“AVC Video”) - T o decode AVC Video that was encoded by a consumer engaged in a personal and non- commercial activity - To decode AVC Video that was obtained from a video provider licensed to provide AVC Video Additional information may be obtained from MPEG LA, LLC (http://www.mpegla.com).
-
Page 9: Outline Of Operations
Outline of operations This unit is a handheld P2 memory card camera-recorder that achieves the high quality images provided by full HD through the incorporation of a cam-type 22x optical zoom and a 1/3-type 2.2-megapixel 3MOS sensor in the camera unit, and including AVC-Intra100 compression as standard in the recording and playback unit. P2 mode shooting and Personal Computer/ Memory card recorder playback (Page 10 of Vol. 2, Page 74 of Vol. 2) P2 card The contents can be transferred as a data stream (digital dubbing). You can use the following features: • HD (High Definition) recording DVCPRO/DV • Multi format recording (IEEE1394) •... -
Page 10: Table Of Contents
Contents Volume 1 (This Book) Read this first! ..........E-1 Outline of operations ........E-8 Before use Operating precautions ........E-11 Precaution for use ......... E-13 Accessories ........... E-14 Optional units ..........E-14 Description of parts Description of parts ........E-15 Left side ............ E-15 Top and right side ........ - Page 11 Volume 2 (CD) Shooting Displays Viewfinder Screen displays Tally lamp Menu Basic shooting operations Using SD/SDHC memory cards Setup menu list Using the zoom function Shooting in progressive mode Reference Recording with Variable Frame Rate (VFR) Before calling for service Shooting in manual mode Updating the firmware incorporated into Adjusting the white balance and black the unit...
-
Page 12: Operating Precautions
Operating precautions Do not allow any water to get into the camera- Battery charger and battery recorder when using it in the rain or snow or at • If the CHARGE lamp continues to blink even when the battery temperature is normal, there the beach. may be something wrong with the battery or • Failure to heed this precaution will cause the camera-recorder or P2 card to malfunction (and battery charger. Contact your dealer. may result in irreparable damage). • The battery takes longer to charge when it is warm. - Page 13 Remove the battery after use. Do not point the lens or viewfinder at the sun. Completely remove the battery. (The battery Doing so may damage the parts inside. continues to be used even if you have turned the Protective caps for the connectors camera-recorder off.) The battery can over discharge if you leave it in the Keep the protective caps fitted over any connectors camera-recorder and it may become impossible to that are not being used. recharge it. Do not remove the battery when the power is on. If the battery is removed, make sure that the power is off and the mode lamp completely lights off. Keep dust and other foreign objects away from the battery terminal.
-
Page 14: Precaution For Use
Always take some trial shots before actual shooting. • When shooting important events (such as weddings), always take some trial shots and check that the sound and images have been recorded properly before actual shooting. Be sure to check and set the calendar and time zone. • These settings affect the control and playback sequence of the recorded contents. Before making a recording, set and check the calendar and time zone. (Page E-25) Panasonic makes no guarantees for your recordings. • Please understand that Panasonic cannot provide compensation for images and/or sound not recorded because of problems with the camera-recorder or P2 card. Respect copyrights • Video and audio you have recorded with this camera-recorder is for your own personal enjoyment. In accordance with the copyright laws, it may not be used for other purposes without permission from the copyright holder. -
Page 15: Accessories
Accessories Battery Battery charger/AC power supply cord (For the U.K.) (For areas other than the U.K.) Wireless remote control AC Adaptor/AC cord and battery (CR2025) (For the U.K.) (For areas other than the U.K.) (Page E-23) Eye cup Microphone holder Screws for microphone Microphone holder (Page E-22) (Page 101 of Vol. 2) holder adaptor (Page 101 of Vol. 2) (Page 101 of Vol. 2) 6-mm screws (2) 12-mm screws (2) Shoulder belt CD-ROM (Page E-21) The following accessories are attached to the camera-recorder. Lens cap (Page E-22) Lens hood (Page E-21) INPUT terminal cover (2) Grip belt (Page E-21) *1: For part numbers for the battery, see “Optional units” (see below). • After unpacking, dispose of the AC power supply cable caps and packing materials properly. • Please consult a retailer when purchasing additional accessories. Optional units • XLR microphone AG-MC200G •... -
Page 16: Description Of Parts
Description of parts Left side 1 2 3 4 5 67 8 9 10 11 31 32 33 21 23 24 25 27 26 28 INPUT1 LINE/MIC switch (Page 52 of Vol. 2) 21 IRIS button (Page 30 of Vol. 2) INPUT1 switch (MIC POWER +48 V) 22 GAIN switch (Page 32 of Vol. 2) (Page 52 of Vol. 2) 23 WHITE BAL switch (Page 32 of Vol. 2) INPUT2 LINE/MIC switch (Page 52 of Vol. 2) -
Page 17: Top And Right Side
Top and right side 18 19 Built-in microphone (Page 52 of Vol. 2) 20 Tripod hole (Page E-13) Light shoe Zoom lever (handle side) (Page 18 of Vol. 2) START/STOP button (handle, includes hold mechanism) (Page 10 of Vol. 2) Zoom lever (Page 18 of Vol. 2) REC CHECK button (Page 12 of Vol. 2) Shoulder belt attachment (Page E-21) Eye cup (Page E-22) Eye piece (Page 6 of Vol. 2) 10 Protective caps Keep the protective caps fitted over any... -
Page 18: Front And Rear Side
Description of parts (continued) Front and rear side 1 2 3 USB2.0 USB2.0 23 24 25 26 Tally lamp (Front) (Page 9 of Vol. 2) * D o not connect any equipment except the remote controller to the CAM REMOTE jack. Remote control sensor (Front) (Page E-23) C onnecting any equipment other than White balance sensor (Page 32 of Vol. 2) the remote control may cause the image Built-in speaker brightness to change and/or the images to appear out of focus. -
Page 19: Remote Control
Remote control DATE/TIME button (Page 100 of Vol. 2) The following buttons are for functions that OSD button (Page 100 of Vol. 2) cannot be executed on the camera-recorder. • PHOTO SHOT • TITLE • A.DUB COUNTER button (Page 63 of Vol. 2) • MULTI/P-IN-P • SELECT • REC Same function as the COUNTER button on the • STORE • OFF/ON main unit. • PB.ZOOM • INDEX COUNTER RESET button (Page 63 of Vol. 2) Same function as the COUNTER RESET button on the main unit. Operation buttons START/ DATE/ PHOTO STOP TIME SHOT PLAY button (►) (Page 74 of Vol. 2) /REW button () (Page 74 of Vol. 2) COUNTER RESET TITLE... -
Page 20: Charging The Battery
Charging the battery Charging ■ Before using the battery, fully charge it with the AC Recording time of included battery adaptor. Maximum Keep a spare battery with you. Battery model Voltage/ Charging continuous (included) capacity time recording time Align the battery with the marking on the battery charger, place it flat, slide it in Approx. -
Page 21: Power Sources
Power sources Using the battery Installation Removal Set the POWER/MODE switch to OFF, and Insert the battery until it clicks into place. check that the mode lamp is off. (Page E-24) While pressing the battery release button, raise up the battery to remove it. • Support the battery with your hand to ensure that it will not fall. -
Page 22: Adjusting The Hand Strap
Adjusting the hand strap Adjust the hand strap to suit your hand. Open the cover and adjust the length. Close the cover. • Make sure the cover is fully closed. Attaching the shoulder strap Attach the shoulder strap and use it as a precaution against dropping the camera-recorder. 20 mm or more 20 mm or more Detaching and attaching the lens hood Detaching the lens hood Attaching the lens hood • Turn the lens hood counterclockwise to detach it. -
Page 23: Detaching And Attaching The Lens Cap
Detaching and attaching the lens cap Detaching the lens cap • Pinch the lens cap and remove. Attaching the lens cap • Pinch the lens cap and attach. • Be sure to attach the lens cap to protect the lens when not in use. Lens cap Fitting the eye cup Attach the eye cup by aligning the projections on the eye cup holder and eye cup and fitting them Eye cup holder Eye cup together. • Turning the eye cup after attaching it may cause the eye cup holder to come off. If the eyecup holder does come off, see (Page 156 of Vol. 2) for details on how to refit it. Projection E-22... -
Page 24: The Remote Control
The remote control Insert the battery Remote control setup When using two camera-recorders simultaneously, Push the catch in the direction shown by set this camera-recorder and the remote control to arrow 1 to remove the holder. either “operation mode 1” or “operation mode 2” so the remote control does not operate the wrong camera-recorder by mistake. Setting • Wireless remote control Press the operation buttons STOP () and STILL Insert the battery with the “+” marked side ADV ( ) at the same time to set the remote facing up. -
Page 25: Turn On/Off The Camera-Recorder
Turn on/off the camera-recorder While holding down the lock release button, turn the POWER/MODE switch to the ON or OFF position. Turn on the camera-recorder: The mode lamp (CAMERA) lights red (CAMERA mode) and the camera-recorder is now in the shooting standby mode. • When turning the POWER/MODE switch to the MODE position, the mode lamp (PB/THUMBNAIL) lights green and is PB/THUMBNAIL mode. (Page 74 of Vol. 2) Mode lamp (CAMERA) • Each time turning the POWER/MODE switch to the MODE position, the mode changes CAMERA or PB/THUMBNAIL. Turn off the camera-recorder: The mode lamp (CAMERA or PB/THUMBNAIL) Lock release button goes out. POWER/MODE switch E-24... -
Page 26: Setting The Calendar
Setting the calendar The CLOCK SETTING value is recorded in Push the Operation lever in the ▼ direction the contents (clip), and affects the sequence to move to the MONTH setting. of playback of the thumbnails. Before carrying CLOCK SETTING out recording, be sure to check and set CLOCK YEAR 2011 SETTING and TIME ZONE. MONTH This shows you how to adjust the calendar to 17:20 HOUR on September 25, 2011. MINUTE Set the POWER/MODE switch to ON. PUSH MENU TO RETURN (Page E-24) Push the Operation lever in the ◄... -
Page 27: Charging The Built-In Battery
Charging the built-in battery The camera-recorder’s internal battery saves the date and time. “ ” appears on the screen of the viewfinder or LCD when the internal battery is running low on charge. Do the following to recharge it. Reset the date and time when fully recharged. Connect the AC adaptor. (Page E-20) • Leave the POWER/MODE switch at OFF. Leave the camera-recorder like this for about 4 hours. • The internal battery charges during this time. • Recharge the battery regularly to ensure correct TC and menu operations. If “ ” appears even after charging, it means that the internal battery must be replaced. Ask your dealer to do this. E-26... -
Page 28: Using The Setup Menus
Using the setup menus Use the setup menus to change the settings to Press SET on the Operation lever (or push suit the scenes you are shooting or what you are it in the ► direction) to display the items. recording. Example: MENU button AUTO SW A.IRIS Operation lever PUSH MENU TO RETURN Push the Operation lever in the ▲ or ▼ direction to move to the setting you want. -
Page 29: Initializing The Menu Settings
Initializing the menu settings The menu settings contain both the user file settings and the scene file settings. You can initialize them separately. To initialize the user file (i.e. all the settings other than the scene file settings) Select INITIAL in USER FILE of the OTHER FUNCTIONS screen. The current menu settings of user file will return to the factory settings. To initialize the scene file From the 6 scene files, select the one you want to initialize with the scene dial. Then in the SCENE FILE screen, LOAD/SAVE/INIT, select INITIAL. The settings for only the selected scene file are returned to the factory settings. • This does not effect the other scene files. To simultaneously initialize the user file and the scene files Select YES under MENU INIT on the OTHER FUNCTIONS screen. This returns the user file and... -
Page 30: Setup Menu Structure
Setup menu structure MAIN MENU SCENE FILE LOAD/SAVE/INIT (Page 129 of Vol. 2) FRAME RATE SYNC SCAN TYPE SYSTEM SETUP SYSTEM MODE (SYNCRO SCAN) REC FORMAT DETAIL LEVEL (Page 132 of Vol. 2) CAMERA MODE V DETAIL LEVEL SCAN REVERSE DETAIL CORING ASPECT CONV CHROMA LEVEL SETUP CHROMA PHASE PC MODE SELECT COLOR TEMP Ach COLOR TEMP Bch... - Page 31 DISPLAY SETUP EVF PEAK LEVEL (Page 144 of Vol. 2) EVF PEAK FREQ EVF SETTING EVF B. LIGHT CARD FUNCTIONS SCENE FILE EVF COLOR (Page 147 of Vol. 2) USER FILE EVF MODE SD CARD FORMAT ZEBRA1 DETECT ZEBRA2 DETECT ZEBRA2 OTHER FUNCTIONS USER FILE MARKER (Page 148 of Vol. 2) REMOTE SAFETY ZONE 1394 CONTROL FOCUS BAR...
-
Page 32: Specifications
Specifications [GENERAL] [Camera-recorder] Pickup devices Supply DC 7.2 V 1/3-type progressive, 2.2-megapixel, 3MOS voltage (when the battery is used) sensor DC 7.9 V Effective pixels (when the AC adaptor is used) 1920 (H)×1080 (V) Power 15.0 W (when the LCD monitor is Lens consumption used) Optical image stabilizer lens, 22x motorized zoom, F1.6 – 3.2 (f=3.9 mm – 86 mm) 35 mm conversion: 28 mm – 616 mm (16:9) indicates safety information. Filter diameter 72 mm Ambient operating temperature Color separation optical system 0 °C to 40 °C Prism system Ambient operating humidity ND filter 10% to 80% (no condensation) OFF, 1/4, 1/16, 1/64... - Page 33 Shutter opening angle [Memory card recorder Unit] 3 degrees to 359.5 degrees in 0.5-degree Recording media increments P2 card Frame rates Recording Formats • 59.94 Hz mode: AVC-Intra 100/AVC-Intra 50/DVCPRO HD/ 1080p: DVCPRO50/DVCPRO/DV formats switchable 1/2/4/6/9/12/15/18/20/21/22/24/25/26/27/28/ Recording/Playback Time 30 fps (frames per second) 17 step AVC-Intra 100/DVCPRO HD: 720p: 8 GB×1 approx. 8 min 1/2/4/6/9/12/15/18/20/21/22/24/25/26/27/28/ 16 GB×1 approx. 16 min 30/32/34/36/40/44/48/54/60 fps (frames per 32 GB×1 approx. 32 min second) 25 step 64 GB×1 approx. 64 min • 50 Hz mode:...
- Page 34 Specifications (continued) [Digital video Unit] [Digital audio Unit] Recorded video signals Audio Recording Signal 1080/59.94i, 1080/29.97p, 1080/29.97pN, AVC-Intra 100/AVC-Intra 50/DVCPRO HD: 1080/23.98p, 1080/23.98pA, 1080/23.98pN, 48 kHz/16 bits, 4CH 720/59.94p, 720/29.97p, 720/29.97pN, DVCPRO50: 720/23.98p, 720/23.98pN, 480/59.94i, 48 kHz/16 bits, 4CH 480/29.97p, 480/23.98p, 480/23.98pA, 1080/50i, DVCPRO/DV: 1080/25p, 1080/25pN, 720/50p, 720/25p, 48 kHz/16 bits, 2CH/4CH switchable 720/25pN, 576/50i, 576/25p Sampling Frequency [Input/Output Unit] AVC-Intra 100/DVCPRO HD: GENLOCK IN Y: 74.1758 MHz, BNC×1, 1.0 V [p-p], 75Ω VIDEO OUT : 37.0879 MHz (59.94 Hz) Pin jack×1, 1.0 V [p-p], 75Ω Y: 74.2500 MHz, SDI OUT : 37.1250 MHz (50 Hz)
- Page 35 USB2.0 (DEVICE) [AC adaptor] Type-miniB, 4 pin USB compliant with USB ver. Power 100 V - 240 V AC, 50 Hz - 60 Hz Source: 0.55 A USB2.0 (HOST) Power 7.9 V DC, 2.53 A Type-A, 4 pin USB compliant with USB ver. 2.0 Output: LCD monitor 3.45-type color LCD monitor with approx. 921,000 dots (16:9) indicates safety information. 0.45-type color LCD monitor with approx. Weight 1,226,000 dots (16:9) Approx. 220 g Dimensions (W x H x D) 42 mm × 31 mm × 104.4 mm [Battery charger] Power 100 V - 240 V AC, 50/60 Hz Source: 0.4 A Power 8.4 V DC, 1.2 A Output: indicates safety information.
- Page 36 Information for Users on Collection and Disposal of Old Equipment and used Batteries These symbols on the products, packaging, and/or accompanying documents mean that used electrical and electronic products and batteries should not be mixed with general household waste. For proper treatment, recovery and recycling of old products and used batteries, please take them to applicable collection points, in accordance with your national legislation and the Directives 2002/96/EC and 2006/66/EC. By disposing of these products and batteries correctly, you will help to save valuable resources and prevent any potential negative effects on human health and the environment which could otherwise arise from inappropriate waste handling. For more information about collection and recycling of old products and batteries, please contact your local municipality, your waste disposal service or the point of sale where you purchased the items. Penalties may be applicable for incorrect disposal of this waste, in accordance with national legislation. For business users in the European Union If you wish to discard electrical and electronic equipment, please contact your dealer or supplier for further information. Information on Disposal in other Countries outside the European Union These symbols are only valid in the European Union. If you wish to discard these items, please contact your local authorities or dealer and ask for the correct method of...