Table of Contents
Advertisement
Quick Links
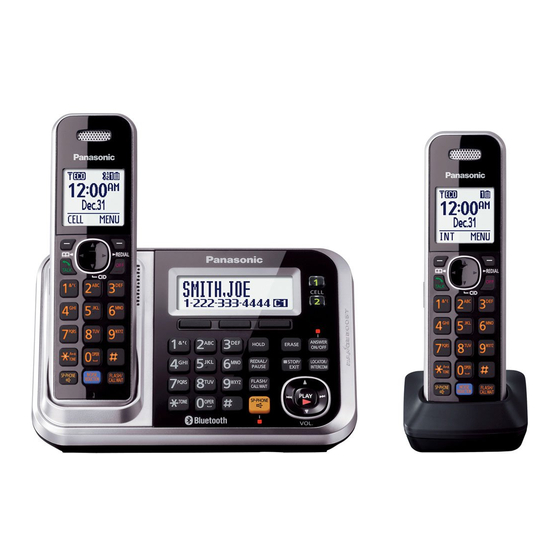
Model shown is KX-TG7842.
Before initial use, see "Getting Started"
on page 11.
Thank you for purchasing a Panasonic product.
Please read these operating instructions before using the unit and save them for
future reference.
For assistance, please call 1-800-561-5505 or visit us at www.panasonic.ca
TG78xxC(en)_1221_ver013.pdf
Operating Instructions
Link-to-Cell Cellular Convergence Solution
1
KX-TG7842C
Model No.
KX-TG7843C
KX-TG365CSK
KX-TG395CSK
KX-TG7872C
KX-TG7873C
2012/12/21
11:21:28
Advertisement
Table of Contents

Related Manuals for Panasonic KX-TG7842C


Summary of Contents for Panasonic KX-TG7842C
-
Page 1: Operating Instructions
Before initial use, see “Getting Started” on page 11. Thank you for purchasing a Panasonic product. Please read these operating instructions before using the unit and save them for future reference. For assistance, please call 1-800-561-5505 or visit us at www.panasonic.ca TG78xxC(en)_1221_ver013.pdf 2012/12/21 11:21:28... -
Page 2: Table Of Contents
Table of Contents Introduction Call Display Service Model composition ........3 Using Call Display service ......50 Accessory information ........4 Caller list ............52 Important Information Using Bluetooth Devices For your safety ..........7 Copying phonebook from a cellular phone Important safety instructions ......8 (phonebook transfer) ........55 For best performance ........8 Text message (SMS) alert ......56... -
Page 3: Introduction
The following features are provided for these models: – USB charging (USB jack is on the left side of the base unit) – Text message alert feature R The suffix (C) in the following model numbers will be omitted in these instructions: KX-TG7842C/KX-TG7843C/KX-TG365CSK/KX-TG395CSK/KX-TG7872C/KX-TG7873C TG78xxC(en)_1221_ver013.pdf 2012/12/21 11:21:28... -
Page 4: Accessory Information
Introduction Accessory information Supplied accessories KX-TG7842 KX-TG7843 KX-TG365SK Accessory item/Part number KX-TG7872 KX-TG7873 KX-TG395SK AC adaptor Telephone line cord Desk stand/Wall mounting adaptor Rechargeable batteries Handset cover Belt clip Charger PNLV226: KX-TG7842/KX-TG7843/KX-TG365SK/KX-TG395SK PNLV234: KX-TG7872/KX-TG7873 The desk stand/wall mounting adaptor comes attached to the base unit. See page 5 for replacement battery information. -
Page 5: Expanding Your Phone System
Replacement batteries may have a different capacity from that of the supplied batteries. By registering the key detector (4 max.) to a Panasonic Digital Cordless Phone and attaching it to an easy-to-lose item in advance, you can locate and find the mislaid item to which the key detector is attached. - Page 6 R The Bluetooth ® word mark and logos are owned by the Bluetooth SIG, Inc. and any use of such marks by Panasonic Corporation is under licence. All other trademarks identified herein are the property of their respective owners. TG78xxC(en)_1221_ver013.pdf...
-
Page 7: Important Information
Important Information R Do not allow the AC adaptor or telephone line cord to be excessively pulled, bent or For your safety placed under heavy objects. To prevent severe injury and loss of life/ Operating safeguards property, read this section carefully before using the product to ensure proper and safe R Unplug the product from power outlets operation of your product. -
Page 8: Important Safety Instructions
Failure to follow these instructions may cause the batteries to swell or explode. Base unit location/avoiding noise Attention: The base unit and other compatible Panasonic units use radio waves to communicate with each other. R For maximum coverage and noise-free communications, place your base unit: –... -
Page 9: Other Information
R The product should not be exposed to direct sunlight. As an ENERGY STAR ® Partner, Panasonic R Do not place heavy objects on top of the has determined that this product meets the product. ENERGY STAR guidelines for energy R When you leave the product unused for a efficiency. -
Page 10: Specifications
Important Information Specifications R Standard: DECT 6.0 (Digital Enhanced Cordless Telecommunications 6.0) Bluetooth wireless technology 2.0 R Frequency range: 1.92 GHz to 1.93 GHz (DECT) 2.402 GHz to 2.48 GHz (Bluetooth) R RF transmission power: 115 mW (max.) R Power source: 120 V AC, 60 Hz R Power consumption: Base unit:... -
Page 11: Getting Started
Getting Started n Base unit (KX-TG7871 series: page 3) R Use only the supplied Panasonic AC Setting up adaptor PNLV234. R The hook of the base unit is not designed to Connections hold the AC adaptor cord for the desk stand or wall mounting use (page 70). -
Page 12: Battery Installation
Note for battery installation R Use the supplied rechargeable batteries. For replacement, we recommend using the Rechargeable Ni-MH ONLY Panasonic rechargeable batteries noted on page 5, 8. R Wipe the battery ends ( ) with a dry cloth. R Avoid touching the battery ends ( or the unit contacts. -
Page 13: Intelligent Eco Mode
Getting Started Panasonic Ni-MH battery Controls performance (supplied batteries) Operation Operating time Handset In continuous use 10 hours max. Not in use (standby) 8 days max. If eco mode is on. Note: R Actual battery performance depends on usage and ambient environment. -
Page 14: Base Unit
Getting Started MNOISE REDUCTIONN USB jack Charge contacts (KX-TG7871 series: page 3) Charge contacts n Control type Soft keys Speaker The handset features 2 soft keys. By Display pressing a soft key, you can select the MHOLDN feature shown directly above it on the display. -
Page 15: Display/Indicators
Getting Started Item Meaning Charging the cellular phone by Out of base unit range The landline is in use. Available for: R When flashing: KX-TG7871 series (page 3) The call is put on hold. R When flashing rapidly: An By connecting a USB cable (not supplied) to incoming call is now being the cellular phone and the base unit, you can received. - Page 16 Getting Started Item Meaning Item Meaning A Bluetooth headset is Clarity booster is on. connected to the base unit. (page 24) Ready to use it. In use Answering system is being A Bluetooth headset is in use. used by another handset or the base unit.
-
Page 17: Initial Settings
Getting Started MOKN Initial settings Enter the current hour and minute (12-hour clock format) by selecting 2 n Direct command code: digits for each. Programmable settings can be accessed by Example: 9:30 pressing MMENUN, #, and then the 09 30 corresponding code on the dial keypad *: Select “AM”... -
Page 18: Link To Cell
R For more details and the list of compatible Handset cellular phones, please visit our Web site: For CELL 1: MMENUN#6111 http://www.panasonic.ca/link2cell For CELL 2: MMENUN#6112 R Before pairing a Bluetooth enabled cellular phone to the base unit, make sure that no MbN: “Yes”... -
Page 19: Link To Cell Settings
Link to Cell – “On (without Talking CID)”: The handset and base unit use your cellular Link to cell settings phone’s ringer tone. Caller information is not announced even if the Talking Call Selecting which unit receives Display is turned on. cellular calls Important: R To use this feature, your cellular phone... - Page 20 Link to Cell reconnect the cellular phone at regular Handset intervals when it returns within base unit range. You can set the interval. The default To connect/disconnect: setting is “1 min”. For CELL 1: MMENUN#6251 For CELL 2: MMENUN#6252 Important: R A long beep sounds.
-
Page 21: Cellular Line Selection
Link to Cell 7-digit phone number when making cellular – will be displayed on the handset calls. momentarily. The handset can be used once is displayed. Handset MMENUN#633 When you use the landline again Enter the 3-digit area code. Before connecting the telephone line to the R To correct a digit, press MCLEARN. -
Page 22: Making/Answering Calls Using The Handset
Making/Answering Calls Using the Handset Erasing a number in the redial list Making cellular calls n When a cellular phone is paired: Important: MEN REDIAL R Only 1 cellular line can be used at a time. MbN: Select the desired phone number. R Before making calls, confirm that the CELL a MMENUN 1 or CELL 2 indicator lights up (page 16). -
Page 23: Answering Calls
Making/Answering Calls Using the Handset When you finish talking, press MOFFN or place the handset on the base unit or charger. Storing a number to the phonebook Phone numbers of up to 24 digits can be Auto talk stored in the phonebook. You can answer calls simply by lifting the n When a cellular phone is paired: handset off the base unit or charger. - Page 24 Making/Answering Calls Using the Handset The call is taken when: For Call Waiting or Visual Call – only 1 cellular phone is paired. Waiting service users – a specific line is set to make cellular calls (page 21). To use Call Waiting or Visual Call Waiting, you R The base unit user can take the call by must first subscribe with your service provider/ pressing MCELL 1N or MCELL 2N.
-
Page 25: Call Share
Making/Answering Calls Using the Handset – a specific line is set to make Handset noise reduction cellular calls (page 21). This feature allows you to hear the voice of MbN: Select the desired cellular phone. the person you are talking to clearly, by a MSELECTN reducing the surrounding noise coming from n While another unit is on a landline call:... -
Page 26: Power Back-Up Operation For Landline
Making/Answering Calls Using the Handset MbN: Select the desired cellular phone. a To hang up the 2nd call and return to the MSELECTN 1st call (cellular call), press MOFFN, then R The call is transferred to the handset. press MCELLN. Using the other line during a Power back-up operation conversation... - Page 27 Making/Answering Calls Using the Handset may be disconnected if you touch the Panasonic Ni-MH battery handset. In such case, try to call back. performance (supplied batteries) R The range of the base unit is limited during during power back-up mode a power failure.
- Page 28 Making/Answering Calls Using the Handset n When 2 or more handsets are registered: When the unit rings, use a handset which is not supplying power to the base unit. For the operation, please see “Answering calls”, page 23. R Do not use or lift the handset which is placed on the base unit during power back-up mode.
-
Page 29: Making/Answering Calls Using The Base Unit
Making/Answering Calls Using the Base Unit When you finish talking, press MZN. Making cellular calls Note: R While on a call, you can switch from the Dial the phone number. base unit to the handset: Press MCELL 1N or MCELL 2N. –... -
Page 30: Answering Calls
Making/Answering Calls Using the Base Unit – a specific line is set to make Answering calls cellular calls (page 21). To release hold on the landline: When a landline call is being received, the Press MZN. SP-PHONE indicator flashes rapidly. R A handset user can take the call by When a cellular call is being received, the pressing M... - Page 31 Making/Answering Calls Using the Base Unit If you subscribe to both Call Display and Transferring a cellular call Visual Call Waiting services, the 2nd caller’s between the base unit and a information is displayed after you hear the Call Waiting tone on the base unit. cellular phone Press MCALL WAITN to answer the 2nd call.
- Page 32 Making/Answering Calls Using the Base Unit To make a 2nd call: Dial the phone number. a MZN To answer a 2nd call: R To hold the 2nd call, press MHOLDN. To hang up the 2nd call and return to the 1st call (cellular call), press MZN, then press MCELL 1N or MCELL 2N.
-
Page 33: Shared Phonebook
Shared Phonebook Character Shared phonebook The shared phonebook allows you to make calls without having to dial manually. The base unit and any handset registered to the base unit can use the shared phonebook. You can add 3,000 names and phone numbers to the shared phonebook, and assign each phonebook entry to the desired group (“Home”, “Cell 1”, “Cell 2”). - Page 34 Shared Phonebook R If there is no entry corresponding to Finding and calling from a the character you selected, the next phonebook entry entry is displayed. MbN: Scroll through the phonebook if Scrolling through all entries necessary. n Using a cellular line: To make a cellular/landline call, continue from step 3 for handset or step 3 for base Handset...
-
Page 35: Editing Entries
Shared Phonebook MbN: Select the desired entry. MbN: “Yes” a MSELECTN To make a cellular/landline call, continue MOFFN from step 3 for handset or step 3 for base Base unit unit, “Scrolling through all entries”, page 34. N a MERASEN MbN: Select the desired group. -
Page 36: Speed Dial
Speed Dial Erasing an entry Speed dial Press and hold the desired speed dial key You can assign 1 phone number to each of (1 to 9). a MMENUN the dial keys (1 to 9) on the handset. MbN: “Erase” a MSELECTN MbN: “Yes”... -
Page 37: Programming
Programming Programmable settings You can customize the unit by programming the following features. To access the features, there are 2 methods. Handset / Base unit n Scrolling through the display menus MMENUN Press MCN or MDN to select the desired main menu. a MSELECTN Press MCN or MDN to select the desired item from the next sub-menus. - Page 38 Programming Sub-menu 1 Sub-menu 2 Settings Code Play all msg. – – #324 – – #325 Erase all msg. Greeting – #302 Record greeting Check greeting – #303 – #304 Pre-recorded (Reset to pre-recorded greeting) New message Outgoing call 1: On #338 –...
- Page 39 Programming Main menu: “Bluetooth” Sub-menu 1 Sub-menu 2 Settings Code Link to cell – #6251 Connect – 1: Add new Disconnect #6252 device 0–6: Off–6 <6> Ringer volume #6281 (for CELL 1) – Handset – 2: Add new #6282 device 0–6: Off–6 <1>...
- Page 40 Programming Sub-menu 1 Sub-menu 2 Settings Code Settings 1: <1 min> #632 Auto connect 2: 3 min 3: 5 min 4: 10 min 0: Off – #633 Cell area code Cell line only 1: On 0: <Off> #157 mode Cell line select #634 1: Cellphone 1 –...
- Page 41 Programming Sub-menu 1 Sub-menu 2 Settings Code Set date & time – #101 Date and time Alarm 1: Once #720 2: Daily 0: <Off> *1, *9 1: <Caller ID #226 – Time adjustment auto> 0: Manual Talking Caller ID Handset 1: <On>...
- Page 42 Programming Sub-menu 1 Sub-menu 2 Settings Code – 1: <On> #165 – Key tone 0: Off – 1: On #200 Auto talk 0: <Off> Set tel line 1: Pulse #120 Set dial mode 2: <Tone> *1, *18 0: 900 ms #121 Set flash time 1: <700 ms>...
- Page 43 Programming Main menu: “Key detector” Sub-menu 1 Sub-menu 2 Settings Code Search – – #655 – Battery check – – n Base unit Main menu: “Phonebook” Operation Code Viewing the phonebook entry. #280 Main menu: “Caller list” Operation Code Viewing the caller list. #213 Main menu: “Answer device”...
- Page 44 Programming Main menu: “Initial setting” Sub-menu 1 Sub-menu 2 Settings Code Ringer setting Off–6 <1> #160 Ringer volume *1, *11 <On> #201 Interrupt tone Night mode On <Off> #238 – On/Off Night mode <11:00 PM/ #237 – Start/End 06:00 AM> Talking CID –...
-
Page 45: Special Programming
Programming *10 If you subscribe to a distinctive ring service, select a tone (tone 1 to 3). If you select a melody, you cannot distinguish lines by their ringers. *11 This tone lets you know when you receive an outside call while you are on another line or an intercom call. -
Page 46: Changing The Handset Name
Programming want to be disturbed, for example, while Changing the start and end time sleeping. Night mode can be set for each unit. Important: Handset / Base unit R Set the date and time beforehand MMENUN#237 (page 17). Continue from step 3 for handset or step R If you have set the alarm, the alarm sounds 3 for base unit, “Turning night mode on/ even if the night mode is turned on. - Page 47 Programming This is called first ring. If you do not want 10-digit format. And then, press the first ring to sound, turn this setting to MSAVEN. Go to step 5. “Off” (page 48). MMENUN Important: MbN: “Save CID” a MSELECTN R When the unit receives a call from a MbN: “Call block”...
-
Page 48: Registering A Unit
Programming To edit a number: Handset / Base unit MEDITN a Edit the phone number. a MMENUN#240 MSAVEN a MEXITN To erase a number: MbN: Select the desired setting. a MERASEN a MbN: “Yes” a MSELECTN MSAVEN a MEXITN Proceed with the operation for your unit. Note for handset and base unit: Handset: MOFFN R When editing, press the desired dial key to... - Page 49 Programming Handset: Press MOKN, then wait until a long beep sounds. Note: R While registering, “Base in registering” is displayed on all registered handsets. R When you purchase an additional handset, refer to the additional handset’s installation manual for registration. Deregistering a handset A handset can cancel its own registration to the base unit, or other handsets registered to...
-
Page 50: Call Display Service
Call Display Service – Pressing MOFFN on a handset. – Pressing MEXITN on the base unit. Using Call Display service Phonebook name display Important: R This unit is Call Display compatible. To use When caller information is received and it Call Display features, you must subscribe matches a phone number stored in the to a Call Display service. - Page 51 Call Display Service phonebook, the stored name in the Handset phonebook is announced. MMENUN#215 Ringer ID for handset MbN: Select the desired setting. MSAVEN a MOFFN You can select the desired ringer tone to a group that each phonebook entry is assigned Call Waiting Deluxe service options (page 33).
-
Page 52: Caller List
Call Display Service Displayed Handset Function option MCN CID Conference Answers the waiting call Press MCN to search from the most recent and combines it with the call, or MDN to search from the oldest call. current call to make a conference call (3-party To call back, press MSELECTN. - Page 53 Call Display Service Base unit: B Local phone number Press M Example: 321-5555 To return to the previous screen, press C Area code – Local phone number Example: 555-321-5555 indicates the caller information was received from the cellular line. Editing a caller’s phone number Base unit before calling back MCIDN...
- Page 54 Call Display Service MbN: Select the desired entry. Erasing all caller information R To edit the number, press MEDITN repeatedly until the phone number is Handset / Base unit shown in the desired format. Proceed with the operation for your unit. MSAVEN Handset: MCN CID MbN: “Phonebook”...
-
Page 55: Using Bluetooth Devices
Using Bluetooth Devices PBAP (Phone Book Access Profile) for Copying phonebook from a Bluetooth connection. Cellular phone: cellular phone (phonebook Follow the instructions of your cellular transfer) phone to copy phonebook entries. R For other cellular phones (not paired), You can copy phonebook entries from the you need to search for and select the paired cellular phones or other cellular phones base unit. -
Page 56: Text Message (Sms) Alert
For instructions on announced 2 times. The default setting is how to do this, visit our Web site: “On”. http://www.panasonic.net/pcc/support/tel/ R The unit cannot display or announce that a Important: text message has been received during a R To use the text message alert feature, you call. - Page 57 Using Bluetooth Devices Handset Pairing a headset to the base unit MMENUN#612 Important: MbN: “Yes” a MSELECTN R Make sure that the Bluetooth headset is not connected to any other Bluetooth device. R When the headset is unpaired, the disappears from the base unit Your headset: display.
- Page 58 Using Bluetooth Devices Call sharing between your headset and the handset Important: R To activate this feature, you should set privacy mode to off beforehand (page 42). n While the handset is on a landline call: To join the conversation with your headset, turn on the headset referring to your headset operating instructions.
-
Page 59: Answering System For Landline
Answering System for Landline Answering system for Turning the answering landline system on/off The answering system can answer and record Base unit calls for you when you are unavailable to Press MANSWER ON/OFFN to turn on/off the answer the phone. answering system. -
Page 60: Listening To Messages Using The Base Unit
Answering System for Landline Recording your greeting message Listening to messages Handset using the base unit MMENUN#302 When new messages have been recorded: – M N on the base unit flashes. MbN: “Yes” a MSELECTN – “New message” is displayed. After a beep sounds, hold the handset Press M N (PLAY). -
Page 61: Listening To Messages Using The Handset
Answering System for Landline Operation Erasing all messages Turn answering system on Press MERASEN 2 times while the unit is not in MPAUSEN Pause message use. 9 or Stop recording MSTOPN Stop playback Listening to messages Turn answering system off Erase currently playing using the handset message... -
Page 62: Advanced New Message Alerting Features
Answering System for Landline Storing a phone number to which the Advanced new message unit makes an alert call alerting features Handset n From the phonebook: Audible message alert MMENUN#338 This feature allows the base unit to beep to MbN: “Notification to” a inform you of a new message arrival when MSELECTN a MADDN new messages are recorded. -
Page 63: Remote Operation
Answering System for Landline Note: Erasing the set phone number R After listening to new messages, you can Handset press #9 during the call to turn off the new message alert by a call feature. MMENUN#338 R Even if the unit makes a new message alert call, the handset redial list does not show MbN: “Notification to”... -
Page 64: Answering System Settings
Answering System for Landline After the greeting message starts, enter Turning on the answering system your remote access code. remotely Follow the voice guidance prompts as If the answering system is off, you can turn it necessary or control the unit using on remotely. -
Page 65: Caller's Recording Time
Answering System for Landline R To use the Voice Mail service provided by greeting-only message asking callers to your service provider/telephone company call again later. rather than the unit’s answering system, – If you use your own message, record the turn off the answering system (page 59). -
Page 66: Voice Mail Service For Landline
Voice Mail Service for Landline Example: Voice Mail service for 1-222-333-4444 PPPP 8888 landline VM access Pauses Password Voice Mail is an automatic answering service number offered by your service provider/telephone company. After you subscribe to this service, your service provider/telephone company’s To erase the Voice Mail access Voice Mail system answers calls for you when number... -
Page 67: Listening To Voice Mail Messages
Voice Mail Service for Landline Listening to Voice Mail messages The unit lets you know that you have new Voice Mail messages in the following ways: – “New Voice Mail” is displayed if message indication service is available. Handset MMENUN#330 R The speakerphone turns on. -
Page 68: Intercom/Locator
Intercom/Locator Answering an intercom call Intercom Handset Intercom calls can be made: – between handsets Press M N to answer the page. – between a handset and the base unit When you finish talking, press MOFFN. Note: Base unit R When paging unit(s), the paged unit(s) beeps for 1 minute. - Page 69 Intercom/Locator To complete the transfer: Base unit Press MOFFN. Press MZN to answer the page. R The outside call is being routed to the destination unit. To establish a conference call: MMENUN a MbN: “Conf.” a MSELECTN R To leave the conference, press MOFFN. The other 2 parties can continue the conversation.
-
Page 70: Useful Information
Useful Information Insert the lower tabs of the adaptor into Wall mounting the unit’s bottom slots (A), then insert by pushing down the levers of the adaptor The base unit can be mounted on a wall by into the upper slots (B). changing the wall mounting adaptor’s position. -
Page 71: Error Messages
Useful Information Error messages Display message Cause/solution Access # to VM service is R You have not stored the Voice Mail access number. not stored Store the number (page 66). Base no power R The handset has lost communication with the base unit. -
Page 72: Troubleshooting
Useful Information Display message Cause/solution Requires subscription to R You must subscribe to a Call Display service. Once Caller ID. you receive caller information after subscribing to a Call Display service, this message will not be displayed. Use rechargeable battery. R A wrong type of battery such as Alkaline or Manganese was inserted. -
Page 73: Battery Recharge
Useful Information Problem Cause/solution I cannot connect a cellular R Confirm that your cellular phone is turned on. phone to the base unit. R Confirm that your cellular phone is within base unit range (page 15). R Depending on the state of the wireless environment, such as the presence of any electrical interference, there may be a delay even if the auto connection feature is turned on. - Page 74 Useful Information Making/answering calls, intercom Problem Cause/solution R The handset is too far from the base unit. Move closer. is displayed. R The base unit’s AC adaptor is not properly connected. Reconnect AC adaptor to the base unit. R The handset is not registered to the base unit. Register it (page 48).
- Page 75 Useful Information Problem Cause/solution I cannot make a call using the R The dialing mode may be set incorrectly. Change the landline. setting (page 17). R The cellular line only mode is turned on. Turn it off (page 20). I cannot make long distance R Make sure that you have long distance service.
- Page 76 Useful Information Problem Cause/solution I cannot dial the phone number R The phone number you dialed might have been edited edited in the caller list. incorrectly (for example, the long distance “1” or the area code is missing). Edit the phone number with another pattern (page 53).
- Page 77 Useful Information Problem Cause/solution I cannot connect my headset to R Confirm that your headset is turned on. the base unit. R If your headset is already connected to another Bluetooth device such as your cellular phone, disconnect the headset from your cellular phone, then perform the connecting procedure from the base unit.
-
Page 78: Answering System
Useful Information Answering system Problem Cause/solution The unit does not record new R The answering system is turned off. Turn it on (page 59). messages. R The answering system does not answer or record calls from cellular lines. R The message memory is full. Erase unnecessary messages (page 60). -
Page 79: Liquid Damage
Useful Information Liquid damage Problem Cause/solution Liquid or other form of moisture R Disconnect the AC adaptor and telephone line cord from has entered the handset/base the base unit. Remove the batteries from the handset and unit. leave to dry for at least 3 days. After the handset/base unit are completely dry, reconnect the AC adaptor and telephone line cord. -
Page 80: Industry Canada Notices And Other Information
Useful Information Industry Canada Notices and other information NOTICE: near, or on top of, a TV or VCR. If interference is experienced, move the This equipment meets the applicable Industry Canada Terminal Equipment cordless telephone further away from the TV or VCR. -
Page 81: Warranty
The warranty ALSO DOES NOT COVER damages which occurred in shipment, or failures which are caused by products not supplied by Panasonic Canada Inc., or failures which result from accidents, misuse, abuse, neglect, mishandling, misapplication, alteration, faulty... -
Page 82: Index
Index Language: 17 Eco mode: 13 Index Equalizer: 25 Error messages: 71 3-way conference: 25, 31 Flash: 24, 30, 42 Additional handset: 48 Groups: 33, 51 Alarm: 45 Answering calls: 23, 30 Handset Answering system Deregistration: 49 Call screening: 59 Locator: 68 Erasing messages: 60, 61, 64 Name: 46... - Page 83 Index USB charging: 15 Visual Call Waiting: 24, 30 VM (Voice Mail): 66 Voice guidance language: 17 Voice Mail: 64, 66 Volume Receiver: 22 Ringer (Base unit): 30, 39, 44 Ringer (Handset): 23, 39, 40 Speaker: 22, 29 Wall mounting: 70 TG78xxC(en)_1221_ver013.pdf 2012/12/21 11:21:33...
- Page 84 Date of purchase (found on the bottom of the base unit) Name and address of dealer Attach your purchase receipt here. 5770 Ambler Drive, Mississauga, Ontario L4W 2T3 © Panasonic System Networks Co., Ltd. 2012 Printed in China *PNQX5765ZA* *PNQX5765ZA* PNQX5765ZA TT1212MG0 (E) TG78xxC(en)_1221_ver013.pdf...