Table of Contents
Advertisement
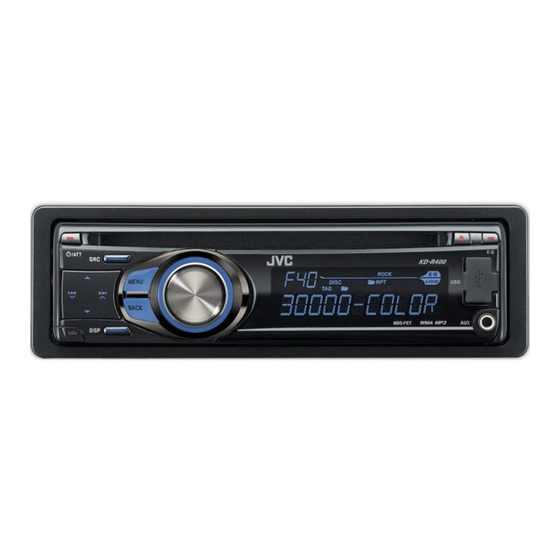
CD RECEIVER
RECEPTOR CON CD
RÉCEPTEUR CD
For canceling the display demonstration, see page 7.
Para cancelar la demostración en pantalla, consulte la página 7.
Pour annuler la démonstration des affichages, référez-vous à la page 7.
For installation and connections, refer to the separate manual.
Para la instalación y las conexiones, refiérase al manual separado.
Pour l'installation et les raccordements, se référer au manuel séparé.
INSTRUCTIONS
MANUAL DE INSTRUCCIONES
MANUEL D'INSTRUCTIONS
KD-R400
KD-R400
KD-R400
For customer Use:
Enter below the Model
No. and Serial No. which
are located on the top or
bottom of the cabinet. Retain
this information for future
reference.
Model No.
Serial No.
GET0576-001A
[J]
Advertisement
Chapters
Table of Contents
Troubleshooting

Related Manuals for JVC GET0576-001A


Summary of Contents for JVC GET0576-001A
- Page 1 MANUAL DE INSTRUCCIONES MANUEL D’INSTRUCTIONS KD-R400 KD-R400 KD-R400 For customer Use: Enter below the Model No. and Serial No. which are located on the top or bottom of the cabinet. Retain this information for future reference. Model No. Serial No. GET0576-001A...
- Page 2 – Connect the equipment into an outlet on a circuit different from that to which the receiver is connected. – Consult the dealer or an experienced radio/TV technician for help. Caution: Changes or modifications not approved by JVC could void the user’s authority to operate the equipment. IMPORTANT FOR LASER PRODUCTS 1. CLASS 1 LASER PRODUCT 2.
-
Page 3: Table Of Contents
Detaching the control panel Attaching the control panel How to reset your unit • Your preset adjustments will also be erased. How to forcibly eject a disc • You can forcibly eject the loaded disc even if the disc is locked. -
Page 4: Operations
Basic operations Using the control panel • FM/AM: Select preset station. • CD/USB: Select folder. • Turn on the power. • Attenuate the sound (if the power is on). • Turn off the power [Hold]. Select the source. AM * CD * (back to the beginning) •... -
Page 5: Display Window
Display window Tr (track) indicator Source display / Track number / Folder number / Time countdown indicator DISC indicator Sound mode indicators—CLASSIC, HIP HOP, JAZZ, ROCK, POPS, USER Playback mode / item indicators—RND (random), (disc), (folder), RPT (repeat) EQ (equalizer) indicator LOUD (loudness) indicator Disc information indicators—... -
Page 6: Using The Remote Controller (Rm-Rk50)
Using the remote controller (RM-RK50) Installing the lithium coin battery (CR2025) For USA-California Only: This product contains a CR Coin Cell Lithium Battery which contains Perchlorate Material—special handling may apply. See www.dtsc.ca.gov/hazardouswaste/perchlorate Caution: • Danger of explosion if battery is incorrectly replaced. Replace only with the same or equivalent type. -
Page 7: Preparation
Preparation Canceling the display demonstration and setting the clock • See also page 14. Press and hold until the main menu is called up. [Turn] [Press] • Repeat this procedure. Changing the display information When the power is turned off: The current clock time is displayed if “CLOCK DISP” is set to “CLOCK OFF,” (see page 14). -
Page 8: Listening To The Radio
Listening to the radio Select “FM” or “AM.” Search for a station to listen—Auto Search. When a station is tuned in, searching stops. To stop searching, press the same button again. • You can also search for a station manually—Manual Search. Hold either one of the buttons until “M”... -
Page 9: Disc Operations
Manual presetting (FM/AM) You can preset up to 18 stations for FM and 6 stations for AM. Ex.: Storing FM station of 92.50 MHz into preset number “04.” Select preset number “04.” Disc operations Stop playing and ejecting the disc •... -
Page 10: Listening To The Usb Device
Pressing (or holding) the following buttons allows you to... [Press] Pause/resume playback. MP3/WMA: Select folder [Press] Select track [Hold] Reverse/fast-forward track Selecting the playback modes You can use only one of the following playback modes at a time. [Turn] [Press] Ô... -
Page 11: Listening To The Other External Components
To stop play and detach the USB device Straightly pull it out from the unit. • Press SRC to listen to another playback source. You can operate the USB device in the same way you operate the files on a disc. (See pages 9 and 10.) Cautions: •... -
Page 12: Selecting A Preset Sound Mode
Selecting a preset sound mode You can select a preset sound mode suitable to the music genre. • See also page 14. Preset value setting for each sound mode Sound BASS mode Freq. Level USER 60 Hz 00 Q1.25 1.0 kHz ROCK 100 Hz CLASSIC... -
Page 13: Title Assignment
Select a tone. [Turn] [Press] Adjust the sound elements of the selected tone. [Turn] [Press] Adjust the frequency. Adjust the level. Adjust the Q-slope. Range/selectable items Sound elements BASS MIDDLE TREBLE Frequency 60 Hz 0.5 kHz 80 Hz 1.0 kHz 100 Hz 1.5 kHz 200 Hz... -
Page 14: Menu Operations
Menu operations Call up the menu. Category Menu items Selectable settings, [reference page] DEMO • DEMO ON Display demonstration • DEMO OFF CLOCK DISP * • CLOCK ON Clock display • CLOCK OFF CLOCK SET : Adjust the hour, then the minute, [7]. Clock setting : Select a preset sound mode suitable to the music genre. - Page 15 Category Menu items Selectable settings, [reference page] AREA • AREA US Tuner channel interval • AREA EU • AREA SA MONO * • MONO ON Monaural mode • MONO OFF IF BAND • AUTO Intermediate frequency band • WIDE COLOR 01 : Select one of the preset or user color for display and button (except EQ/ –...
- Page 16 Category Menu items Selectable settings, [reference page] VOL ADJUST VOL ADJ –05 Volume adjust — VOL ADJ +05 (Initial: VOL ADJ 00) L/O MODE • SUB.W Line output mode • REAR SUB.W FREQ * • LOW Subwoofer • MID cutoff frequency •...
-
Page 17: Color Settings
Color settings Creating your own color —USER Color You can create your own colors—“DAY COLOR” or “NIGHT COLOR.” DAY COLOR: Used when “DIMMER” is set to “DIMMER OFF.” NIGHT COLOR: Used when “DIMMER” is set to “DIMMER ON.” Select “COLOR” “USER.”... -
Page 18: More About This Unit
More about this unit Basic operations Turning on the power • By pressing SRC button on the unit, you can also turn on the power. If the source is ready, playback also starts. Turning off the power • If you turn off the power while listening to a track, playback will start from where it had been stopped previously next time you turn on the power. - Page 19 • CD-RWs may require a longer readout time since the reflectance of CD-RWs is lower than that of regular CDs. • Do not use the following CD-Rs or CD-RWs: – Discs with stickers, labels, or a protective seal stuck to the surface. –...
- Page 20 • This unit can play back MP3/WMA files meeting the conditions below: – Bit rate of MP3: 32 kbps — 320 kbps – Sampling frequency of MP3: 32 kHz, 44.1 kHz, 48 kHz (for MPEG-1) 16 kHz, 22.05 kHz, 24 kHz (for MPEG-2) –...
-
Page 21: Troubleshooting
Troubleshooting What appears to be trouble is not always serious. Check the following points before calling a service center. Symptoms • Sound cannot be heard from the speakers. • The unit does not work at all. • “AUX IN” cannot be selected. •... - Page 22 Symptoms • A longer readout time is required (“READING” keeps flashing on the display). • Tracks do not play back in the order you have intended them to play. • The elapsed playing time is not correct. • “NO FILE” appears on the display. •...
-
Page 23: Maintenance
Maintenance How to clean the connectors Frequent detachment will deteriorate the connectors. To minimize this possibility, periodically wipe the connectors with a cotton swab or cloth moistened with alcohol, being careful not to damage the connectors. Connectors Moisture condensation Moisture may condense on the lens inside the unit in the following cases: •... -
Page 24: Specifications
Specifications AUDIO AMPLIFIER SECTION Power Output: 20 W RMS × 4 Channels at 4 Ω and ≤ 1% THD+N Signal-to-Noise Ratio: 80 dBA (reference: 1 W into 4 Ω) Load Impedance: Tone Control Range: Frequency Response: Line-Out Level/Impedance: Subwoofer-Out Level/Impedance: Output Impedance: Other Terminal: TUNER SECTION... - Page 25 CD PLAYER SECTION Type: Signal Detection System: Number of Channels: Frequency Response: Dynamic Range: Signal-to-Noise Ratio: Wow and Flutter: MP3 Decoding Format: (MPEG1/2 Audio Layer 3) WMA (Windows Media® Audio) Decoding Format: USB SECTION USB Standard: Data Transfer Rate (Full Speed): Compatible Device: Compatible File System: Playable Audio Format:...
- Page 26 Having TROUBLE with operation? Please reset your unit Refer to page of How to reset your unit Still having trouble?? USA ONLY Call 1-800-252-5722 http://www.jvc.com We can help you! EN, SP, FR © 2008 Victor Company of Japan, Limited 1008DTSMDTJEIN...
- Page 27 ENGLISH This unit is designed to operate on 12 V DC, NEGATIVE ground electrical systems. If your vehicle does not have this system, a voltage inverter is required, which can be purchased at JVC car audio dealers. WARNINGS To prevent short circuits, we recommend that you disconnect the battery’s negative terminal and make all electrical connections before...
-
Page 28: Removing The Unit
La siguiente ilustración muestra una instalación típica. Si tiene alguna pregunta o necesita información acerca de las herramientas para instalación, consulte con su concesionario de JVC de equipos de audio para automóviles o a una compañía que suministra tales herramientas. -
Page 29: Electrical Connections
ENGLISH ELECTRICAL CONNECTIONS PRECAUTIONS on power supply and speaker connections: • DO NOT connect the speaker leads of the power cord to the car battery; otherwise, the unit will be seriously damaged. • BEFORE connecting the speaker leads of the power cord to the speakers, check the speaker wiring in your car. -
Page 30: Localizacion De Averias
Connecting the external amplifier or subwoofer / Conexión de los amplificadores o subwoofer externos / Connexion d’amplificateurs extérieurs ou d’un caisson de grave You can connect an amplifier to upgrade your car stereo system. • Connect the remote lead (blue with white stripe) to the remote lead of the other equipment so that it can be controlled through this unit. - Page 31 CD RECEIVER CD-RECEIVER РЕСИВЕР С ПРОИГРЫВАТЕЛЕМ КОМПАКТ-ДИСКОВ ∆ΕΚΤΗΣ ΜΕ CD KD-R501/KD-R402/KD-R401 INSTRUCTIONS BEDIENUNGSANLEITUNG ИНСТРУКЦИИ ПО ЭКСПЛУАТАЦИИ Ο∆ΗΓΙΕΣ GET0574-006A [EY]...
- Page 32 Notice: The sign Pb below the symbol for batteries indicates that this battery contains lead. Thank you for purchasing a JVC product. possible performance from the unit. Warning: If you need to operate the unit while driving, be sure to look around carefully or you may be involved in a traffic accident.
-
Page 33: Detaching The Control Panel
Detaching the control panel Attaching the control panel How to reset your unit • Your preset adjustments will also be erased. How to forcibly eject a disc • You can forcibly eject the loaded disc even if the disc is locked. -
Page 34: Basic Operations
Basic operations • FM/AM: Select preset station. • CD/USB: Select folder. • Turn on the power. • Attenuate the sound (if the power is on). • Turn off the power [Hold]. Select the source. CD * AUX IN * (back to the beginning) •... - Page 35 Display window Tr (track) indicator Source display / Track number / Folder number / Time countdown indicator DISC indicator Sound mode indicators—CLASSIC, HIP HOP, JAZZ, ROCK, POPS, USER Playback mode / item indicators— RND (random), (disc), (folder), RPT (repeat) EQ (equalizer) indicator LOUD (loudness) indicator Disc information indicators—...
-
Page 36: Preparation
Preparation Canceling the display demonstration and setting the clock • See also page 16. Press and hold until the main menu is called up. [Turn] [Press] • Repeat this procedure. Changing the display information When the power is turned off: The current clock time is displayed if “CLOCK DISP” is set to “CLOCK OFF,” (see page 16). -
Page 37: Listening To The Radio
Listening to the radio Select “FM” or “AM.” Search for a station to listen—Auto Search. When a station is tuned in, searching stops. To stop searching, press the same button again. • You can also search for a station manually—Manual Search. Hold either one of the buttons until “M”... -
Page 38: Using The Standby Receptions
Manual presetting (FM/AM) You can preset up to 18 stations for FM and 6 stations for AM. Ex.: Storing FM station of 92.50 MHz into preset number “04.” Select preset number “04.” Selecting preset station The following features are available only for FM Radio Data System stations. - Page 39 To activate TA Standby Reception The TP (Traffic Programme) indicator either lights up or flashes. • If the TP indicator lights up, TA Standby Reception is activated. • If the TP indicator flashes, TA Standby Reception is not yet activated. (This occurs when you are listening to an FM station without the Radio Data System signals required for TA Standby Reception.) To activate the reception, tune in to another station...
-
Page 40: Disc Operations
Disc operations Stop playing and ejecting the disc • “NO DISC” appears. Press SRC to listen to another playback source. Prohibiting disc ejection To cancel the prohibition, repeat the same procedure. Selecting a track/folder [Turn] [Press] • For MP3/WMA discs, select the desired folder, then the desired track by repeating the control dial procedures. -
Page 41: Listening To The Usb Device
Selecting the playback modes You can use only one of the following playback modes at a time. [Turn] [Press] Ô REPEAT RANDOM [Turn] [Press] Listening to the USB device This unit can play MP3/WMA tracks stored in a USB device. All tracks will be played repeatedly until you change the source or detach the USB device. -
Page 42: Listening To The Other External Components
Cautions: • Avoid using the USB device if it might hinder your safety driving. • Do not pull out and attach the USB device repeatedly while “READING” is shown on the display. • Do not start the car engine if a USB device is connected. -
Page 43: Controller-Rm-Rk50
Using the remote controller — This unit can be remotely controlled as instructed here (with an optionally purchased remote controller). We recommend that you use remote controller RM-RK50 with your unit. Installing the lithium coin battery (CR2025) Caution: • Danger of explosion if battery is incorrectly replaced. Replace only with the same or equivalent type. -
Page 44: Selecting A Preset Sound Mode
Selecting a preset sound mode You can select a preset sound mode suitable to the music genre. • See also page 16. [Turn] [Press] • See page 15 for “USER” settings. Preset value setting for each sound mode Sound BASS mode Freq. - Page 45 Storing your own sound mode You can store your own adjustments in memory. Select “USER” for “EQ.” [Turn] [Press] While “USER” is shown on the display... Select a tone. [Turn] [Press] Adjust the sound elements of the selected tone. [Turn] [Press] Adjust the frequency.
-
Page 46: Menu Operations
Menu operations Call up the menu. Category Menu items Selectable settings, [reference page] DEMO • DEMO ON Display demonstration • DEMO OFF CLOCK DISP * • CLOCK ON Clock display • CLOCK OFF CLOCK SET : Adjust the hour, then the minute, [6]. Clock setting 24H/12H •... - Page 47 Category Menu items Selectable settings, [reference page] AF-REG * • AF ON Alternative frequency/ regionalization reception • AF-REG ON • OFF PTY-STANDBY * PTY OFF, PTY PTY standby codes TA VOLUME * VOLUME 00 Traffic – VOLUME 50 announcement (or VOLUME 00 volume –...
- Page 48 Category Menu items Selectable settings, [reference page] FADER* R06 – F06 Fader BALANCE * L06 – R06 Balance LOUD • LOUD OFF Loudness • LOUD ON VOL ADJUST VOL ADJ –05 Volume adjust — VOL ADJ +05 (Initial: VOL ADJ 00) L/O MODE •...
-
Page 49: Color Settings (For Kd-R501)
Category Menu items Selectable settings, [reference page] AM * • AM OFF AM station • AM ON AUX IN * • AUX OFF Auxiliary input • AUX ON Displayed only when any source other than “AM” is selected. Displayed only when any source other than “AUX IN” is selected. Color settings (for KD-R501) Creating your own color —USER Color... -
Page 50: More About This Unit
More about this unit Basic operations Turning on the power • By pressing SRC button on the unit, you can also turn on the power. If the source is ready, playback also starts. Turning off the power • If you turn off the power while listening to a track, playback will start from where it had been stopped previously next time you turn on the power. - Page 51 Playing a CD-R or CD-RW • Use only “finalized” CD-Rs or CD-RWs. • This unit can only play back files of the same type as those detected first if a disc includes both audio CD (CD-DA) files and MP3/WMA files. •...
- Page 52 Playing MP3/WMA tracks from a USB device • While playing from a USB device, the playback order may differ from other players. • This unit may be unable to play back some USB devices or some files due to their characteristics or recording conditions.
-
Page 53: Troubleshooting
Troubleshooting What appears to be trouble is not always serious. Check the following points before calling a service center. Symptoms • Sound cannot be heard from the speakers. • The unit does not work at all. • “AUX IN” cannot be selected. •... - Page 54 Symptoms • Noise is generated. • A longer readout time is required (“READING” keeps flashing on the display). • Tracks do not play back in the order you have intended them to play. • The elapsed playing time is not correct. •...
-
Page 55: Maintenance
Maintenance How to clean the connectors Frequent detachment will deteriorate the connectors. To minimize this possibility, periodically wipe the connectors with a cotton swab or cloth moistened with alcohol, being careful not to damage the connectors. Connectors Moisture condensation Moisture may condense on the lens inside the unit in the following cases: •... -
Page 56: Specifications
Specifications AUDIO AMPLIFIER SECTION Maximum Power Output: Continuous Power Output (RMS): Load Impedance: Tone Control Range: Frequency Response: Signal-to-Noise Ratio: Line-Out Level/Impedance: Output Impedance: Subwoofer-Out Level/Impedance: Other Terminal: TUNER SECTION Frequency Range: FM Tuner Usable Sensitivity: 50 dB Quieting Sensitivity: Alternate Channel Selectivity (400 kHz): Frequency Response: Stereo Separation:... - Page 57 CD PLAYER SECTION Type: Signal Detection System: Number of Channels: Frequency Response: Dynamic Range: Signal-to-Noise Ratio: Wow and Flutter: MP3 Decoding Format: (MPEG1/2 Audio Layer 3) WMA (Windows Media® Audio) Decoding Format: USB SECTION USB Standard: Data Transfer Rate (Full Speed): Compatible Device: Compatible File System: Playable Audio Format:...
- Page 58 Having TROUBLE with operation? Please reset your unit Refer to page of How to reset your unit Haben Sie PROBLEME mit dem Betrieb? Bitte setzen Sie Ihr Gerät zurück Siehe Seite Zurücksetzen des Geräts Затруднения при эксплуатации? Пожалуйста, перезагрузите Ваше устройство Для...
- Page 59 Dieses Gerät ist für einen Betrieb in . If your vehicle does not have this system, a voltage inverter is required, which can be purchased at JVC IN- Anlage, ist ein Spannungsinverter erforderlich, der CAR ENTERTAINMENT dealers. bei JVC Autoradiohändler erworben werden kann.
- Page 60 Informationen hinsichtlich des Einbausatzes brauchen, your JVC IN-CAR ENTERTAINMENT dealer or a wenden Sie sich an ihren JVC Autoradiohändler oder company supplying kits. ein Unternehmen das diese Einbausätze vertreibt. • If you are not sure how to install this unit •...
- Page 61 ELECTRICAL CONNECTIONS ELEKTRISCHE ANSCHLÜSSE ЭЛЕКТРИЧЕСКИЕ ПОДКЛЮЧЕНИЯ • Connect the ISO connectors as illustrated. • Schließen Sie die ISO-Steckverbinder an, wie in der Abbildung gezeigt. • • Συνδέστε τоυς συνδέσµоυς ISO σύµφωνα µε την εικóνα. From the car body Von der Fahrzeugkarosserie Απó...
- Page 62 Stellen Sie „L/O MODE“ auf „REAR“ (siehe Seite 18 der BEDIENUNGSANLEITUNG). Ρυθμίστε το “L/O MODE” (Κατάσταση λειτουργίας εξόδου Line) στο “REAR” (Απoλαβή ενισχυτή) για να απoτρέψετε ενδεχόµενη καταστρoφή τoυς (βλ. σελίδα 18 στις O∆ΗΓΙΕΣ.) Rear speakers JVC Amplifier Hintere Lautsprecher JVC Verstärker Задние JVC-усилитель громкоговорители Ενισχυτής JVC Πίσω...
- Page 63 CD RECEIVER РЕСИВЕР С ПРОИГРЫВАТЕЛЕМ КОМПАКТ-ДИСКОВ ПРИЙМАЧ З ПРОГРАВАЧЕМ КОМПАКТ-ДИСКІВ KD-R407 INSTRUCTIONS ИНСТРУКЦИИ ПО ЭКСПЛУАТАЦИИ ІНСТРУКЦІЇ GET0575-001A [EE]...
- Page 64 [European Union only] Available characters on the display Available characters Display indications Thank you for purchasing a JVC product. possible performance from the unit. Warning: If you need to operate the unit while driving, be sure to look around carefully or you may be involved in a traffic accident.
-
Page 65: Detaching The Control Panel
Detaching the control panel Attaching the control panel How to reset your unit • Your preset adjustments will also be erased. How to forcibly eject a disc • You can forcibly eject the loaded disc even if the disc is locked. -
Page 66: Basic Operations
Basic operations • FM/AM: Select preset station. • CD/USB: Select folder. • Turn on the power. • Attenuate the sound (if the power is on). • Turn off the power [Hold]. Select the source. CD * AUX IN * FM-LO (back to the beginning) •... - Page 67 Display window Tr (track) indicator Source display / Track number / Folder number / Time countdown indicator DISC indicator Sound mode indicators—CLASSIC, HIP HOP, JAZZ, ROCK, POPS, USER Playback mode / item indicators— RND (random), (disc), (folder), RPT (repeat) EQ (equalizer) indicator LOUD (loudness) indicator Disc information indicators—...
-
Page 68: Preparation
Preparation Canceling the display demonstration and setting the clock • See also page 15. Press and hold until the main menu is called up. [Turn] [Press] • Repeat this procedure. Changing the display information When the power is turned off: The current clock time is displayed if “CLOCK DISP” is set to “CLOCK OFF,” (see page 15). -
Page 69: Listening To The Radio
Listening to the radio Select “FM,” “AM,” or “FM-LO.” Search for a station to listen—Auto Search. When a station is tuned in, searching stops. To stop searching, press the same button again. • You can also search for a station manually—Manual Search. Hold either one of •... - Page 70 Manual presetting (FM/AM) You can preset up to 12 stations for FM, 6 stations for FM-LO, and 6 stations for AM. Ex.: Storing FM station of 92.50 MHz into preset number “04.” Select preset number “04.” Selecting preset station The following features are available only for FM Radio Data System stations.
- Page 71 To activate TA Standby Reception The TP (Traffic Programme) indicator either lights up or flashes. • If the TP indicator lights up, TA Standby Reception is activated. • If the TP indicator flashes, TA Standby Reception is not yet activated. (This occurs when you are listening to an FM station without the Radio Data System signals required for TA Standby Reception.) To activate the reception, tune in to another station...
-
Page 72: Disc Operations
Disc operations Stop playing and ejecting the disc • “NO DISC” appears. Press SRC to listen to another playback source. Prohibiting disc ejection To cancel the prohibition, repeat the same procedure. Selecting a track/folder [Turn] [Press] • For MP3/WMA discs, select the desired folder, then the desired track by repeating the control dial procedures. -
Page 73: Listening To The Usb Device
[Turn] [Press] REPEAT TRACK RPT : Repeats current track FOLDER RPT : MP3/WMA: Repeats current folder RANDOM FOLDER RND : MP3/WMA: Randomly plays all tracks of current folder, then tracks of next folders ALL RND : Randomly plays all tracks Listening to the USB device This unit can play MP3/WMA tracks stored in a USB device. -
Page 74: Listening To The Other External Components
Cautions: • Avoid using the USB device if it might hinder your safety driving. • Do not pull out and attach the USB device repeatedly while “READING” is shown on the display. • Do not start the car engine if a USB device is connected. -
Page 75: Selecting A Preset Sound Mode
Selecting a preset sound mode You can select a preset sound mode suitable to the music genre. • See also page 15. [Turn] [Press] • See page 14 for “USER” settings. Preset value setting for each sound mode Sound BASS mode Freq. - Page 76 Storing your own sound mode You can store your own adjustments in memory. Select “USER” for “EQ.” [Turn] [Press] While “USER” is shown on the display... Select a tone. [Turn] [Press] Adjust the sound elements of the selected tone. [Turn] [Press] Adjust the frequency.
-
Page 77: Menu Operations
Menu operations Call up the menu. Category Menu items Selectable settings, [reference page] DEMO • DEMO ON Display demonstration • DEMO OFF CLOCK DISP * • CLOCK ON Clock display • CLOCK OFF CLOCK SET : Adjust the hour, then the minute, [6]. Clock setting 24H/12H •... - Page 78 Category Menu items Selectable settings, [reference page] AF-REG * • AF ON Alternative frequency/ regionalization reception • AF-REG ON • OFF PTY-STANDBY * PTY OFF, PTY PTY standby codes TA VOLUME * VOLUME 00 Traffic – VOLUME 50 announcement (or VOLUME 00 volume –...
- Page 79 Category Menu items Selectable settings, [reference page] VOL ADJUST VOL ADJ –05 — Volume adjust VOL ADJ +05 (Initial: VOL ADJ L/O MODE • SUB.W Line output mode • REAR SUB.W FREQ * • LOW Subwoofer cutoff • MID frequency •...
-
Page 80: More About This Unit
More about this unit Basic operations Turning on the power • By pressing SRC button on the unit, you can also turn on the power. If the source is ready, playback also starts. Turning off the power • If you turn off the power while listening to a track, playback will start from where it had been stopped previously next time you turn on the power. - Page 81 Playing a CD-R or CD-RW • Use only “finalized” CD-Rs or CD-RWs. • This unit can only play back files of the same type as those detected first if a disc includes both audio CD (CD-DA) files and MP3/WMA files. •...
- Page 82 Playing MP3/WMA tracks from a USB device • While playing from a USB device, the playback order may differ from other players. • This unit may be unable to play back some USB devices or some files due to their characteristics or recording conditions.
-
Page 83: Troubleshooting
Troubleshooting What appears to be trouble is not always serious. Check the following points before calling a service center. Symptoms • Sound cannot be heard from the speakers. • The unit does not work at all. • “AUX IN” cannot be selected. •... - Page 84 Symptoms • A longer readout time is required (“READING” keeps flashing on the display). • Tracks do not play back in the order you have intended them to play. • The elapsed playing time is not correct. • “NO FILE” appears on the display. •...
-
Page 85: Maintenance
Maintenance How to clean the connectors Frequent detachment will deteriorate the connectors. To minimize this possibility, periodically wipe the connectors with a cotton swab or cloth moistened with alcohol, being careful not to damage the connectors. Connectors Moisture condensation Moisture may condense on the lens inside the unit in the following cases: •... -
Page 86: Specifications
Specifications AUDIO AMPLIFIER SECTION Maximum Power Output: Continuous Power Output (RMS): Load Impedance: Tone Control Range: Frequency Response: Signal-to-Noise Ratio: Line-Out Level/Impedance: Output Impedance: Subwoofer-Out Level/Impedance: Other Terminal: TUNER SECTION Frequency Range: FM-LO: FM Tuner Usable Sensitivity: 50 dB Quieting Sensitivity: Alternate Channel Selectivity (400 kHz): Frequency Response: Stereo Separation:... - Page 87 CD PLAYER SECTION Type: Signal Detection System: Number of Channels: Frequency Response: Dynamic Range: Signal-to-Noise Ratio: Wow and Flutter: MP3 Decoding Format: (MPEG1/2 Audio Layer 3) WMA (Windows Media® Audio) Decoding Format: USB SECTION USB Standard: Data Transfer Rate (Full Speed): Compatible Device: Compatible File System: Playable Audio Format:...
- Page 88 Having TROUBLE with operation? Please reset your unit Refer to page of How to reset your unit Затруднения при эксплуатации? Пожалуйста, перезагрузите Ваше устройство Для получения информации о перезагрузке Вашего устройства обратитесь на соответствующую страницу Маєте ПРОБЛЕМУ з функціонуванням? Повторно налаштуйте систему Див.
- Page 89 KD-R407 Installation/Connection Manual Руководство по установке/подключению Керівництво зі встановлення та з’єднання GET0575-002A [EE] WARNINGS ПРЕДУПРЕЖДЕНИЯ 1008DTSMDTJEIN EN, RU, UK © 2008 Victor Company of Japan, Limited ПОПЕРЕДЖЕННЯ...
- Page 90 INSTALLATION (IN-DASH MOUNTING) ВСТАНОВЛЕННЯ (МОНТАЖ НА ПРИЛАДОВУ ПАНЕЛЬ) × ×...
- Page 91 ELECTRICAL CONNECTIONS ЕЛЕКТРИЧНІ З’ЄДНАННЯ...
- Page 92 JVC Amplifier Підсилювач JVC JVC Amplifier Підсилювач JVC TROUBLESHOOTING НЕСПРАВНОСТІ...
- Page 93 CD RECEIVER KD-R504 For canceling the display demonstration, see page 7. For installation and connections, refer to the separate manual. INSTRUCTIONS GET0585-001A [UI]...
- Page 94 Lower the volume before playing these digital sources to avoid damaging the speakers by sudden increase of the output level. Thank you for purchasing a JVC product. possible performance from the unit. For safety... • Do not raise the volume level too much, as this will block outside sounds, making driving dangerous.
- Page 95 Detaching the control panel Attaching the control panel How to reset your unit • Your preset adjustments will also be erased. How to forcibly eject a disc • You can forcibly eject the loaded disc even if the disc is locked.
- Page 96 Basic operations Using the control panel • FM/AM: Select preset station. • CD/USB: Select folder. • Turn on the power. • Attenuate the sound (if the power is on). • Turn off the power [Hold]. Select the source. AM * CD * (back to the beginning) •...
- Page 97 Display window Tr (track) indicator Source display / Track number / Folder number / Time countdown indicator DISC indicator Sound mode indicators—CLASSIC, HIP HOP, JAZZ, ROCK, POPS, USER Playback mode / item indicators— RND (random), (disc), (folder), RPT (repeat) EQ (equalizer) indicator LOUD (loudness) indicator Disc information indicators—...
-
Page 98: Using The Remote Controller (Rm-Rk50)
Using the remote controller (RM-RK50) Installing the lithium coin battery (CR2025) Caution: • Danger of explosion if battery is incorrectly replaced. Replace only with the same or equivalent type. • Battery shall not be exposed to excessive heat such as sunshine, fire, or the like. -
Page 99: Preparation
Preparation Canceling the display demonstration and setting the clock • See also page 14. Press and hold until the main menu is called up. [Turn] [Press] • Repeat this procedure. Changing the display information When the power is turned off: The current clock time is displayed if “CLOCK DISP” is set to “CLOCK OFF,” (see page 14). -
Page 100: Listening To The Radio
Listening to the radio Select “FM” or “AM.” Search for a station to listen—Auto Search. When a station is tuned in, searching stops. To stop searching, press the same button again. • You can also search for a station manually—Manual Search. Hold either one of •... -
Page 101: Disc Operations
Manual presetting (FM/AM) You can preset up to 18 stations for FM and 6 stations for AM. Ex.: Storing FM station of 92.50 MHz into preset number “04.” Select preset number “04.” Disc operations Stop playing and ejecting the disc •... -
Page 102: Listening To The Usb Device
Pressing (or holding) the following buttons allows you to... [Press] Pause/resume playback. MP3/WMA: Select folder [Press] Select track [Hold] Reverse/fast-forward track Selecting the playback modes You can use only one of the following playback modes at a time. [Turn] [Press] Ô... -
Page 103: Listening To The Other External Components
To stop play and detach the USB device Straightly pull it out from the unit. • Press SRC to listen to another playback source. You can operate the USB device in the same way you operate the files on a disc. (See pages 9 and 10.) Cautions: •... -
Page 104: Selecting A Preset Sound Mode
Selecting a preset sound mode You can select a preset sound mode suitable to the music genre. • See also page 14. Preset value setting for each sound mode Sound BASS mode Freq. Level USER 60 Hz 00 Q1.25 1.0 kHz ROCK 100 Hz CLASSIC... -
Page 105: Title Assignment
Select a tone. [Turn] [Press] Adjust the sound elements of the selected tone. [Turn] [Press] Adjust the frequency. Adjust the level. Adjust the Q-slope. Range/selectable items Sound elements BASS MIDDLE TREBLE Frequency 60 Hz 0.5 kHz 80 Hz 1.0 kHz 100 Hz 1.5 kHz 200 Hz... -
Page 106: Menu Operations
Menu operations Call up the menu. Category Menu items Selectable settings, [reference page] DEMO • DEMO ON Display demonstration • DEMO OFF CLOCK DISP * • CLOCK ON Clock display • CLOCK OFF CLOCK SET : Adjust the hour, then the minute, [7]. Clock setting : Select a preset sound mode suitable to the music genre. - Page 107 Category Menu items Selectable settings, [reference page] IF BAND • AUTO Intermediate frequency band • WIDE FADER* R06 – F06 Fader BALANCE * L06 – R06 Balance LOUD • LOUD OFF Loudness • LOUD ON VOL ADJUST VOL ADJ –05 — Volume adjust VOL ADJ +05 (Initial: VOL...
-
Page 108: More About This Unit
Category Menu items Selectable settings, [reference page] AM * • AM OFF AM station • AM ON AUX IN * • AUX OFF Auxiliary input • AUX ON Displayed only when any source other than “AM” is selected. Displayed only when any source other than “AUX IN” is selected. More about this unit Basic operations Turning on the power... - Page 109 Playing a CD-R or CD-RW • Use only “finalized” CD-Rs or CD-RWs. • This unit can only play back files of the same type as those detected first if a disc includes both audio CD (CD-DA) files and MP3/WMA files. •...
- Page 110 Playing MP3/WMA tracks from a USB device • While playing from a USB device, the playback order may differ from other players. • This unit may be unable to play back some USB devices or some files due to their characteristics or recording conditions.
-
Page 111: Troubleshooting
Troubleshooting What appears to be trouble is not always serious. Check the following points before calling a service center. Symptoms • Sound cannot be heard from the speakers. • The unit does not work at all. • “AUX IN” cannot be selected. •... - Page 112 Symptoms • A longer readout time is required (“READING” keeps flashing on the display). • Tracks do not play back in the order you have intended them to play. • The elapsed playing time is not correct. • “NO FILE” appears on the display. •...
-
Page 113: Maintenance
Maintenance How to clean the connectors Frequent detachment will deteriorate the connectors. To minimize this possibility, periodically wipe the connectors with a cotton swab or cloth moistened with alcohol, being careful not to damage the connectors. Connectors Moisture condensation Moisture may condense on the lens inside the unit in the following cases: •... -
Page 114: Specifications
Specifications AUDIO AMPLIFIER SECTION Maximum Power Output: Continuous Power Output (RMS): Load Impedance: Tone Control Range: Frequency Response: Signal-to-Noise Ratio: Line-Out Level/Impedance: Output Impedance: Subwoofer-Out Level/Impedance: Other Terminal: TUNER SECTION Frequency Range: FM Tuner Usable Sensitivity: 50 dB Quieting Sensitivity: Alternate Channel Selectivity (400 kHz): Frequency Response: Stereo Separation:... - Page 115 CD PLAYER SECTION Type: Signal Detection System: Number of Channels: Frequency Response: Dynamic Range: Signal-to-Noise Ratio: Wow and Flutter: MP3 Decoding Format: (MPEG1/2 Audio Layer 3) WMA (Windows Media® Audio) Decoding Format: USB SECTION USB Standard: Data Transfer Rate (Full Speed): Compatible Device: Compatible File System: Playable Audio Format:...
- Page 116 Having TROUBLE with operation? Please reset your unit Refer to page of How to reset your unit © 2008 Victor Company of Japan, Limited 1008DTSMDTJEIN...
- Page 117 • Be sure to ground this unit to the car’s chassis again after installation. Notes: • Replace the fuse with one of the specified rating. If the fuse blows frequently, consult your JVC car audio dealer. • It is recommended to connect speakers with a maximum power of more than 50 W (both at the rear and at the front, with an impedance of 4 Ω...
- Page 118 Connecting the external amplifier or subwoofer You can connect an amplifier to upgrade your car stereo system. • Connect the remote lead (blue with white stripe) to the remote lead of the other equipment so that it can be controlled through this unit.
- Page 119 CD RECEIVER For canceling the display demonstration, see page 7. For installation and connections, refer to the separate manual. INSTRUCTIONS KD-R506/KD-R505/ KD-RC502/KD-RC501 KD-R506/KD-R505/ KD-RC502/KD-RC501 GET0584-001B [U/UH]...
- Page 120 Lower the volume before playing these digital sources to avoid damaging the speakers by sudden increase of the output level. Thank you for purchasing a JVC product. possible performance from the unit. For safety... • Do not raise the volume level too much, as this will block outside sounds, making driving dangerous.
- Page 121 Detaching the control panel Attaching the control panel How to reset your unit • Your preset adjustments will also be erased. How to forcibly eject a disc • You can forcibly eject the loaded disc even if the disc is locked.
-
Page 122: Basic Operations
Basic operations Using the control panel • FM/AM: Select preset station. • CD/USB: Select folder. • Turn on the power. • Attenuate the sound (if the power is on). • Turn off the power [Hold]. Select the source. AM * CD * (back to the beginning) •... - Page 123 Display window Tr (track) indicator Source display / Track number / Folder number / Time countdown indicator DISC indicator Sound mode indicators—CLASSIC, HIP HOP, JAZZ, ROCK, POPS, USER Playback mode / item indicators— RND (random), (disc), (folder), RPT (repeat) EQ (equalizer) indicator LOUD (loudness) indicator Disc information indicators—...
-
Page 124: Using The Remote Controller (Rm-Rk50)
Using the remote controller (RM-RK50) Installing the lithium coin battery (CR2025) Caution: • Danger of explosion if battery is incorrectly replaced. Replace only with the same or equivalent type. • Battery shall not be exposed to excessive heat such as sunshine, fire, or the like. -
Page 125: Preparation
Preparation Canceling the display demonstration and setting the clock • See also page 14. Press and hold until the main menu is called up. [Turn] [Press] • Repeat this procedure. Changing the display information When the power is turned off: The current clock time is displayed if “CLOCK DISP” is set to “CLOCK OFF,” (see page 14). -
Page 126: Listening To The Radio
Listening to the radio Select “FM” or “AM.” Search for a station to listen—Auto Search. When a station is tuned in, searching stops. To stop searching, press the same button again. • You can also search for a station manually—Manual Search. Hold either one of •... -
Page 127: Disc Operations
Manual presetting (FM/AM) You can preset up to 18 stations for FM and 6 stations for AM. Ex.: Storing FM station of 92.50 MHz into preset number “04.” Select preset number “04.” Disc operations Stop playing and ejecting the disc •... -
Page 128: Listening To The Usb Device
Pressing (or holding) the following buttons allows you to... [Press] Pause/resume playback. MP3/WMA: Select folder [Press] Select track [Hold] Reverse/fast-forward track Selecting the playback modes You can use only one of the following playback modes at a time. [Turn] [Press] Ô... -
Page 129: Listening To The Other External Components
To stop play and detach the USB device Straightly pull it out from the unit. • Press SRC to listen to another playback source. You can operate the USB device in the same way you operate the files on a disc. (See pages 9 and 10.) Cautions: •... -
Page 130: Selecting A Preset Sound Mode
Selecting a preset sound mode You can select a preset sound mode suitable to the music genre. • See also page 14. Preset value setting for each sound mode Sound BASS mode Freq. Level USER 60 Hz 00 Q1.25 1.0 kHz ROCK 100 Hz CLASSIC... -
Page 131: Title Assignment
Select a tone. [Turn] [Press] Adjust the sound elements of the selected tone. [Turn] [Press] Adjust the frequency. Adjust the level. Adjust the Q-slope. Range/selectable items Sound elements BASS MIDDLE TREBLE Frequency 60 Hz 0.5 kHz 80 Hz 1.0 kHz 100 Hz 1.5 kHz 200 Hz... -
Page 132: Menu Operations
Menu operations Call up the menu. Category Menu items Selectable settings, [reference page] DEMO • DEMO ON Display demonstration • DEMO OFF CLOCK DISP * • CLOCK ON Clock display • CLOCK OFF CLOCK SET : Adjust the hour, then the minute, [7]. Clock setting : Select a preset sound mode suitable to the music genre. - Page 133 Category Menu items Selectable settings, [reference page] IF BAND • AUTO Intermediate frequency band • WIDE FADER* R06 – F06 Fader BALANCE * L06 – R06 Balance LOUD • LOUD OFF Loudness • LOUD ON VOL ADJUST VOL ADJ –05 — Volume adjust VOL ADJ +05 (Initial: VOL...
-
Page 134: More About This Unit
Category Menu items Selectable settings, [reference page] AM * • AM OFF AM station • AM ON AUX IN * • AUX OFF Auxiliary input • AUX ON Displayed only when any source other than “AM” is selected. Displayed only when any source other than “AUX IN” is selected. More about this unit Basic operations Turning on the power... - Page 135 Playing a CD-R or CD-RW • Use only “finalized” CD-Rs or CD-RWs. • This unit can only play back files of the same type as those detected first if a disc includes both audio CD (CD-DA) files and MP3/WMA files. •...
- Page 136 Playing MP3/WMA tracks from a USB device • While playing from a USB device, the playback order may differ from other players. • This unit may be unable to play back some USB devices or some files due to their characteristics or recording conditions.
-
Page 137: Troubleshooting
Troubleshooting What appears to be trouble is not always serious. Check the following points before calling a service center. Symptoms • Sound cannot be heard from the speakers. • The unit does not work at all. • “AUX IN” cannot be selected. •... - Page 138 Symptoms • A longer readout time is required (“READING” keeps flashing on the display). • Tracks do not play back in the order you have intended them to play. • The elapsed playing time is not correct. • “NO FILE” appears on the display. •...
-
Page 139: Maintenance
Maintenance How to clean the connectors Frequent detachment will deteriorate the connectors. To minimize this possibility, periodically wipe the connectors with a cotton swab or cloth moistened with alcohol, being careful not to damage the connectors. Connectors Moisture condensation Moisture may condense on the lens inside the unit in the following cases: •... -
Page 140: Specifications
Specifications AUDIO AMPLIFIER SECTION Maximum Power Output: Continuous Power Output (RMS): Load Impedance: Tone Control Range: Frequency Response: Signal-to-Noise Ratio: Line-Out Level/Impedance: Output Impedance: Subwoofer-Out Level/Impedance: Other Terminal: TUNER SECTION Frequency Range: FM Tuner Usable Sensitivity: 50 dB Quieting Sensitivity: Alternate Channel Selectivity (400 kHz): Frequency Response: Stereo Separation:... - Page 141 CD PLAYER SECTION Type: Signal Detection System: Number of Channels: Frequency Response: Dynamic Range: Signal-to-Noise Ratio: Wow and Flutter: MP3 Decoding Format: (MPEG1/2 Audio Layer 3) WMA (Windows Media® Audio) Decoding Format: USB SECTION USB Standard: Data Transfer Rate (Full Speed): Compatible Device: Compatible File System: Playable Audio Format:...
- Page 142 Having TROUBLE with operation? Please reset your unit Refer to page of How to reset your unit EN, TH © 2009 Victor Company of Japan, Limited 0509DTSMDTJEIN...
- Page 143 • Be sure to ground this unit to the car’s chassis again after installation. Notes: • Replace the fuse with one of the specified rating. If the fuse blows frequently, consult your JVC car audio dealer. • It is recommended to connect speakers with a maximum power of more than 50 W (both at the rear and at the front, with an impedance of 4 Ω...
- Page 144 The following illustration shows a typical installation. If you have any questions or require information regarding installation kits, consult your JVC car audio dealer or a company supplying kits. • If you are not sure how to install this unit correctly, have it installed by a qualified technician.
- Page 145 ENGLISH ELECTRICAL CONNECTIONS PRECAUTIONS on power supply and speaker connections: • DO NOT connect the speaker leads of the power cord to the car battery; otherwise, the unit will be seriously damaged. • BEFORE connecting the speaker leads of the power cord to the speakers, check the speaker wiring in your car.
- Page 146 Connecting the external amplifier or subwoofer / You can connect an amplifier to upgrade your car stereo system. • Connect the remote lead (blue with white stripe) to the remote lead of the other equipment so that it can be controlled through this unit.