Table of Contents
Advertisement
Available languages
Available languages
Having TROUBLE with operation?
Please reset your unit
Refer to page of How to reset your unit
Still having trouble??
USA ONLY
Call 1-800-252-5722
http://www.jvc.com
We can help you!
EN, SP
© 2009 Victor Company of Japan, Limited
CD RECEIVER
RECEPTOR CON CD
For canceling the display demonstration, see page 4.
Para cancelar la demostración en pantalla, consulte la página 4.
For installation and connections, refer to the separate manual.
Para la instalación y las conexiones, refiérase al manual separado.
0709DTSMDTJEIN
INSTRUCTIONS
MANUAL DE INSTRUCCIONES
KD-S36
KD-S36
For customer Use:
Enter below the Model
No. and Serial No. which
are located on the top or
bottom of the cabinet. Retain
this information for future
reference.
Model No.
Serial No.
GET0643-001A
[J]
Advertisement
Chapters
Table of Contents

Related Manuals for JVC GET0643-001A


Summary of Contents for JVC GET0643-001A
- Page 1 0709DTSMDTJEIN KD-S36 KD-S36 For customer Use: Enter below the Model No. and Serial No. which are located on the top or bottom of the cabinet. Retain INSTRUCTIONS this information for future reference. MANUAL DE INSTRUCCIONES Model No. Serial No. GET0643-001A...
- Page 2 – Connect the equipment into an outlet on a circuit different from that to which the receiver is connected. – Consult the dealer or an experienced radio/TV technician for help. Caution: Changes or modifications not approved by JVC could void the user’s authority to operate the equipment. IMPORTANT FOR LASER PRODUCTS 1. CLASS 1 LASER PRODUCT 2.
-
Page 3: Table Of Contents
How to reset your unit • Your preset adjustments will also be erased (except the registered Bluetooth device, see pages 12 and 13). How to forcibly eject a disc • You can forcibly eject the loaded disc even if the disc is locked. -
Page 4: Canceling The Display Demonstration
Canceling the display demonstration Turn on the power. Setting the clock Turn on the power. Select “CLOCK.” Select “CLOCK SET.” Adjust the hour. Adjust the minute. Finish the procedure. Select “DEMO OFF.” (Initial setting) Finish the procedure. (Initial setting) -
Page 5: Operations
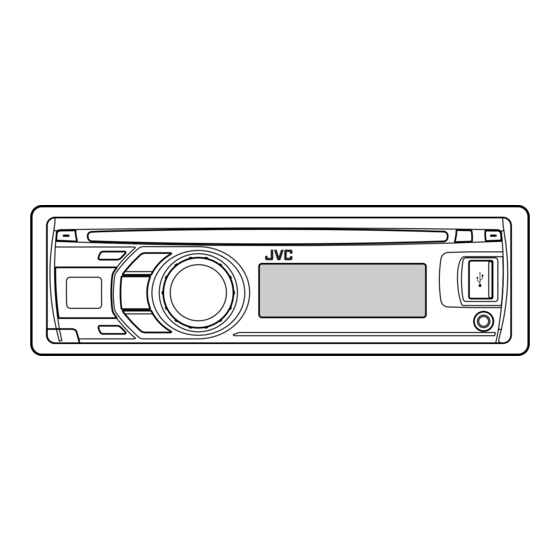
Basic operations Using the control panel • FM/AM: Select preset station. • HD RADIO: Select channel. • SIRIUS/XM: Select category. • CD/USB/CD-CH: Select folder. • IPOD: Enter the main menu/Pause playback/ Confirm selection. • BT-PHONE/BT-AUDIO: Enter/go back to previous Bluetooth menu. •... -
Page 6: Using The Remote Controller (Rm-Rk50)
You can use this function only when “IPOD MODE” is available for the connected iPod (see pages 33 and 34). You can still adjust the volume during pause when the selected source is CD/USB/USB-IPOD. Before resume playback, check to be sure that you have not raise the volume level too much. Display window Bluetooth indicator Tr (track) indicator... - Page 7 Before using the remote controller: • Aim the remote controller directly at the remote sensor on the unit. • DO NOT expose the remote sensor to bright light (direct sunlight or artificial lighting). Remote sensor • Turns the power on if pressed briefly or attenuates the sound when the power is on.
-
Page 8: Listening To The Radio
Listening to the radio Select “FM” or “AM.” Search for a station to listen—Auto Search. When a station is tuned in, searching stops. To stop searching, press the same button again. • You can also search for a station manually—Manual Search. Hold either one •... -
Page 9: Disc/Usb Operations
Manual presetting (FM/AM) You can preset up to 18 stations for FM and 6 stations for AM. Ex.: Storing FM station of 92.50 MHz into preset number “04.” Select preset number “04.” Disc/USB operations Playing a disc Caution on volume setting: Digital devices (CD/USB) produce very little noise compared with other sources. -
Page 10: Playing A File On A Usb Device
Playing a file on a USB device This unit can play MP3/WMA files stored on a USB mass storage class device. You can connect a USB mass storage class device such as a USB memory, Digital Audio Player, portable HDD, etc. to the unit. -
Page 11: Disc/File Operations
Disc/file operations Selecting a track/folder [Turn] [Press] • For MP3/WMA discs, select the desired folder, then the desired track by repeating the control dial procedures. • To return to the previous menu, press BACK. Pressing (or holding) the following buttons allows you to... -
Page 12: Using The Bluetooth® Devices
Using the Bluetooth ® devices For Bluetooth operations, it is required to connect the Bluetooth adapter (KS-BTA200) (not supplied) to the CD changer jack on the rear of this unit. • Refer also to the instructions supplied with the Bluetooth adapter and the Bluetooth device. •... - Page 13 Use the Bluetooth device to search and connect. On the device to be connected, enter the same PIN code you have just entered for this unit. “CONNECTED” appears on the display. Now connection is established and you can use the device through the unit.
-
Page 14: Using The Bluetooth Cellular Phone
When a text message comes in... If the cellular phone is compatible with text message (notified through JVC Bluetooth adapter) and “MSG INFO” (message info) is set to “AUTOMATIC” (see page 25), the unit rings to inform you of the message arrival. -
Page 15: Using The Bluetooth Audio Player
Bluetooth device, turn off, and turn on the unit again to restore the sound. If this does not work, reconnect the device (see page 13). Bluetooth Information: If you wish to receive more information about Bluetooth, visit the following JVC web site: <http://www.jvc.co.jp/english/car/> (English website only) EXTERNAL DEVICES... -
Page 16: Listening To The Hd Radio ™ Broadcast
Listening to the HD Radio ™ Broadcast Before operating, connect HD Radio tuner box, KT-HD300 (not supplied) to the CD changer jack on the rear of the unit. What is HD Radio Technology? HD Radio Technology can deliver high-quality digital sound—AM digital will have FM-like quality (in stereo) and FM digital will have CD-like quality—with static- free and clear reception. -
Page 17: Listening To The Cd Changer
Listening to the CD changer It is recommended to use a JVC MP3-compatible CD changer (not supplied) with your unit. You can connect a CD changer to the CD changer jack on the rear of the unit. • You can only play conventional CDs (including CD Text) and MP3 discs. -
Page 18: Listening To The Satellite Radio
Before operating, connect either one of the following (not supplied) to the CD changer jack on the rear of this unit. • JVC SIRIUS satellite radio System, SC-C1 and KS-SRA100, PnP, SC-VDOC1 and KS-SRA100, for listening to the SIRIUS Satellite radio. -
Page 19: Storing Channels In Memory
Select “SIRIUS” or “XM.” Select a category. SIRIUS: If you select “ALL,” you can tune in to all the channels of all categories. Select a channel to listen. • Holding the button changes the channels rapidly. • While searching, invalid and unsubscribed channels are skipped. XM: If you do not select a channel within 15 seconds, category selected in step 2 Storing channels in memory You can preset up to 18 channels for both SIRIUS and... -
Page 20: Listening To The Ipod/Iphone
Listening to the iPod/iPhone You can connect the iPod/iPhone using the following cable or adapter: Cable/adapter USB 2.0 cable (supplied with the iPod/iPhone) to the USB input jack on the control panel Interface adapter for iPod, KS-PD100 (not supplied) to the CD changer jack on the rear of the unit •... -
Page 21: When Connected With The Interface Adapter
Pressing (or holding) the following buttons allows you to... [Press] Pause/resume playback. [Press] Select track [Hold] Reverse/fast-forward track Selecting the playback modes [Turn] [Press] Ô REPEAT RANDOM When connected with the interface adapter Preparation: Make sure “CH/IPOD” is selected in the “SRC SELECT” Select “IPOD.”... -
Page 22: Listening To The Other External Components
• If a track is selected, playback starts automatically. • Press to return to the previous menu. Pressing (or holding) the following buttons allows you to... Pause/resume playback [Press] Select track [Hold] Reverse/fast-forward track Listening to the other external components You can connect an external component to: •... -
Page 23: Settings
Selecting a preset sound mode You can select a preset sound mode suitable to the music genre. • See also page 26. Storing your own sound mode You can store your own adjustments in memory. Select “USER.” [Turn] [Press] While “USER” is shown on the display... Select a tone. -
Page 24: Title Assignment
Repeat steps 3 and 4 to adjust other sound characteristics. The adjustment made will be stored automatically. Preset value setting for each sound mode Sound BASS mode Freq. Level USER 60 Hz 00 Q1.25 1.0 kHz ROCK 100 Hz CLASSIC 80 Hz +01 Q1.25 1.0 kHz POPS... -
Page 25: Bluetooth Settings
Appears only when a Bluetooth phone is connected. Appears only when a Bluetooth phone is connected and it is compatible with text message (notified through JVC Bluetooth adapter). Bluetooth Audio: Shows only “Version.” Change the setting accordingly. Setting menu (... -
Page 26: Menu Operations
Menu operations Call up the menu. Category Menu items Selectable settings, [reference page] DEMO • DEMO ON Display demonstration • DEMO OFF CLOCK DISP * • CLOCK ON Clock display • CLOCK OFF CLOCK SET : Adjust the hour, then the minute, [4]. Clock setting CLOCK ADJ * •... - Page 27 Category Menu items Selectable settings, [reference page] DIMMER • DIMMER AUTO Dimmer • DIMMER ON • DIMMER OFF SCROLL * • SCROLL ONCE Scroll • SCROLL AUTO • SCROLL OFF Pressing DISP for more than one second can scroll the display regardless of the setting.
- Page 28 Category Menu items Selectable settings, [reference page] COLOR 01 : Select one of the preset or user color for display and button (except EQ/ — COLOR 29, USER MENU COLOR • ON Menu color • OFF RING COLOR * • ON Ring color •...
- Page 29 : VOLUME 00 – VOLUME 50 : Enable “AM” in source selection, [5]. : Disable “AM” in source selection. : To use a JVC CD changer, [17], or an Apple iPod/iPhone, [20]. : To listen to a portable audio player (connected to the CD changer jack), [22].
-
Page 30: Color Settings
Color settings Selecting a preset color You can select a preset color for the buttons and display. • See also page 28. Creating your own color —USER Color You can create your own colors—“DAY COLOR” or “NIGHT COLOR.” DAY COLOR: Color for the display and buttons. NIGHT COLOR: Color for the display and buttons when the display is dimmed. -
Page 31: References
More about this unit Basic operations Turning on the power • By pressing SRC button on the unit, you can also turn on the power. If the source is ready, playback also starts. Turning off the power • If you turn off the power while listening to a track, playback will start from where it had been stopped previously next time you turn on the power. - Page 32 • CD-RWs may require a longer readout time since the reflectance of CD-RWs is lower than that of regular CDs. • Do not use the following CD-Rs or CD-RWs: – Discs with stickers, labels, or a protective seal stuck to the surface. –...
-
Page 33: Satellite Radio
• This unit can play back MP3 files recorded in VBR (variable bit rate). • The maximum number of characters for: – Folder names : 32 characters – File names : 32 characters – MP3 Tag : 64 characters – WMA Tag : 32 characters •... - Page 34 • The Bluetooth word mark and logos are owned by the Bluetooth SIG, Inc. and any use of such marks by Victor Company of Japan, Limited (JVC) is under license. Other trademarks and trade names are those of their respective owners.
-
Page 35: Troubleshooting
Troubleshooting What appears to be trouble is not always serious. Check the following points before calling a service center. Symptoms • Sound cannot be heard from the speakers. • The unit does not work at all. • “AUX IN” cannot be selected. •... - Page 36 Symptoms • Disc cannot be played back. • Noise is generated. • A longer readout time is required (“READING” keeps flashing on the display). • Tracks do not play back in the order you have intended them to play. • The elapsed playing time is not correct. •...
- Page 37 Symptoms • Tracks/folders are not played back in the order you have intended. • “CANNOT PLAY” appears on the display. • “NO USB” appears on the display. • The unit cannot detect the USB device. • “NOT SUPPORT” appears on the display and track skips.
- Page 38 Symptoms • Phone sound quality is poor. • The sound is interrupted or skipped during playback of a Bluetooth audio player. • The connected audio player cannot be controlled. • Sound quality changes when receiving HD Radio stations. • No sound can be heard. •...
- Page 39 Symptoms • “CALL 1-888-539-SIRIUS TO SUBSCRIBE” scrolls on the display while listening to the SIRIUS Satellite radio. • No sound can be heard. “UPDATING” appears on the display. • “NO SIGNAL” appears on the display. • “NO ANTENNA” or “ANTENNA”appears on the display.
- Page 40 • “RESET 1” – “RESET 7” appears on the display. • “RESET 8” appears on the display. JVC bears no responsibility for any loss of data in an iPod/iPhone and/or USB mass storage class device while using this System. Remedies/Causes •...
-
Page 41: Maintenance
Maintenance How to clean the connectors Frequent detachment will deteriorate the connectors. To minimize this possibility, periodically wipe the connectors with a cotton swab or cloth moistened with alcohol, being careful not to damage the connectors. Connectors Moisture condensation Moisture may condense on the lens inside the unit in the following cases: •... -
Page 42: Specifications
Specifications AUDIO AMPLIFIER SECTION Power Output: 20 W RMS × 4 Channels at 4 Ω and ≤ 1% THD+N Signal-to-Noise Ratio: 80 dBA (reference: 1 W into 4 Ω) Load Impedance: Tone Control Range: Frequency Response: Line-Out Level/Impedance: Subwoofer-Out Level/Impedance: Output Impedance: Other Terminal: TUNER SECTION... - Page 43 CD PLAYER SECTION Type: Signal Detection System: Number of Channels: Frequency Response: Dynamic Range: Signal-to-Noise Ratio: Wow and Flutter: MP3 Decoding Format: (MPEG1/2 Audio Layer 3) WMA (Windows Media® Audio) Decoding Format: USB SECTION USB Standard: Data Transfer Rate (Full Speed): Compatible Device: Compatible File System: Playable Audio Format:...
- Page 44 – Consulte a su distribuidor o a un técnico experto en radio/televisión. Precaución: Los cambios o modificaciones no aprobados por JVC pueden anular la autoridad del usuario para operar el equipo. IMPORTANTE PARA PRODUCTOS LÁSER 1. PRODUCTO LÁSER CLASE 1 2.
-
Page 45: Cómo Reposicionar Su Unidad
Cómo reposicionar su unidad • Sus ajustes preestablecidos también serán borrados (excepto el dispositivo Bluetooth registrado, consulte las páginas 12 y 13). Cómo expulsar el disco por la fuerza • Puede obligar a expulsar el disco cargado aunque se encuentre bloqueado. Para bloquear/desbloquear el disco, consulte la página 9. -
Page 46: Cancelación De Las Demostraciones En Pantalla
Cancelación de las demostraciones en pantalla Encienda la unidad. (Configuración inicial) Puesta en hora del reloj Encienda la unidad. (Configuración inicial) Seleccione “CLOCK.” Seleccione “CLOCK SET.” Ajuste la hora. Ajuste los minutos. Finalice el procedimiento. Seleccione “DEMO OFF.” Finalice el procedimiento. -
Page 47: Operaciones
Operaciones básicas Uso del panel de control • FM/AM: Selecciona la emisora preajustada. • HD RADIO: Seleccionar un capítulo. • SIRIUS/XM: Seleccione una categoría. • CD/USB/CD-CH: Seleccionar la carpeta. • IPOD: Ingresa al menú principal/Pausa la reproducción/Confirma la selección. • BT-PHONE/BT-AUDIO: Ingresa/vuelve al menú Bluetooth anterior. -
Page 48: Uso Del Control Remoto (Rm-Rk50)
Esta función sólo se puede utilizar cuando “IPOD MODE” se encuentra disponible para el iPod conectado (consulte las páginas 33 y 34). Incluso es posible ajustar el volumen durante la pausa, cuando la fuente seleccionada sea CD/USB/USB-IPOD. Antes de reanudar la reproducción, asegúrese de no que el volumen no esté ajustado a un nivel demasiado alto. Ventanilla de visualización Indicador Bluetooth Indicador Tr (pista) - Page 49 Antes de utilizar el control remoto: • Apunte el control remoto directamente hacia el sensor remoto del receptor. • NO exponga el sensor remoto a una luz brillante (luz solar directa o iluminación artificial). Sensor remoto • La unidad se enciende al pulsarlo brevemente o el sonido se atenúa cuando está...
-
Page 50: Para Escuchar La Radio
Para escuchar la radio Seleccione “FM” o “AM”. Efectúa la búsqueda de una emisora—Búsqueda automática. Cuando se sintoniza una emisora, la búsqueda se detiene. Para detener la búsqueda, pulse nuevamente el mismo botón. • También es posible efectuar la búsqueda manual de una emisora—Búsqueda •... -
Page 51: Operaciones De Disco/Usb
Preajuste manual (FM/AM) Es posible preajustar hasta 18 emisoras para FM y 6 emisoras para AM. Ej.: Almacenando la emisora FM de 92,50 MHz en el número de preajuste “04”. Seleccione el número de preajuste “04”. Operaciones de disco/USB Para reproducir un disco Precaución sobre el ajuste de volumen: Los dispositivos digitales (CD/USB) producen muy poco ruido al compararse con otras fuentes. -
Page 52: Reproducción De Un Archivo En Un Dispositivo Usb
Reproducción de un archivo en un dispositivo USB Esta unidad puede reproducir archivos MP3/WMA almacenados en un dispositivo de clase de almacenamiento masivo USB. Puede conectar a la unidad un dispositivo de clase de almacenamiento masivo USB tal como una memoria USB, un reproductor de audio digital, un HDD (disco duro) portátil, etc. -
Page 53: Operaciones De Disco/Archivo
Operaciones de disco/archivo Selección de una pista/carpeta [Gire] [Pulse] • Para los discos MP3/WMA, seleccione la carpeta deseada y luego la pista que desea repitiendo los procedimientos del control giratorio. • Para volver al menú anterior, pulse BACK. Pulsando (o sosteniendo) los siguientes botones usted podrá... -
Page 54: Uso De Dispositivos Bluetooth
Uso de dispositivos Bluetooth ® Para las operaciones Bluetooth, se deberá conectar el adaptador Bluetooth (KS-BTA200) (no suministrado) al jack del cambiador de CD en la parte trasera de esta unidad. • Consulte también las instrucciones suministradas con el adaptador Bluetooth y el dispositivo Bluetooth. •... - Page 55 Utilice el dispositivo Bluetooth para efectuar la búsqueda y conexión. En el dispositivo que se desea conectar, ingrese el mismo código PIN que el ingresado para esta unidad. Aparece “CONNECTED” en la pantalla. Ahora la conexión ha quedado establecida y usted puede usar el dispositivo a través de la unidad.
-
Page 56: Usar El Teléfono Celular Bluetooth
Si el teléfono celular es compatible con mensajes de texto (que se notifica a través del adaptador Bluetooth JVC), y “MSG INFO” (información sobre mensaje) está ajustado a “AUTOMATIC” (consulte la página 25), la unidad emite un pitido audible para avisarle la llegada de un mensaje. -
Page 57: Uso Del Reproductor De Audio Bluetooth
Si esto no funciona, vuelva a conectar el dispositivo (consulte la página 13). Información Bluetooth: Si desea obtener más información sobre Bluetooth, visite el siguiente sitio web de JVC: <http://www.jvc.co.jp/english/car/> (Sitio web sólo en inglés) DISPOSITIVOS EXTERNOS... -
Page 58: Para Escuchar La Transmisión De Hd Radio
Para escuchar la transmisión de HD Radio ™ Antes de hacer funcionar, conecte el sintonizador HD Radio, KT-HD300 (no suministrado) al jack del cambiador de CD en la parte posterior de la unidad. ¿Qué es la tecnología HD Radio? La tecnología HD Radio puede brindar sonido digital de alta calidad—las emisiones digital AM tendrán calidad similar a las FM (en estéreo) y las digital FM poseerán calidad similar a la de un CD—con una recepción clara... -
Page 59: Escuchando El Cambiador De Cd
Escuchando el cambiador de CD Se recomienda usar, con esta unidad, un cambiador de CD compatible con MP3 JVC (no suministrado). Puede conectar un cambiador de CD al jack del cambiador de CD en la parte trasera de la unidad. -
Page 60: Para Escuchar La Radio Satelital
Antes de la operación, conecte cualquiera de las dos unidades siguientes (no suministrado) al jack del cambiador de CD de la parte trasera de esta unidad. • Sistema de radio satelital JVC SIRIUS, SC-C1 y KS-SRA100, PnP, SC-VDOC1 y KS-SRA100, para escuchar la radio satelital SIRIUS. - Page 61 Seleccione “SIRIUS” o “XM”. Seleccione una categoría. SIRIUS: Si selecciona “ALL”, puede sintonizar todos los canales de todas las categorías. Seleccione el canal de audición. • Al mantener pulsado el botón, los canales se cambian rápidamente. • Durante la búsqueda, se omiten los canales no válidos y aquellos a los que no está...
-
Page 62: Escuchando El Ipod/Iphone
Escuchando el iPod/iPhone Puede conectar el iPod/iPhone mediante el siguiente cable o adaptador. Cable/adaptador Cable USB 2.0 (suministrado con el iPod/iPhone) al jack de entrada USB del panel de control Adaptador de interfaz para iPod, KS-PD100 (no suministrado) al jack del cambiador de CD en la parte trasera de la unidad •... -
Page 63: Cuando Se Conecta Con El Adaptador De
Pulsando (o sosteniendo) los siguientes botones usted podrá... [Pulse] Pausar/reanudar la reproducción. [Pulse] Seleccionar la pista [Sostener] Retroceso/avance rápido de pista Cómo seleccionar los modos de reproducción [Gire] [Pulse] Ô REPEAT RANDOM Cuando se conecta con el adaptador de interfaz Preparativos: Asegúrese de que esté... -
Page 64: Escuchando Otros Componentes Externos
Pulsando (o sosteniendo) los siguientes botones usted podrá... Pausar/reanudar la reproducción [Pulse] Seleccionar la pista [Sostener] Retroceso/avance rápido de pista Escuchando otros componentes externos Podrá conectar un componente externo a: • EXT INPUT: Jack del cambiador de CD de la parte trasera de esta unidad utilizando los siguientes adaptadores (no suministrado): –... -
Page 65: Ajustes
Selección de un modo de sonido preajustado Podrá seleccionar un modo de sonido preajustado adecuado al género musical. • Consulte también la página 26. Cómo guardar su propio modo de sonido Es posible almacenar sus propios ajustes en la memoria. Seleccione “USER”. -
Page 66: Asignación De Título
Repita los pasos 3 y 4 para ajustar otras carácterísticas de sonido. Los ajustes realizados se guardarán automáticamente. Configuración del valor preajustado para cada modo de sonido Modo de BASS sonido Frec. Nivel USER 60 Hz 00 Q1.25 1.0 kHz ROCK 100 Hz CLASSIC... -
Page 67: Ajustes Bluetooth
Bluetooth. Aparece solamente cuando se ha conectado un teléfono Bluetooth, y es compatible con mensajes de texto (se notifica a través del adaptador Bluetooth JVC). Bluetooth Audio: Sólo se muestra “Version”. Cambie el ajuste de conformidad. Menú de ajustes (... -
Page 68: Operaciones De Los Menús
Operaciones de los menús Llame el menú. Categoría Opciones del Configuraciones seleccionables, [página de referencia] menú DEMO • DEMO ON Demostración en pantalla • DEMO OFF CLOCK DISP * • CLOCK ON Indicación del reloj • CLOCK OFF CLOCK SET : Ajuste la hora, y a continuación, los minutos, [4]. - Page 69 Categoría Opciones del Configuraciones seleccionables, [página de referencia] menú DIMMER • DIMMER AUTO Atenuador de • DIMMER ON luminosidad • DIMMER OFF SCROLL * • SCROLL ONCE Desplazamiento • SCROLL AUTO • SCROLL OFF Pulsando DISP durante más de 1 segundo podrá desplazar la indicación independientemente del ajuste.
- Page 70 Categoría Opciones del Configuraciones seleccionables, [página de referencia] menú COLOR 01 : Seleccione uno de los colores preajustados o de usuario para la iluminación de — COLOR 29, USER MENU COLOR • ON Color de los menús • OFF RING COLOR * •...
- Page 71 : Se activa “AM” en la selección de fuente, [5]. • AM OFF : Se desactiva “AM” en la selección de fuente. • CH/IPOD : Para usar un cambiador de CD JVC, [17] o un iPod/iPhone Apple [20]. • EXT INPUT : Para escuchar un reproductor de audio portátil (conectado al jack del cambiador de CD), [22].
-
Page 72: Ajustes De Color
Ajustes de color Selección de un color preajustado Puede seleccionar un color preajustado para los botones y la pantalla. • Consulte también la página 28. Creando sus propios colores —USER Color Podrá crear sus propios colores—“DAY COLOR” (color de día) o “NIGHT COLOR” (color de noche). DAY COLOR: Color para la pantalla y los botones. -
Page 73: Referencias
Más sobre este receptor Operaciones básicas Conexión de la alimentación • También es posible conectar la alimentación pulsando el botón SRC en la unidad. Si está preparada la fuente, también se iniciará la reproducción. Apagado de la unidad • Si apaga la unidad mientras está escuchando alguna pista, la próxima vez que la encienda, la reproducción comenzará... - Page 74 • Los CD-RWs pueden requerir un tiempo de lectura mayor debido a que la reflectancia de los CD-RWs es menor que la de los CDs regulares. • No utilice los CD-Rs o CD-RWs siguientes: – Discos con pegatinas, etiquetas o un sello de protección adheridos a la superficie.
- Page 75 • Esta unidad puede reproducir archivos MP3 grabados en VBR (velocidad de bit variable). • Número máximo de caracteres para: – Nombres de las carpetas : 32 caracteres – Nombres de los archivos : 32 caracteres – Etiqueta MP3 : 64 caracteres –...
- Page 76 • La marca Bluetooth y sus logotipos son propiedad de Bluetooth SIG, Inc., y cualquier uso de los mismos por Victor Company of Japan, Limited (JVC) se realiza bajo licencia. Otras marcas y nombres comerciales son de sus respectivos propietarios.
-
Page 77: Localización De Averías
Localización de averías Lo que aparenta ser una avería podría resolverse fácilmente. Verifique los siguientes puntos antes de llamar al centro de servicio. Síntomas • No se puede escuchar el sonido a través de los altavoces. • El receptor no funciona en absoluto. •... - Page 78 Síntomas • No se puede reproducir el disco. • Se generan ruidos. • Se requiere mayor tiempo de lectura (“READING” permanece parpadeando en la pantalla). • Las pistas no se reproducen en el orden de reproducción intentado por usted. • El tiempo de reproducción transcurrido no escorrecto.
- Page 79 Síntomas • Las pistas/carpetas no se reproducen en el orden que desea. • Aparece “CANNOT PLAY” en la pantalla. • Aparece “NO USB” en la pantalla. • La unidad no puede detectar el dispositivo USB. • Aparece “NOT SUPPORT” en la pantalla y se omiten las pistas.
- Page 80 Síntomas • La calidad del sonido telefónico es mala. • El sonido se interrumpe o salta durante la reproducción de un reproductor de audio Bluetooth. • No puede controlarse el reproductor de audio conectado. • La calidad del sonido cambia cuando se reciben emisoras HD Radio.
- Page 81 Síntomas • El texto “CALL 1-888-539-SIRIUS TO SUBSCRIBE” (llame al 1-888-539-SIRIUS para suscribirse) se desplaza por la pantalla mientras escucha la radio SIRIUS. • El sonido no se escucha. Aparece “UPDATING” en la pantalla. • Aparece “NO SIGNAL” en la pantalla. •...
- Page 82 • Aparece “RESET 1” – “RESET 7” en la pantalla. • Aparece “RESET 8” en la pantalla. JVC no se hará responsable de ninguna pérdida de datos en un iPod/iPhone y/o dispositivo de clase de almacenamiento masivo USB mientras se utiliza este sistema. Soluciones/Causas •...
-
Page 83: Mantenimiento
Mantenimiento Cómo limpiar los conectores Un desmontaje frecuente producirá el deterioro de los conectores. Para reducir esta posibilidad al mínimo, limpie periódicamente los conectores con un palillo de algodón, teniendo cuidado de no dañar los conectores. Conectores Condensación de humedad Podría condensarse humedad en el lente del interior de la unidad, en los siguientes casos: •... -
Page 84: Especificaciones
Especificaciones SECCIÓN DEL AMPLIFICADOR DE AUDIO Salida de potencia: 20 W RMS × 4 canales a 4 Ω y ≤ 1% THD+N Relación señal a ruido: 80 dBA (referencia: 1 W en 4 Ω) Impedancia de carga: Gama de control de tono: Respuesta de frecuencias: Nivel/impedancia salida línea: Nivel/impedancia salida subwoofer:... - Page 85 SECCIÓN DEL REPRODUCTOR DE CD Tipo: Sistema de detección de señal: Número de canales: Respuesta de frecuencias: Gama dinámica: Relación señal a ruido: Lloro y trémolo: Formato de decodificación MP3: (MPEG1/2 Audio Layer 3) Formato de decodificación WMA (Windows Media® Audio): SECCIÓN USB Norma USB: Velocidad de transferencia de datos (Velocidad máxima):...