Table of Contents
Advertisement
Operating Instructions
DVD Recorder
Model No. DMR-EH80V
EJECT
CH
PULL OPEN
DMR-EH80V
The GUIDE Plus+ System is available in these countries:
™
Belgium, Germany, France, Netherlands, Austria,
This service may not be available in some areas of the countries listed above.
*
The supplied areas may change.
*
VHS RECORDING
PAL NTSC
REC
PAL NTSC
HDD & DVD
DVD-RAM/DVD-R/DVD-RW/+R RECORDING
RAM
OPEN/CLOSE
VHS
HDD
DVD
CH
SD CARD / DV IN
™
Spain,
Switzerland,
Italy (Status: 30th April 2005).
SD
DRIVE SELECT
HDD
REC
DUBBING
VHS
DVD
/x1.3
Advertisement
Chapters
Table of Contents

Related Manuals for Panasonic DMR-EH80V


Summary of Contents for Panasonic DMR-EH80V
-
Page 1: Operating Instructions
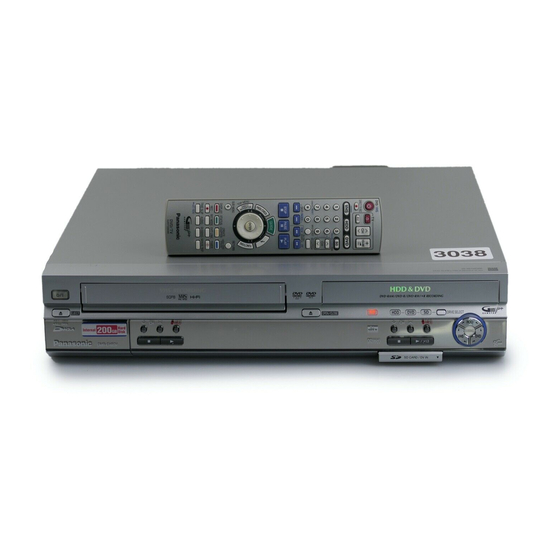
Operating Instructions DVD Recorder Model No. DMR-EH80V VHS RECORDING HDD & DVD DVD-RAM/DVD-R/DVD-RW/+R RECORDING PAL NTSC EJECT OPEN/CLOSE DRIVE SELECT PULL OPEN DUBBING /x1.3 DMR-EH80V SD CARD / DV IN ™ PAL NTSC The GUIDE Plus+ System is available in these countries: ™... -
Page 2: Table Of Contents
Contents Page FUNCTIONS selection menu 65-111 DISC MANAGEMENT 109-111 Before you start Safety precautions Overview: FUNCTIONS selection menu Disc name New functions Entering text Disc protection Symbols 8-13 Erase all titles Remote control Front panel Format disc DIRECT NAVIGATOR 68-72 Display Auto-Play Select Overview: DIRECT NAVIGATOR... -
Page 3: Before You Start
Dear customer Thank you for your trust and your decision to purchase DVD/VHS VOLUME DIRECT TV REC this top-quality device. Panasonic is one of the leading Audio/Video cable Operating Instructions AC mains lead TRACKING/V-LOCK/PAGE manufacturers of entertainment electronics devices. -
Page 4: Safety Precautions
Safety precautions Voltage: Only use power sources complying with the specifications for this device. AC mains lead protection Ensure the AC mains lead is connected correctly and not damaged. Install this device in a horizontal Poor connection and lead damage can cause fire or electric shock. position. - Page 5 Sikkerhetsinstrukser (Norsk) Turvallisuusohjeita (Finnish) ADVARSEL: VAROITUS: Norsk: Apparatet bør stilles opp i nærheten av stikkontakten på en slik måte at man uhindret får FOR Å REDUSERE FAREN FOR BRANN, ELEKTRISK STØT TULIPALO-, SÄHKÖISKUVAARAN TAI TUOTETTA KOHTAAVAN MUUN VAHINGON VÄHENTÄMISEKSI EI LAITETTA SAA ELLER SKADER PÅ...
-
Page 6: New Functions
New functions Your DVD Recorder saves data in the highest quality to a quickly accessible HDD and e.g. to DVD-RAM. Thus, there are many new features available that outperform older storage media. Immediate recording The unit finds available storage space on its own without overwriting your old data. To start recording right away, press the record button REC. - Page 7 New functions GUIDE Plus+ ™ Your DVD Recorder can display a television programme list for analogue broadcast. You can enjoy various useful features such as displaying the television programme list for up to the next 7 days and perform easy timer recordings by simply selecting the desired programmes from the television programme list.
-
Page 8: Remote Control
TIME SLIP CANCEL/RESET Navigating the GUIDE Plus+ menu. Cancel button JET REW Back 24 hours Switch button of the AV input between INPUT SELECT Panasonic Green Forward 24 hours AV1, AV2, AV3 (front), TP (DVD), DC (VHS) , DV DVD/TV Blue Programme selection [Prog. -
Page 9: Vhs Functions
Still picture or time loop playback. ENTER: Select or save a setting. AUDIO DUBBING MANUAL SKIP TIME SLIP ENTER: Select or save a setting. JET REW SUB MENU Launch sub menus. Panasonic RETURN RETURN DVD/TV Exit a menu. Exit a menu. EUR7729KM0... - Page 10 Record mode button (SP, LP, EP) Record mode button (XP, SP, LP, EP) ENTER DUBBING DUBBING DUBBING menu DUBBING menu SUB MENU RETURN CREATE HDD/DVD DISPLAY STATUS CHAPTER ERASE REC MODE EXT LINK TIMER AUDIO DUBBING MANUAL SKIP TIME SLIP JET REW Panasonic DVD/TV EUR7729KM0...
- Page 11 REC MODE EXT LINK TIMER Green Add station or selection buttons in the menus. AUDIO DUBBING MANUAL SKIP TIME SLIP JET REW Yellow Move station or selection buttons in the menus. Panasonic Blue DVD/TV Navigate the GUIDE Plus+ menu. EUR7729KM0...
- Page 12 SANSUI 05,31,33 WHITE WESTINGHOUSE 05,06 Some television models of the brands listed above, (e.g. older Panasonic units), cannot be operated using the remote control. Switching to AV input on your Panasonic television set Press AV. Each press of the button switches between TV reception and AV input.
- Page 13 Remote control If you use another Panasonic unit at the same location, change the mode of the remote control so that you can operate the units independently of each other. Setting the remote control Setting the remote control mode for unit.
-
Page 14: Front Panel
S VIDEO IN PULL OPEN EXT LINK EXT LINK DUBBING VIDEO IN L/MONO - AUDIO IN - R /x1.3 DMR-ES80V Panasonic DMR-EH80V SD CARD / DV IN SD CARD DV IN Display SD Card slot One Touch Dubbing Standby/on switch Front connections Press to switch the unit from on to standby mode or vice versa. -
Page 15: Display
Display TIMER-controlled recording. Blinking: There are less than 10 minutes until the start of a programmed TIMER recording. The device is not set to TIMER standby mode. Information displays in DVD/HDD mode Information displays in VHS mode VHS operating state, e.g. playback, search Disc is being read. -
Page 16: Rear Panel
Rear panel HDD/DVD OUT AC IN~ = Power supply HDD/DVD OUT VHS/DVD COMMON AV2 (DECODER/EXT) COMPONENT VIDEO OUT 21-pin Scart socket = connection of an external unit = Luminance signal (luminance) = Chrominance signal (colour difference) AV1 (TV) 21-pin Scart socket = TV connection = Chrominance signal (colour difference) R-AUDIO-L = Audio output right/left channel VIDEO... -
Page 17: Connecting With 21-Pin Scart Cable
Connecting with a 21-pin Scart cable Connecting the TV Setup Aerial With Q Link function and Download from TV 21-pin Scart socket AC mains lead With a 21-pin Scart cable Auto-Setup RF IN Aerial input AC IN~ DVD Recorder = Extra equipment for the connection shown: Aerial infeed line 21-pin Scart cable Follow the steps below. -
Page 18: Connecting With Audio/Video Cable
Connecting with Audio/Video cable (HDD/DVD only) Connecting the TV Setup Aerial AC mains lead With an Audio/Video cable Auto-Setup RF IN Aerial input AC IN~ DVD Recorder = Extra equipment for the connection shown: Aerial infeed line Follow the steps below. HDD/DVD OUT Aerial infeed line... -
Page 19: Connecting With S Video Cable
Connecting with S VIDEO cable (HDD/DVD only) Connecting the TV Setup Aerial Auto-Setup With an S VIDEO cable and an AC mains lead Audio cable RF IN Aerial input AC IN~ DVD Recorder = Extra equipment for the connection shown: S VIDEO cable, Aerial infeed line Follow the steps below. -
Page 20: Download From Tv Using Q Link
Download from TV using (Registered trademark of Panasonic) Note that you must first perform a station search. If you have a Panasonic television, [Download from TV] will be displayed Download in progress, please wait. RETURN: to abort automatically at the beginning of the station transfer. -
Page 21: Guide Plus+ Setup
GUIDE Plus+ setup Auto-Setup Auto-Setup of the GUIDE Plus+ system In order to receive data, the country, date and time of your current location must be Do you want to setup set in the basic settings of the unit. When the unit is first set up, the Auto-Setup menu the GUIDE Plus+ system ? for the GUIDE Plus+ system will appear after the station search or the automatic station configuration (Q Link). -
Page 22: Guide Plus+ Setup
GUIDE Plus+ setup Automatic update of the GUIDE Plus+ data 12. 1. Mi 14:55 Setup After the GUIDE Plus+ system has been set up, the data is automatically updated several times each day. To guarantee an update, switch your unit to standby mode and Do you want to setup the GUIDE Plus+ system? do not take your unit offline. -
Page 23: External Devices
External devices = Extra equipment for the connections shown Connecting a Set Top Box, satellite receiver, decoder You can connect a Set Top Box to receive digital terrestrial signals (DVB-T), AC mains lead a Satellite receiver (digital / analogue) or a decoder for decrypting programmes. AC IN~ Disconnect the power from all units. -
Page 24: Audio Out (L/R), Optical
External devices Connecting an analogue amplifier or an analogue system component = Extra equipment for the connections shown Amplifier (example) Before you connect the cable, make sure that the power to both devices is turned off. After you have connected the cables, switch both devices on. AUDIO IN In order to enjoy stereo or Dolby Pro Logic, connect the appropriate amplifier or an analogue audio component. -
Page 25: Av3, Dv-In
VIDEO IN Before you connect the cable, make sure that the power to both devices is turned off. Panasonic DMR-EH80V After you have connected the cables, switch both devices on. Audio/Video cable If the audio output of the other device is mono, connect it to the L/MONO socket. -
Page 26: Component-Video Out
COMPONENT VIDEO OUT (HDD/DVD only) COMPONENT VIDEO OUT socket These sockets can be used for interlace or progressive output and deliver a clearer picture than the S VIDEO OUT socket. Connections via these sockets COMPONENT output colour difference signals ( / ) and luminance signal ( ) separately. VIDEO IN Colours can be reproduced true to colour. -
Page 27: Handling Discs
DVD lens cleaner (RP-CL720E) Compatible models: Only for Panasonic's DVD recorders. Do NOT use this cleaner with any other Panasonic DVD products or with the DVD products of any other companies since doing so may damage the products. -
Page 28: Handling Your Hdd
Handling your HDD Your HDD (Hard disk drive) is a highly precise recording unit with a particularly long recording capacity and a high recording speed. Be careful with the unit since it can be easily damaged. Always save an additional backup copy of important data on a disc! Your HDD is sensitive to vibrations, jolts and dust. -
Page 29: Handling Your Hdd
Liability for recorded data "HDD SLP (SLEEP)" appears in the display Panasonic is in no way liable for Your HDD automatically went into SLEEP mode. When the unit is switched on, the HDD spins at a direct or indirect problems resulting high speed. -
Page 30: Disc Formats
Disc formats Playback and recording discs TIME SLIP function, CPRM compatible, supports 2 channel sound, 200GB 16:9 format,creation of playback lists, deleting individual titles frees Video / pictures rewritable (Hard disk drive) up storage space,Temporary storage 4,7GB / 9,4GB, 12cm TIME SLIP function, CPRM compatible, supports 2 channel sound, 2,8GB, 8cm 16:9 format,creation of playback lists, deleting individual titles frees... - Page 31 Disc formats DVD-Video format (V) DVD Video Recording format (VR) Cartridge discs When the write-protection device is activated, This format corresponds with the commercially This format enables the free editing of available DVD-Video. Recordings made with this recordings. Digital programmes that you can neither record nor edit or delete the unit must be finalised in order to be played back allow "one time only recording"...
-
Page 32: Using Dvd-R, Dvd-Rw, +R
Using DVD-R, DVD-RW, +R -RW V +R Copying from HDD to DVD in high-speed mode You can copy titles from the HDD to DVD in high-speed mode. Before the titles are saved to the HDD, please perform the following settings: In the SETUP menu, set the setting for Rec for High Speed dubbing to [On]. -
Page 33: Sd Memory Card
This unit supports SD Memory Cards that are formatted with FAT 12 and FAT 16 systems (based on write protection SD Memory Card spec.). Additional information is available on the Internet at http://panasonic.co.jp/pavc/global/cs Suitable SD storage cards 8 MB 16 MB... -
Page 34: Playback
Playback Playback functions JPEG playback 41-44 Playback 35-39 Picture playback Playback Displaying the picture properties Pause during playback Rotating pictures Cancelling playback Zoom in / Zoom out Resuming playback Editing a picture Direct playback Folder Selecting programmes/titles for playback Select Folder A menu appears on the television screen Editing Folders MANUAL SKIP... -
Page 35: Playback
Playback Preparation Switch your television on and select the appropriate AV channel. Switch the DVD Recorder on and select the desired drive with HDD or DVD. PLAY Playback STOP Cancelling playback RAM -R -RW V +R -RW VR Press PLAY . Press STOP to watch TV via the unit's tuner. -
Page 36: Selecting Programmes/Titles For Playback
Playback Selecting programmes/titles for playback RAM -R -RW V +R -RW VR DIRECT NAVIGATOR TITLE VIEW VIDEO PICTURE DVD-RAM You can display the menu during playback, recording and in stop mode using the DIRECT NAVIGATOR button. TP 12.9. THU Press DIRECT NAVIGATOR. to select the desired title and confirm with ENTER. -
Page 37: Slow-Motion Playback
Playback SLOW/ SEARCH Slow-motion playback Press SLOW/SEARCH in pause mode. Speed can be controlled in 5 stages. Press PLAY to resume normal playback. RAM -R -RW V +R The pause feature is automatically switched on after approx. 5 minutes. Only for forwards direction. Only motion pictures DVD-A Fast forward/rewind... -
Page 38: Quick View (Play/ X1.3)
Playback Quick View (Play/ x1.3) Increase playback speed without negative effects on sound. Press and hold PLAY during playback. DVD-RAM PLAY x1.3 Press PLAY again to return to normal playback speed. Output takes place in PCM with a digital connection. Quick View is cancelled if SKIP or PAUSE is pressed or playback of a... -
Page 39: Time Slip
Playback TIME SLIP TIME SLIP RAM -R -RW V +R -RW VR JET REW Press TIME SLIP. to select the time that the playback should jump forward or back. If you press the buttons, the time span increases or decreases minute-by-minute. If you hold the button, it increases or decreases in 10-minute units. -
Page 40: Mp3 Playback
MP3 playback CD (MP3/JPEG) FUNCTIONS CD(MP3/JPEG) MP3 Playback mode The following information on the file type appears at the beginning: Playback MENU Playback mode is set to MP3. Select "JPEG" from MENU in FUNCTIONS if you play Recording GUIDE Plus+ pictures ( JPEG ). -
Page 41: Jpeg Playback
JPEG playback Picture playback JPEG Menu PICTURE (JPEG) VIEW SD CARD PICTURE Press DIRECT NAVIGATOR. Folder DISC HDD RAM If TITLE VIEW appears, press the GREEN button, to switch to PICTURE. The PICTURE (JPEG) VIEW appears on the screen. to select the desired picture and start picture playback using ENTER. To select a picture using the numeric buttons, press e.g. -
Page 42: Folder
JPEG playback Folder Press DIRECT NAVIGATOR. HDD RAM If TITLE VIEW appears, press the GREEN button to switch to PICTURE. The PICTURE (JPEG) VIEW appears on the screen. Select Folder to select [Folder] in PICTURE (JPEG) VIEW. DIRECT NAVIGATOR PICTURE ( Confirm [Folder] with ENTER. -
Page 43: Paging In The Direct Navigator
JPEG playback DIRECT NAVIGATOR PICTURE (JPEG) VIEW SD CARD PICTURE Paging in the DIRECT NAVIGATOR Folder \SUMMER to select [Previous] or [Next] and confirm with ENTER or press SKIP Selecting several objects to select the desired title and press PAUSE to add it to the selection or Previous Next... -
Page 44: Jpeg/Mp3 Format
JPEG/MP3 format The unit can process up to a maximum of 999 files and 99 folders (including higher folders). If TIFF-format pictures are to be played back or if there are a lot of files and/or folders, the procedure can take quite some time. Some files may not be able to be displayed or played back. -
Page 45: Playback
Do not open the protective flap on the front side of the cassette and do not touch the tape. Use high-quality, brand-name tapes, for example from Panasonic. During the playback of cassettes that were recorded on a different VHS recorder, you may experience a lower picture quality. -
Page 46: Playback
Playback Switch the unit on and insert a recorded video cassette. SLOW/ SEARCH PLAY Image search forwards or backwards Playback During playback, press or . Press PLAY to start the playback. The search speed increases by pressing the button twice From standby mode, you also start playback using PLAY . -
Page 47: Vhs Index Search System (Viss)
Playback SKIP/INDEX VHS index search system (VISS) Setting the track position manually The unit automatically sets the track position. If a cassette was This unit records special index signals with each recording. recorded on another unit, it may be necessary to set the track The index search function uses these signals. -
Page 48: Recording
Recording Recording functions Recording information 49-50 Recording 51-53 Recording, Pause during recording Direct TV recording Setting a time for the end of the recording Playback during recording Simultaneous recording and playback FLEXIBLE REC (FR) Displaying the available recording time TIMER-controlled recordings 54-57 Manual programming Storage space on the disc... - Page 49 Recording Recording information It is not possible to simultaneously record to the HDD (Hard disk drive) and a DVD. Continuous recording or playback of both sides of double-sided disc is not possible. Digital sound signals cannot be recorded. Digital programmes that are restricted to one-time recording cannot be recorded on DVD-R, DVD-RW, +R or 8cm DVD-RAM discs.
- Page 50 Recording Recording information If you have activated the write-protection, cancel it. -RW V If you use an unformatted DVD-RAM or DVD-RW you must format it before the first recording. You can only change the channel or the record mode in pause mode. The material is then recorded as a separate title.
- Page 51 Recording Recording television programmes Use CH , or the number buttons to select the TV channel or use INPUT SELECT to select the AV channel for externally connected devices. Press REC MODE to select the recording mode. Press REC to start the recording. Press STOP to stop the recording.
- Page 52 Recording Setting a time for the end of the recording HDD RAM -R -RW V +R During record, press REC on the unit. The unit display changes with each press of the button: Counter Counter This is not possible with FLEXIBLE REC or TIMER-controlled recordings. The unit does not switch off after the recording ends.
- Page 53 Recording FLEXIBLE REC (FR) RAM -R -RW V +R The unit calculates the best possible recording quality between XP and EP. It is adjusted to fit the space available on the disc. This function is not possible during an EXT LINK recording. Titles recorded to the HDD (Hard disk drive) in FR mode are recorded such that they FLEXIBLE REC can later be exactly copied to a 4.7GB disc.
- Page 54 TIMER-controlled recordings Manual programming TIMER Remain HDD 72:50 LP DVD 3:59 LP RECORDING 12:09:37 18. 2. THU Press PROG/CHECK. The TIMER RECORDING screen appears. Disc Stop Nr Name Datum No. Name Date Start Start Stop Mode Drive Mode space Confirm the highlighted line with ENTER. 10/ 2 01 ARD MON - SAT...
- Page 55 TIMER-controlled recordings Checking , changing or deleting TIMER RECORDINGS Press PROG/CHECK. to select the TIMER RECORDING. Remain 72:50 LP DVD 3:59 LP TIMER RECORDING 12:09:37 18. 2. THU Disc Checking or changing Nr Name Datum Stop Mode No. Name Date Start Start Stop...
- Page 56 TIMER-controlled recordings 49-50 Please take notice of the recording information. RAM -R -RW V +R You can programme up to 32 programmes per month in advance. Remain 72:50 LP DVD 3:59 LP ShowView ShowView 12:09:37 18. 2. THU ShowView Programming recordings with By entering a ShowView number, the TIMER-controlled recording is easy to set.
- Page 57 TIMER-controlled recordings TIMER RECORDING in the GUIDE Plus+ system You can select a programme that you want to record in the GUIDE Plus+ programme list (even if [No Data] is displayed) and transfer it directly to the TIMER RECORDING TIMER Remain HDD 106:51 SP DVD 2:00 SP RECORDING...
- Page 58 Recording Recording television programmes Insert a video cassette with an intact write-protection tab. Use CH , to select the channel. Recording time for E-240 cassettes Press REC MODE to select the tape speed. SP - Normal mode: approx. 4 hours With each press of the button, the display switches from: SP LP - Long-Play-mode: approx.
- Page 59 TIMER-controlled recordings Manual programming Timer recording 1 / 3 Press PROG/CHECK. The Timer recording screen appears. Name Date Start Stop Confirm the highlighted line with ENTER. 1 ARD 19.11. 10:30 11:30 SP ON to select the name of the TV station. - - - - - - - - -.
- Page 60 TIMER-controlled recordings ShowView Programming recordings with ShowView ShowView Insert a video cassette with intact write-protection tab. Press ShowView. 8 3 5 4 2 - - - - Enter the ShowView number using the number buttons. to delete a number. Confirm the ShowView number with ENTER. ENTER :enter : access...
-
Page 61: Recording Via Dv Input
DV AUTO REC The programmes (e.g. via a digital video unit) are recorded as one title. Model of DV Panasonic A new chapter is created at each break in the picture and a playlist is automatically created. NV--DX100 Switch off this unit and the DV unit (e.g. digital camcorder) before you connect it to the DV... - Page 62 TIMER-controlled recordings via external devices Before TIMER recordings via external devices You control the recording function via an external device (e.g. receiver) using SETUP AV2 Settings EXT LINK. Connect the external device with a 21-pin Scart cable to the AV2 socket. AV2 Input Video Adjust the Ext Link function for the connected device.
- Page 63 VIDEO IN In stop mode, use INPUT SELECT to select the input channel AV3. Panasonic DMR-EH80V Press PLAY . At the point where you want to begin recording, press PAUSE . Press REC. Start the playback on the external device.
-
Page 64: Manually Copying
Manually copying RAM -R -RW V +R Manually copying from VHS to HDD or DVD DC channel (copy input channel) Start the playback. If you select the DC channel, the VHS element can receive and record video/audio Press PAUSE where you want to start recording. signals from HDD or DVD. -
Page 65: Functions Selection Menu
FUNCTIONS selection menu You can access the main functions via the FUNCTIONS selection menu. Press FUNCTIONS in stop mode. The illustrations show DVD-RAM menus. to select a menu and confirm with ENTER. The menu entries can be different To view the second screen page, use to select [To Others] and depending on the disc or medium confirm with ENTER. -
Page 66: Entering Text
FUNCTIONS selection menu RAM -R -RW V +R Entering text You can give discs or programmes titles in various menus: In DIRECT NAVIGATOR, in PLAYLISTS, in DISC MANAGEMENT and when setting the TIMER-controlled recording. DIRECT NAVIGATOR PLAYLISTS DISC MANAGEMENT Enter Name Standard Characters Other Characters Schreibschutz... -
Page 67: Symbols
FUNCTIONS selection menu Symbols DIRECT NAVIGATOR PLAYLISTS TIMER RECORDING Remain 72:50 LP DVD 3:59 LP TIMER The title is currently being recorded. RECORDING 12:09:37 18. 2. THU Disc Nr Name Datum No. Name Date Start Stop Stop Mode Drive Mode The title overlaps other recordings. -
Page 68: Overview: Direct Navigator
FUNCTIONS selection menu DIRECT NAVIGATOR In DIRECT NAVIGATOR, you can archive, edit or start recordings after selecting a title. DIRECT NAVIGATOR TITLE VIEW DVD-RAM VIDEO PICTURE Direct access: Press DIRECT NAVIGATOR on your remote control. The DIRECT NAVIGATOR menu is displayed. ARD 12. -
Page 69: Edit Title
FUNCTIONS selection menu DIRECT NAVIGATOR Edit Title DIRECT NAVIGATOR TITLE VIEW DVD-RAM VIDEO PICTURE Press SUB MENU in DIRECT NAVIGATOR. to select the desired option and confirm with ENTER. Erase ARD 12. 9. THU Properties Erase When you perform this procedure, the title is deleted and cannot be recovered. Edit RAM -R -RW V +R... - Page 70 FUNCTIONS selection menu DIRECT NAVIGATOR Erase Edit Title Properties Press SUB MENU in DIRECT NAVIGATOR. Edit Enter Name to select [Edit] and confirm with ENTER. Set up Protection Chapter View to select the desired option and confirm with ENTER. Cancel Protection Table View Partial Erase Enter Name...
- Page 71 FUNCTIONS selection menu DIRECT NAVIGATOR Erase Edit Title Properties Press SUB MENU in DIRECT NAVIGATOR. Edit Enter Name to select [Edit] and confirm with ENTER. Set up Protection Chapter View to select the desired option and confirm with ENTER. Cancel Protection Table View Change Thumbnail Partial Erase...
- Page 72 FUNCTIONS selection menu DIRECT NAVIGATOR RETURN Playing back chapters DIRECT NAVIGATOR TITLE VIEW VIDEO PICTURE DVD-RAM Press SUB MENU in DIRECT NAVIGATOR. to select Chapter View and confirm with ENTER. [Previous] or [Next] to select additional pages and press ENTER. ARD 12.9.
-
Page 73: Overview: Guide Plus
FUNCTIONS selection menu GUIDE Plus+ GUIDE Plus+ system Launching and operating the GUIDE Plus+ system Direct access Access via the FUNCTIONS menu The GUIDE Plus+ information panels Landscape view in the GUIDE Plus+ system Changing stations in landscape view Portrait view in the GUIDE Plus+ system Changing stations in portrait view Programme information in the GUIDE Plus+ system Selecting the programme from the desired category in the GUIDE Plus+ system 77... -
Page 74: Guide Plus
FUNCTIONS selection menu GUIDE Plus+ Launching and operating the GUIDE Plus+ system Two convenient GUIDE Plus+ lists (Landscape view and Portrait view) in which you can select the desired station and display programme information are available in the GUIDE Plus+ system. FUNCTIONS DVD-RAM Direct access:... -
Page 75: Landscape View In The Guide Plus+ System
FUNCTIONS selection menu GUIDE Plus+ Landscape Prog. Type Landscape view in the GUIDE Plus+ system 12.1. Wed 15:05 12.1. Mi All Types The approximate programme start times are shown in the time bar in 30-minute 16:05~17:05 Gilmore Girls Time: 15:00 15:30 16:00 16:30... -
Page 76: Portrait View In The Guide Plus+ System
FUNCTIONS selection menu GUIDE Plus+ Prog. Type Portrait Portrait view in the GUIDE Plus+ system 12.1. Wed 15:05 12.1. Wed All Types to navigate within the GUIDE Plus+ list. ARD ZDF RTL SAT1 RTL2 VOX PRO7 15:00~15:15 Only current and future programmes are shown. Abenteuer Wildnis Tagesschau 15:15~16:00... -
Page 77: Programme Information In The Guide Plus+ System
FUNCTIONS selection menu GUIDE Plus+ Programme information in the GUIDE Plus+ system 12. 1. Wed 12. 1. Wed 15:05 Additional information (name of programme, programme duration, broadcast time, 7th Heaven short description) is available for some programmes. VOX , Series 15:05-16:05 , 60Min These programmes have the symbol . -
Page 78: Setup Of The Guide Plus+ System
FUNCTIONS selection menu GUIDE Plus+ Setup of the GUIDE Plus+ system Landscape Prog. Type 12. 1. Wed 15:05 All Types 12. 1. Wed You can change the basic settings for your GUIDE Plus+ list in the 15:05~16:05 7th Heaven Time: 15:00 15:30 16:00... -
Page 79: Changing The Basic Settings For Your Guide Plus+ System
FUNCTIONS selection menu GUIDE Plus+ Changing the basic settings for your GUIDE Plus+ system 12. 1. Wed 15:05 Setup Host Channel Postal Code 31224 The GUIDE Plus+ System information is transferred via the Host Channel. Host Channel Auto Wrong entries lead to incorrect data. The [Auto] setting is recommended. Data Download Auto Download Priority GUIDE Plus+... -
Page 80: Editor
FUNCTIONS selection menu GUIDE Plus+ Changing the basic settings for your GUIDE Plus+ system Press GUIDE to launch the GUIDE Plus+ list. 12. 1. Wed 15:05 Editor Press SUB MENU. The sub menu is displayed. SUB MENU Name On/Off Reference Source Tuner Editor... -
Page 81: Dubbing
FUNCTIONS selection menu DUBBING Dubbing overview Information on high-speed copying Dubbing with the dubbing list Titles and playlists can be dubbed to the disc in the desired order. Editing the playlist Deleting all saved dubbing settings and lists Dubbing information Recording and playback during dubbing Timer-controlled Dubbing A finalized DVD-R, DVD-RW (DVD-Video format), +R etc. - Page 82 FUNCTIONS selection menu DUBBING Different media formats with different dubbing methods can be copied with this unit. Dubbing overview 88-89 84-86 Timer-controlled Dubbing One Touch Dubbing Dubbing with the dubbing list Cancel All Destination Capacity: 4080MB Cancel All Time Setting Size: 1306MB ( 32%) Dubbing Direction Dubbing Direction...
- Page 83 FUNCTIONS selection menu DUBBING Information on high-speed copying RAM -R -RW V +R Information on dubbing with the dubbing list. Copy direction In high-speed mode, it is possible to copy from HDD to RAM and vice versa. In normal-speed mode, it is only possible to copy from HDD to RAM. -RW VR In high-speed mode, it is possible to copy from DVD-RW(VR) to HDD.
- Page 84 FUNCTIONS selection menu DUBBING Dubbing with the dubbing list Titles and playlists can be compiled and dubbed in the desired order. -RW VR Press FUNCTIONS. -R +R -RW V Select DUBBING and confirm with ENTER. HDD RAM -RW VR to select the desired option. HDD RAM SD HDD RAM SD only pictures...
- Page 85 FUNCTIONS selection menu DUBBING Create List You can create a copy list from the existing titles and PLAYLISTS. Confirm [New item] with ENTER. Destination Capacity: 4080MB Cancel All In the Create List screen, use to select the desired title and confirm with ENTER. Size: 1306MB ( 32%) Dubbing Direction Size...
- Page 86 FUNCTIONS selection menu DUBBING Editing the dubbing list In the DUBBING screen, use to select [Create List] and to select [New item]. Destination Capacity: 4080MB Speicherplatz Ziel: 4080MB Cancel All Größe: Size: 1306MB ( 32%) 0MB( 0%) to select the desired title and press SUB MENU. Kopierrichtung Dubbing Direction Size...
- Page 87 FUNCTIONS selection menu DUBBING Dubbing information Recording and playback during dubbing During dubbing in high-speed mode, you can record to the HDD (Hard disk drive) or play back from it. Press ENTER to switch off the screen display. Use STATUS to display information on the dubbing procedure. Time-lapsed playback, editing, etc.
- Page 88 FUNCTIONS selection menu DUBBING Timer-controlled Dubbing DVD-V The entire disc/cassette can be dubbed or the duration of the dubbing can be determined. RAM -R -RW V +R The titles are transferred without chapters. S-VHS RAM -R -RW V +R The procedures and screen displays are also recorded during the dubbing. Video cassettes and DVD-Video discs available for purchase are usually copy-protected and cannot be dubbed DVD-Audio, Video CDs, Audio CDs cannot be dubbed.
- Page 89 FUNCTIONS selection menu DUBBING Dubbing Mode to select [Recording Mode] and confirm with ENTER. to select the desired recording mode [XP, SP, LP, EP, FR] and confirm with ENTER. The format is automtically identified. to return to [Dubbing Mode] and use to select [Dubbing Time].
- Page 90 DUBBING / Copying One Touch Dubbing You can copy directly between VHS, HDD and DVD. RAM -R -RW V +R The title that is currently running can be dubbed with just one push of the RAM -R -RW V +R -RW VR button without other settings being required.
-
Page 91: Playlists
FUNCTIONS selection menu PLAYLISTS To Others You can create and then edit a playlist from your favourite chapters of your recording. Insert a recorded disc. If write protection is activated, deactivate it. Creating a Playlist PLAYLISTS Create DVD-RAM Press FUNCTIONS in stop mode. 03 ZDF 1.10. -
Page 92: Select / Edit Playlists
FUNCTIONS selection menu PLAYLISTS To Others Select / Edit Playlists Press FUNCTIONS. DVD-RAM PLAY to select [To Others] and confirm with ENTER. Confirm PLAYLISTS with ENTER. to select a playlist. You can play the playlist with ENTER. With SUB MENU, the sub-menu for editing the playlist appears. - Page 93 FUNCTIONS selection menu PLAYLISTS To Others Edit Playlists Press FUNCTIONS. to select [To Others] and confirm with ENTER. Confirm PLAYLISTS with ENTER. to select a playlist. Press SUB MENU to select [Edit] and confirm with ENTER. In the sub-menu, select the desired option. Erase Properties Create...
-
Page 94: Edit Chapters
FUNCTIONS selection menu PLAYLISTS To Others Edit Chapters PLAYLISTS PLAYLIST VIEW DVD-RAM Press FUNCTIONS. to select [To Others] and confirm with ENTER. Confirm PLAYLISTS with ENTER. 23.9 THU 0:30 1.10 FRI 0:10 1.10 FRI 0:20 In PLAYLIST VIEW, use to select a playlist. Erase Properties Press SUB MENU. - Page 95 FUNCTIONS selection menu PLAYLISTS To Others Edit Chapters PLAYLISTS CHAPTER VIEW DVD-RAM DVD-RAM In CHAPTER VIEW, use to select the desired chapter and press SUB MENU. 03 ZDF 1.10. FRI 0:00 In the sub-menu, use to select the desired option and confirm with ENTER. Add Chapter Move Chapter Move Chapter...
-
Page 96: Copying All Pictures From An Sd Card
FUNCTIONS selection menu COPY ALL PICTURES To Others Copying all pictures from an SD Card You can copy all content from an SD Card to HDD or DVD using the COPY ALL PICTURES function. To select the SD drive, press SD. Press FUNCTIONS. -
Page 97: Setup
FUNCTIONS selection menu SETUP To Others Press FUNCTIONS in stop mode. to select [To Others] and confirm with ENTER. to select SETUP and confirm with ENTER. to select the desired sub menu and use to switch to setting. to select the desired setting and confirm with ENTER. to select the desired option and confirm with ENTER. - Page 98 FUNCTIONS selection menu SETUP To Others ENTER Tuning Manual Entering a new television station SETUP Manual to select an empty station position and confirm with ENTER. Auto-Setup Restart Enter the channel using 0 0 0 0 0 0 0 0 0 0 0 0 0 0 0 0 0 0 0 0 0 0 0 0 0 0 0 0 0 0 0 0 0 0 0 0 0 0 0 0 0 0 0 0 0 0 0 0 0 0 0 0 0 0 0 0 0 0 0 0 0 0 0 0 0 0 0 0 0 0 0 0 0 0 0 0 0 0 0 0 0 0 0 0 0 0 0 0 0 0 0 0 0 0 0 0 9 9 9 9 9 9 9 9 9 9 9 9 9 9 9 9 9 9 9 9 9 9 9 9 9 9 9 9 9 9 9 9 9 9 9 9 9 9 9 9 9 9 9 9 9 9 9 9 9 9 9 9 9 9 9 9 9 9 9 9 9 9 9 9 9 9 9 9 9 9 9 9 9 9 9 9 9 9 9 9 9 9 9 9 9 9 9 9 9 9 9 9 9 9 9 9 Download from TV Tuning...
- Page 99 FUNCTIONS selection menu SETUP To Others Tuning Manual ENTER Changing the name of the television station Manual Tuning Name Name to select the name of the television station and confirm with ENTER. to select [Name] and use to select the name field. The cursor jumps to the first letter SAT1 Change the letter using...
-
Page 100: List Of Language Codes
FUNCTIONS selection menu SETUP To Others Tuning Auto-Setup Restart ENTER Auto-Setup Restart Auto-Setup Restart Warning--all stored tuning data will be lost ! to select [Yes] and confirm with ENTER. Do you want to proceed ? The station search begins. To cancel the process, use to select [No] and confirm with ENTER SELECT or press RETURN. -
Page 101: Disc
FUNCTIONS selection menu SETUP To Others ENTER ENTER Disc Settings Options SETUP Settings for playback Ratings Changing the Security Level Ratings Level 5 [Unlock Recorder] DVD-Audio Video mode Playback Return to level 8 You can restrict the playback of DVD-Video by Tuning Soundtrack Ratings... -
Page 102: Picture
FUNCTIONS selection menu SETUP To Others ENTER ENTER Picture Settings Options SETUP Comb Filter [ON] [Off] Comb Filter On: The picture becomes clear and contour-rich. This setting is always set to [On] if you Still Mode Automatic have selected [TV System - NTSC]. Seamless Play Tuning Off: If the picture to be recorded is grainy. -
Page 103: Sound
FUNCTIONS selection menu SETUP To Others ENTER ENTER Sound Settings Options SETUP Dynamic Range [ON] [Off] Dynamic Range Compression Compression Bilingual Audio Selection DVD-V On: The level of quiet sections is increased and the level of loud sections is Digital Audio Output (only Dolby Digital) decreased. - Page 104 FUNCTIONS selection menu SETUP To Others ENTER ENTER Sound Digital Audio Output Options MPEG PCM Down Conversion Dolby Digital SETUP Digital Audio Output Digital Audio Output PCM Down Conversion Select the appropriate setting if an external unit is connected to the DIGITAL AUDIO Dolby Digital Bitstream OUT of the DVD Recorder.
-
Page 105: Display
FUNCTIONS selection menu SETUP To Others ENTER ENTER Display Settings Options [Automatic] [Off] On-Screen SETUP On-Screen Messages Automatic Messages Automatic: The screen messages are displayed on the screen. Grey Background FL Display [ON] [Off] Bright Grey Background Tuning On: The grey background is displayed when there is no television reception. Disc Picture [Bright] [Dim] [Automatic]... -
Page 106: Connection
FUNCTIONS selection menu SETUP To Others ENTER ENTER Connection Settings Options SETUP TV Aspect [16:9] [4:3] [Letterbox] TV Aspect 16:9 Progressive Select the TV picture format of your television set. TV System Letterbox: Black strips appear at the top and bottom of your screen. Tuning Progressive [ON] [Off]... -
Page 107: Connection
FUNCTIONS selection menu SETUP To Others Connection ENTER ENTER ENTER AV2 Settings ettings Options SETUP AV2 Input AV2 Settings TV Aspect 16:9 Perform the settings in the following sub-menus for the Progressive AV2 Connection connected device. TV System Tuning Ext Link AV1 Output Video Disc... -
Page 108: Others
Remote Control [MODE 1] [MODE 2] [MODE 3] Clock Change the code of the remote control so that you can also use another Power Save Tuning Panasonic DVD un it at the same time. Quick Start Disc Language English If the date and time are not transmitted by the television station, they must be set manually. -
Page 109: Disc Management
FUNCTIONS selection menu DISC MANAGEMENT To Others DISC Press FUNCTIONS in stop mode. MANAGEMENT Remain 0:59(XP) Title No. 1 DVD-RAM Used 0:01 to select [To Others] and confirm with ENTER. to select DISC MANAGEMENT and confirm with ENTER. Disc Name to select the desired menu and confirm with ENTER. -
Page 110: Format Disc
FUNCTIONS selection menu DISC MANAGEMENT CARD MANAGEMENT To Others If write protection is activated, deactivate it. DISC MANAGEMENT Remain 0:59(XP) Title No. 1 DVD-RAM Used 0:01 Press FUNCTIONS in stop mode. to select [To Others] and confirm with ENTER. Disc Name to select DISC MANAGEMENT or CARD MANAGEMENT Disc Protection and confirm with ENTER. -
Page 111: Auto-Play Select
FUNCTIONS selection menu DISC MANAGEMENT To Others Press FUNCTIONS. DISC MANAGEMENT to select [To Others] and confirm with ENTER. Remain 0:59(XP) Title No. 1 DVD-R Used 0:01 to select DISC MANAGEMENT and confirm with ENTER. Disc Name to select the desired menu and confirm with ENTER. Top Menu Use FUNCTIONS to return to the FUNCTIONS menu. -
Page 112: Display Menus
DISPLAY menus DISPLAY menus contain information about the disc or the unit. With DVD-Video you can use the repeat function, change subtitles and angles, with DVD playback, you can change the picture and sound setting. Depending on the status of the unit (playback, stop), there are some entries that cannot be selected or changed. -
Page 113: Display Menus
DISPLAY menus DISPLAY Play Option Setting Disc Repeat Play Repeat Play [On] [Off] This function is only available when the elapsed playtime is displayed. Play During the playback of playback list RAM -R -RW V +R -RW VR DVD-V Picture Sound PL (PLAYLISTS) Title... -
Page 114: Status Displays
STATUS displays STATUS Displaying the information Press STATUS. Press STATUS again. The display changes each time that the button is pressed. To exit the display, press STATUS. 1: Current medium 2: Current recording and playback state, input channel DVD-RAM Pause playback Record PLAY PAUSE... - Page 115 STATUS displays When using the unit, information on the settings of the unit and the operating procedure appear on the telelvision screen. STATUS Displaying the information Press STATUS. Each time the button is pressed, the display switches from time - tape counter - tape remaining - .
-
Page 116: Vhs Functions
VHS FUNCTIONS Settings in the VHS FUNCTIONS Menu Timer recording VHS FUNCTIONS Timer-controlled recording Timer recording QUICK ERASE QUICK ERASE Erase all recordings on a played tape. Tape length : AUTO E - 240 Setting the tape length of the used cassette. Tape length PB Colour system : AUTO AUTO... -
Page 117: Before Requesting Service
Before requesting service RESET In the SETUP menu for Shipping Condition, select the option [Yes]. All settings except for password, time and security level will be reset to the factory default settings. The timer Restoring the default factory settings recording programmes will also be deleted. while retaining your main settings. - Page 118 Dubbing takes longer if there are a lot of titles. If you are using another Panasonic DVD Recorder that is not compatible with the recording mode [EP (8Hours)], you cannot dub titles over 6 hours long to a DVD-R, DVD-RW (DVD-Video format) and +R at high speed.
- Page 119 Before requesting service FUNCTION No function possible. Check the power supply connection. The unit is switched on but cannot be used. There is a malfunction. The numbers following the letter «H» indicate the condition of the unit. Switch the unit to standby /I. If the unit does not switch to standby mode, press and hold /I for approx.
- Page 120 Before requesting service STROM DISPLAY The display lighting Change the [FL Display] in the Display SETUP menu. is weak. " 0:00" blinks on the unit display. No time. Set the time in the Others, [Clock] SETUP menu. REMOTE CONTROL If the unit is in timer standby mode ( on the unit) end this with TIMER...
- Page 121 Before requesting service RECORDING Cannot record Check whether the inserted disc is suitable for recording. The disc is not formatted. Format the di sc (RAM/DVD-RW). The write-protection device on t he Cartridge is set to "PROTECT". De activate the write protection. If you activated the write protection, deactivate it in the DISC MANAGEMENT menu.
-
Page 122: Guide Plus+ System: Questions And Answers
GUIDE Plus+ system: Questions and answers SETUP Check whether GUIDE Plus+ system setup was performed in full. / The GUIDE Plus+ system data is updated several times each day. When the device is first connected, the GUIDE Plus+ system is not yet ready to Why does my GUIDE Plus+ system not receive any receive data. - Page 123 GUIDE Plus+ system: Questions and answers DOWNLOAD How does my unit behave during data transfer ? During data transfer, "GUIDE" appears on your unit’s display and the unit’s fan switches on. RECORDING Is it possible to programme a recording, with a start and end time that You can manually change the start and end time of TIMER programmes in the TIMER RECORDING menu.
-
Page 124: Glossary
Glossary Bitstream HDD (Hard disk drive) computer or mobile phone. The data is transferred over the Digital multi-channel audio data (e.g. 5.1-channel) before Internet or over television channels. This unit can receive A mass storage device used in computers etc. The drive decoding to the individual channels. -
Page 125: Further Information
Further Information This DVD Recorder is a precision unit. Handle it The manufacturer accepts no responsibility and offers This product incorporates copyright protection technology carefully and do not expose it to vibrations during no compensation for loss of recorded or edited material that is protected by U.S. -
Page 126: Specifications
Specifications Dimensions: approx. 430 mm (W) x 89 mm (H) x 380 mm (D) Power supply AC 220V-240 V, 50 Hz Weight: approx. 7 kg Operating temperature: 5°C - 40°C Power consumption 46 W ( approx. 5 W in power save Operating humidity: 35% - 80% RH (no condensation) DVD/HDD... -
Page 127: Specifications
Specifications DVD/HDD Video interface Video interface TV system TV system 625/50:PAL/SECAM 525/60:NTSC PAL: 625/50 / SECAM (input only) NTSC: 525/60 Input Input The input impedance of each input socket is 75 Ohm. The input impedance of each input socket is 75 Ohm. AV1 SCART Video: 1 Vp-p AV2 SCART... -
Page 128: Index
Index Page Page Page Angle Grey Background Recording mode Audio channel 38,50,112 GUIDE Plus+ 7,21,73 Recording time Audio Mode 98,103 Recording time in EP mode 28,29 AV1 Output Regional codes AV2 Connection Repeat Play Interlace AV2 Input 17,26,106,107 AV2 Settings JET REW Satellite receiver 23,107...