
Related Manuals for KitchenAid KHWS01PMT / WH


Summary of Contents for KitchenAid KHWS01PMT / WH
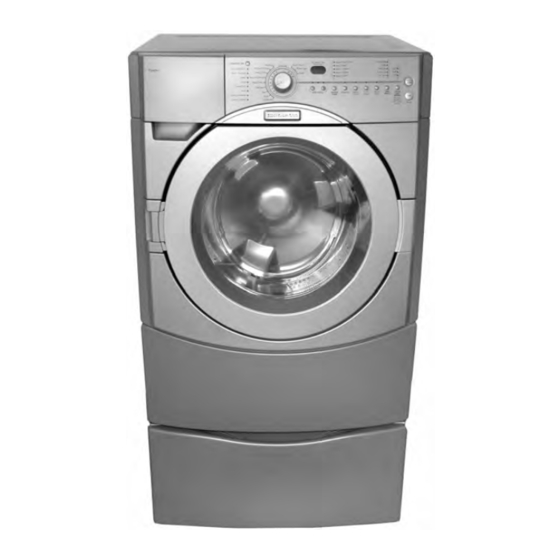
- Page 1 KAL-4 TECHNICAL EDUCATION FRONT-LOADING AUTOMATIC WASHER MODEL KHWS01PMT / WH JOB AID 4317352...
- Page 2 GOALS AND OBJECTIVES The goal of this Job Aid is to provide detailed information that will enable the service technician to properly diagnose malfunctions and repair the KitchenAid Ensemble Front-Loading Automatic Washer. The objectives of this Job Aid are to: •...
-
Page 3: Table Of Contents
TABLE OF CONTENTS Page GENERAL ..........................1-1 KitchenAid Model & Serial Number Designations .............. 1-1 Model & Serial Number Label And Tech Sheet Locations..........1-2 Specifications ........................1-3 Pedestal Warranty ......................1-3 KitchenAid Washer Warranty ..................... 1-4 INSTALLATION INFORMATION ................... 2-1 Installation Requirements .................... - Page 4 Page COMPONENT TESTING ......................5-1 Pressure Switch ......................... 5-1 Detergent Dispenser Motor & Switch ................. 5-2 Inlet Valve Solenoids ......................5-2 Door Lock/Switch Assembly ....................5-3 Drain Pump Motor ......................5-4 Interference Filter ....................... 5-4 Heating Element & Temperature Sensor ................5-5 Heating Element Relay ......................
-
Page 5: General
GENERAL MODEL & SERIAL NUMBER DESIGNATIONS MODEL NUMBER K H W S 01 P MT 0 MODEL NUMBER PRODUCT GROUP K = KITCHENAID PRODUCT IDENTIFICATION H = HORIZONTAL AXIS - DOMESTIC FEATURE CODE W = WASHER FEATURE CODE S = SUPERBA... -
Page 6: Model & Serial Number Label And Tech Sheet Locations
MODEL & SERIAL NUMBER LABEL AND TECH SHEET LOCATIONS The Model/Serial Number label and Tech Sheet locations are shown below. Model & Serial Number Label Location Tech Sheet Location (Behind Toe Panel) -
Page 7: Specifications
SPECIFICATIONS Model Number KHWS01PMT / WH Color MT = Meteorite, WH = White Electrical Requirements Heating Power 1,000W Max. Current Rated Current Voltage 120V Frequency 60 Hz Gallons/Normal Cycle 15.8 Gal./60 L Capacity 19.8 lbs. (9 kg.) Volume 3.7 cu. ft. (IEC equivalent) Max. -
Page 8: Kitchenaid Washer Warranty
For two years from the date of purchase, when this washer is operated and maintained according to instructions attached to or furnished with the product, KitchenAid will pay for replacement parts and repair labor costs to correct defects in materials or workmanship. Service must be provided by a KitchenAid designated service com- pany. -
Page 9: Installation Information
INSTALLATION INFORMATION INSTALLATION REQUIREMENTS TOOLS AND PARTS OPTIONAL PEDESTAL Assemble the necessary tools and supplies A pedestal (LAB2700PMT/LAB2700LQ) may before beginning the washer installation. The be purchased separately for this washer. This parts supplied are in the washer basket. pedestal will add about 13″ (33 cm) to the height of the unit for a total vertical height of Tools needed for connecting the water inlet approximately 51″... - Page 10 • Hot and cold water faucets located within Custom Undercounter Installation 4 ft. (1.2 m) of the hot and cold water fill The dimensions shown are for the recom- valves, and water pressure of 20-100 psi mended spacing. (137.9-689.6 kPa). •...
-
Page 11: Drain System
Recessed Or Closet Installation— DRAIN SYSTEM With Stacked Washer & Dryer The washer can be installed using the standpipe The dimensions shown are for the recom- drain system (floor or wall), the laundry tub mended spacing. drain system, or the floor drain system. Select the drain hose installation method you need 48 in. -
Page 12: Electrical Requirements
ELECTRICAL REQUIREMENTS • If codes permit and a separate ground wire is used, it is recommended that a qualified WARNING electrician determine that the ground path is adequate. • Do not ground to a gas pipe. • Check with a qualified electrician if you are not sure the washer is properly grounded. -
Page 13: Installation Instructions
INSTALLATION INSTRUCTIONS Installing The Washer REMOVE TRANSPORT SYSTEM Close the bolt holes with the four transport bolt hole plugs. WARNING CONNECT THE INLET HOSES Connect the inlet hoses to the water fau- Excessive Weight Hazard cets. Use two or more people to move and Make sure the washer basket is empty. - Page 14 ROUTE THE DRAIN HOSE LEVEL THE WASHER The drain hose is connected to your washer. Properly leveling your washer prevents exces- Proper routing of the drain hose protects your sive noise and vibration. To level the washer: floors from damage due to water leakage. Check the levelness of the washer by Carefully read and follow these instructions.
-
Page 15: Installing The Washer On The Pedestal
INSTALLING THE WASHER ON THE PEDESTAL 23-5/8" (60 cm) 2-5/8" 18-9/16" (6.7 cm) (47.2 cm) 27" (68.6 cm) 13" (33 cm) IMPORTANT: Check that all 4 pads are present as shown. If they are not, do not install the pedestal, and contact your dealer. UNINSTALLING THE WASHER Unplug the power supply cord. - Page 16 INSTALLING THE PEDESTAL Move the pedestal against the washer bottom, and slide the pedestal’s keyhole WARNING slots over the lower two partially installed screws. Excessive Weight Hazard Position the pedestal toward the front of the washer and install the two remaining Use two or more people to move and hex-head sheet metal screws.
- Page 17 10. When the washer is level, use a 9/16″ 11. Pull both drawer slides out and reas- open-end wrench to securely tighten the semble the drawer to the drawer slides locknuts on all four feet against the pedes- with the two (2) phillips screws you re- tal.
- Page 18 — NOTES — 2-10...
-
Page 19: Product Operation
THEORY OF OPERATION INTRODUCTION The flowmeter is also used to introduce addi- tional water into the tub for higher water levels, The KitchenAid Ensemble Front-Loading Au- based on cycle requirements. tomatic Washer presents a number of new features and operating characteristics quite different from previous models. - Page 20 The dispenser drawer has four separate com- The water enters the wash tub through the partments for adding laundry products to the main inlet tube. wash load. These compartments are: 1. Prewash Detergent Compartment 2. Main Wash Detergent Compartment 3. Bleach Compartment 4.
- Page 21 PRESSURE SWITCH The pressure switch also senses the suds level in the wash tub. If excessive sudsing occurs, The pressure switch is located in the top right the washer starts an automatic suds routine. rear corner of the washer. This switch senses The display will show the word “Sud.”...
- Page 22 TOUCH PAD/LED ASSEMBLY MOTOR CONTROL UNIT (MCU) The Touch Pad/LED Assembly is removed as The Motor Control Unit is located inside a a single assembly and is connected to the plastic control box located in the lower front Central Control Unit by a ribbon cable. This corner of the washer cabinet.
-
Page 23: Pump Motor
PUMP MOTOR SUSPENSION SYSTEM A separate pump/pump motor is used to drain The wash tub is held in position with four shock the wash tub. absorbers attached to the bottom four corners of the tub assembly. In addition, the wash tub is suspended from the top frame of the washer with two springs attached to the sides of the unit. - Page 24 HEATING ELEMENT & HEATING ELEMENT RELAY TEMPERATURE SENSOR A relay is used to turn the heating element on and off. The heating element relay is located in A heating element is used to increase the water the lower right-hand side of the washer cabi- temperature during certain wash cycles.
-
Page 25: Customer Interface & Cycle Selection
CUSTOMER INTERFACE & CYCLE SELECTION Control On - This button must be pressed Soil Level - Changes the length of the wash before initiating any cycle selection. cycle. “+” will add time to a normal wash cycle; “–” will shorten a normal wash cycle. Status Indicators - Show which portion of the cycle the washer is operating. -
Page 26: Cycles
CYCLES Sanitary - Cleans heavily soiled colorfast fab- Rapid Wash - Washes small loads of lightly rics. This cycle combines a super hot water soiled garments that are needed in a hurry. temperature and fast speed tumbling to help This cycle combines fast speed tumbling, a ensure the removal of heavy soils and stains. - Page 27 Soak - Removes small spots of set-in stains on you want from the SPIN SPEED modifier. A fabrics. This cycle provides a soak time with Rinse/Spin cycle is useful for loads that need warm or cold water, and then drains the water. rinsing only or for adding fabric softener to a Extra water, a short tumbling phase for equal load.
-
Page 28: Options
OPTIONS You can customize your wash by adding “Op- NOTE: The Prewash and Auto Soak options tions” to your cycle selections. You can add or cannot be selected in the same cycle. change an option after starting a cycle anytime Auto Soak - For loads of heavily soiled cotton, before the selected option begins. -
Page 29: Modifiers
MODIFIERS Preset cycle settings for Water Temperature, Wash/Rinse Temp - Select a water tempera- Wash/Rinse, and Spin Speed can be changed. ture based on the type of load being washed. You can change a modifier after starting a Use the warmest water safe for fabrics. Follow cycle anytime before the selected modifier garment label instructions. - Page 30 — NOTES — 3-12...
-
Page 31: Component Access
COMPONENT ACCESS This section instructs you on how to service each component inside the KitchenAid Ensemble Front-Loading Automatic Washer. The components and their locations are shown below. COMPONENT LOCATIONS Central Control Unit Inlet Valves Interference Filter Flowmeter Pressure Switch Detergent Dispenser Motor &... -
Page 32: Removing The Console And The Touchpad/Led Assembly
REMOVING THE CONSOLE AND THE TOUCHPAD / LED ASSEMBLY To remove the console: WARNING a) Lift the locking tab and disconnect the ribbon cable connector from the cen- tral control unit. b) Remove the ribbon cable from the five clips. Electrical Shock Hazard Touchpad/LED Disconnect power before servicing. - Page 33 d) Remove the T-20 torx screw from the To remove the touchpad / LED assem- recessed hole of the console. bly: a) Use a small screwdriver and unsnap the three top locking tabs from the touchpad/LED assembly. b) Starting from the right, unsnap the four lower locking tabs from the touchpad/ LED assembly, and lift the assembly from the console.
-
Page 34: Removing The Door Lock/Switch Assembly, And The Front Panel & Bellows
REMOVING THE DOOR LOCK / SWITCH ASSEMBLY, AND THE FRONT PANEL & BELLOWS Open the washer door. WARNING Door Lock/Switch Assembly Bellows Electrical Shock Hazard Disconnect power before servicing. Replace all parts and panels before operating. Failure to do so can result in death or electrical shock. - Page 35 To remove the door lock/switch as- To remove the front panel and bellows: sembly: a) Remove the top cover and the console a) Remove the bellows retaining wire (re- (see page 4-2 for the procedures). fer to steps 5 and 6 for the procedure). b) Remove the bellows retaining wire (re- b) Pull the bellows out and remove the fer to steps 5 and 6 for the procedure).
- Page 36 g) Remove the end of the dispenser tube i) Remove the bellows retainer clamp. from the bellows. Dispenser Tube Remove Bellows Retainer Clamp j) Remove the bellows from the front of the tub. h) Use a 7mm socket, and turn the bel- lows retainer clamp screw counter- clockwise until the clamp is loose enough to remove from around the...
-
Page 37: Removing The Flowmeter
REMOVING THE FLOWMETER Remove the top cover and the console WARNING (see page 4-2 for the procedures). Flowmeter Electrical Shock Hazard Disconnect power before servicing. Replace all parts and panels before operating. Failure to do so can result in death or electrical shock. -
Page 38: Removing The Detergent Dispenser Motor & Assembly
REMOVING THE DETERGENT DISPENSER MOTOR & ASSEMBLY To remove the detergent dispenser WARNING motor: a) Unhook the spring from the end of the water distribution lever. b) Carefully pull the cam actuator and the water distribution lever off the motor shaft, then pull the water distribution lever off the lever connection pin. - Page 39 d) Remove the motor and switch wires c) Use a small screwdriver and raise the from the wire clip. locking arm so that it clears the tab. Pull the inlet hose connector and rub- e) Disconnect the two wire connectors ber o-ring out of the detergent dis- from the motor terminals.
-
Page 40: Removing The Inlet Valves
REMOVING THE INLET VALVES Disconnect the four wire connectors from WARNING the inlet valve terminals. Disconnect The 4 Wires Electrical Shock Hazard Disconnect power before servicing. Replace all parts and panels before operating. From behind the washer, remove the inlet Failure to do so can result in death or valve screw, then slide the valves to the electrical shock. -
Page 41: Removing The Central Control Unit
REMOVING THE CENTRAL CONTROL UNIT Unlock the two wire clips and remove the WARNING wires from each of the clips (4 total). Heating Element Door Lock Relay Main Motor Switches Door Control Serial Switch Line Flowmeter Unit Comm Filter Link Electrical Shock Hazard Unlock Wire Clip... -
Page 42: Removing The Interference Filter
REMOVING THE INTERFERENCE FILTER Disconnect the three connectors from the WARNING interference filter terminals. NOTE: The green 2-wire connector has a locking arm at the bottom that you must press to re- lease the connector. Remove the two T-20 hex-head torx screws from the interference filter and remove the filter from the washer. -
Page 43: Removing The Pressure Switch
REMOVING THE PRESSURE SWITCH Pull the pressure hose off the pressure WARNING switch inlet. Press on the two locking arms at the bottom of the wire connector, and pull the connector off the pressure switch termi- nals. Wire Connector Electrical Shock Hazard Disconnect power before servicing. -
Page 44: Removing The Motor Controller
REMOVING THE MOTOR CONTROLLER Open the wiring access door on the front WARNING of the motor controller housing. Disconnect the four wire connectors from the motor controller. NOTE: Each connec- tor has a locking arm or locking tabs that you must release to remove the connector from the unit. - Page 45 REASSEMBLY NOTE: After reinstalling the motor controller housing, slide a wire tie through the slot in the standoff and secure the wires to the standoff. Wire Standoff 4-15...
-
Page 46: Removing The Temperature Sensor & The Heating Element
REMOVING THE TEMPERATURE SENSOR & THE HEATING ELEMENT ″ Use a 13/32 (10 mm) socket and loosen WARNING the hex nut on the heating element bracket. To remove the temperature sensor: a) Disconnect the sensor connector. b) Pull the sensor out of the heating ele- ment bracket hole. -
Page 47: Removing The Heating Element Relay
REMOVING THE HEATING ELEMENT RELAY Rotate the element relay holder so you WARNING can access the relay board. Unhook the wires from the holder, then lift the relay, and unhook it from the slots in the back of the holder. Electrical Shock Hazard Disconnect power before servicing. -
Page 48: Removing The Drain Pump Assembly
REMOVING THE DRAIN PUMP ASSEMBLY Raise the drain pump wiring cover and WARNING disconnect the wire connector. Wiring Cover Electrical Shock Hazard Disconnect power before servicing. Replace all parts and panels before operating. Failure to do so can result in death or electrical shock. -
Page 49: Removing The Airtrap
REMOVING THE AIRTRAP WARNING Electrical Shock Hazard Disconnect power before servicing. Replace all parts and panels before operating. Failure to do so can result in death or electrical shock. Unplug washer or disconnect power. Turn off the water supply to the washer. Pull the washer away from the wall so that Airtrap you can access the rear panel. -
Page 50: Removing An Interlock Switch
REMOVING AN INTERLOCK SWITCH Press in on the locking tab. Slide the WARNING switch holder down in the chassis slots, and remove it from the chassis. Electrical Shock Hazard Disconnect power before servicing. Slide Switch Replace all parts and panels before Holder Down operating. - Page 51 Push out on the locking tabs of the switch holder, rotate the switch up, and remove it from the holder. Rotate Switch Up Switch Holder Locking Tabs 4-21...
-
Page 52: Removing The Drive Motor
REMOVING THE DRIVE MOTOR Remove the drive belt from the end of the WARNING drive motor shaft and then remove the belt from the drive pulley. Electrical Shock Hazard Disconnect power before servicing. Replace all parts and panels before operating. Failure to do so can result in death or electrical shock. - Page 53 Pull the drive motor toward you and re- 10. Cut the drive motor wire tie from around move the pivot studs from the tub holes; the motor wires and pull the cut tie out of then turn the motor around so that you can the slot in the standoff.
-
Page 54: Removing The Tub And Basket Assembly
REMOVING THE TUB AND BASKET ASSEMBLY Remove the T-20 hex-head torx screws WARNING from the top (and bottom, if not already done in step 7) braces and remove both braces from the rear of the washer. Top Brace Electrical Shock Hazard Disconnect power before servicing. - Page 55 10. Loosen the clamp and pull the end of the 13. Remove the two rear shock absorbers drain hose from the tub. from the tub. To remove a shock absorber: a) Pry the locking tab down with a small screwdriver. Align Tabs With Slots Drain Hose...
- Page 56 14. Remove the screw from the green ground 16. At the front of the washer, remove the six wire eyelet and remove the wires from the T-20 hex-head torx screws (total) from the clips in the tub. top front brace and remove the brace from the washer.
- Page 57 19. Using the procedure in step 13, remove 22. Mark the edges of the 23 tub clamps with the two front shock absorbers from the a pencil so that you can reinstall the clamps tub. in the same locations later. 20.
- Page 58 24. Lift the rear half of the tub off the front half. 26. To replace the heater element wire holder, remove the T-20 torx screw. 25. Lift the basket from the front half of the tub. 27. To replace the tub gasket, pry the gasket Rear Half Of Tub out of the slot and remove it.
- Page 59 REASSEMBLY NOTES: When reinstalling the bottom front coun- terweight, first tape the flat nut in place in When reassembliing the tub, install the the tub slot so it does not fall out. metal clips over the flanges of the two tub sections with a hammer.
- Page 60 — NOTES — 4-30...
-
Page 61: Component Testing
COMPONENT TESTING Before testing any of the components, perform • Check all connections before replacing com- the following checks: ponents, looking for broken or loose wires, failed terminals, or wires not pressed into • Control failure can be the result of corrosion connectors far enough. -
Page 62: Detergent Dispenser Motor & Switch
WARNING Electrical Shock Hazard Disconnect power before servicing. Replace all parts and panels before operating. Failure to do so can result in death or electrical shock. DETERGENT DISPENSER INLET VALVE SOLENOIDS MOTOR & SWITCH COLD Refer to page 4-10 for the procedure for servic- ing the inlet valves. -
Page 63: Door Lock/Switch Assembly
WARNING Electrical Shock Hazard Disconnect power before servicing. Replace all parts and panels before operating. Failure to do so can result in death or electrical shock. DOOR LOCK/SWITCH ASSEMBLY To test the door lock/unlock solenoids: a) Disconnect the connector from the CCU. Door Switch Actuator b) Touch the ohmmeter test leads to the indicated connector terminals. -
Page 64: Drain Pump Motor
WARNING Electrical Shock Hazard Disconnect power before servicing. Replace all parts and panels before operating. Failure to do so can result in death or electrical shock. DRAIN PUMP MOTOR INTERFERENCE FILTER Motor Terminals Refer to page 4-12 for the procedure for servic- Refer to page 4-18 for the procedure for servic- ing the interference filter. -
Page 65: Heating Element & Temperature Sensor
WARNING Electrical Shock Hazard Disconnect power before servicing. Replace all parts and panels before operating. Failure to do so can result in death or electrical shock. HEATING ELEMENT & HEATING ELEMENT RELAY TEMPERATURE SENSOR Heating Element Temperature Sensor Connector Refer to page 4-17 for the procedure for servic- ing the heating element relay. -
Page 66: Drive Motor
WARNING Electrical Shock Hazard Disconnect power before servicing. Replace all parts and panels before operating. Failure to do so can result in death or electrical shock. DRIVE MOTOR INTERLOCK SWITCH Actuator Refer to page 4-20 for the procedure for servic- ing an interlock switch. -
Page 67: Diagnostics & Troubleshooting
DIAGNOSTICS & TROUBLESHOOTING DIAGNOSTICS DIAGNOSTIC GUIDE WARNING Before servicing, check the following: Electrical Shock Hazard • Make sure there is power at the wall outlet. Disconnect power before • Has a household fuse blown or circuit breaker servicing. tripped? Time delay fuse? Replace all parts and panels before operating. - Page 68 FAILURE/ERROR DISPLAY CODES DISPLAY EXPLANATION AND RECOMMENDED PROCEDURE NO WATER DETECTED ENTERING MACHINE OR PRESSURE SWITCH TRIP NOT DETECTED If after 30 seconds the control does not detect water entering machine, the valves will be turned off and the error code will be displayed. If the control has turned the water valves on, and after 8 minutes, the flow sensor has de- tected 10.5 gallons of water passing through it, but has not detected the pressure switch trip, the valves will be turned off, and the error code will flash.
- Page 69 DISPLAY EXPLANATION AND RECOMMENDED PROCEDURE LONG DRAIN If the drain time exceeds eight minutes, the water valves are turned off and “F/02 ” is flashed. Press PAUSE/CANCEL two times to clear the display. NOTE: After four minutes the “Sud” error will be displayed, then four minutes later the “F/02 ” error code will be displayed..
- Page 70 DISPLAY EXPLANATION AND RECOMMENDED PROCEDURE MOTOR CONTROL UNIT ERROR The main control has detected a short in the Motor Control Unit. If a failure occurs during high-speed spin, the door will be unlocked after three minutes. F/07 Possible Causes / Procedure 1.
- Page 71 DISPLAY EXPLANATION AND RECOMMENDED PROCEDURE SERIAL COMMUNICATION ERROR Communication between the Central Control Unit (CCU) and the Motor Control Unit (MCU) cannot be sent correctly. F/11 Possible Causes / Procedure 1. Unplug washer or disconnect power. 2. Check wire harness connections to the MCU, the motor, and Central Control Unit (CCU). 3.
- Page 72 DISPLAY EXPLANATION AND RECOMMENDED PROCEDURE CCU / TOUCHPAD / LED ASSEMBLY ERROR F/21 F/22 This error occurs if the touchpad/LED assembly is not able to transmit/receive data to/from the central control unit (CCU). Possible Causes / Procedure 1. Check the touchpad/LED assembly by selecting different cycles and changing the modifiers and options available to confirm the touchpad/LED is responding.
- Page 73 DISPLAY EXPLANATION AND RECOMMENDED PROCEDURE SUDS LOCK (OVERDOSE OF DETERGENT DETECTED DURING THE WASH CYCLE) The Motor Control Unit senses a suds lock condition by analyzing the current draw on the drive motor. If “Sud ”is displayed a potential Suds Lock is detected. This may signify a bad pump, an extra heavy load, excessive detergent, or excessive suds.
-
Page 74: Diagnostic Test
• Push PREWASH OPTION four times DIAGNOSTIC TEST within five seconds. (If PREWASH The washer must be empty and the control OPTION is not present on this model, must be in the OFF state before pressing the press RINSE HOLD four times within five touchpad sequence to start the test. - Page 75 Water Temperature Sensor Be sure to perform the Diagnostic Tests 1. Unplug washer or disconnect power. on the previous page before replacing the 2. Disconnect the wire harness from the water system components. temperature sensor and measure the resis- tance of the sensor. Use the following table. Motor Continuity Test An abnormal condition is an open circuit.
- Page 76 CONTROL BOARD REMOVAL To remove the touchpad/LED assembly: OR REPLACEMENT 1. Unplug washer or disconnect power. 2. Disconnect touchpad/LED assembly wire IMPORTANT: Electrostatic (static electric- harness from the CCU. ity) discharge may cause damage to elec- 3. Remove dispenser drawer. tronic control assemblies.
- Page 77 POSSIBLE CAUSE/TEST PROBLEM NOTE: Possible Cause/Tests must be performed in the sequence shown for each problem 1. Check that the unit is plugged into a working outlet and for blown fuses. 2. Check for power going to Central Control Unit (CCU) by listening for a click in the CCU when unit is plugged in.
- Page 78 POSSIBLE CAUSE/TEST PROBLEM NOTE: Possible Cause/Tests must be performed in the sequence shown for each problem 1. Verify the unit is level. 2. Verify dispenser drawer is not clogged with detergent. 3. Check water connections to the unit and within the unit. Check for plugged screen in water source.
- Page 79 POSSIBLE CAUSE/TEST PROBLEM NOTE: Possible Cause/Tests must be performed in the sequence shown for each problem 1. Unplug washer or disconnect power. 2. Check wire harness connections. 3. Check drain pump. 4. Check drain pump motor. WILL NOT DRAIN 5. Check that the drain hose and drain pump filter are clear of foreign objects. 6.
- Page 80 — NOTES — 6-14...
-
Page 81: Wiring Diagram
WIRING DIAGRAM... - Page 82 — NOTES —...
-
Page 83: Tech Tips
TECH TIPS MANUAL DOOR LATCH To manually unlock the door lock system, Located on the bottom of the door latch perform the following steps. assembly is a teardrop shaped tab. Gently pull the tab down approximately 1/4″, or Unplug the power cord from the outlet. until a click is heard. - Page 84 — NOTES —...
-
Page 85: Product Specifications
WARRANTY INFORMATION SOURCES IN THE UNITED STATES: FOR PRODUCT SPECIFICATIONS AND WARRANTY INFORMATION CALL: FOR WHIRLPOOL PRODUCTS: 1-800-253-1301 FOR KITCHENAID PRODUCTS: 1-800-422-1230 FOR ROPER PRODUCTS: 1-800-447-6737 FOR TECHNICAL ASSISTANCE WHILE AT THE CUSTOMER’S HOME CALL: THE TECHNICAL ASSISTANCE LINE: 1-800-253-2870...