Panasonic HDC-SD60 User Manual
High definition video camera
Hide thumbs
Also See for HDC-SD60:
- Operating instructions manual (160 pages) ,
- Specification sheet (2 pages) ,
- Operating instructions manual (144 pages)
Table of Contents
Advertisement
Panasonic HDC-SD60 HDC-TM60 HDC-HS60 High Definition
http://www.manuallib.com/file/2591125
From ManualLib.com
ManualLib.com collects and classifies the global product
instrunction manuals to help users access anytime and
anywhere, helping users make better use of products.
Home: http://www.manuallib.com/ Chinese: http://www.shuomingshuku.com/
This Manual: http://www.manuallib.com/file/2591125
Advertisement
Table of Contents

Related Manuals for Panasonic HDC-SD60


Summary of Contents for Panasonic HDC-SD60
- Page 1 Panasonic HDC-SD60 HDC-TM60 HDC-HS60 High Definition http://www.manuallib.com/file/2591125 From ManualLib.com ManualLib.com collects and classifies the global product instrunction manuals to help users access anytime and anywhere, helping users make better use of products. Home: http://www.manuallib.com/ Chinese: http://www.shuomingshuku.com/ This Manual: http://www.manuallib.com/file/2591125...
-
Page 2: Operating Instructions
Operating Instructions High Definition Video Camera HDC-SD60 Model No. HDC-TM60 HDC-HS60 Before use, please read these instructions completely. Please also refer to Operating Instructions (PDF format) recorded on the CD-ROM containing the Operating Instructions (supplied). You can learn about advanced operation methods and check the Troubleshooting. -
Page 3: Information For Your Safety
Information for Your Safety The socket outlet shall be installed near the WARNING: equipment and easily accessible. TO REDUCE THE RISK OF FIRE, The mains plug of the power supply cord ELECTRIC SHOCK OR PRODUCT shall remain readily operable. DAMAGE, To completely disconnect this apparatus ≥... -
Page 4: Caution For Use
∫ Information for Users on [Information on Disposal in other Countries outside the European Collection and Disposal of Old Union] Equipment and used Batteries These symbols are only valid in the These symbols on the European Union. If you wish to discard products, packaging, and/ these items, please contact your local or accompanying... -
Page 5: This Unit
≥ Functions that can be used for still picture Panasonic does not accept any recording/still picture playback are indicated responsibility for damages directly or in these operating instructions. indirectly due to any type of problems that ≥... -
Page 6: Table Of Contents
Before using [2] Recording motion pictures ..25 [1] Parts identification and [3] Recording still pictures ..... 26 handling ........7 [4] Intelligent auto mode....27 [HDC-SD60]/[HDC-TM60] ....7 [5] Motion picture/Still picture [HDC-HS60] ......... 10 playback ........28 Setup Setup [1] Power supply...... -
Page 7: Accessories
Accessories Check the accessories before using this unit. Product numbers correct as of Feb. 2010. These may be subject to change. Optional accessories Battery pack VW-VBK180 Some optional accessories may not be available in some countries. AC adaptor VSK0712 Battery charger (VW-BC10E) Battery pack (lithium/VW-VBK180) AC cable Battery pack (lithium/VW-VBK360) -
Page 8: Preparation
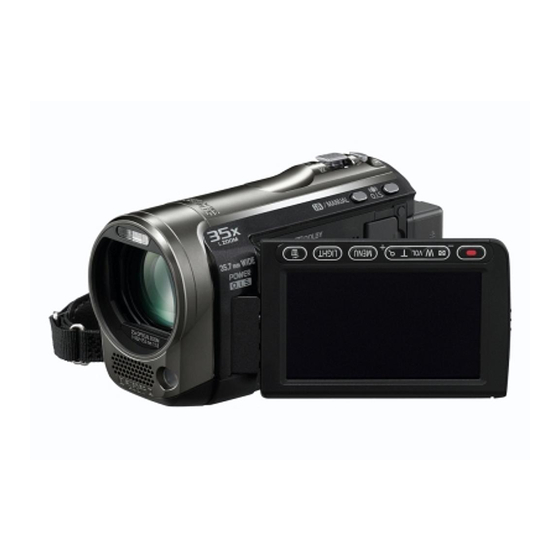
Preparation Parts identification and Before using handling [HDC-SD60]/[HDC-TM60] Power button [ ] (l 20) Speaker 1 2 3 4 Intelligent auto/Manual button [iA/MANUAL] (l 27) Optical image stabilizer button /O.I.S.] (l 33) Mode switch (l 21) Battery holder (l 14) - Page 9 18 LCD monitor (Touch screen) (l 22) ≥ It can open up to 90o. ≥ It can rotate up to 180o A towards the lens or 90o B towards the opposite direction. Due to limitations in LCD production technology, there may be some tiny bright or dark spots on the LCD monitor screen.
- Page 10 27 Status indicator (l 20) 28 Photoshot button [ ] (l 26) 29 Zoom lever [W/T] (In motion picture recording mode or still picture recording mode) (l 31) Thumbnail display switch [ Volume lever [sVOLr] (In playback mode) 30 DC input terminal (l 15) ≥...
-
Page 11: [Hdc-Hs60]
[HDC-HS60] Power button [ ] (l 20) Speaker 1 2 3 4 Intelligent auto/Manual button [iA/MANUAL] (l 27) Optical image stabilizer button /O.I.S.] (l 33) Mode switch (l 21) Battery holder (l 14) HDMI mini connector [HDMI] (l 36) USB terminal [ AV multi connector [AV MULTI] (l 36) ≥... - Page 12 18 LCD monitor (Touch screen) (l 22) ≥ It can open up to 90o. ≥ It can rotate up to 180o A towards the lens or 90o B towards the opposite direction. Due to limitations in LCD production technology, there may be some tiny bright or dark spots on the LCD monitor screen.
- Page 13 27 Status indicator (l 20) 28 Photoshot button [ ] (l 26) 29 30 29 Zoom lever [W/T] (In motion picture recording mode or still picture recording mode) (l 31) Thumbnail display switch [ Volume lever [sVOLr] (In playback mode) 30 HDD access lamp [ACCESS HDD] 31 DC input terminal (l 15) ≥...
-
Page 14: Setup
Please be advised that we are not liable for any accident or failure occurring as a result of use of a counterfeit battery pack. To ensure that safe products are used we would recommend that a genuine Panasonic battery pack is used. (ENG) VQT2M64... -
Page 15: Inserting/Removing The Battery
Inserting/removing the battery ≥ Press the power button to turn off the power. (l 20) Install the battery by inserting it in the direction shown in the figure. Removing the battery Be sure to hold down the power button until the status indicator goes off. -
Page 16: Charging The Battery
If you turn on the unit while charging with the AC adaptor, you can use the unit with power supplied from the outlet. ≥ We recommend using Panasonic batteries (l 6, 16, 17). ≥ If you use other batteries, we cannot guarantee the quality of this product. -
Page 17: Charging And Recording Time
Charging and recording time ∫ Charging/Recording time ≥ Temperature: 25 oC/humidity: 60% HDC-SD60 Battery model number Maximum Actual [Voltage/Capacity Charging time continuously recordable time (minimum)] recordable time Supplied battery/ VW-VBK180 (optional) 2 h 50 min 1 h 55 min [3.6 V/1790 mAh]... - Page 18 ≥ The remaining battery capacity is displayed when using the Panasonic battery that you can use for this unit. The actual time can vary depending on your actual use. ≥ When using the AC adaptor or batteries made by other companies, the remaining battery capacity will not be shown.
-
Page 19: Recording To A Card
(This website is in English only.) ≥ Keep the Memory Card out of reach of ≥ 4 GB or more Memory Cards that do not children to prevent swallowing. -
Page 20: Inserting/Removing An Sd Card
Inserting/removing an SD card When using an SD card not from Panasonic, or one previously used on other equipment, for the first time on this unit, format the SD card. (l 35) When the SD card is formatted, all of the recorded data is deleted. Once the data is deleted, it cannot be restored. -
Page 21: Turning The Unit On/Off
Preparation Turning the unit on/off Setup You can turn the power on and off using the power button or by opening and closing the LCD monitor. Turning the power on and off with the power button Press the power button to turn on the power. ... -
Page 22: Selecting A Mode
Preparation Selecting a mode Setup Change the mode to recording or playback. Operate the mode switch to change the mode to Motion picture recording mode (l 25) Still picture recording mode (l 26) Playback mode (l 28) (ENG) VQT2M64... -
Page 23: Adjusting Lcd Monitor
Preparation Adjusting LCD monitor Setup ∫ About the operation icons How to use the touch screen These icons are used to switch the menu and thumbnail display page, for item You can operate by directly touching the selection and setting etc. LCD monitor (touch screen) with your finger. -
Page 24: Setting Date And Time
Preparation Setting date and time Setup When the unit is turned on for the first time, a message asking you to set the date and time will appear. Select [YES] and perform steps 2 to 3 below to set the date and time. ¬... -
Page 25: Basic
Basic Selecting a media to record Recording/ Playback [HDC-TM60/HDC-HS60] The card, built-in memory, and HDD media can be selected separately to record motion pictures or still pictures. Change the mode to Select the menu. : [MEDIA SELECT] MENU Touch the media to record motion pictures or still pictures. A [VIDEO/SD CARD] B [VIDEO/Built-inMemory] ... -
Page 26: Recording Motion Pictures
Basic Recording motion Recording/ Playback pictures Change the mode to Open the LCD monitor. Press the recording start/stop button to start recording. A When you begin recording, ; changes to ¥. Press the recording start/stop button again to pause recording. -
Page 27: Recording Still Pictures
Basic Recording still pictures Recording/ Playback Change the mode to Open the LCD monitor. Press the button halfway. (For auto focus only) Press the button fully. ∫ About the screen indications in still picture recording MEGA R3000 R3000 R3000 Still picture operation indicator Flash ß: ßj:... -
Page 28: Intelligent Auto Mode
Basic Intelligent auto mode Recording/ Playback The following modes appropriate for the condition are set just by pointing the unit to what you want to record. /MANUAL Intelligent auto/Manual button Press this button to switch Intelligent auto mode/Manual mode. Mode Scene Effect Portrait... -
Page 29: Motion Picture/Still Picture Playback
Basic Motion picture/Still Recording/ Playback picture playback Change the mode to Touch the play mode select icon A. Touch the desired media to be played back motion pictures or still pictures. A [VIDEO/SD CARD] B [PICTURE/SD CARD] C [VIDEO/SD CARD] D [VIDEO/Built-inMemory] ... - Page 30 Touch the scene or the still picture to be played back. ≥ Next (previous) page can be displayed by touching Select the playback operation by touching the operation icon. A Operation icon 0h00m00s 0h00m00s 0h00m00s ≥ Touch to display/not-display the operation icon.
-
Page 31: Setup
Basic Using the menu screen Setup MENU Press the MENU button. Touch [EXIT] or press the MENU MENU button to exit the menu Touch the top menu A. setting. ∫ About guide display After touching , touching the submenus and items will cause function descriptions and settings confirmation messages to appear. -
Page 32: Advanced
Advanced Zoom in/out function Recording (Advanced) The maximum optical zoom ratio is 25k. The default setting of the [ZOOM MODE] is [i.Zoom 35k]. It can be extended to a maximum of 35k during motion picture recording mode. ¬ Change the mode to Zoom lever/Adjust zoom buttons T side: Close-up recording (zoom in) -
Page 33: Extra Optical Zoom
Extra optical zoom If the number of the recording pixels is set to anything other than the maximum number of recording pixels in still picture recording mode, the still picture can be recorded with a zoom ratio of a maximum of 50k without degrading the picture quality. ≥... -
Page 34: Optical Image Stabilizer Function
Advanced Optical image stabilizer Recording (Advanced) function Optical image stabilizer can stabilize the image without decreasing the image quality as much. ¬ Change the mode to Optical image stabilizer button Pressing the button changes the optical image stabilizer setting. (Motion picture recording mode) # OFF (Still picture recording mode) # OFF... -
Page 35: Editing
Advanced Deleting scenes/still Editing pictures Deleted scenes/still pictures cannot be restored, so perform appropriate confirmation of the contents before proceeding with deletion. ¬ Change the mode to To delete by confirming images being played back 0h00m00s 0h00m00s 0h00m00s Press the button while scenes or still pictures to be deleted are being played back. -
Page 36: Formatting
Advanced Formatting Editing Please be aware that if a medium is formatted, then all the data recorded on the medium will be erased and cannot be restored. Back up important data on a PC, DVD disc etc. Select the menu. (l 30) : [SETUP] # [FORMAT CARD] MENU : [SETUP] # [FORMAT MEDIA] # [SD CARD] or [Built-inMemory]... -
Page 37: With A Tv
≥ Use the supplied AV multi cable. Check the output settings when connecting the component terminal or the video terminal with the AV multi cable. ≥ Use of the following Panasonic HDMI mini cables is recommended to connect the unit to the HDMI terminal. - Page 38 ≥ Check that the plugs are inserted as far as they go. ≥ Do not use any other cables except a genuine Panasonic HDMI mini cable (RP-CDHM15, RP-CDHM30; optional). ≥ Do not use any other AV multi cables except the supplied one.
-
Page 39: Others
AVC ≥ “AVCHD” and the “AVCHD” Logo are Standard (“AVC Video”) and/or (ii) decode trademarks of Panasonic Corporation and AVC Video that was encoded by a consumer Sony Corporation. engaged in a personal and non-commercial ≥... -
Page 40: Specifications
Others Specifications High Definition Video Camera Information for your safety Power source: DC 5.0 V (When using AC adaptor) DC 3.6 V (When using battery) Power consumption: Recording: Charging: 4.4 W 7.7 W 4.4 W 7.7 W 4.7 W 7.7 W Signal system 1080/50i Recording format... - Page 41 White balance Auto tracking white balance system adjustment Standard illumination 1,400 lx Minimum required Approx. 4 lx (1/25 in low light mode) illumination Approx. 1 lx with the colour night view function AV multi connector AV video output level: video output level 1.0 Vp-p, 75 h, PAL system Component video output level: 1.0 Vp-p, 75 h...
- Page 42 Mass in operation Approx. 299 [with battery (supplied) and an SD card (optional)] Approx. 300 [with battery (supplied)] Approx. 369 [with battery (supplied)] Operating temperature 0 oC to 40 oC Operating humidity 10% to 80% Battery operation time See page 16 Motion pictures Recording SD card...
- Page 43 Still pictures Recording SD card SD Memory Card (FAT12 and FAT16 system compliant) media SDHC Memory Card (FAT32 system compliant) SDXC Memory Card (exFAT system compliant) Refer to page 18 for details on SD cards usable in this unit. Built-in 16 GB memory 120 GB...
-
Page 44: Reading The Operating Instructions (Pdf Format)
Instructions (PDF format) Select the desired language Delete the PDF file from the “Program and then click [Operating Files\Panasonic\HDC\” folder. Instructions] to install. ≥ When the contents in the Program Files folder cannot be displayed, click the (Example: When an English language [Show the contents of this folder] to display them. - Page 45 Panasonic Corporation Web site: http://panasonic.net Pursuant to at the directive 2004/108/EC, article 9(2) Panasonic Testing Centre Panasonic Marketing Europe GmbH Winsbergring 15, 22525 Hamburg, Germany © Panasonic Corporation 2010...