Advertisement
Quick Links
Download this manual
See also:
Instruction Manual
Advertisement
Chapters

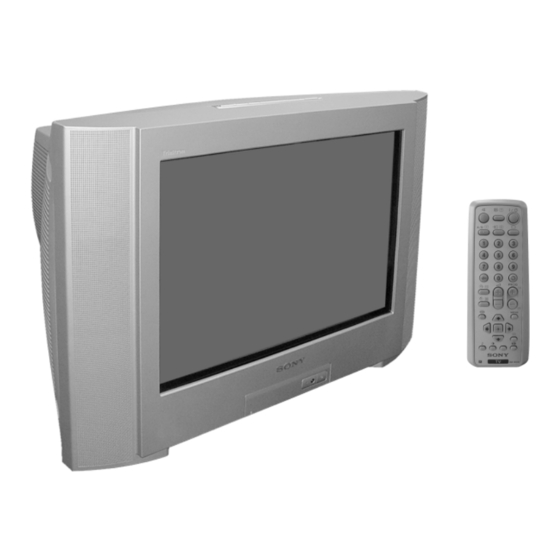
Related Manuals for Sony KV-21CL5K


Summary of Contents for Sony KV-21CL5K
-
Page 1: Service Manual
SERVICE MANUAL CHASSIS MODEL COMMANDER DEST. CHASSIS NO. MODEL COMMANDER DEST. CHASSIS NO. KV-21CL5K RM-W100 OIRT SCC-U92G-A TRINITRON COLOR TV ®... -
Page 2: Table Of Contents
EXPLOSÈES ET LES LISTES DE PIECES SONT D’UNE IMPOR-TANCE CRITIQUE POUR LA SÈCURITÈ DU FONCTIONNEMENT, NE LES REMPLACER QUE PAR DES COMPSANTS SONY DONT LE NUMÈRO DE PIÈCE EST INDIQUÈ DANS LE PRÈSENT MANUEL OU DANS DES SUPPLÈMENTS PUBLIÈS PAR SONY. -
Page 3: Warning (Uk Only)
2 (C Board) The servicing of these boards requires special precautions to be taken as outlined below: 1. It is strongly recommended to use Sony Approved Lead Free Solder material in order to guarantee optimal quality of new solder joints. -
Page 4: Self Diagnostic Function
KV-21CL5K RM-W100 SELF DIAGNOSTIC FUNCTION The units in this manual contain a self diagnostic function. If an error occurs, the STANDBY (1) indicator will automatically begin to flash. A description of the self-diagnosis function is explained in the instruction manual. The number of times the STANDBY (1) indicator flashes translates to a probable source of the problem. - Page 5 KV-21CL5K RM-W100 2. DISPLAY OF INDICATOR STANDBY (1) FLASH COUNT Diagnostic Item Flash Count* +B overcurrent 2 times V-Protect 4 times IK (AKB) 5 times HV Protect 8 times * One flash count is not used for self-diagnosis. Lamp ON 300ms...
- Page 6 KV-21CL5K RM-W100 5. HANDLING OF SELF-DIAGNOSTIC SCREEN DISPLAY Since the diagnostic results displayed on the screen are not automatically cleared, always check the self-diagnostic screen during repairs. When you have completed the repairs, clear the result display to “0”. Unless the result display is cleared to “0”, the self-diagnosis function will not be able to detect subsequent faults after completion of the repairs.
-
Page 7: Disassembly
KV-21CL5K RM-W100 SECTION 1 DISASSEMBLY 1-1. REAR COVER REMOVAL 1-2. SPEAKER BLOCK ASSY REMOVAL 1 Eight Screws Two Screws (PT screws) (4 x 16)W(+) P TAPPING 2 Rear cover 1-3. CHASSIS ASSY REMOVAL 1-4. SERVICE POSITION 1-6. A BOARD REMOVAL 1-5. -
Page 8: Picture Tube Removal
KV-21CL5K RM-W100 1-7. PICTURE TUBE REMOVAL Note: • Please make sure the TV set is not in standing position before removing necessary CRT support located on bottom right and left. 1) Place the TV set with the CRT face down on a cushion jig. -
Page 9: Set-Up Adjustments
KV-21CL5K RM-W100 SECTION 2 SET-UP ADJUSTMENTS • The following adjustments should be made when a Perform the adjustments in the following order : complete realignment is required or a new picture tube is 1. Beam Landing installed. 2. Convergence 3. Focus Set the controls as follows unless otherwise noted: 4. -
Page 10: Convergence
KV-21CL5K RM-W100 4. If the H.STAT variable resistor cannot bring the red, 2-2. CONVERGENCE green and blue dots together at the centre of the Preparation: screen, adjust the horizontal convergence with the H. • Before starting this adjustment, adjust the focus, STAT variable resistor and the V.STAT magnet in the... - Page 11 KV-21CL5K RM-W100 H-TILT correction can be performed by adding a TLH 5. Layout of each control. correction assembly to the Deflection Yoke. V.STAT Purity 8. YCH Adjustment BMC (Hexapole) YCH VR Deflection Yoke 9. TLV Adjustment 6. Geometry Adjustment. TLV VR...
-
Page 12: Focus Adjustment
KV-21CL5K RM-W100 2-3. FOCUS ADJUSTMENT 2-5. WHITE BALANCE ADJUSTMENT 1. Receive digital monoscope pattern. 1. Enter into Service Menu. 2. Set Picture Mode to PERSONAL. 2. Input white pattern signal. 3. Adjust focus VR to obtain the best focus at the centre of 3. -
Page 13: Circuit Adjustments
KV-21CL5K RM-W100 SECTION 3 CIRCUIT ADJUSTMENTS 3-1. ADJUSTMENT WITH COMMANDER Service adjustment to this model can be performed using the supplied remote commander RM-W100. a. ENTERING SERVICE MODE With the unit on standby, press the following sequence of buttons on the remote commander. - Page 21 KV-21CL5K RM-W100 – 21 –...
-
Page 22: Adjustment Item Table
KV-21CL5K RM-W100 NOTE • shaded items are adjustable data. • no data. • Standard data listed on the Adjustment Item Table are reference values, therefore it may be different for each model and for each mode. • Note for Different Data: Those are the standard data values written on the microprocessor. Therefore, the data values of the modes are stored respectively in the memory. - Page 23 KV-21CL5K RM-W100 OPB4 Item Firmware/SMAT 1 spk Models Equalizer Surround V-Chip TEXT KV-21CL5K Firmware (SSD Firmware Downloading) 0 = disabled, 1 = enabled SMAT Surround Matrix 0 = Active, 1 = Passive 1 spk Models 1 Speaker Models 0 = 2 or 3 Speakers Models,...
-
Page 24: T-Mode
KV-21CL5K RM-W100 Set NVM as non-virgin 3-3. T-MODE: Set NVM as virgin T-Mode is available by pressing the 'TEST' button once, Auto AGC Adjustment OSD 'T' appears. The function described below are available by selecting the indicated keys. The 'T' is released RGB priority (toggle) automatically after each command is executed. -
Page 25: Sub Brightness Adjustment
KV-21CL5K RM-W100 3-6. SUB BRIGHTNESS ADJUSTMENT 3-8. SUB COLOUR ADJUSTMENT 1. Input a PAL monoscope pattern. 1. Receive a PAL colour bar signal. 2. Go to Test Mode. 2. Connect an oscilloscope to Pin 2 of CN004(A board). 3. Press 'Test' 'Test 13' on the Remote commander. -
Page 26: Deflection Adjustment
KV-21CL5K RM-W100 3-10. DEFLECTION ADJUSTMENT Vertical Amplitude (VSIZ) 1. Set the TV mode to normal (4:3). 2. Enter into the 'GEOMETRY' service menu. 3. Select and adjust each item in order to obtain the optimum image. (see table below) Vertical Linearity (VLIN) 4. -
Page 27: Diagrams
KV-21CL5K RM-W100 SECTION 4 DIAGRAMS 4-1. BLOCK DIAGRAM – 27 –... -
Page 28: Circuit Boards Location
KV-21CL5K RM-W100 4-2. CIRCUIT BOARDS LOCATION C Board A Board 4-3. SCHEMATIC DIAGRAM Reference information Note: All capacitors are in µF unless otherwise noted. RESISTOR : RN METAL FILM • • All electrolytic capacitors are rated at 50V unless otherwise noted. -
Page 29: A Board - Processor (Block A)
KV-21CL5K KV-21CL5K RM-W100 RM-W100 4-3-1. A Board – Pr ocessor (Bloc k A) CN004 CN007 CN009 To CN701 To CN905 (Block F) (C Board) CN003 V-IN C005 C006 R377 U-IN 1.5K CHIP PROCESSOR (BLOCK A) 3.3V L003 10uH D066 R394 GP08D 4.7k... -
Page 30: A Board - Audio (Block B)
KV-21CL5K KV-21CL5K RM-W100 RM-W100 4-3-2. A Board – Audio (Block B) CN200 CN202 CN201 To Speaker To Speaker J201 J200 JACK J202 R238 R237 RN-CP C235 R239 470p RN-CP :CHIP C217 R233 1000 AUDIO(BLOCK B) C234 JR1256 C223 470p D200... -
Page 31: A Board - Power Supply (Block C)
KV-21CL5K KV-21CL5K RM-W100 RM-W100 4-3-3. A Board – Power Suppl y (Block C) IC606 C641 C672 BA033T 0.01 3.3V REG 3.3V (C1) To A3,D18 IC607 BA18BC0FP-E2 POWER SUPPLY (BLOCK C) C675 1.8V REG 1.8V_MAIN (C2) To A47 JW1665 C685 C662 17.5MM... -
Page 32: A Board - Deflection (Block D)
KV-21CL5K KV-21CL5K RM-W100 RM-W100 4-3-4. A Board – Deflection (Bloc k D) IC804 STV9302A DEFLECTION (BLOCK D) V-OUT C863 R881 C858 C855 0.047 0.47 R8004 R8005 CHIP T801 C844 NX-4751//M3A4 RN-CP RN-CP 0.047 To A3,C1 (D18) 3.3V R895 3.3k To A64 (D17) ROT_SW... -
Page 33: A Board - Tuner (Block E)
KV-21CL5K KV-21CL5K RM-W100 RM-W100 4-3-5. A Board – Tuner (Block E) B-BX1s11705-OIRT-A..(BLOCK E)-21CL5K SWF102 SWF101 SWF100 FILTER SURFACE WAVE FILTER SURFACE WAVE TUNER (BLOCK E) R106 R110 D102 CHIP CHIP TU101 JR1100 FSS BTP-AC421 C115 DIODE R128 L101 C116 CHIP... -
Page 34: A Board - Jack, Scart Terminal (Block F)
KV-21CL5K KV-21CL5K RM-W100 RM-W100 4-3-6. A Board – Jac k, Scar t Terminal (Bloc k F) CN904 To Bus Connector JR1903 R9031 To E17 (F30)TU-AGC CHIP L902 R9028 To A60 (F29) B_INT CHIP 47uH To A59 (F28) B_DAT CHIP C956... -
Page 36: Voltage Measurement And Waveform
KV-21CL5K RM-W100 4-4. VOLTAGE MEASUREMENT AND WAVEFORM A BOARD VOLTAGE LIST AND WAVEFORM Pin No. Voltage[v] Pin No. Voltage[v] Pin No. Voltage[v] 0.05 IC001 0.01 0.01 0.03 0.01 2.16Vp-p 1.40Vp-p – – 0.17 1.40Vp-p 0.01 0.01 0.03 0.01 0.05 0.01 1.08Vp-p... - Page 37 KV-21CL5K RM-W100 A BOARD VOLTAGE LIST AND WAVEFORM Pin No. Voltage[v] Pin No. Voltage[v] Pin No. Voltage[v] IC200 0.01 14.0 Q803 0.05 (-0.01)[0] 0.44 22.6 PH600 19.1 18.0 (-0.01)[0] 0.05 (0.01)[0.02] 11.2 Q001 0.02 1.40Vp-p 0.02 55.4 0.01 23.8 Q006 10.4...
- Page 38 KV-21CL5K RM-W100 C BOARD VOLTAGE LIST AND WAVEFORM Pin No. Voltage[v] Pin No. Voltage[v] IC751 139.2 1.56Vp-p 108.0Vp-p 149.0 1.66Vp-p 98.0Vp-p 138.4 98.0Vp-p 1.64Vp-p J751 138.2 197.7 150.0 140.0 – 44 –...
-
Page 39: Printed Wiring Boards And Parts Location
KV-21CL5K KV-21CL5K RM-W100 RM-W100 4-5. PRINTED WIRING BOARDS & PARTS LOCATION NOTE: The circuit indicated at left contains high voltage of over PRINTED WIRING BOARDS 1220 Vp-p. Please pay attention when inspecting or repairing it to prevent an electric shock. - Page 40 KV-21CL5K RM-W100 PRINTED WIRING BOARDS [RGB AMP] – C Board – A703 CN701 A705 C754 CN704 CN703 C752 R781 R752 C790 R784 R776 G1-1 L780 R785 G1-2 C759 R786 Q701 R794 EY706 R766 RV750 A701 B IN G IN C753...
-
Page 41: Semiconductors
KV-21CL5K RM-W100 4-6. SEMICONDUCTORS TRANSISTOR MSB709-RT1 2SC3209LK IRF614-005 FN155 2SA1091-0 2SC5885 MSD601-RT1 UN2211 UN2216 DIODE CATHODE ANODE ANODE CATHODE CATHODE ANODE D3SB60F3 MMDL914T1 AM01AV1 MA2ZD14001SO HSS82-TJ S3L20UF4 RD3.6SB D1NL20U UDZSTE-175.6B RD5.1ESB2 10ERB20-TA2B5 D3S6M-F UDZSTE-179.1B MTZJ-T-77-15 10ERB20-TB3 EGP20G UPC574J 11EQS10-TB5 EL1Z... - Page 42 KV-21CL5K RM-W100 TOP VIEW TOP VIEW Dual In-line Package Pin 6~98 Small Outline L-leaded Package Pin 8~98 AN5276T NJM4556AD CAT24WC16J1-TE13 LM2903DT TJM4558CDT – 49 –...
-
Page 43: Exploded Views
KV-21CL5K RM-W100 SECTION 5 EXPLODED VIEWS NOTE: • • Items marked " ∗ " are not stocked since Items with no part number and no The components identified by description are not stocked because they are seldom required for routine... -
Page 44: Electrical Parts List
KV-21CL5K RM-W100 The components identified by shading and mark ! are critical for safety. SECTION 6 Replace only with part number specified. ELECTRICAL PARTS LIST REF NO. PART NO. DESCRIPTION REMARK REF NO. PART NO. DESCRIPTION REMARK • Items marked " ∗ " are not stocked since •... - Page 45 KV-21CL5K RM-W100 The components identified by shading and mark ! are critical for safety. Replace only with part number specified. REF NO. PART NO. DESCRIPTION REMARK REF NO. PART NO. DESCRIPTION REMARK C204 1-130-495-00 MYLAR 0.1UF 5.00% C635 1-126-971-11 ELECT 470UF 20.00% 50V...
- Page 46 KV-21CL5K RM-W100 The components identified by shading and mark ! are critical for safety. Replace only with part number specified. REF NO. PART NO. DESCRIPTION REMARK REF NO. PART NO. DESCRIPTION REMARK C857 1-104-666-11 ELECT 220UF 20.00% 25V <DIODE> C858...
- Page 47 KV-21CL5K RM-W100 The components identified by shading and mark ! are critical for safety. Replace only with part number specified. REF NO. PART NO. DESCRIPTION REMARK REF NO. PART NO. DESCRIPTION REMARK D804 8-719-991-33 1SS133T-77 FB800 1-410-397-21 FERRITE 1.1UH D805...
- Page 48 KV-21CL5K RM-W100 The components identified by shading and mark ! are critical for safety. Replace only with part number specified. REF NO. PART NO. DESCRIPTION REMARK REF NO. PART NO. DESCRIPTION REMARK JR041 1-216-864-11 SHORT CHIP L900 1-469-525-91 INDUCTOR 10UH...
- Page 49 KV-21CL5K RM-W100 The components identified by shading and mark ! are critical for safety. Replace only with part number specified. REF NO. PART NO. DESCRIPTION REMARK REF NO. PART NO. DESCRIPTION REMARK <RESISTOR> R213 1-216-835-11 METAL CHIP 1/10W R214 1-216-835-11...
- Page 50 KV-21CL5K RM-W100 The components identified by shading and mark ! are critical for safety. Replace only with part number specified. REF NO. PART NO. DESCRIPTION REMARK REF NO. PART NO. DESCRIPTION REMARK R414 1-260-336-11 CARBON 4.7K 1/2W R833 1-260-125-11 CARBON...
- Page 51 KV-21CL5K RM-W100 The components identified by shading and mark ! are critical for safety. Replace only with part number specified. REF NO. PART NO. DESCRIPTION REMARK REF NO. PART NO. DESCRIPTION REMARK R925 1-216-809-11 METAL CHIP 1/10W <VARIABLE RESISTOR> R926...
- Page 52 1-410-667-31 INDUCTOR 22UH <REMOTE COMMANDER BATTERY COVER> L781 1-414-186-31 INDUCTOR 33UH ***************************************** L782 1-414-186-31 INDUCTOR 33UH L783 1-414-186-31 INDUCTOR 33UH 1-477-861-11 STANDARDTYPE COMMANDER RM-W100 Sony Corporation Sony Technology Malaysia Sdn. Bhd. English 2003.9 9-872-377-01 Visual Products – 59 –...
-
Page 53: Instruction Manual
4-098-284-11(1) FD Trinitron Colour Television Instruction Manual Инструкции за експлоатация Návod k obsluze Kezelési útmutató Instrukcja obsługi Инструкция по эксплуатации Návod na obsluhu KV-21CL5K © 2003 Sony Corporation... - Page 54 Introduction Thank you for choosing this Sony FD Trinitron Colour Television. Before operating the TV, please read this manual thoroughly and retain it for future reference. Symbols used in the manual: • Important information. • Shaded buttons on the remote control show you the buttons you have to •...
-
Page 55: Safety Information
Safety Information Never push objects of any kind For environmental and safety into the set as this could result in This set is to operate on a 220- reasons, it is recommended that a fire or electric shock. Never 240V AC supply only. Take care the TV set is not left in standby spill liquid of any kind on the not to connect too many... -
Page 56: Overview
Overview of Remote Control Buttons Displaying on screen To temporarily switch off TV information Press to temporarily switch off TV (the standby Press to display all on-screen indicator 1 on TV lights up). Press again to switch on indications. Press again to TV from standby mode. -
Page 57: Overview Of Tv Buttons
Overview of TV Buttons Displaying Selecting Volume Programme Up or the menu Input control Down buttons system source buttons (selects TV channels) Video Input Audio Input Headphone Standby On/Off Lift up the door jack jacks jack indicator switch flap with mark to reveal the control panel. -
Page 58: First Time Operation
Switching On the TV and Automatically Tuning The first time you switch on your TV, a sequence of menu screens appear on the TV enabling you to: 1) choose the language of the menu screen, 2) choose the country in which you wish to operate the TV, 3) search and store all available channels (TV Broadcast), 4) change the order in which the channels (TV Broadcast) appear on the screen and 5) adjust the picture slant. - Page 59 After all available channels are captured and stored, the Programme Sorting Programme Sorting menu appears automatically on the screen Programme: enabling you to change the order in which the channels appear on TVE2 the screen. If you wish to keep the broadcast channels in the tuned order, Select channel Select [ –...
-
Page 60: Menu System
Introducing and Using the Menu System Your TV uses an on-screen menu system to guide you through the operations. Use the following buttons on the Remote Control to operate the menu system: Press MENU to switch the menu on. • To highlight the desired menu or option, press •... - Page 61 Press to decrease the green tones. Press to increase the green tones. Hue can only be adjusted for NTSC colour signal (e.g. USA video tapes). Sharpness Press to soften the picture. Press to sharpen the picture. Reset Select to reset the picture to the factory preset levels. Intelligent On/Off Select to optimize the picture quality.
-
Page 62: Sound
Sound The “Sound” menu allows you to alter Sound Sound the sound adjustments. Mode: Dynamic Mode: Dynamic Sound Adjustment Sound Adjustment Balance Balance To do this: Auto Volume: Auto Volume: After selecting the item you want to alter, press , then press Select Confirm Select... -
Page 63: Timer
Timer The “Timer” menu allows you to alter Timer Timer the timer adjustments. Sleep Timer: Sleep Timer: On Timer: On Timer: Select Confirm Select Confirm Sleep Timer The “Sleep Timer” option in the “Timer” menu allows you to select a time period for the TV to switch itself automatically into the standby mode. -
Page 64: Channel Set Up
Channel Set Up The “Channel Set Up” menu allows Channel Set Up Channel Set Up you to preset channels on this TV. Auto Tuning Auto Tuning Programme Sorting Programme Sorting Programme Labels Programme Labels Manual Programme Preset Manual Programme Preset Select Confirm Select... - Page 65 Manual The “Manual Programme Preset” option in the “Channel Set Up” Programme menu allows you to: a) Preset channels or a video input source one by one to the Preset programme order of your choice. To do this: After selecting the “Manual Programme Preset” option, press .
-
Page 66: Set Up
Set Up The “Set Up” menu allows you to Set Up Set Up alter various options on this TV. Language/Country Language/Country Picture Rotation Picture Rotation RGB Centring: RGB Centring: Select Confirm Select Confirm Language/ The “Language/Country” option in the “Set Up” menu allows you to Country select the language that the menus are displayed in. -
Page 67: Teletext
Teletext Teletext is an information service transmitted by most TV stations. The index page of the Teletext service (usually page 100) gives you information on how to use the service. To operate Teletext, use the remote control buttons as indicated below. Be sure to use a channel (TV Broadcast) with a strong signal, otherwise Teletext errors may occur. -
Page 68: Additional Information
8mm/Hi8/ DVD/VCR camcorder “PlayStation”* decoder When you connect the * “PlayStation” is a product headphones, the TV of Sony Computer speakers will Entertainment, Inc. automatically be muted. * “PlayStation” is a trademark of Sony Computer Entertainment, Inc. Connecting a VCR: To connect a VCR, please refer to the section “Connecting an aerial and VCR”... -
Page 69: Specifications
Specifications TV system: Sound Output: Depending on your country selection: 2 x 10 W (music power) B/G/H, D/K 2 x 5 W (RMS) Colour system: Power Consumption: PAL, SECAM 66 W NTSC 3.58, 4.43 (only Video In) Standby Power Consumption: Channel Coverage: <... -
Page 70: Troubleshooting
Remote control does not function. • Replace the batteries. The standby indicator 1 on the TV • Contact your nearest Sony service centre. flashes red. In case of problems, have your TV serviced by qualified personnel. Never open the casing yourself.