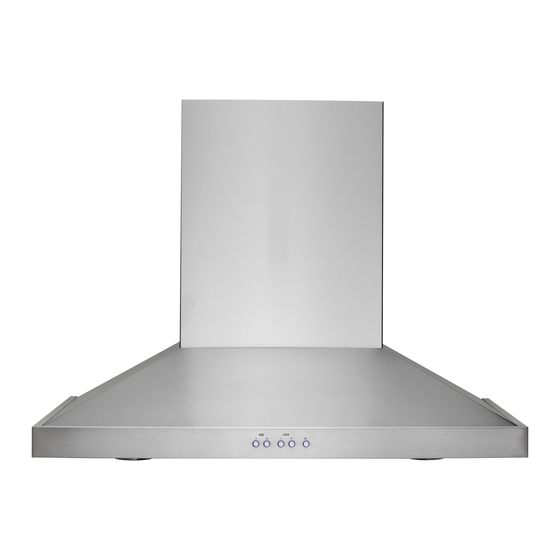
GE Monogram ZV830 Installation Instructions Manual
30" chimney vent hood
Hide thumbs
Also See for Monogram ZV830:
- Installation instructions manual (60 pages) ,
- Installation instructions manual (60 pages) ,
- Owner's manual (40 pages)
Table of Contents

Summary of Contents for GE Monogram ZV830
-
Page 1: Installation Instructions
Call 1-800-667-8721 anywhere in the US and Canada www.rangehoods.com Installation Instructions 30″ Chimney Vent Hood For Model: ZV830 01-08 JR ::rangehoods.com GE Monogram at accessories kitchen:: is a division of... -
Page 2: Safety Information
To reduce risk of fire and to properly exhaust air, be sure to duct air outside—do not vent exhaust air into spaces within walls or ceilings or into attics, crawl spaces or garages. ::rangehoods.com GE Monogram at accessories kitchen:: is a division of... -
Page 3: Table Of Contents
The supplied duct cover is sized to reach 8′ to 10′ ceiling heights. See page 7. ZX83012 Accessory – Duct accessory for ceiling heights of 10′ to 12′. See page 7. ::rangehoods.com GE Monogram at accessories kitchen:: is a division of... -
Page 4: Installation Preparation
• Route house wiring as close to the installation location as possible, in the ceiling or back wall. Refer to Wiring Locations on page 9. • Connect the hood wiring to the house wiring in accordance with local codes. ::rangehoods.com GE Monogram at accessories kitchen:: is a division of... -
Page 5: Duct Fittings
44 ft. *Actual length of straight duct plus duct fitting equivalent. Equivalent length of duct pieces are Total Duct Run based on actual tests conducted by GE Evaluation Engineering and reflect requirements for good venting performance with any ventilation hood. ::rangehoods.com... -
Page 6: Tools And Materials Required
• Remove duct covers. • Remove the parts box and other pieces. Locate the literature package. • Remove and properly discard the protective plastic wrapping and other packaging materials. ::rangehoods.com GE Monogram at accessories kitchen:: is a division of... -
Page 7: Determine Installation Height
Call 1-800-667-8721 anywhere in the US and Canada www.rangehoods.com Installation Preparation DETERMINE INSTALLATION HEIGHT Wall Mount ZV830 Installation Heights • Telescopic duct covers are provided to conceal the ductwork running to the ceiling. Actual *Possible Ceiling *Possible VENTED RECIRCULATING •... -
Page 8: Check Installation Hardware
Align Bottom Edge With Align Bottom Edge With Pencil Line Indicating Pencil Line Indicating Bottom of Hood Bottom of Hood Wall mount template Stainless steel filter 1 charcoal filter for recirculating installation ::rangehoods.com GE Monogram at accessories kitchen:: is a division of... -
Page 9: Installation-Vented To The Outside
″ • Wiring should enter the back wall at least 18 above ″ the bottom of the hood, and within 5-1/2 of the left side of the centerline. ::rangehoods.com GE Monogram at accessories kitchen:: is a division of... -
Page 10: Step 2, Install Hood Mounting Screws
• Drive screws, by hand, into the fasteners to allow anchors to expand. Remove the screws. • Secure the bracket to the wall with wood screws and/or fasteners. Centerline cutout ::rangehoods.com GE Monogram at accessories kitchen:: is a division of... -
Page 11: Step 5, Connect Ductwork
Duct tape over seam Screw and screw CAUTION: Do not use sheet metal screws at the hood flange connection. Doing so will prevent proper damper operation. Seal connection with tape only. ::rangehoods.com GE Monogram at accessories kitchen:: is a division of... -
Page 12: Step 6, Connect Electrical
• Secure the junction box cover with the 6 original • Locate the screw holes on the inside front edge screws. of the opening. Install 2 screws to secure the duct cover to the hood. ::rangehoods.com GE Monogram at accessories kitchen:: is a division of... -
Page 13: Step 8, Install Filters
• To remove the filter, push the latch toward the center and pull downward. • To close the filter cover panel, push up on both sides at the front corners to engage the latch. ::rangehoods.com GE Monogram at accessories kitchen:: is a division of... -
Page 14: Installation-Recirculating
The horizontal support must be flush with the room side of the studs. Use cleats behind both sides of the support to secure to wall studs. IMPORTANT: Reinstall drywall for an even mounting surface. ::rangehoods.com GE Monogram at accessories kitchen:: is a division of... -
Page 15: Step 2, Install Hood Mounting Screws
• Drive screws, by hand, into the fasteners to allow anchors to expand. Remove the screws. • Secure the bracket to the wall with wood screws and/or fasteners. Centerline cutout ::rangehoods.com GE Monogram at accessories kitchen:: is a division of... -
Page 16: Step 5, Size And Cut Duct Piece
• Drive 2 screws into each side of the bottom of the deflector and into the bracket. • Use duct tape to seal duct to the deflector and at the exhaust outlet. ::rangehoods.com GE Monogram at accessories kitchen:: is a division of... -
Page 17: Step 6, Connect Electrical
• Secure the junction box cover with the 6 original • Locate the screw holes on the inside front edge screws. of the opening. Install 2 screws to secure the duct cover to the hood. ::rangehoods.com GE Monogram at accessories kitchen:: is a division of... -
Page 18: Step 8, Install Filters
NOTE: The charcoal filter should not be used without the metal filter secured below. • To close the filter cover panel, push up on both sides at the front corners to engage the latch. ::rangehoods.com GE Monogram at accessories kitchen:: is a division of...


