Table of Contents
Advertisement
VIDEO CASSETTE RECORDER
HR-J648EH
HR-J648E
HR-J448E
HR-J248E
TV/VCR
TV
DISPLAY
(MONITOR)
1
2
3
4
5
6
/ADD TIME
7
8
9
CANCEL
/
/DAILY
/WEEKLY
/C.RESET
0
/AUX
PROG CHECK
4 TIMER
EXPRESS PROGRAMMING
2
START
STOP
DATE
TV PROG
1
3
¡
REW
PLAY
REW
7
8
REC
STOP
PAUSE
PROG
TV VOL+
1
4
¢
/MENU
3
OK
C.MEMORY
TV VOL-
PUSH JOG
STANDBY/ON
Press and hold TV button while pressing
COUNTER
, TV PROG. + / -, TV / VCR
TIMER
TV PROG
RESET
The recorder illustrations appearing in this instruction manual are
of the HR-J648E.
SEE
SEE
AUTO SET UP
AUTO SET UP
ON REAR SIDE
ON REAR SIDE
(Hi-Fi)
(Monaural)
(Monaural)
M
REVIEW
SPLPEP
V C R
REMAIN
INSTRUCTIONS
(Hi-Fi)
¢
¢
INDEX
q
SP/ LP
¡
1
PAL
ENGLISH
CONTENTS
Safety Precautions ...................... 2
Basic Connections ...................... 3
Auto Set Up ............................... 4
Language ................................... 7
Video Channel Set ...................... 8
V
Setup ....................... 10
IEW
Basic Playback ......................... 12
Playback Features ..................... 13
Basic Recording ....................... 17
B.E.S.T. Picture System ............. 18
On-Screen Displays .................. 20
Recording Features ................... 21
V
Timer Recording....... 24
IEW
Regular Timer Programming ..... 26
Recorder .................................. 30
Edit From A Camcorder ............ 32
Connecting/Using A Decoder ... 33
CLOCK SET
QUESTIONS AND ANSWERS
TROUBLESHOOTING
INDEX
EN
LPT0002-097A
2
4
12
17
24
30
33
34
39
41
42
44
47
Advertisement
Table of Contents

Related Manuals for JVC HR-J648EH, HR-J648E, HR-J448E, HR-J248E


Summary of Contents for JVC HR-J648EH, HR-J648E, HR-J448E, HR-J248E
-
Page 1: Table Of Contents
C.MEMORY TV VOL– PUSH JOG STANDBY/ON Press and hold TV button while pressing COUNTER , TV PROG. + / –, TV / VCR TIMER TV PROG RESET The recorder illustrations appearing in this instruction manual are of the HR-J648E. INSTRUCTIONS... -
Page 2: Safety First
Use a SECAM-L recorder to record SECAM-L signals. For Italy: "It is declared that this product, brand JVC, conforms to the Ministry Decree n. 548 of 28 Aug.'95 published in the Official Gazette of the Italian Republic n. 301 of 28 Dec.'95"... -
Page 3: Installing Your New Recorder
INSTALLING YOUR NEW RECORDER Basic Connections Aerial terminal Back of TV 21-pin SCART connector RF Cable (provided) 21-pin SCART Cable AV1 IN/OUT Mains Power Cord Mains outlet Back of HR-J448E/J248E AUDIO OUT(put) connectors (HR-J648E/EH only) For connection to the audio input connctors on a Hi-Fi stereo system It's essential that your video recorder be properly connected. -
Page 4: Initial Settings
Auto Set Up Auto Channel Set/Auto Clock Set/Auto Guide Program Number Set ¶ International Telephone Country Code SUOMI : 358 SUISSE PORTUGAL : 351 ITALIA DEUTSCHLAND : 49 ESPAÑA NORGE : 47 BELGIUM SVERIGE : 46 NEDERLAND : 31 DANMARK : 45 GREECE ÖSTERREICH... -
Page 5: Select Language
¶ MENU Language Code ENGLISH : 01 NEDERLANDS : 06 DEUTSCH : 02 SVENSKA FRANCAIS : 03 NORSK ITALIANO : 04 SUOMI CASTELLANO : 05 DANSK Auto Set Up results appear on the front display panel When both auto channel set and auto clock set have been completed success- fully the correct current... - Page 6 If both auto channel set and auto clock set have been performed successfully: Perform "Video Channel Set" on page 8. Turn on the TV and select its VIDEO channel or AV mode, then make sure that all necessary stations have been stored in the recorder's memory by using the TV PROG.
-
Page 7: Language
Language Be sure to set your Video Channel before performing Language setting ( pg. 8). Turn on the TV and select the VIDEO channel (or AV mode). ¶ MENU This recorder offers you the choice to view on-screen messages in 10 different languages. Though Auto Set Up selects the language automatically ( setting manually using this procedure as required. -
Page 8: Video Channel Set
If you cannot obtain the two vertical white bars clearly with any channel between 22 and 69, consult your JVC dealer. EXIT VIDEO CHANNEL SET MODE Press OK. - Page 9 TV PROG. ¡ ¶ ¢ IMPORTANT: Before performing the following steps, make sure the recorder's power is off and there is no cassette inserted in the recorder. With AV Connection ¢ ¢ ACCESS VIDEO CHANNEL ¡ SET MODE Hold down STOP on the recorder until the display panel shows the following.
-
Page 10: Showv
Setup Turn on the TV and select the VIDEO channel (or AV mode). NUMBER ¶ MENU With S because each TV programme has a corresponding code number which your recorder is able to recognise. NOTE: “Guide Program (GUIDE PROG) Number” refers to the assigned TV station numbers, according to broadcast area, for S timer recording. - Page 11 ENTER SHOWVIEW NUMBER Press OK, and a cursor appears above “GUIDE PROG”. Then, using the NUMBER keys, input the number (found in most TV listings) of a program scheduled to be broadcast on each station on the list from step 1, starting at the top.
-
Page 12: Playback
Basic Playback Turn on the TV and select the VIDEO channel (or AV mode). ¶ The easiest, most basic operation possible with your video recorder is tape playback. Already-recorded signals on a video tape are read by your video recorder and displayed on your TV just like a TV programme. -
Page 13: Playback Features
Playback Features PAUSE ¶ Variable-Speed Search ACTIVATE VARIABLE-SPEED SEARCH During playback, press PUSH JOG The more times you press, the faster the playback picture moves. To decrease speed, press the button for the opposite direction. To resume normal playback, press PLAY. NOTE: In the search, still, or frame by frame playback mode, the picture may be distorted, and there may be a loss of colour. -
Page 14: Manual Tracking
REVIEW ¶ Manual Tracking Your video recorder is equipped with automatic tracking control. During playback, you can override this and adjust the tracking manually by pressing the TV PROG. buttons. ¢ ¢ ¡ REVIEW TV PROG. NOTE: ¡ When a new tape is inserted, the recorder enters the automatic tracking mode automatically. -
Page 15: Index Search
Index Search Your recorder automatically marks index codes at the beginning of each recording. This function gives you quick access to any one of 9 index codes in either direction. NOTE: Before starting, make sure the recorder is in the Stop mode. ACTIVATE INDEX SEARCH Press PUSH JOG (™... -
Page 16: Next Function Memory
¶ C.MEMORY Soundtrack Selection (HR-J648E/EH only) Your video recorder is capable of recording three soundtracks (HI-FI L, HI-FI R and NORM) and will play back the one you select. During Playback Pressing AUDIO MONITOR on the remote control changes the soundtrack being played back as follows: TRACK (On-Screen Display) HI FI... -
Page 17: Recording Basic Recording
RECORDING Basic Recording Turn on the TV and select the VIDEO channel (or AV mode). SP/LP NUMBER ¶ RECORD TV signals being received by the recorder’s built-in tuner can be recorded onto a video tape. You can “capture” a TV programme using your video recorder. -
Page 18: Picture System
B.E.S.T. Picture System Turn on the TV and select the VIDEO channel (or AV mode). ¶ RECORD MENU Display Panel Indication As the tape check progresses, the “– –” marks on the display panel increase upward. Once the "BEST" indicator starts blinking, the check is complete. - Page 19 ¡ ¶ RECORD ¢ NOTES: With HR-J648E/J648EH/J448E: The B.E.S.T. system works for both SP and LP modes only after a tape has been inserted and the Record mode is first initiated. It does not work during recording. With HR-J248E: The B.E.S.T. system works only after a tape has been inserted ¢...
-
Page 20: On-Screen Displays
On-Screen Displays Turn on the TV and select the VIDEO channel (or AV mode). ¶ MENU The superimposed indication on the TV screen tells you what the recorder is doing. PR. 12 ABCD 21 : 00 24. 12. 97 – WARNING– TIMER RECORDING TO START SOON [CANCEL]... -
Page 21: Recording Features
¶ Record One Programme While Watching Another If your recorder is connected to the TV via AV connection, ..press TV/VCR. The recorder's VCR indicator and the TV broadcast being recorded disappear. ¢ ¢ ¡... - Page 22 ¶ Receiving Stereo And Bilin- gual Programmes (HR-J648E/EH only) Your recorder is equipped with a Sound-Multiplex decoder (A2) and, if you own the HR-J648EH, a Digital stereo sound decoder (NICAM) as well, making reception of stereo and bilingual broadcasts possible. When the channel is changed, the type of broadcast being received will be displayed on the TV screen for a few seconds.
- Page 23 Instant Timer Recording (ITR) This easy method lets you record for from 30 minutes to 6 hours (selectable in 30-min. increments), and shuts the recorder off after recording is finished. START RECORDING ¢ ¢ Press RECORD on the recorder. ¡ ENGAGE ITR MODE Press RECORD again.
-
Page 24: Timer Recording
Timer Recording Before performing S timer recording: Be sure to read "S Setup" ( Insert a cassette with the safety tab in place. The recorder will come on automatically. Turn on the TV and select the VIDEO channel (or AV mode). NUMBER :PDC/VPS PROG. - Page 25 NUMBER ¶ MENU Satellite Tuner Users To timer-record a satellite broadcast using S perform steps 1 – 6 and, before the selected programme begins, select the appropriate channel on the satellite tuner. Then set the tuner's timer. If your satellite tuner doesn't have a timer, leave the unit's power switched on.
-
Page 26: Regular Timer Programming
Regular Timer Programming Remember, the clock must be set before you can programme the timer ( pg. 39). Before performing the following steps: Insert a cassette with the safety tab in place. The recorder will come on automatically. Turn on the TV and select the VIDEO channel (or AV mode). START+/–... - Page 27 WEEKLY :PDC/VPS ¡ ¶ ¢ ENTER CHANNEL POSITION Press TV PROG. +/–. ¢ ¢ ¡ IMPORTANT Be sure to confirm the setting of PDC/VPS recording. If " on the display panel, PDC/VPS is set to ON. If " not lit on the display panel, PDC/VPS is set to OFF. To change the setting, press (NUMBER key "7").
-
Page 28: Auto Timer
PROG. CHECK START+/– ¶ MENU Check And Cancel Programmes ACCESS PROGRAMME DISPLAY AND/OR SCREEN Press PROG. CHECK. The display panel shows the programme start time. Pressing OK changes the display to the programme stop time, then the date and channel position. If the recorder is turned on and the TV is set to its VIDEO channel or AV mode, you can check program information on screen as well. -
Page 29: Timer Warning
DISPLAY START+ ¡ ¶ ¢ Timer Warning If you have programmed your recorder to timer-record a programme or a series of programmes, a warning appears on screen to tell you that the record- ing is to start in 5 minutes. NOTES: The warning only appears if you’re not in the Timer mode at... -
Page 30: Editing
Edit To Or From Another Video Recorder NUMBER "0" ¶ MENU AV2 SELECT Setting Press MENU twice to access the Main Menu screen. Press PUSH JOG %fi to move the highlight bar (pointer) to "MODE SET", then press OK. Press PUSH JOG %fi to move the highlight bar (pointer) to "AV2 SELECT". Press PUSH JOG to move the highlight bar (pointer) to your choice: a–AV2... - Page 31 HR-J648E/EH TV Receiver Player 21-pin SCART Cable (not provided) VIDEO CHAN- RF Cable NEL or (provided) AV mode Recorder HR-J448E/J248E TV Receiver Player 21-pin SCART Cable (not provided) VIDEO CHAN- NEL or RF Cable AV mode (provided) Recorder Your recorder Recorder 21-pin SCART Cable...
-
Page 32: Edit From A Camcorder
Edit From A Camcorder NUMBER "0" ¶ Back of HR-J648E/EH AUDIO OUT Camcorder VIDEO OUT Player You can use a camcorder as the source player and your video recorder as the recorder. TV PROG. ¡ ¢ Your recorder Cable adapter Audio/Video signals EDITING (cont.) MAKE CONNECTIONS... -
Page 33: System Connections
SYSTEM CONNECTIONS Connecting/ Using A Decoder TV Receiver RF Cable (provided) AV1 IN/OUT AV2 IN/DECODER Back of HR-J448E/ J248E Satellite antenna Satellite tuner The AV2 IN/DECODER connector can be used as an input terminal for an external decoder (descrambler). Simply connect a decoder and you can enjoy the variety of programming that is available through scrambled channels. -
Page 34: Tuner Set
Turn on the TV and select the VIDEO channel (or AV mode). ¶ MENU IMPORTANT Perform the following steps only if auto channel set has not been set correctly by Auto Set Up function ( you have moved to a different area or if a new station starts broadcasting in your area. - Page 35 ¶ MENU IMPORTANT Depending on the reception conditions, the station names may not be stored correctly, and auto Guide Program Number Set may not work properly. If the Guide Program numbers are not set properly, S pg. 24) will not work correctly; be sure to check if the Guide Program numbers have been set correctly pg.10, "S Setup").
-
Page 36: Storing Channels Manually
Storing Channels Manually Store channels that were not stored during Auto Set Up ( or Auto Channel Set ( pg. 34). ACCESS MAIN MENU Press MENU twice. ACCESS CONFIRMATION SCREEN Press PUSH JOG%fi to move the highlight bar (pointer) to “MANUAL CH SET”, then press OK. The Confirma- tion screen appears. - Page 37 Perform steps 1 and 2 of "Storing Channels Manually" on page 36 to access the Confirmation screen before continuing. Set Stations (A) SELECT ITEM Press PUSH JOG %fi until the item you want begins blinking. Then press OK twice and the station’s name (ID) begins blinking.
-
Page 38: Tv Station And Id List
TV Station And ID List STATION NAME 1000 TV1000 3SAT 3SAT ADLT ADULT ANT3 ANTENA3 ARTE ARTE BBC GROUP BBC1 BBC1 BBC2 BBC2 BAYERN3 CANAL PLUS PORTUGUSES CAN5 CANALE5 CHANNEL4 CHANNEL5 CHLD CHILD CINE CINEMA CLUB TELECLUB CSUR ANDALUCIA DISC DISCOVERY DR TV ETB1... - Page 39 CLOCK SET Turn on the TV and select the VIDEO channel (or AV mode). ¶ MENU IMPORTANT Perform the following steps only if auto clock set has not been set correctly by Auto Set Up function ( Auto Channel Set ( backup has expired.
-
Page 40: Auto Clock Set
¶ MENU NOTES: Auto Clock and Just Clock require a PDC signal, and will not operate with a VPS signal. Just Clock (when set to "ON") enables adjustment of the recorder's built-in clock every hour on the hour, except for 23:00, 0:00, 1:00 and 2:00. - Page 41 QUESTIONS AND ANSWERS PLAYBACK Q. What happens if the end of the tape is reached during playback or search? A. The tape is automatically rewound to the beginning. Q. Can the video recorder indefinitely remain in the still mode? A. No. It stops automatically after 5 minutes to protect the heads.
- Page 42 Press TV PROG.+ or – a few times to remove the noise bars from the screen. Engage and adjust tracking manually. pg. 14) Consult your JVC dealer. CORRECTIVE ACTION Insert a cassette, or using adhesive tape, reseal the slot where the tab was removed.
-
Page 43: Other Problems
4. Camcorder recording is not possible. TIMER RECORDING SYMPTOM 1. Timer recording won’t work. 2. On-screen timer programming is not possible. 3. “‰“ and “]“ on the display panel won’t stop blinking. 4. The cassette is automatically ejected, and “‰“ and “]“ on the display panel won’t stop blinking. -
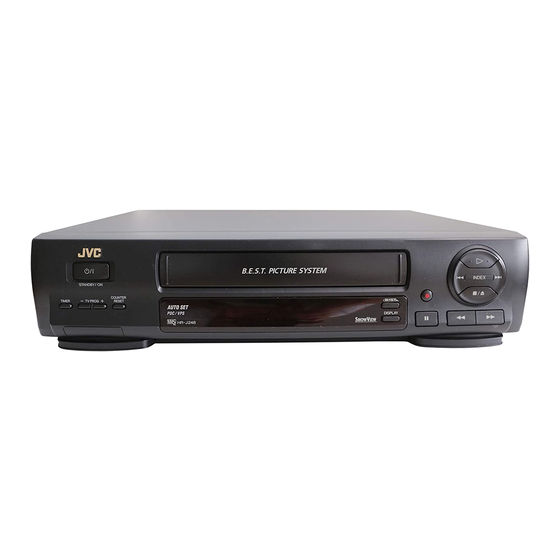
Page 44: Front View
FRONT VIEW STANDBY/ON TIMER TV PROG 1 TIMER Button pg. 25, 27 2 STANDBY/ON Button 3 TV PROG. +/– Buttons pg. 17 4 COUNTER RESET Button 5 Cassette Loading Slot 6 RECORD Button pg. 17 7 INDEX Button pg. 15 8 PLAY Button pg. -
Page 45: Display Panel
6 Channel*/Mode Display * Channel position 1 will be displayed as "CH 1". Clock Display 7 Instant REVIEW Indicator 8 "Cassette Loaded" Mark 9 VCR Indicator 0 Tape Speed Indicators ! Tape Remaining Time Indicator @ Counter/Remain Display REVIEW pg. 16 pg. -
Page 46: Remote Control
How To Use The remote control can operate most of your video recorder's functions, as well as basic functions of JVC TV sets. (See below) Point the remote control toward the sensor window. The maximum operating distance of the remote control is about 8 m. -
Page 47: Specifications
SPECIFICATIONS GENERAL Power requirement : AC 220 – 240 V`, 50/60 Hz Power consumption : 24 W (HR-J648E/EH) : 20 W (HR-J448E/J248E) Temperature Operating : 5°C to 40°C Storage : –20°C to 60°C Operating position : Horizontal only Dimensions (WxHxD) : 400 x 94 x 340 mm Weight : 4.3 kg... - Page 48 Auto Set Up The Auto Set Up function sets the tuner channels, clock and Guide Program numbers automatically. BEFORE YOU START PLEASE MAKE SURE THAT: The TV aerial cable is connected to the ANT.IN jack on the rear panel of the video recorder. The video recorder's mains power cord is connected to a mains outlet.