Kenwood KRC-335 Instruction Manual
Kenwood krc-335 cassette receiver instruction manual
Hide thumbs
Also See for KRC-335:
- Instruction manual (85 pages) ,
- Instruction manual (28 pages) ,
- Service manual (19 pages)
Table of Contents
Advertisement
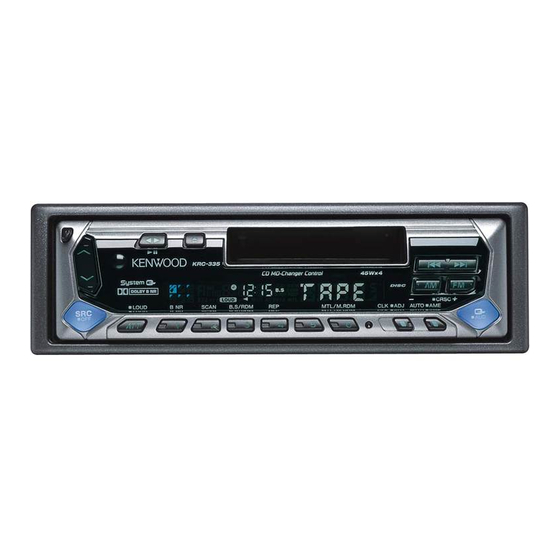
KRC-335
CASSETTE RECEIVER
INSTRUCTION MANUAL
AMPLI-TUNER-LECTEUR DE CASSETTE
MODE D'EMPLOI
RADIO CASETE
MANUAL DE INSTRUCCIONES
RADIO CASSETE
MANUAL DE INSTRUÇÕES
Take the time to read through this instruction manual.
Familiarity with installation and operation procedures will help you obtain the best
performance from your new cassette-receiver.
For your records
Record the serial number, found on the back of the unit, in the spaces designated on the
warranty card, and in the space provided below. Refer to the model and serial numbers
whenever you call upon your KENWOOD dealer for information or service on the product.
Model KRC-335 Serial number
© B64-2123-00 (K)
Advertisement
Table of Contents

Related Manuals for Kenwood KRC-335


Summary of Contents for Kenwood KRC-335
-
Page 1: Instruction Manual
Record the serial number, found on the back of the unit, in the spaces designated on the warranty card, and in the space provided below. Refer to the model and serial numbers whenever you call upon your KENWOOD dealer for information or service on the product. Model KRC-335 Serial number... -
Page 2: Table Of Contents
Contents Safety precautions...3 About Cassette tape ...4 General features ...5 Power Selecting the Source Volume Attenuator Loudness System Q Audio Control Speaker Setting Clock Display Adjusting Clock DSI (Disabled System Indicator) Theft Deterrent Faceplate Tuner features ...8 Tuning Mode Tuning Station Preset Memory Auto Memory Entry Preset Tuning... -
Page 3: Safety Precautions
Note that none of the KDC-C100, KDC-C302, C205, C705, and non-Kenwood CD changers can be connected. You can damage both your unit and the CD changer if you connect them incorrectly. -
Page 4: About Cassette Tape
Safety precautions NOTE • If you experience problems during installation, consult your Kenwood dealer. • If the unit does not seem to be working right, try pressing the reset button first. If that does not solve the problem, consult your Kenwood dealer. -
Page 5: General Features
General features Release button ATT / LOUD Clock indicator Clock display SYSTEM Q ATT indicator LOUD indicator indicator Power Turning ON the Power Press the [SRC] button. ¢ Turning OFF the Power Press the [SRC] button for at least 1 second. Selecting the Source Press the [SRC] button. -
Page 6: Loudness
General features Attenuator Turning the volume down quickly. Press the [ATT] button. Each time the button is pressed the Attenuator turns ON or OFF. When it’s ON, the "ATT" indicator blinks. Loudness Compensating for low and high tones during low volume. Press the [LOUD] button for at least 1 second. -
Page 7: Power
Speaker Setting Fine-tuning so that the System Q value is optimal when setting the speaker type. Enter Standby Press the [SRC] button. Select the "OFF" display. Enter Speaker Setting mode Press the [Q] button. Select the Speaker type Press the [4] or [¢] button. Each time the button is pressed the setting switches as shown below. -
Page 8: Theft Deterrent Faceplate
General features Theft Deterrent Faceplate The faceplate of the unit can be detached and taken with you, helping to deter theft. Removing the Faceplate Press the Release button. The faceplate is unlocked, allowing you to detach it. • The faceplate is a precision piece of equipment and can be damaged by shocks or jolts. -
Page 9: Tuning Mode
Tuning Mode Choose the tuning mode. Press the [AUTO] button. Each time the button is pressed the Tuning mode switches as shown below. Tuning mode Display Operation Auto seek "AUTO 1" Automatic search for a station. indicator Preset station "AUTO 2" Search in order of the stations seek indicator... -
Page 10: Preset Tuning
Tuner features Preset Tuning Calling up the stations in the memory. Select the band Press the [FM] or [AM] button. Call up the station Press the [#1] — [#6] button. CRSC (Clean Reception System Circuit) Temporarily have reception switched from stereo to mono to reduce multi-path noise when listening to the FM station. -
Page 11: Playing Cassette Tapes
Playing Cassette Tapes When the Cassette Tape is inserted Press the [SRC] button. Select the "TAPE" display. When you want to listen to the reverse side Press the [23] button. Eject the Cassette Tape Press the [0] button. Fast Forwarding and Rewinding Fast Forwarding Press the [FM] button. -
Page 12: External Disc Control Features
External disc control features SCAN RDM M.RDM Track time SCN indicator Disc number RDM indicator REP indicator Playing External Disc Playing discs set in the optional accessory disc player connected to this unit. – DISC ¢ DISC Press the [SRC] button. Select the display for the disc player you want. -
Page 13: Track Search
Track Search Selecting the song you want to hear. Press the [4] or [¢] button. Album Search (Function of disc changer) Selecting the disc you want to hear. Press the [DISC–] or [DISC+] button. Track/Album Repeat Replaying the song/disc you're listening to. Press the [REP] button. -
Page 14: Basic Operations Of Remote
Basic Operations of remote – FM/AM/DISC /DISC Loading and Replacing the battery Use one lithium battery (CR2025). Insert the batteries with the + and – poles aligned properly, following the illustration inside the case. 4/¢ 2WARNING Store unused batteries out of the reach of children. Contact a doctor immediately if the battery is accidentally swallowed. -
Page 15: In Tuner Source
In Tuner source [FM]/ [AM] buttons Select the band. Each time the [FM] button is pressed it switches between the FM1, FM2, and FM3 bands. [4]/ [¢] buttons Tune up or down band. In Cassette tape source [4]/ [¢] buttons Do <Tape Advance)>... -
Page 16: Accessories
Accessories External view External view ... Number of items ...1 ...2 The use of any accessories except for those provided might result in damage to the unit. Make sure only to use the accessories shipped with the unit, as shown above. Installation Procedure 1. -
Page 17: Connecting Wires To Terminals
Ignition key switch Car fuse box (Main fuse) – Battery KENWOOD disc changer control input To connect the Disc changer, consult your Disc changer manual. Fuse (10A) Wiring harness (Accessory1)25 P.CONT... -
Page 18: Installation
Installation ■ Installation Firewall or metal support Screw (M4X8) (commercially available) Metal mounting strap Self-tapping screw (commercially available) (commercially available) Make sure that the unit is installed securely in place. If the unit is unstable, it may malfunction (for example, the sound may skip). ■... -
Page 19: Removing The Unit
■ Removing the hard rubber frame Engage the catch pins on the removal tool and remove the two locks on the lower level. Lower the frame and pull it forward as shown in the figure. Accessory2 Removal tool When the lower level is removed, remove the upper two locations. -
Page 20: Troubleshooting Guide
Troubleshooting Guide What might seem to be a malfunction in your unit may just be the result of slight misoperation or miswiring. Before calling service, first check the following table for possible problems. General The power does not turn ON.01 ✔... - Page 21 Cassette tape source Can’t remove tape.44 ✔ The cause is that more than 10 minutes has elapsed since the vehicle ACC switch was turned OFF. ☞ The tape can only be removed within 10 minutes of the ACC switch being turned OFF. If more than 10 minutes has elapsed, turn the ACC switch ON again and press the Eject button.
- Page 22 Troubleshooting Guide The following messages are displayed when your system condition. E-01: No disc magazine has been loaded in the changer. The disc magazine is not completely loaded. ➪ Load the disc magazine properly. No CD in the unit. ➪ Insert the CD.
-
Page 23: Specifications
Specifications Specifications subject to change without notice. FM tuner section Frequency range (200 kHz space) ...87.9 MHz –107.9 MHz Usable sensitivity (S/N = 30dB) ...9.3 dBf (0.8 µV/75 Ω) Quieting Sensitivity (S/N = 50dB) ...15.2 dBf (1.6 µV/75 Ω) Frequency response (±3 dB) ...30 Hz – 15 kHz Signal to Noise ratio (MONO) ...70 dB Selectivity (±400 kHz)...≥...