Table of Contents
Advertisement
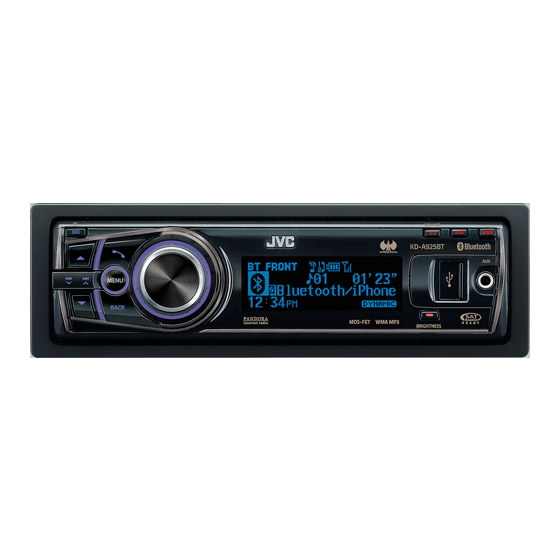
KD-A925BT
CD RECEIVER / RECEPTOR CON CD /
RÉCEPTEUR CD
For canceling the display demonstration, see page 4. / Para cancelar la demostración en pantalla,
consulte la página 4. / Pour annuler la démonstration des affichages, référez-vous à la page 4.
For installation and connections, refer to the separate manual.
Para la instalación y las conexiones, refiérase al manual separado.
Pour l'installation et les raccordements, se référer au manuel séparé.
MANUAL DE INSTRUCCIONES
MANUEL D'INSTRUCTIONS
INSTRUCTIONS
ENGLISH
ESPAÑOL
FRANÇAIS
For customer Use:
Enter below the Model
No. and Serial No. which
are located on the top or
bottom of the cabinet.
Retain this information
for future reference.
Model No.
Serial No.
GET0718-001A
[J]
Advertisement
Table of Contents

Related Manuals for JVC KD-A925BT


Summary of Contents for JVC KD-A925BT
- Page 1 ENGLISH ESPAÑOL FRANÇAIS KD-A925BT CD RECEIVER / RECEPTOR CON CD / RÉCEPTEUR CD For canceling the display demonstration, see page 4. / Para cancelar la demostración en pantalla, consulte la página 4. / Pour annuler la démonstration des affichages, référez-vous à la page 4.
- Page 2 – Connect the equipment into an outlet on a circuit different from that to which the receiver is connected. – Consult the dealer or an experienced radio/TV technician for help. Caution: Changes or modifications not approved by JVC could void the user’s authority to operate the equipment. IMPORTANT FOR LASER PRODUCTS 1. CLASS 1 LASER PRODUCT 2.
-
Page 3: Table Of Contents
How to attach the control panel CONTENTS 3 How to attach the control panel 3 How to detach the control panel 3 How to reset your unit 3 How to forcibly eject a disc Canceling the display How to detach the control panel demonstration Avoid touching the connectors. -
Page 4: Canceling The Display Demonstration
Canceling the display demonstration Turn on the power. Select <Off>. DEMO SET UP SET UP DEMO DEMO Clock [Hold] Clock Color Color (Initial setting) Select <DEMO>. Finish the procedure. DEMO (Initial setting) Setting the clock Turn on the power. Adjust the minute. Set Clock 12 : 00 SET UP... -
Page 5: Preparing The Remote Controller
Preparing the remote controller Caution: When you use the remote controller for the first time, pull out the insulation sheet. • Danger of explosion if battery is incorrectly replaced. Replace only with the same or equivalent type. • Battery shall not be exposed to excessive heat Insulation sheet such as sunshine, fire, or the like. -
Page 6: Basic Operations
When the temperature increases, and the operating temperature is resumed, these functions will start working again. JVC bears no responsibility for any loss of data in an iPod/iPhone and/or USB mass storage class device while using this System. Maintenance Cleaning the unit Wipe off the dirt on the panel with a dry silicon or soft cloth. - Page 7 • The Bluetooth word mark and logos are owned by the Bluetooth SIG, Inc. and any use of such marks by Victor Company of Japan, Limited (JVC) is under license. Other trademarks and trade names are those of their respective owners.
-
Page 8: Listening To The Radio
Listening to the radio Ÿ • [Press] Searches for stations automatically. • [Hold] Searches for stations manually. “M” appears, then press the button ] “FM” or “AM” repeatedly. lights up when receiving an FM stereo broadcast with sufficient signal strength. Improving the FM reception Manual presetting (FM/AM) You can preset up to 18 stations for FM and... -
Page 9: Listening To A Disc
Title assignment Repeat step 3 until you have finished entering the title. You can assign titles up to 30 station frequencies (FM and AM) using 8 characters (maximum) for each title. • If you try to assign titles to more than 30 station frequencies, “Name Full”... -
Page 10: Selecting The Playback Modes
Basic operations 3 Turn the control dial to select your desired track. Then press the control dial to confirm. • Only the existing characters will be shown on Selects folder of the MP3/WMA. the search menu. • Press and hold 5/∞ to continuously change the character of the search menu. -
Page 11: Listening To A Usb Device
Listening to a USB device This unit is equipped with two USB input terminals (on the control panel and USB cable from the rear of the unit). You can use these two terminals at the same time. You can operate the USB device in the same way you operate the files on a disc. (page 10) •... -
Page 12: Using Bluetooth ® Devices
Using Bluetooth ® devices Bluetooth is a short-range wireless radio communication technology for the mobile device such as mobile phones, portable PCs, and other devices. The Bluetooth devices can be connected without cables and communicate with each other. By connecting the supplied USB Bluetooth Adapter (KS-UBT1) to one of the USB input terminals of this unit, you can operate a Bluetooth device using this unit. - Page 13 Use the Bluetooth device to search and After pairing is successful, the unit will select “JVC Unit.” establish Bluetooth connection with the • For some Bluetooth devices, you may Bluetooth device*. (“Pairing COMPLETED” need to enter the PIN code first after appears and lights up on the display.)
-
Page 14: Using A Bluetooth Mobile Phone
Using a Bluetooth mobile phone Making a call • Press and hold to activate voice dial operation directly if only one phone is connected. If two phones are connected, pressing and holding will enter “Phone list” ] Enter “HF Menu” screen. screen. - Page 15 To select a contact from the phonebook Ringing Tone • 1 Select “Phonebook” calling method. In Unit [Initial] : The unit rings to alert you (page 14) when a call/Text Message comes in. 2 Press 5/∞ to show the search menu Call : Select your preferred ring tone when a –...
-
Page 16: Additional Information
Bluetooth connection is disconnected. Continue the conversation using your mobile phone. • When the unit is turned off, the device is disconnected. • If you wish to receive more information about Bluetooth, visit the following JVC web site: <http://www.jvc.co.jp/english/car/index.html> (English website only). -
Page 17: Using A Bluetooth Audio Player
Using a Bluetooth audio player Selecting the playback modes Operations and display indications differ depending on their availability on the • For Bluetooth devices that support AVRCP 1.3. connected device. ] Select “BT FRONT” or [Hold] “BT REAR.” If playback does not start automatically, operate the Bluetooth audio player to start playback. -
Page 18: Listening To An Ipod/Iphone
Yes : Initialize all the Bluetooth settings (including stored pairing, phonebook, and etc.). / No : Cancels. Information My BT Name : Shows the unit name (JVC Unit). / My Address : Shows address of USB Bluetooth Adapter. / ConnectedPhone * : Shows connected phone name. / ConnectedAudio * : Shows connected audio device name. - Page 19 Cautions: • Avoid using the iPod/iPhone if it might hinder your safety driving. • Make sure all important data has been backed ] Select the desired track. up to avoid losing the data. Repeat this step until the desired track is selected.
- Page 20 • When operating an iPod/iPhone, some operations may not be performed correctly or as intended. In this Random case, visit the following JVC web site: <http://www. Album : Functions the same as jvc.co.jp/english/car/index.html> (English website “Shuffle Albums” of the iPod only).
- Page 21 Preparation: Start the Pandora application using the iPod/iPhone. ] Select the desired station. Connect the iPod/iPhone to one of the USB input terminals of the unit. (page 18) To scroll through the desired menu using The source automatically change to •...
-
Page 22: Listening To The Hd Radio ™ Broadcast
Listening to the HD Radio ™ Broadcast Before operating, connect HD Radio tuner box, KT-HD300 (not supplied) to the expansion port on the rear of the unit. • For details, refer also to the instructions supplied with the HD Radio tuner box. What is HD Radio Technology? HD Radio Technology can deliver high-quality digital sound—AM digital will have FM-like quality (in stereo) and FM digital will have CD-like quality—with static-free and clear reception. -
Page 23: Listening To The Satellite Radio
For listening to a SIRIUS Satellite radio: For listening to an XM Satellite radio: • SCC1 and KS-SRA100 • JVC Smart Digital Adapter (XMDJVC100) • D&P, SCVDOC1 and KS-SRA100 • CNP2000UCA and CNPJVC1 For details, refer also to the instructions supplied with the other components. -
Page 24: Storing Channels In Memory
Storing channels in memory Activate your SIRIUS subscription after connection You can preset up to 18 channels for both 1 Press /SOURCE to select “SIRIUS” as the SIRIUS and XM. source. Tune in to a channel you want to store. SIRIUS Satellite radio starts updating all the (Steps ~ –... -
Page 25: Listening To The Other External Components
Checking the satellite radio ID Changing the display information While selecting “SIRIUS” or “XM,” press /¢ to select “Channel 0.” Category name = Channel name = Artist SIRIUS: The 12-digit SIRIUS ID will be displayed name/Composer name * = Song/program after “Channel 0”... -
Page 26: Sound Adjustment
Sound adjustment You can select a preset sound mode suitable for the music genre. FLAT = NATURAL = DYNAMIC = VOCAL = BASS = USER* = SOUND 2* = SOUND 3* = (back to the beginning) SOUND 1* For settings, see “Customizing the preset sound mode—USER” below. For settings, see “Setting and storing “My Sound EQ”... -
Page 27: Setting The Speaker Output Timing-Time Alignment
<.jms> files in the root folder Step 3: Plays middle frequency sound of the USB device.) (eg. Piano). • Visit the following JVC web site: Step 4: Plays middle-high frequency <http://www.jvc.co.jp/english/car/ sound (eg. Brass). index.html> (English website only) to: Step 5: Plays high frequency sound –... - Page 28 Initial settings Speaker distance [ cm ] ] Select the car type [ User/ Compact/ Sedan M/ Sedan L/ SUV/ Sm.SUV/ Truck/ X’ Over/ Wagon/ Minivan/ Van ]. Front User L. Front R. Front ] Select the seat position [ All/ Front/ Front Compact L.
-
Page 29: Setting The Crossover High/Low Pass Filter-X'over Hpf/Lpf
Setting the crossover High/Low Pass Filter—X’over HPF/LPF 3 Press 5 / ∞ to select the [Hold] measurement unit [ cm/ inch ]. 4 Press the control dial to confirm the settings. If “Pro” is selected in step 3... HPF/LPF ] <Audio> ] <X’over HPF/LPF> Front HPF Off –18dB/Oct... -
Page 30: Menu Operations
Menu operations Repeat step 2 if necessary. • To return to the previous [Hold] menu, press BACK. If no operation is done • To exit from the menu, press for about 60 seconds, the MENU. operation will be canceled. Menu item Selectable setting, [ Initial: Underlined ] DEMO On : Display demonstration will be activated automatically if no operation is done for... - Page 31 Menu item Selectable setting, [ Initial: Underlined ] Day Color Button Zone You can create your own day and night colors for <Button Zone> and <Display Zone> separately. Press 5/∞ to select a primary color [ Red/ Green/ Blue ], then Display Zone turn the control dial to adjust the level [ 00 —...
- Page 32 Menu item Selectable setting, [ Initial: Underlined ] For settings, see page 26. Time Alignment For settings, see page 27. D. T. Expander * On : Digital Track Expander feature compensates high frequency sound for compressed digital tracks (eg. digital music sources). / Off : Cancels. •...
- Page 33 Menu item Selectable setting, [ Initial: Underlined ] Displayed only when the source is “FM” or “HD RADIO.” For settings, see page 8. Area Change US : When using in North/Central/South America. AM/FM intervals are set to 10 kHz/200 kHz. / EU : When using in any other areas. AM/FM intervals are set to 9 kHz/50 kHz.
-
Page 34: Troubleshooting
Troubleshooting Symptom Remedy/Cause Sound cannot be heard from the speakers. Adjust the volume to the optimum level. / Make sure the unit is not muted/paused. (page 7) / Check the cords and connections. The unit does not work at all. Reset the unit. - Page 35 Symptom Remedy/Cause The elapsed playing time is not correct. This sometimes occurs during playback. This is caused by how the tracks are recorded on the disc. “Please Eject” appears on the display. Insert a disc that contains MP3/WMA tracks. “Not Support” appears on the display Skip to the next track encoded in an appropriate format or to the and track skips.
- Page 36 “HW Error” appears on the display. Reset the unit and try the operation again. If “HW Error” appears again, consult your nearest JVC car audio dealer. The iPod does not turn on or does not Check the connecting cable and its connection. / Charge the work.
- Page 37 Symptom Remedy/Cause “No File” appears on the display. Check whether the device contains playable files. “Cannot Play” appears on the display. Check whether the connected iPod/iPhone is compatible with this unit. (page 20) Pandora cannot be operated with this unit. Make sure <Application Mode> is selected for <iPod Switch>. (page 33) / Check the cords and connections.
- Page 38 Symptom Remedy/Cause “CHANNEL---” or “CHANNEL UNAVL” Selected channel is no longer available or is unauthorized. appears on the display for about 2 seconds, Select another channel or continue listening to the previous then returns to the previous channel while channel. listening to the XM Satellite radio.
-
Page 39: Specifications
Specifications AUDIO AMPLIFIER SECTION WMA (Windows Media® Audio) Decoding Format : Max. Bit Rate: 320 kbps Power Output : 20 W RMS × USB SECTION 4 Channels at 4 Ω and ≤ 1% THD+N USB Standard : USB 1.1, USB 2.0 Signal-to-Noise Ratio : 80 dBA Data Transfer Rate : (reference: 1 W into 4 Ω) - Page 40 Still having trouble?? USA ONLY Call 1-800-252-5722 http://www.jvc.com We can help you! • “Made for iPod,” and “Made for iPhone” mean that an electronic accessory has been designed to connect specifically to iPod, or iPhone, respectively, and has been certified by the developer to meet Apple performance standards.
- Page 41 • Si vous avez des questions ou avez besoin d’information sur des kits herramientas para instalación, consulte con su concesionario de kits, consult your JVC car audio dealer or a company supplying kits. d’installation, consulter votre revendeur d’autoradios JVC ou une JVC de equipos de audio para automóviles o a una compañía que...
- Page 42 JVC Amplifier / FRONT : To front speakers / A los altavoces delanteros / Aux enceintes avant Amplificador de JVC / JVC Amplificateur REAR : To rear speakers / A los altavoces traseros / Aux Signal cord / Cable de señal / enceintes arrières...
- Page 43 JVC adapters or system to siguientes componentes al puerto de expansión, a través de los diversos suivants à l’aide de divers adaptateur JVC ou système au port d’extension. adaptadores o sistema JVC. the expansion port.
- Page 44 The countries where you may use the Country Country Country Bluetooth® function Andorra Ísland Türkiye Die Länder, in denen Sie die Bluetooth® Funktion verwenden können Italia Pays où vous pouvez utiliser la fonction Bluetooth® United States of America Australia De landen waar u de Bluetooth®-functie mag gebruiken Lichtenstein Venezuela Österreich...