Kenwood Sovereign VR-5080 User Manual
Digital audio/video receiver
Hide thumbs
Also See for Sovereign VR-5080:
- Connection and setup manual (60 pages) ,
- Connection and setup manual (157 pages) ,
- Service manual (68 pages)
Table of Contents
Advertisement
Advertisement
Table of Contents

Related Manuals for Kenwood Sovereign VR-5080


Summary of Contents for Kenwood Sovereign VR-5080
- Page 2 Using Your New Kenwood Audio-Video Receiver Welcome to the Users’ Guide for your new Kenwood Audio-Video Re- ceiver. It connects all your current audio and video components. It allows you to control them all with Kenwood’s remarkable LCD remote. This manual covers three models.
-
Page 3: Table Of Contents
Chapter One: Moving Around ... 1 What’s on the Front Panel of Your Kenwood Audio - Video Receiver? ... 2 What’s on Remote Control Unit? ... 4 LCD Indicators ... 6 How Do I Use Remote Control Unit? ... 7 Remote controllable range ...7... - Page 4 Operating a Television ... 37 Operating an AV Device ... 38 Operating a CD player ... 39 To play Kenwood 200-Disc CD Changer ... 39 Single or Rotary CD Player ... 41 CD-R Recorder ... 41 Operating an MD Recorder or Cassette Deck ... 42 Playing an Analog Turntable ...
- Page 5 Radio Tuning ... 44 Recording ... 47 How Do I Adjust the LCD Display? ... 50 Using Remote Control unit under low light ... 50 Adjusting the contrast of LCD display ... 50 Adjusting the brightness of receiver ... 51 Selecting the display mode of receiver front panel ...
- Page 6 I can’t hear sound from one or more of the speakers, or the sound is abnormally low ... 72 I can’t hear sound from my surround or center speakers ... 72 I can hear sound only from the center speaker when Dolby Pro Logic is selected ...
- Page 7 Remote Control unit ... 75 My Remote Control unit is slow to respond—sometimes I have to press buttons or select commands several times ... 75 My Remote Control unit is not responding ... 75 I want to clear all the items in Remote Control unit and make it to the factory-set default condition.
-
Page 9: Chapter One: Moving Around
Re- mote Control unit. It includes the following sections: What’s on the Front Panel of Your Kenwood Audio - Video Receiver? What’s on Remote Control Unit? LCD indicators How Do I Use Remote Control Unit? -
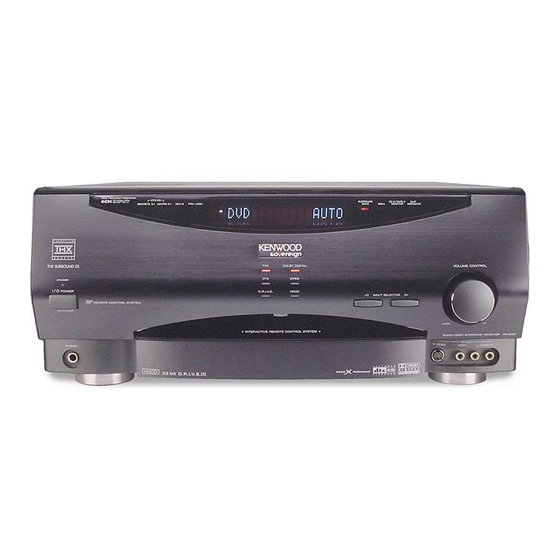
Page 10: What's On The Front Panel Of Your Kenwood Audio-Video Receiver
What’s on the Front Panel of Your Kenwood Audio- Video Receiver? 1. STANDBY indicator POWER ON/STANDBY button 3. PHONES jack 4. SPEAKERS A/B button 5. INPUT MODE button / RF ON/OFF button 6. CD 2/TAPE 2 MONITOR button / RF BAND button 7. - Page 11 What’s on the Front Panel of Your Kenwood Audio-Video Receiver?, continued STANDBY POWER ON/STANDBY PHONES 16.VOLUME CONTROL knob 17.INPUT SELECTOR buttons 18.Indicators SURROUND BACK 96kfs CD2/TAPE2 MONITOR CLIP INDICATOR Button 4 to 14 are located inside the panel door. DTS-ES SURROUND DISCRETE 6.1 MATRIX 6.1...
-
Page 12: What's On Remote Control Unit
What’s on Remote Control Unit? What’s on Remote Control Unit? 2WAY LCD REMOTE CONTROL UNIT CONFIRM/SHIFT MACRO MUSIC MOVIE AV POWER SYS.POWER VOL. VOL. MUTE DIMMER INPUT MODE SUB W. LISTEN M. SOUND TITLE/GUIDE MENU TUNING BAND ENTER RETURN /PAGE /PAGE AUTO/MONO REC MODE... - Page 13 What’s on Remote Control Unit? 15. Numeric buttons (AV device control buttons) 10 button / STATUS button 11 button / MULTI ZONE button 12 button / ZONE A/B button 16. LCD cursor up/down buttons 17. Input selector buttons MUSIC: Audio device selector button MOVIE: Video device selector button TV: TV/video monitor selector button 18.
-
Page 14: Lcd Indicators
What’s on Remote Control Unit? LCD Indicators LCD function button 1 1. Playback/recording mode indicators ` Play indicator/ 8: Pause indicator/ 7: Stop indicator 2. Character display Shows various information such as the input device name and track number. 3. Current function of LCD function button 1 4. -
Page 15: How Do I Use Remote Control Unit
What’s on Remote Control Unit? How Do I Use Remote Control Unit? How Do I Use Remote Control Unit? To select an item: The displayed items can be scrolled or switched using the LCD cursor button. The selected item is displayed in the reversed color for distinction from other items. -
Page 16: Chapter Two: Controlling The Receiver
The Remote Control unit transmits an infrared signal in addition to an RF signal. When operation by means of the RF signal is not possible be- cause of the radio wave conditions, aim the Remote Control unit towards the receiver and use it as an infrared remote control. For operation of other identified devices or with an external IR receiver, aim the Remote Control unit towards the respective unit and use it as an infrared remote control. -
Page 17: How Do I Adjust The Sound
How Do I Adjust the Sound? How Do I Adjust the Sound? You can control and adjust a variety of sound settings using the receiver’s front panel or Remote Control unit. Turning the Speakers On To turn on the front A speakers, open the receiver’s front panel door and press the SPEAKERS A button. -
Page 18: Adjusting The Volume
How Do I Adjust the Sound? Adjusting the Volume Use one of the following methods to adjust the volume. • Turn the VOLUME knob on the front panel of the receiver. VOL. • Press VOL. fi fi SPEAKERS I NPUT CD 2/TAPE 2 LISTEN MULTI... -
Page 19: Adjusting The Tone (Only In Stereo Mode With Thx Mode Off)
How Do I Adjust the Sound? Adjusting the Tone (Only in STEREO mode with THX mode Off) The Tone control adjusts the bass and treble tone of your front speakers manually. In addition to setting Bass and Treble tone adjustment values, you can completely bypass the tone control circuitry for a purer sound. - Page 20 How Do I Adjust the Sound? Operation on the receiver: 1. Press the SOUND button in the door repeatedly until TONE OFF or ON is displayed. 2. Press the MULTI CONTROL (%/fi) button to display TONE ON (or OFF if desired so). 3.
-
Page 21: Adjusting The Loudness (Only In Stereo Mode With Thx Mode Off)
How Do I Adjust the Sound? Adjusting the Loudness (Only in STEREO mode with THX mode Off) The Loudness control increases the bass and treble at low volume control settings. This adjusts to the way the human ear hears sound at quiet vol- umes, retaining music’s fullness and sparkle. -
Page 22: Adjusting Speaker Levels
How Do I Adjust the Sound? Adjusting Speaker Levels You can use the Sound menu to temporarily adjust the speaker levels of your center speaker, surround speakers, surround back speakers and subwoofer. For example, if a particular movie has dialog that’s hard to understand, you can temporarily increase the center channel volume just for that movie. -
Page 23: Adjusting The Input Level
How Do I Adjust the Sound? 2. Press the MULTI CONTROL (%/fi) button to select the desired vol- ume level, then press the SOUND button repeatedly until “SOUND FIXED” is displayed. If you select another source device or turn off the receiver, the above set- ting is reset to the level adjusted in Chapter Two of the Connection and Setup Guide. -
Page 24: Muting Sound
How Do I Adjust the Sound? Muting Sound The sound can be muted temporarily. • Press the MUTE button on Remote Control unit. The MUTE indicator on the receiver panel blinks during muting. Use one of the following methods to cancel muting. •... -
Page 25: How Do I Adjust The Surround Modes
On the VR-5700/ VR-5090/VR-5080, when the THX mode is on, the THX technologies are automatically added after the decoded signal. Movies which have been encoded in Dolby Digital, DTS, MPEG, Dolby Pro Logic, Stereo and Mono can all benefit from activating the THX technologies. -
Page 26: What Are Listen Modes
How Do I Adjust the Surround Modes? Movies that were created using the Dolby Digital Surround EX tech- nology, when released into the home consumer market may exhibit a Dolby Digital Surround EX logo on the packaging. A list of movies created using this technology can be found on the Dolby web site at http://www.dolby.com. - Page 27 See page 29 for the Dolby Pro Logic II parameters. To allow the users enjoy multichannel playback also from the analog audio of currently available Dolby Surround home video software, the VR-5700/VR-5090/VR-5080 incorporates a Dolby Pro Logic II sur- round decoder. Manufactured under license from Dolby Laboratories. "Dolby", "Pro Logic", "Surround EX "...
- Page 28 How Do I Adjust the Surround Modes? • DTS NEO:6: This is a new technology which decodes 2-channel sig- nals into 6-channel signals using high-accuracy digital matrix tech- nology. The DTS NEO:6 decoder has near-discrete properties in the frequency characteristics of the channels as well as in channel separa- tion.
-
Page 29: Checking The Input Signal During Playback
How Do I Adjust the Surround Modes? Checking the Input signal during playback During playback of Dolby Digital, MPEG or DTS signal, the surround identification signal in the input is identified and displayed by means of the L, C, R, SR, SB (or S), SL and LFE icons. 1. -
Page 30: Input Modes
How Do I Adjust the Surround Modes? Input Modes (only for input with digital jacks) The input mode should usually be set to Full Auto. However, the input mode can also be set manually when you want to fix the inputs as analog signals, etc. -
Page 31: Switching Input Modes
How Do I Adjust the Surround Modes? Switching Input Modes To fully enjoy the sonic benefits of specially-encoded DVD AUDIO discs played on a compatible DVD player, you must set the receiver’s input to 6Ch Input. When you are finished listening to analog media, set the receiver’s input back to Full Auto. -
Page 32: To Set The Thx Mode
How Do I Adjust the Surround Modes? To set the THX Mode Press the THX button on Remote Control unit. +100 Each press switches the modes as follows. When the surround back speakers are set to Lrg or Nml/THX: 1 THX Sur EX On 2 THX Sur EX Auto 3 THX On 4 THX Off... - Page 33 How Do I Adjust the Surround Modes? ÷ THX Sur EX On The input signal is decoded automatically into 6.1-channel signals if the input signal is Dolby Digital or DTS and contains two chan- nel surround signals. The THX operation is activated. ÷...
-
Page 34: To Set The Listen Mode Manually
How Do I Adjust the Surround Modes? To set the Listen Mode manually The listen mode can be set manually except with certain input signals. 1. Press Remote Control unit’s LISTEN M. button repeatedly until the desired listen mode is displayed. +100 Operation on the receiver: Press the LISTEN MODE button inside the door repeatedly until the... -
Page 35: Examples Of Inputs With Which Switching Is Available
How Do I Adjust the Surround Modes? Examples of inputs with which switching is available when the input signal is Dolby Digital *Dolby Digital **PL II : MOVIE **PL II : MUSIC ****Pro Logic Stereo when the input signal is DTS-ES Matrix 6.1 ***DTS-ES Mtrx 6.1 Stereo when the input signal... - Page 36 How Do I Adjust the Surround Modes? when the input signal is PCM or Analog PL II : Movie PL II : Music Pro Logic Neo : Cinema Neo : Music *Arena *Jazz Club *Cathedral *Concert Hall *Stadium 1 *Stadium 2 *Theater 1 *Theater 2 Multi Ch Music...
-
Page 37: Description Of Dolby Pro Logic Ii: Music Mode
How Do I Adjust the Surround Modes? Description of Dolby Pro Logic II: Music mode Panorama mode : Expands the image of front-channel stereo to the sur- round speakers to create a sound environment that fills your surroundings. Dimension : This controls the balance between the Front and Rear in 3 steps on the front and 3 steps on the rear. - Page 38 How Do I Adjust the Surround Modes? 6. Press the SOUND button to “Center Width 0” (or “1” to “7” etc.) is displayed on Remote Control unit. 7. Press the LCD cursor up/down ( unit to select “Center Width 1” (or “0”, “2” to “7”), then press the Home button.
-
Page 39: Applying Digital Signal Processor (Dsp) Effects
How Do I Adjust the Surround Modes? Applying Digital Signal Processor (DSP) Effects The DSP mode creates the reverberation devices (elements of sound ech- oed in various spaces) which determine the feeling of presence. Since DSP uses digital processing, it can produce these effects without soiling the sound quality of the original music or video source. - Page 40 How Do I Adjust the Surround Modes? To customize the DSP effect: 1. Press the SOUND button and press the Next button repeatedly until “DSP Wall Type” is displayed on Remote Control unit. 2. Press the LCD cursor up/down ( unit to select Soft, Medium or Hard.
-
Page 41: Hdcd And D.r.i.v.e. Effects
HDCD signals by connecting a CD player through digital connection, even if it does not incorporate the HDCD circuitry. D.R.I.V.E. is a KENWOOD original technology for reproducing signals with high resolution by instant switching of the internal filters according to the input signal. This receiver incorporate a high performance DSP to provide very high resolution from 32-bit DRIVE III circuitry, achieving stereo audio reproduction with the best quality ever reached. -
Page 42: Headphone Operation
How Do I Adjust the Surround Modes? Headphone Operation Insert the headphone plug into the receiver’s PHONES jack and adjust the listening level. VOLUME CONTROL STANDBY ON/STANDBY When listening through headphones, set SPEAKERS A and B to OFF. -
Page 43: Selecting The Inputs
8 VIDEO4 9 DVD 0 AV AUX - PHONO (VR-5080 only) Although VIDEO4 is displayed in the initial status, the receiver cannot be switched to select VIDEO4. The VIDEO4 display will not appear after Remote Control unit has been set up. -
Page 44: How Do I Operate Devices
How Do I Operate Devices? How Do I Operate Devices? Your Remote Control unit makes it easy for you to control the different devices connected to your receiver. Once AV devices are connected and identified by Remote Control unit , it can use the same remote control functions as the remotes originally pro- vided with the AV devices. -
Page 45: Operating A Television
How Do I Operate Devices? Operating a Television To operate a standard TV: 1. Press the TV button. 2. Use Remote Control unit to perform same remote control operations as with the remote of the TV set. For the buttons which are usually available, see “Chapter Three: Button Layout in Controlling Other Devices”... -
Page 46: Operating An Av Device
How Do I Operate Devices? Operating an AV Device To play a VCR, DVD player or LD player: 1. Select the input you want (see page 35). 2. Use Remote Control unit to perform same remote control operations as with the remote of the selected AV device. For the buttons which are usually available, see “Chapter Three: Button Layout in Controlling Other Devices”... -
Page 47: Operating A Cd Player
Operating a CD player Kenwood 200-Disc CD Changer Kenwood 200-Disc CD Changers have many different features that make them ideal complements to your Kenwood receiver. Some changer mod- els can store disc and track titles for all loaded discs, and then download this information to your Remote Control unit. - Page 48 How Do I Operate Devices? To play discs and tracks by title: 1. Select the CD input (see page 35). 2. Press the Text button (LCD function button 1) to display the disc title menu. 3. Press the LCD cursor up/down ( disc, then press the Sel.
-
Page 49: Single Or Rotary Cd Player
How Do I Operate Devices? Single or Rotary CD Player 1. Select the CD input (see page 35). 2. Use Remote Control unit to perform same remote control operations as with the remote of the selected AV device. The available buttons are variable depending on the AV device manufac- turer and model. -
Page 50: Operating An Md Recorder Or Cassette Deck
How Do I Operate Devices? Operating an MD Recorder or Cassette Deck To play an MD or cassette: 1. Select the input you want (see page 35). 2. Use Remote Control unit to perform same remote control operations as with the remote of the selected AV device. The available buttons are variable depending on the AV device manufac- turer and model. -
Page 51: Playing An Analog Turntable
How Do I Operate Devices? Playing an Analog Turntable To play an analog disk turntable: 1. Select the PHONO input (see page 35). 2. Play an analog disk on the turntable. As this cannot be controlled from Remote Control unit, use the turntable controls. For detailed operating procedures of your AV device, refer to its instruc- tion manual. -
Page 52: Radio Tuning
How Do I Operate Devices? Radio Tuning Auto: When a tuning button is pressed, the station with the closest frequency to the current frequency position will be tuned in automatically. In this case, the stereo mode is activated auto- matically when a stereo station is tuned in (FM band only). Manual: When auto tuning is not available because the radio waves are weak, tune a radio station by selecting its frequency manually. - Page 53 How Do I Operate Devices? To tune into a radio station: 1. Select the Tuner input (see page 35). 2. Select the FM or AM band. fi fi MULTI P.CALL MEMORY CONTROL • Press the BAND button on the receiver •...
- Page 54 How Do I Operate Devices? To tune into a preset station: 1. Select the Tuner input (see page 35). 2. Press Remote Control unit’s 4 or ¢ button or the receiver’s P.CALL (%/fi) button. Each press of the button switches the preset station (see “Presetting radio stations”...
-
Page 55: Recording
How Do I Operate Devices? Recording To record audio/video: 1. Select the recording input source device such as a AV device or tuner (see page 35). 2. Use Remote Control unit to select the channel and perform other required operations in the same way as with the remote of the se- lected AV device. - Page 56 How Do I Operate Devices? • If you’re recording from a digital source, any action other than adjust- ing the volume may cause the sound to “clip” on the recording. • You cannot record from the component you are using to record. For example, if you’re recording on a VCR connected to the VIDEO1 jacks, select a source other than Video 1.
- Page 57 How Do I Operate Devices? To set the Digital Rec mode: 1. Press the F. SHIFT = REC (REC MODE)* button on Remote Control unit. 2. Select “Rec Mode Auto” or “Rec Mode Manual”. It is not possible to recording monitor a digital source signal onto the device connected to the CD2/TAPE2 MONITOR input.
-
Page 58: How Do I Adjust The Lcd Display
How Do I Adjust the LCD Display? How Do I Adjust the LCD Display? Using Remote Control unit under low light When using Remote Control unit under low light, the backlight of the LCD display can be turned on. • Press and hold the F.SHIFT button for more than 2 seconds. -
Page 59: Adjusting The Brightness Of Receiver
How Do I Adjust the LCD Display? Adjusting the brightness of receiver When the ambient light is low, for example in the night, the brightness of the receiver’s display can be dimmed and LED indicators (THX, DTS, D.R.I.V.E., DOLBY DIGITAL, MPEG, HDCD and 2-way communication indicator) can be disabled. -
Page 60: Executing Several Operations At Once (Macro Function)
Executing Several Operations at Once (Macro function) Executing Several Operations at Once (Macro function) By registering several steps of remote control operations beforehand, these operations can be executed with a single operation. This function is re- ferred to as the macro function. The receiver can register up to three sets of macros. -
Page 61: Executing A Macro
Executing Several Operations at Once (Macro function) Example of registration: In the following example, the steps for turning the TV on, turning the VCR on, setting the TV channel and playing the VCR will be registered in MACRO 2. 1. Press and hold the MACRO button on Remote Control unit for more than 2 seconds. -
Page 62: Using Remote Control Unit In Multiple Zones
Depending on your tastes and budget, you can set up one of the follow- ing “sound scenarios” to make full use of the VR-5700/VR-5090/VR-5080’s capabilities: No additional amplifier for Zone B: You can use your receiver’s Speaker B output for Zone B. - Page 63 Using Remote Control Unit in Multiple Zones To switch control modes for Zone A or Zone B: 1. Press the F. SHIFT = 11 (MULTI ZONE)* button on Remote Control unit. +100 Each time the F. SHIFT = 11 (MULTI ZONE)* button is pressed, switches the On and Off.
-
Page 64: Operation Using The Sys.power Button On Remote Control Unit
Using Remote Control Unit in Multiple Zones Operation using the SYS.POWER button on Remote Control unit To perform the Multi-Zone operation, switch the Multi Zone function On in advance (see page 55). 1. When the receiver is OFF (STANDBY mode): •... -
Page 65: Chapter Three: Button Layout In Controlling Other Devices
Chapter Three: Button Layout in Controlling Other Devices The remote control unit provided with the receiver can also control a variety of AV devices. As the functions of the buttons are variable depend- ing on the controlled device, it is recommended to control each device by referring to a function chart. -
Page 66: Numeric Buttons
Tuner Operation AV POWER : P.CALL DOWN : P.CALL UP Cassette deck Operation AV POWER : Play (3) (A) : Pause (A) : Stop (A) : F. Rewind (A) : F. Forward (A) Use with F.SHIFT button : : Play (2) (A) TUNING BAND ENTER... - Page 67 CD Player Operation AV POWER : Pause : Play/Pause : Stop : Skip (Reverse) : Skip (Forward) : Disc select (DISC Up) : Disc select (DISC Down) Display buttons Display buttons 01 : Disc sel. 02 : Set 03 : P.Mode 04 : Check 05 : Clear 06 : Disc Title...
- Page 68 CD-R Recorder Operation AV POWER : Play : Pause : Stop : Skip (Reverse) : Skip (Forward) : F. Forward : F. Backward Display buttons 01 : Open/Close 02 : CDR Mode 03 : CD Mode 04 : Program 05 : Rec Mute 06 : Clear There may be certain devices which cannot be remote controlled by it.
- Page 69 MD Player Operation AV POWER : Play : Pause : Stop : Skip (Reverse) : Skip (Forward) Display buttons 01 - 05 : Extend1 - 5 (there may be cer- tain devices which cannot be remote controlled by it.) There may be certain devices which cannot be remote controlled by it. TUNING BAND ENTER...
-
Page 70: Slow Forward
DVD Player Operation AV POWER : Play : Pause : Stop : Skip (Reverse) : Skip (Forward) : F. Forward : F. Backward Use with F.SHIFT but- ton : : Slow Reverse : Slow Forward Display buttons 01 : Disc Sel 02 : Chapter/Time 03 : Angle 04 : PGM... - Page 71 VCR Operation AV POWER : Play : Pause : Stop : F Rewind : F. Forward : Channel (Up) : Channel (Down) Display buttons 01 : Thumb Up 02 : Thumb Down 03 : Jump 04 : Inst. Replay 05 : Quick Skip 06 : Exit There may be certain devices which cannot be remote controlled by it.
- Page 72 LD Player Operation AV POWER : Play / Pause : Pause : Stop : Skip (Reverse) : Skip (Forward) : Slow (Forward) : Slow (Reverse) Display buttons 01 : Frame/Time 02 : Side A or A/B 03 : Side B There may be certain devices which cannot be remote controlled by it.
- Page 73 TV Operation AV POWER : Mute : Volume (Down) : Volume (Up) : Channel (Up) : Channel (Down) Display buttons 01 : – / – – 02 : > 12 03 : Wide 04 : Pic. In Pic. (Picture in picture) 05 : Text/Mix/TV 06 : Text off 07 : Mix...
- Page 74 Cable TV Player Operation TITLE/GUIDE AV POWER RETURN /PAGE Volume (Down) Volume (Up) : Channel (Up) : Channel (Down) Display buttons 01 : A 02 : B 03 : C There may be certain devices which cannot be remote controlled by it. MENU TUNING BAND...
- Page 75 Satellite tuner Operation AV POWER : Channel (Up) : Channel (Down) Display buttons 01 - 05 : Extend1 - 5 There may be certain devices which cannot be remote controlled by it. TITLE/GUIDE MENU TUNING BAND ENTER RETURN /PAGE /PAGE AUTO/MONO ENTER : Enter 5 : Cursor Up...
- Page 76 DSS Operation AV POWER : Channel (Up) : Channel (Down) Display buttons 01 : Exit 02 - 06 : Extend1 - 5 There may be certain devices which cannot be remote controlled by it. TITLE/GUIDE MENU TUNING BAND ENTER RETURN /PAGE /PAGE AUTO/MONO...
-
Page 77: Chapter Four: Troubleshooting
Chapter Four: Troubleshooting Troubleshooting is how you determine what part of a complex system (like a home theater system) is at fault when the system isn’t working how you think it should. When you troubleshoot a system, you diagnose a problem by examining and eliminating possible causes until there’s only one left. - Page 78 3. Go over all component connections slowly and methodically. Double-check the settings on your remote. Wrong or loose connections are the most likely cause of the most common home entertainment problem: no sound. Use the Connec- tion and Setup Guide to double-check your connections for each com- ponent.
-
Page 79: Sound
The CD2/TAPE2 MONITOR input has not been selected. (If it has, the CD2/TAPE2 MONITOR indicator on the receiver’s front panel will be lit). See “What’s on the Front Panel of Your Kenwood Audio - Video Receiver?” on page 2 of this manual. -
Page 80: Sound Is Abnormally Low
The CD2/TAPE2 MONITOR input has not been selected. (If it has, the CD2/TAPE2 MONITOR monitor indicator on the receiver’s front panel will be lit). See “What’s on the Front Panel of Your Kenwood Audio - Video Receiver?” on page 2 of this manual. -
Page 81: Thx Surround Ex Set To "Auto", But The Source Is Not Reproduced In 6.1-Channel Audio
Sound A Dolby Digital Surround EX-encoded source is played with THX Surround EX set to “Auto”, but the source is not reproduced in 6.1- channel audio. • Some encoded sources (discs) do not contain the recording of the encoding identification signal. To reproduce such sources in 6.1-chan- nel audio, set THX Surround EX to ON. -
Page 82: Quiet
Video I can’t see the program I’m playing on the TV. There wasn’t any video output to my VCR when I recorded • Check that the video source and TV are connected via the same type of connectors (For VR-5080). -
Page 83: Remote Control Unit
Video/Remote Control unit • Check that the correct video input on the TV is selected. • Check that the video software you record does not have copy guard protection. • All Zone B inputs must be composite. S-Video is not supported in Zone B. -
Page 84: I Want To Clear All The Items In Remote Control Unit And Make It To The Factory-Set Default Condition
Receiver/Tuner I want to clear all the items in Remote Control unit and make it to the factory-set default condition. 1. Remove the batteries. 2. While holding the simultaneously, load the batteries. After the above, all settings are reset to the factory settings. The RF remote control function does not work. -
Page 85: The Sound Is Distorted, And The Clip Indicator On The
Receiver/Tuner If none of the above solutions work, reset the microprocessor: 1. Turn the receiver off. 2. Unplug the receiver. 3. Plug it back in while pressing and holding the Power switch (you may need someone else to help you do this) •... -
Page 86: I Can't Receive A Radio Station
Receiver/Tuner I can’t receive a radio station Check that: • The appropriate antenna is connected. See Chapter One of the Con- nections and Setup Guide. • The broadcast band is correct. See “Radio Tuning” on page 44 of this manual. •... - Page 87 Numerics 200-Disc CD Changer operating ... 39 playing CDs ... 39 reading and storing disc titles .. 39 adjusting Remote Control unit display ... 50 analog input, switching ... 23 AV AUX front panel ... 3 balancing volume extremes ... 15 CD player operating ...
- Page 88 operating devices ... 36 macros ... 53 range ... 7 PHONO input ... 43 Power indicator light ... 3 Power On/Standby button ... 3 preset stations ... 45 radio stations ... 45 reading and storing CD titles ... 39 receiver changing display mode ...