Table of Contents
Advertisement
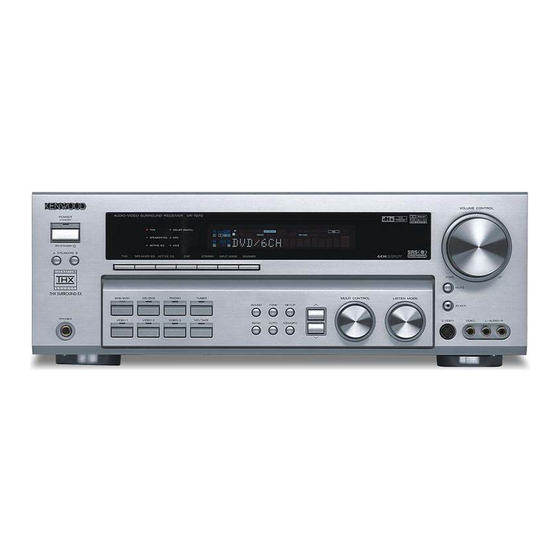
AUDIO VIDEO SURROUND RECEIVER
VR - 7070
INSTRUCTION MANUAL
KENWOOD CORPORATION
About the supplied remote control
Compared to standard remote controls, the remote control supplied with this receiver has several
operation modes. These modes enable the remote control to control other audio/video components. In
order to effectively use the remote control it is important to read the operating instructions and obtain a
proper understanding of the remote control and how to switch its operation modes (etc.).
Using the remote control without completely understanding its design and how to switch the operation
modes may result in incorrect operations.
B60-5343-00 00 MA
(K, P)
0209
Advertisement
Table of Contents

Related Manuals for Kenwood VR-7070


Summary of Contents for Kenwood VR-7070
-
Page 1: Instruction Manual
AUDIO VIDEO SURROUND RECEIVER VR - 7070 INSTRUCTION MANUAL KENWOOD CORPORATION About the supplied remote control Compared to standard remote controls, the remote control supplied with this receiver has several operation modes. These modes enable the remote control to control other audio/video components. In order to effectively use the remote control it is important to read the operating instructions and obtain a proper understanding of the remote control and how to switch its operation modes (etc.). -
Page 2: Before Applying The Power
Before applying the power Units are designed for operation as follows. U.S.A. and Canada ... AC 120 V only Australia ... AC 240 V only Europe and U.K ... AC 230 V only China and Russia ... AC 220 V only Other countries ... -
Page 3: Table Of Contents
If any acccessories are missing, or if the unit is damaged or fails to operate, notify your dealer immediately. If the unit was shipped to you directly, notify your shipper immediately. Kenwood recommends that you retain the original carton and packing materials in case you need to move or ship the unit in the future. -
Page 4: Preparing The Remote Control
Infrared ray system reduces air pollution and lowers utility bills. TAR ® Partner, As an NERGY Kenwood Corporation has determined that NERGY STAR ® this product meets the guidelines for energy efficiency.This product can save energy. Saving energy... -
Page 5: Special Features
Before applying the power Special features True home theater sound This receiver incorporates a wide variety of surround modes to bring you maximum enjoyment from your video software. Select a surround mode according to your equipment or the software you are going to play and enjoy! THX mode activates proprietary THX features that help recreate the cinematic experience in a home environment. -
Page 6: Names And Functions Of Parts
Names and functions of parts Main unit Speaker MUTE indicators indicator SL S Speaker selection indicators Input channel indicators Output channel indicators POWER STANDBY ON/STANDBY A SPEAKERS B SPEAKER EQ ACTIVE EQ DVD/6CH CD/DVD PHONES VIDEO 1 VIDEO 2 1 POWER ON/STANDBY ¡... -
Page 7: Remote Control Unit
Names and functions of parts Remote control unit This remote control unit can be use not only for Kenwood products but also for other non-Kenwood products by setting the appropriate manufacturer’s setup codes. 1 Source keys (MD/TAPE, CD/DVD, DVD/6CH, TUNER, VID1, VID2, VID3, AV AUX, PHONO) -
Page 8: Setting Up The System
Setting up the system Make connections as shown in the following pages. When connecting the related system components, be sure to refer to the instruction manuals supplied with the components you are connecting. Do not connect the power cord to a wall outlet until all connections are completed. -
Page 9: Connecting The Terminals
Setting up the system Connecting the terminals 1 Strip coating. 2 Loosen. 3 Insert. 4 Secure. 1 Strip coating. 2 Push the lever. 3 Insert the cord. 4 Return the lever. Connection of banana plugs 1 Secure. 2 Insert. • Sound will not be heard if the speaker terminal is not fully secured. •... -
Page 10: Connecting Audio Components
Setting up the system Connecting audio components SYSTEM CONTROL & jacks REC OUT PLAY IN PHONO CD/DVD MD/TAPE CD or DVD player To AC wall outlet Cassette deck or MD recorder Moving coil (MC) cartridge record player cannot be used directly from the receiver unit. -
Page 11: Connecting Video Components
Setting up the system Connecting video components S Video jacks S VIDEO VIDEO VIDEO VIDEO VIDEO VIDEO Video IN/OUT A video component with digital audio outputs should be connected to the VIDEO 2 or VIDEO 3 jacks. S VIDEO S VIDEO S VIDEO S VIDEO VIDEO... -
Page 12: Digital Connections
(sold separately) To connect an LD player with a DIGITAL RF OUT, connect the LD player to the KENWOOD RF digital demodulator (DEM-9991D). Next, connect the DIGITAL OUT jacks of the demodulator to the DIGITAL IN jacks of the receiver. -
Page 13: Connecting Video Components
Setting up the system Connecting video components (COMPONENT VIDEO) If you have connected the receiver to a video component with COMPONENT jacks, you can get a better picture quality than by connecting to the S-VIDEO jacks. VIDEO When connecting the TV to the COMPONENT jacks, be sure to connect all the other components to the COMPONENT jacks. COMPONENT VIDEO MONITOR OUT CR IN... -
Page 14: Connecting A Dvd Player (6-Channel Input)
Setting up the system Connecting a DVD player (6-channel input) If you have connected a DVD player to the receiver with digital connection, be sure to read the “Input mode settings” section carefully. VIDEO VIDEO VIDEO VIDEO VIDEO OUT (Yellow RCA pin cord) VIDEO VIDEO... -
Page 15: Connecting The Speakers
Setting up the system Connecting the speakers Surround Speakers (Be sure to connect both surround speakers) Right SURROUND GRAY FRONT A Right Front Speakers A Surround Back/Subwoofer Use this terminal if you wish to connect to a Surround Back speaker with the SETUP of “6ch AMP SB”... -
Page 16: Pre Out Connections
Setting up the system PRE OUT connections This receiver has additional preout jacks. These can be used for various purposes, but will need to be connected to an external power amplifier as shown in the example below. ROOM B FRONT SURROUND SURROUND PRE OUT •... -
Page 17: Connecting To Another Room (Room B)
Setting up the system Connecting to another room (ROOM B) This connection allows you to connect your main system to a monitor TV and speaker system located in another area (ROOM B). ROOM B ROOM A (Main system) CENTER ROOM B FRONT SURROUND SURROUND BACK... -
Page 18: Connecting The External Ir Repeater
The remote control for this receiver has the IR (infrared rays) transmission function. IR repeaters enables you to control components located in cabinets or behind glass doors. You can enjoy a wider remote control signal range by placing the IR repeater away from the receiver. KENWOOD components (except DVD player): System control Other components: (Registering setup codes) IR REPEATER... -
Page 19: Connecting To The Av Aux Jacks
Setting up the system Connecting to the AV AUX jacks The AV AUX jacks are convenient for connection of video components such as a camcorder or a video game. S VIDEO VIDEO L-AUDIO-R S VIDEO cord VIDEO OUT Camcorder, other VCR, video game or S VIDEO OUT portable MD player... -
Page 20: Connecting The System Control
2. Do not connect system control cords to any components other than those specified by KENWOOD. It may cause a malfunction and damage your equipment. 3. Be sure the system control plugs are inserted all the way in to the system control terminals. -
Page 21: Preparing For Surround Sound
Preparing for surround sound Speaker settings To enable you to obtain optimum enjoyment from the receiver’s listening modes, make sure to complete the speaker settings (subwoofer, front, center, and surround speakers) as described below. POWER ON/STANDBY SETUP MULTI CONTROL TUNER (Multi %/ fi, @/#) Turn on the power to this receiver by pressing the POWER... - Page 22 Preparing for surround sound ∧ 7 Press the key or # key again to accept the setting. • The surround speaker setting indication “SURR” appears. 8 Use the MULTI CONTROL knob or Multi (%/fi) to select the appropriate surround speaker setting. If you selected “LARGE”...
- Page 23 Preparing for surround sound Adjust the bass peak level. A restriction is put on the low frequency so that the bass peak level will not go higher than the acceptable level when the volume is increased. If subwoofer speaker is OFF, the limitation will affect the low frequency of the front left and right speakers ∧...
-
Page 24: Normal Playback
Normal playback Preparing for playback Some preparatory steps are needed before starting playback. POWER ON/STANDBY A SPEAKERS B MD/TAPE Turning on the receiver 1 Turn on the power to the related components. 2 Turn on the power to this receiver by pressing the POWER ON/STANDBY key. -
Page 25: Adjusting The Sound
Normal playback Adjusting the sound SPEAKER EQ ACTIVE EQ A SPEAKERS B TONE MULTI CONTROL PHONES TUNER Tone Active EQ Adjusting the TONE You can adjust the sound quality when the receiver is in the PCM stereo and analog stereo mode and when “THX OFF”. 1 For the remote control, press and hold the TUNER key for more than 3 seconds to switch to receiver mode. - Page 26 Normal playback ACTIVE EQ mode You can enjoy a more impressive sound effect when ACTIVE EQ is turned ON during Dolby Digital and DTS playback and, when in PCM and analog stereo mode. Press the ACTIVE EQ key for the following selections; 1 ACTIVE EQ MUSIC : Effective when listening to music.
-
Page 27: Recording
Recording Recording audio (analog sources) MD/TAPE Recording a music source 1 Use the Input Selector keys to select the source (other than “MD/ TAPE”) you want to record. 2 Set the MD or TAPE recorder to record. 3 Start playback, then start recording. Recording video 1 Use the Input selector keys to select the video source (other than “VIDEO 1”) you want to record. -
Page 28: Listening To Radio Broadcasts
Listening to radio broadcasts The receiver can store up to 40 stations in the memory and recall them by one-touch operation. Tuning radio stations BAND MULTI CONTROL TUNER AUTO TUNER Tune – 1 Tune + ¡ Use the TUNER key to select the tuner. Use the BAND key to select the desired broadcast band. -
Page 29: Receiving Preset Stations
Listening to radio broadcasts Receiving preset stations TUNER Numeric keys Press the TUNER key to select tuner as the source. Enter the number of the preset station you want to receive (up to “40”). Press the numeric keys in the following order: For “15”, press 0,0,) For “20”, press... -
Page 30: Ambience Effects
Ambience effects This receiver is equipped with listening modes that allow you to enjoy an enhanced sonic ambience with a variety of video sources. In order to obtain the optimum effect from the surround modes, make sure to input the proper speaker settings beforehand. Surround modes The below speaker placements are for 5.1 channel surround sound system which are;... - Page 31 Ambience effects Dolby Digital The Dolby Digital surround format lets you enjoy up to 5.1 channels of digital surround sound from Dolby Digital program sources (such as Laserdisc or DVD software marked previous Dolby surround, Dolby Digital provides even better sound quality, greater spatial accuracy, and improved dynamic range.
- Page 32 Ambience effects THX Surround EX mode THX Surround EX-Dolby Digital Surround EX is a joint development of Dolby Laboratories and the THX division of Lucasfilm Ltd. In a movie theatre, film soundtracks that have been encoded with Dolby Digital Surround EX technology are able to reproduce an extra channel which has been added during the mixing of the program.
-
Page 33: Surround Play
Ambience effects Surround play The DTS compatible models can reproduce a CD, DVD, or LD carrying the DTS mark. DOLBY DIGITAL can be used when playing DVD or LD software bearing mark and DOLBY DIGITAL format digital broadcasts (etc.). DOLBY PRO LOGIC can be used when playing video, DVD, or LD software bearing the mark. -
Page 34: Dvd 6-Channel Playback
Ambience effects THX mode. This mode creates a home theater environment which is able to reproduce a cinema surround sound system featuring improved special representation and acoustic imaging of surround channels by translating THX Surround EX technology. Press the THX key to switch the following setting : 1 THX Sur EX ON : THX Surround EX function is turned ON when Dolby Digital 5.1ch signal is... -
Page 35: Convenient Functions
Ambience effects Convenient functions STEREO DIMMER MULTI CONTROL SOUND TUNER (Multi %/ fi, @ / #) Sound Dimmer Listen Mode5/ ∞ Adjusting the sound You can make further adjustments to the sound while listening to playback in the surround mode. 1 For the remote control, press and hold the TUNER key for more than 3 seconds to switch to receiver mode. - Page 36 Ambience effects Center Width mode (Pro Logic II Music mode only) Center width adjustment allows you to enjoy an enchanced sound when listening to music through center image from only center speaker, or left and right speakers or various combinations adjustments. 1 Press the SOUND key, then press the “CENTER WIDTH”...
- Page 37 Ambience effects Display dimmer adjustment The dimmer function lets you select the brightness of the receiver's display. You might find this useful if you darken your room to watch movies or listen to music. Each time you press the DIMMER key, the display brightness changes among the three available settings.
-
Page 38: Basic Remote Control Operations For Other Components
Find the setup code of the component to be registered. • Refer to the setup code lists to find the setup code for the component to be registered. Example: To register a DVD made by KENWOOD, you would enter “0534”. Input... -
Page 39: Checking The Codes
Operating other components This operation lets you operate the registered components. KENWOOD audio components with system control turn on and off automatically with the receiver via the system control connections. Use the source keys to select the component you desire. -
Page 40: Components
Basic remote control operations for other components Storing the remote control code of the other components The remote control unit can store the remote control code of the other components and you can operate the other components from the remote control unit. -
Page 41: Setup Code Chart
Go Video 0715, 0783 Gradiente 0651 Greenhill 0717 Harman/Kardon 0582, 0702 Hitachi 0573, 0664 Hiteker 0672 0702 0623, 0558, 0867 0717 Kenwood 0534, 0490, 0682 Konka 0711 Koss 0651 Lasonic 0798 Magnavox 0503, 0675 Malata 0782 Marantz 0539 Microsoft 0522... - Page 42 0054 Inteq 0017 0054 0000 0053 0180, 0802, 0805 0803 0180, 0030 Kamp 0216 Kawasho 0216 Kenwood 0030, 0019 Kodak 0802 Konka 0707, 0632, 0628, 0638, 0703, 0902 0056 0154, 0047, 0054, 0156, 0178, 0747, 0802 Logik 0016, 0803 Llyod’s...
- Page 43 Basic remote control operations for other components Setup code chart Maker Setup codes Motorola 0093 Multitech 0180, 0800, 0803 0156, 0166, 0178 0030, 0019, 0056, 0434, 0497 0092 Nikko 0178, 0030, 0092, 0802 Noblex 0804 Onwa 0180 Optimus 0250, 0166, 0154, 0806, 0812, 0815, 0802 Optonica 0093...
- Page 44 0432 GoldStar 0038 HI-Q 0047 Harman/Kardon 0038, 0081 Hitachi 0042 Hughes Network 0042 Systems 0067 Kenwood 0067, 0038 Kodak 0035 0035 0043 Magnavox 0035, 0081, 0563, 0039, 0149 Marantz 0081, 0035 Matsushita 0035, 0162 Memorex 0104, 0047, 0479, 0048, 0035,...
- Page 45 CD and MD player setup codes Maker Setup codes Kenwood 0028, 0190, 0338, 0339, 0826, 0037, 0340, 0523, 0626, 0677, 0858, 0859, 0681, 1490 Setup codes for Kenwood components with System Control connection Component Setup codes 1338 1339 Cassette Deck...
-
Page 46: Cassette Deck, Cd Player & Md Recorder Operations
Basic remote control operations for other components CASSETTE deck, CD player & MD recorder operations You can perform these basic operations using the keys described below when connected to KENWOOD cassette deck, CD player or MD recorder equipped with system control operations. -
Page 47: Other Components' Operations
2 Press the keys corresponding to the operations you desire. Refer to the following sections for details. These keys can be used to perform the basic operations of KENWOOD and other manufacturers’ components which the setup code for each component had been entered beforehand. - Page 48 Basic remote control operations for other components DSS operation keys VID1 TUNER VID2 VID3 AV AUX TAPE PHONO POWER RCVR SRC Power (Source power) Enter Multi Enter Numeric keys Multi Exit + 10 + 100 TV Mute Last Page (Last channel) Return LAST / A/B Exit...
-
Page 49: In Case Of Difficulty
In case of difficulty Resetting the Microcomputer The microcomputer may malfunction (unit cannot be operated, or shows an erroneous display) if the power cord is unplugged while the power is ON, or due to some other external factor. If this happens, execute the following procedure to reset the microcomputer and return the unit to its normal operating condition. - Page 50 In case of difficulty Remote control unit Symptom Certain inputs cannot be selected using the remote control. Remote control operation is not possible. Cause • No setup codes registered for the respective input(s). • The remote control is set to a different operation mode.
-
Page 51: Specifications
Optical ... (–21 dBm ~ –15 dBm), 660 nm ±30 nm Notes 1. KENWOOD follows a policy of continuous advancements in development. For this reason specifications may be changed without notice. 2. The full performance may not be exhibited in an extremely cold location (under a water-freezing temperature). - Page 52 For your records Record the serial number, found on the back of the unit, in the spaces designated on the warranty card, and in the space provided below. Refer to the model and serial numbers whenever you call upon your dealer for information or service on this product.