
Related Manuals for KitchenAid KAD-7


Summary of Contents for KitchenAid KAD-7
-
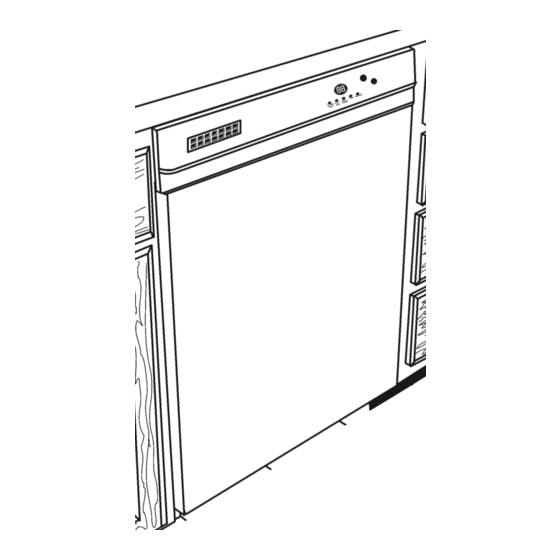
Page 1: Stainless Steel
KAD-7 TECHNICAL EDUCATION For the way it's made.™ KUD01 STAINLESS STEEL DISHWASHER JOB AID 4317288... - Page 2 INTRODUCTION This Job Aid, KUD01 STAINLESS STEEL DISHWASHERS , Part No. 4317288 provides specific infor- mation on the operation, diagnosis and repair of the KitchenAid KUD01 series Stainless Steel Dish- washer. KUD01 STAINLESS STEEL DISHWASHERS has been compiled to provide the most recent informa- tion on design, features, operation, troubleshooting, and repair procedures.
-
Page 3: Table Of Contents
ELECTRONIC CONTROL CONNECTOR PINS ... 41 MODEL/SERIAL NUMBER PLATE ... 42 MODEL SPECIFIC SERVICE PARTS TABLE ... 43 KEY PAD MATRIX ... 43 SPECIFICATIONS ... 44 WATER USAGE ... 44 WHAT TO DO IF THE DISHWASHER DOOR DOES NOT OPEN ... 45... - Page 4 WHAT TO DO IF THE DISHWASHER DOOR DOES NOT OPEN If the door latch assembly is damaged or malfunctions, the dishwasher door may not open. If this occurs, the following procedure will open the dishwasher door and allow repairs to the door latch assembly.
-
Page 5: Section One
• Do not install the dishwasher on carpeted floors. • An outside wall behind the dishwasher should be insulated to prevent the water line, inlet valve and drain line from freezing and rupturing. Additional Considerations The application of a horizontal pump and filter technology allows for the tub to be designed three inches deeper than current models. - Page 6 -- NOTES -- MODEL SPECIFIC TABLES MODEL USER JUMPER INTERCONNECT INTERFACE TAILS CARD KUDS01DJ 8269200 (Top) 8269202 8269207 8269201 (Front) KUDS01IJ 8269199 KUDR01TJ 8269198 KUDM01TJ 8269197 KUDI01TJ 8269196 RINSE MODEL PRESSURE DISPENSER SWITCH SENSOR KUDS01DJ 8269189 8268477 KUDS01IJ 8269996 KUDR01TJ KUDM01TJ KUDI01TJ KEYPAD MATRIX...
-
Page 7: Section Two
K = 2000 WEEK OF MANUFACTURE PRODUCT SEQUENCE NUMBER MODEL NUMBER DESIGNATOR MODEL NUMBER INTERNATIONAL SALES OR MARKETING CHANNEL K = KITCHENAID BRAND PRODUCT IDENTIFIER PD = Convertable/Potable UD = Undercounter FEATURE LEVEL: I, J, M, P, R, S SERIES CONFIGURATION FEATURES... -
Page 8: Cycles And Cycle Variations
CYCLES AND CYCLE VARIATION The KUD01 dishwasher optimizes washing performance and efficiently uses resources by varying cycle functions and length. The selection of wash options allows the consumer to customize a cycle for optimum washing performance. The soil sensor monitors soils in the wash water and sends input to the electronic control. -
Page 9: Automatic Purge Filtration
STRIP CIRCUITS FILL WASH/RINSE DRAIN DISPENSER VENT HEAT DRY Quick Clean Up Use this cycle for pre-rinsed or lightly-soiled loads. The cycle automatically adds a fill and brief pre- wash, purging cold water from the hot water line improves washing results, without adding time for water heating periods. -
Page 10: Canceling A Cycle
Anytime during a cycle press: The display shows: The dishwasher starts a two minute drain (if needed.) The wash pump does not operate during this drain function. Let the dishwasher drain completely. The display turns off after two minutes. NOTE: If the dishwasher does not need to be drained, the display turns off. -
Page 11: Option Selections
NOTE: Energy Saver Dry is an option with all cycles, except Quick Rinse. Control Lock Use the Control Lock to prevent the dishwasher from accidentally being turned on. Use the Lock, also, to prevent accidental cycle or option changes during a cycle. When the Lock On Icon is lit, all buttons are disabled. - Page 12 Delay Hours Select this option to run the dishwasher at a later time or during off-peak hours. Items can be added any time during the delay countdown. After adding hours, close the door firmly until it latches. The delay countdown will not continue if the door is not latched.
-
Page 13: Cycle Status Indicators
If the Sani Rinse option is selected, the sanitized indicator glows when the Sani Rinse cycle is finished. If the dishwasher did not properly sanitize the dishes, the light flashes at the end of the cycle. This can happen if the cycle is interrupted. The light goes off when the door in opened. -
Page 14: Function Description
FUNCTION DESCRIPTION The washing action of the KitchenAid KUD01 Stainless Steel Dishwasher performs more work and maintains higher performance with reduced energy consumption. This is accomplished with the fol- lowing: 1) A redesigned wash system using separate wash and drain pumps. 2) A soil sensor and thermistor which monitor washing conditions. - Page 15 NOTE 5 - NUMERIC CYCLE TIME DISPLAY Some models with numeric cycle time displays show an animated spinning clock pattern during the first four intervals of the cycle (intervals 45-42) while sensor based cycle modifications (and true time remaining) are being determined. Other models simply display the worst case cycle time remaining (in minutes) until the end of interval 42.
- Page 16 (see notes 5, 6, & 7). The dishwasher will hold in this suspended, water heating mode until the water reaches the temperature specified for the thermal hold or a maximum default time limit for the thermal hold (below) expires.
-
Page 17: Section Three
COMMON CYCLE TIME CHART NOTES NOTE 1 – CYCLE MODIFICATIONS BASED ON SENSOR INPUTS The control monitors food soil and temperature sensors during the first four intervals of the cycle (intervals 45-42) to determine what sensor based cycle modifications are appropriate. The modifica- tions made to the cycle depend on the cycle and options selected as well as the sensor inputs. -
Page 18: Accessing Components In The Door
ACCESSING COMPONENTS IN THE DOOR Removing the Console Panel The control panel on the KitchenAid KUD01 Dishwasher comes in two versions: a) Split Controls: Top and Front Display and b) Front Display. Both control panels are removed in the same manner. - Page 19 (See Note 1b and 1c, page 32). Removing the Electronic Control Board The electronic control board on the KitchenAid KUD01 Dishwasher is virtually the same configuration THERMAL HOLD for both the split controls and the full control versions.
- Page 20 The chart reflects all possible cycles/cycle varia- tions available on ALL Year 2000 Stainless Steel Dishwasher models. As a result the chart may list some cycles that will not apply to the specific model being serviced.
-
Page 21: Accessing Components Inside The Tub
The Inner Feed Tube is held in place by two (2) metal clips. (Fig. 3-9) One is located on the inner top of the dishwasher tub. The second is located on the back of the dishwasher tub. (Fig. 3-10, Inset) Fig. - Page 22 Removing the Water Inlet The water inlet is located on the left side of the dishwasher tub. (Fig. 3-12) From the inside of the tub, use a small pair of Channel Locks™ and turn the inlet grille ¼...
- Page 23 Remove the toe and access panels from the bottom of the dishwasher. Unsnap the cover over the overfill con- trol switch. Lift the overfill control switch from the as- sembly.
-
Page 24: Servicing The Sump Assembly
SERVICING THE SUMP ASSEMBLY Removing the Sump Assembly The entire sump assembly can be removed from inside the dishwasher tub. Remove the access and toe panels from underneath the dishwasher door by re- moving the two (2) screws securing it to the dishwasher frame. - Page 25 -- NOTES -- Removing the Wash Motor Remove the bolt securing the wash motor and drip shield in place on the pump assembly. (Fig. 3-20) Once the bolt and drip shield are removed, turn the wash motor counter-clockwise until it stops (approximately ¼ turn). Pull the motor straight back from the sump assembly.
- Page 26 Lift the volute from the wash motor. Accessing Components in the Sump Assembly Components inside the sump can be accessed without removing the sump from the dishwasher tub. Remove the four (4) Torx T-20 screws securing the soil accumulator from the sump base.