Table of Contents
Advertisement
JS_KWD_KDC_X399_KN_C00_03.indd 1
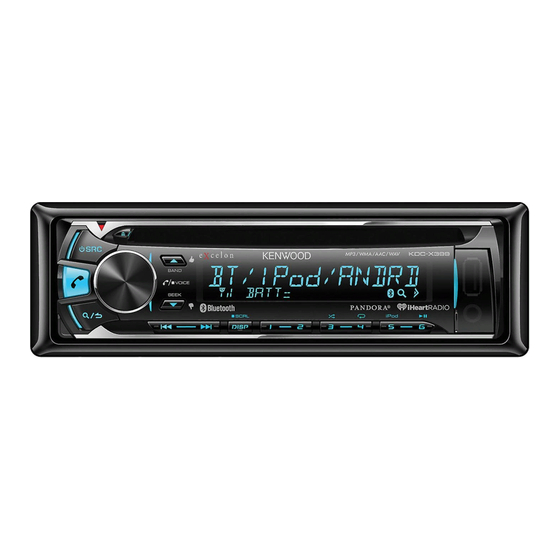
KDC-X399
KDC-BT362U
CD-RECEIVER
INSTRUCTION MANUAL
AMPLI-TUNER LECTEUR DE CD
MODE D'EMPLOI
REPRODUCTOR DE DISCOS COMPACTOS RECEPTOR DE FM/AM
MANUAL DE INSTRUCCIONES
Take the time to read through this instruction manual.
Familiarity with installation and operation procedures will help you obtain the best performance from your new CD-receiver.
For your records
Record the serial number, found on the back of the unit, in the spaces designated on the warranty card, and in the space provided below.
Refer to the model and serial numbers whenever you call upon your Kenwood dealer for information or service on the product.
Model KDC-X399/ KDC-BT362U/ KDC-MP362BT/ KMR-D362BT
Serial number
US Residents Only
Register your Kenwood product at www.Kenwoodusa.com
© 2014 JVC KENWOOD Corporation
KDC-MP362BT
KMR-D362BT
Register Online
B5A-0142-00 (KN)
14/7/2014 11:40:10 AM
Advertisement
Table of Contents

Related Manuals for Kenwood KDC-X399


Summary of Contents for Kenwood KDC-X399
- Page 1 Record the serial number, found on the back of the unit, in the spaces designated on the warranty card, and in the space provided below. Refer to the model and serial numbers whenever you call upon your Kenwood dealer for information or service on the product.
-
Page 2: Fcc Warning
Los equipos eléctricos y electrónicos al final de la vida útil, deberán ser reciclados en instalaciones JVC KENWOOD Corporation que puedan dar el tratamiento adecuado a estos productos y a sus 2967-3, ISHIKAWA-MACHI, subproductos residuales correspondientes. - Page 3 IC (Industry Canada) Notice CAUTION This device complies with Industry Canada licence-exempt RSS standard(s). This equipment complies with FCC/IC radiation exposure limits set forth for an uncontrolled Operation is subject to the following two conditions: environment and meets the FCC radio frequency (RF) Exposure Guidelines in Supplement C (1) This device may not cause interference, and to OET65 and RSS-102 of the IC radio frequency (RF) Exposure rules.
-
Page 4: Before Use
CONTENTS BEFORE USE BEFORE USE Warning Do not operate any function that takes your attention away from safe driving. BASICS Caution GETTING STARTED Volume setting: RADIO • Adjust the volume so that you can hear sounds outside the car to prevent accidents. •... - Page 5 BASICS Faceplate Remote control (RC-406) ( supplied for Volume knob (turn/press) Loading slot Display window Remote sensor (Do not expose to bright sunlight.) Pull out the insulation sheet when using for the first time. Detach button Remote control functions are not available for Attach Detach How to reset...
-
Page 6: Getting Started
GETTING STARTED Set the initial settings Press repeatedly to enter STANDBY. Press the volume knob to enter [FUNCTION]. Turn the volume knob to make a selection (see the following table), then press the knob. Repeat step until the desired item is selected or activated. Press and hold to exit. - Page 7 F/W UP xx.xx YES: Starts upgrading the firmware. ; NO: Cancels (upgrading is not activated). Direct Access Tuning (using RC-406) ( except for For details on how to update the firmware, see: www.kenwood.com/cs/ce/ Press DIRECT to enter Direct Access Tuning. Press the number buttons to enter a frequency. CLOCK Press to search for a station.
- Page 8 RADIO • [MONO SET]/ [NEWS SET]/ [REGIONAL]/ [AF SET]/ [TI]/ [PTY SEARCH] Other settings is selectable only when the band is FM1/ FM2/ FM3. Press the volume knob to enter [FUNCTION]. • Available Program Type: Turn the volume knob to make a selection (see the following table), then press (For the knob.
-
Page 9: Cd / Usb / Ipod / Android
CD / USB / iPod / ANDROID Start playback The source changes automatically and playback starts. M Eject disc Label side On the faceplate On the remote control Playback / pause Press Press USB input terminal Press and hold S / T. Press and hold S / ... - Page 10 CD / USB / iPod / ANDROID When connecting an Android device, “Press [VIEW] to install KENWOOD MUSIC PLAY APP” is Direct Music Search (using RC-406) ( except for shown. Follow the instructions to install the application. You can also install the latest version Press DIRECT.
-
Page 11: Start Listening
Pandora® (except for Preparation: Create and save a new station Install the latest version of the Pandora application on your device Press and hold the volume knob. (iPhone/ iPod touch), then create an account and log in to Pandora. Turn the volume knob to select [FROM TRACK] or [FROM ARTIST], then •... - Page 12 (except for Preparation: Search for a station Install the latest version of iHeart Link for KENWOOD application on your device Press (iPhone/ iPod touch), then create an account and log in to iHeartRadio. Turn the volume knob to select a category, then press the •...
-
Page 13: Siriusxm® Radio
SiriusXM® Radio (for Only SiriusXM® brings you more of what you Start listening SiriusXM Keymode love to listen to, all in one place. Get over 140 Press repeatedly to select Press and hold to change the channels, including commercial-free music SIRIUS XM. - Page 14 SiriusXM® Radio SmartFavorites and TuneStart™ CHANNEL LOCK To unlock settings: 1 Turn the volume knob to select a number. User stored channels (1 to 6) of the current band are recognized as 2 Press S / T to move to the entry position. SmartFavorite channels.
-
Page 15: Bluetooth
– Bluetooth function of the connected devcie is turned on. angle – [AUTO PAIRING] is set to [ON]. ( 17) Secure using cord clamps (not – KENWOOD MUSIC PLAY application is installed on the Android device. supplied) if necessary. * For , connect to the microphone input terminal. -
Page 16: Receiving Call
BLUETOOTH® BLUETOOTH — Mobile phone Improve the voice quality While talking on the phone... Press the volume knob to enter [FUNCTION]. Turn the volume knob to make a selection (see the following table), then press the knob. Repeat step until the desired item is selected or activated. - Page 17 BLUETOOTH® Make the settings for receiving a call Press to enter Bluetooth mode. Turn the volume knob to make a selection (see the following table), then press the knob. Repeat step until the desired item is Make a call selected or activated. Press and hold to exit.
- Page 18 BLUETOOTH® Delete a contact NUMBER DIAL 1 Turn the volume knob to select a number (0 to 9) or character ( , #, +). Press to enter Bluetooth mode. 2 Press S / T to move the entry position. Turn the volume knob to select [CALL HISTORY], then press the knob. Repeat steps until you finish entering Turn the volume knob to select a contact.
-
Page 19: Bluetooth Settings
BLUETOOTH® Other settings Bluetooth test mode Press the volume knob to enter [FUNCTION]. You can check the connectivity of the supported Turn the volume knob to make a selection (see the following table), then press the knob. profile between the Bluetooth device and the Repeat step until the desired item is selected/activated or follow the instructions stated unit. - Page 20 BLUETOOTH® BLUETOOTH — Audio Internet radio via Bluetooth (except for Listen to Pandora Preparation: Select [ON] for [PANDORA SRC]. ( 5) You can listen to Pandora on your smart phone (Android OS) through Bluetooth on this unit. Open the Pandora application on your device. Audio player via Bluetooth Connect your Bluetooth audio player via repeatedly to select BT AUDIO (or press SRC on RC-406).
-
Page 21: Audio Settings
AUDIO SETTINGS Preparation: While listening to any source... Select [ON] for [BUILT-IN AUX]. ( 5) Press the volume knob to enter [FUNCTION]. Turn the volume knob to select [AUDIO CONTROL], then press the knob. Start listening Turn the volume knob to make a selection (see the following table), then press Connect a portable audio player (commercially the knob. - Page 22 AUDIO SETTINGS EQ PRO (for SUBWOOFER SET ON: Turns on the subwoofer output. ; OFF: Cancels. BASS ADJUST BASS CTR FRQ 60HZ/ 80HZ/ 100HZ/ 200HZ: Selects the center LPF SUBWOOFER THROUGH: All signals are sent to the subwoofer. ; 85HZ/ 120HZ/ frequency. 160HZ: Audio signals with frequencies lower than 85 Hz/ 120 Hz/ 160 Hz are sent to the subwoofer.
-
Page 23: Display Settings
KENWOOD Music Control. GREEN2/ GREEN3/ YELLOWGREEN1/ YELLOWGREEN2/ YELLOW/ ORANGE1/ ORANGE2/ • When you play audio files with song data added using the KENWOOD Music Editor Light or ORANGERED KENWOOD Music Control, you can search for audio files by Genres, Artists, Albums, Playlists, and Songs. -
Page 24: Troubleshooting
“PROTECTING SEND SERVICE” Send the unit to the nearest service center. • You cannot operate iPod if “KENWOOD” or “ ” is displayed on iPod. appears. About Android device • This unit supports Android OS 4.1 and above. - Page 25 TROUBLESHOOTING Symptom Remedy Symptom Remedy • Make sure KENWOOD MUSIC PLAY APP is installed on Cannot playback at “NA FILE” Make sure the disc contains supported audio files. ( 21) [BROWSE MODE]. the Android device. ( 8) “NO DISC” Insert a playable disc into the loading slot.
- Page 26 Make sure you have installed the latest version of the “NO SIGNAL” Make sure the antenna is mounted outside the vehicle. iHeart Link for KENWOOD application on your device. “SUBSCRIPTION UPDATED Your subscription is updated. Press the volume knob to “PLEASE LOGIN”...
-
Page 27: Specifications
SPECIFICATIONS TROUBLESHOOTING Symptom Remedy FM Frequency Range • Reduce the distance between the unit and the Bluetooth Phone sound quality 87.9 MHz — 107.9 MHz (200 kHz space) is poor. device. • Move the car to a place where you can get a better signal 87.5 MHz —... - Page 28 SPECIFICATIONS USB Standard USB 1.1, USB 2.0 (Full speed) Maximum Output Power 50 W × 4 File System FAT12/ 16/ 32 Full Bandwidth Power 22 W × 4 (at less than 1 % THD) Maximum Supply Current DC 5 V 1 A Speaker Impedance 4 Ω — 8 Ω MP3 Decode Compliant with MPEG-1/2 Audio Layer-3 Tone Action Band 1: 100 Hz ±8 dB WMA Decode...
-
Page 29: How To Remove The Unit
INSTALLATION / CONNECTION Warning Installing the unit (in-dash mounting) • The unit can only be used with a 12 V DC power supply, negative ground. • Disconnect the battery’s negative terminal before wiring and Do the required wiring. mounting. ( 28, 29) •... -
Page 30: Wiring Connection
To front speaker (right) Gray/Black (Steering remote control wire) Green To rear speaker (left) Green/Black Brown To connect the Kenwood navigation system, Purple (Mute control wire) refer your navigations manual To rear speaker (right) Purple/Black Car fuse box Ignition switch... - Page 31 (A) Faceplate If no connections are made, do not let the wire come out from the tab. White To front speaker (left) White/Black To Kenwood Wired Marine Remote Light blue/yellow Control unit (optional accessory) (B) Trim plate Gray (Marine remote control...
- Page 32 • Android is trademark of Google Inc. • The Bluetooth® word mark and logos are registered trademarks owned by Bluetooth SIG, Inc. and any use of such marks by JVC KENWOOD Corporation is under license. Other trademarks and trade names are those of their respective owners.