Advertisement
Quick Links
Advertisement

Related Manuals for Sony NT-2


Summary of Contents for Sony NT-2
- Page 1 3-800-895- © 1995 by Sony Corporation...
- Page 2 The serial number is located inside the cassette holder and the model number is located at the bottom. Record the serial number in the space provided below. Refer to them whenever you call upon your Sony dealer regarding this product. Model No. NT-2 Serial No._________________________...
- Page 3 • Consult the dealer or an experienced radio/TV technician for help. This equipment has been tested You are cautioned that any and found to comply with the changes or modifications not limits for a Class B digital expressly approved in this device, pursuant to Part 15 of manual could void your the FCC rules.
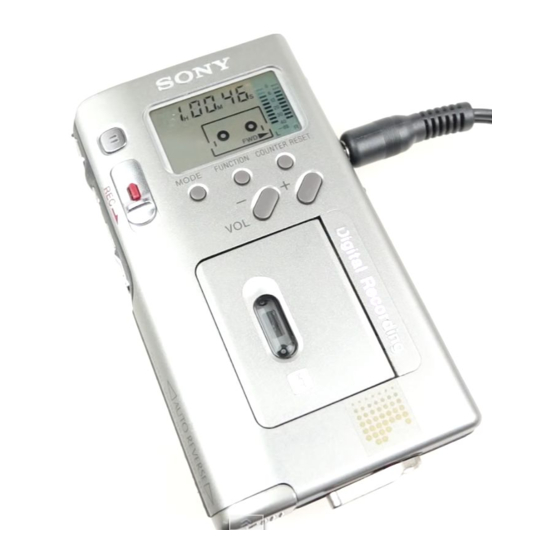
- Page 4 Digital micro recorder NT-2 AC power adaptor High-fidelity digital sound realized Line cable by the NT (Non-Tracking) format is NT cassette tape (NTC-60, 60- available with simple operations. minute) Cleaning cassette NTC-10CL Stereo headphones with a remote The tiny NT (Non-Tracking)
- Page 5 Using on a dry battery ................9 Installing a lithium battery ..............10 Setting the clock ..................12 Recording with a microphone ..............14 Adjusting the recording level ..............17 Selecting the automatic adjustment mode ......17 Adjusting the recording level manually (Manual recording) ................
- Page 6 The recorder is operable on AC power using the AC power adaptor (supplied). Use a line cable RK-G136GS (stereo miniplug stereo miniplug, not supplied). For example, portable CD players have this type of LINE OUT jacks.
- Page 7 Slide in the tape in the direction of the arrow until it clicks. : To record on one side DIR MODE facing the cassette holder (FWD) : To record on both sides (from FWD to REV) While pressing the red button, slide it. Once you open the cassette holder, the side to start recording will change to the Press .
- Page 8 DIR MODE : To play one side : To play both sides* * The recorder plays both sides three times continuously and then automatically stops for protecting the tape. stop playing play the opposite side of a tape suspend playback fast-forward (stop) and then FF rewind...
- Page 9 Install an Size AA (LR6) alkaline battery. While pressing the lid, slide it in the direction of the arrow. The indication flashes in the display. You can record continuously with a new Replace the battery with a new one, alkaline battery for about 5 hours, or otherwise the battery will go dead and play back for about 3 hours.
- Page 10 To operate the built-in clock, install the lithium battery (CR1220, supplied). The lid is removed.
- Page 11 • Keep the lithium battery and the Replace the lithium battery once about a year. When the battery becomes weak, recorder out of the reach of children. the date and time display may flash or Should the battery be swallowed, the clock may lose time.
-
Page 12: Clock Set
Set the clock before starting any recording operations to stamp the date and time. After connecting to the power source, set the year (Y), month (M), date (D), hour (H), minute (M) in this order. To go to the next step, press MODE. To enter the digits, press + or –. - Page 13 The display changes as illustrated. CLOCK CLOCK –dB –dB The time is displayed in the 24-hour system. CLOCK CLOCK –dB –dB The clock starts operating, and the current time (hour, minute, and second) is displayed. To set the time precisely, press MODE at the same time as a time signal.
- Page 14 Make a recording using the stereo michrophone (supplied). Slide in the tape in the direction of the arrow until it clicks. : To record on one side DIR MODE facing the cassette holder (FWD) : To record on both sides (from FWD to REV)
- Page 15 Recording level adjustment mode has You can play the tape recorded with the been preset to SPEECH. To change the NT-2 smoothly without a break when mode to MUSIC or adjust the recording the tape changes from the FWD level manually, refer to “Adjusting the (forward) side to the REV (reverse) side recording level”...
- Page 16 You can attach the microphone to your The cassette is record-protected. Release clothing (for example, your tie or collar). the record-protect or insert a new The clip rotates as illustrated. cassette. (pages 27, 33) The REV side of the cassette is record- protected.
- Page 17 Sound levels of the source are automatically adjusted when recorded on the tape. You can select the automatic adjustment mode according to the sound source. If you want to control the recording level more precisely, you can adjust the level manually. In other modes, press FUNCTION while pressing the red button.
- Page 18 In other modes, press FUNCTION while pressing the red button. REC MODE AUTO MANUAL –dB The recording level control is switched to manual control. REC MODE AUTO MANUAL –dB...
- Page 19 Each time you press the MODE button while recording, while in the standby mode, or right after the recorder has stopped recording, the display changes as follows: Counted length of the tape, not REC MODE AUTO elapsed time. MANUAL –dB REMAIN This shows you can record for 32 REC MODE...
- Page 20 Connect another piece of audio equipment such as a stereo system. : To play only one side. : To play both sides continuously*. * The recorder plays three times continuously and then automatically stops for protecting the tape. Playback starts. •...
- Page 21 stop playing play the opposite side of a tape suspend playback fast-forward (stop) and then FF. rewind (stop) and then REW. Use the car battery cord DCC-E215HG or DCC-E215 (not supplied) and the car connecting pack CPA-8 (not supplied). Connect the DC IN 1.5V jack of the recorder to the cigarette lighter socket of the car with the car battery cord.
- Page 22 When listening with the headphones, you can select the sound quality. The BASS BOOST feature intensifies low frequency sound for richer bass reproduction. Each time you press MODE, the setting changes as follows: “OFF” →”BASS 1"→”BASS 2" BASS 1: slight emphasis of the bass BASS 2: strong emphasis of the bass Press the BB button.
- Page 23 The AVLS (Automatic Volume Limiter System) function allows you to limit the maximum volume of the recorder to protect your ears. The volume does not exceed over “P 23” (maximum “P 30”) when using AVLS function, even if you attempt to turn the volume up higher.
- Page 24 The recording time and date stamped on the tape is displayed during playback. Each time you press the MODE button, the display changes as follows: Counted length of the tape, not elapsed time –dB REMAIN This shows you can play for 32 more minutes.
-
Page 25: The Display
To prevent the buttons from being accidentally operated, use the Hold function. It can lock the controls while you are walking with the recorder in your bag or pocket. Even when this function is activated, you can still reset the tape counter and change the display. - Page 26 • The supplied AC power adaptor for this model is not available. If you need this AC power adaptor, please consult your nearest Sony dealer. Do not install the unit in a location near heat sources such as radiators or air ducts, or in a place subject to direct sunlight, excessive dust, mechanical vibration or shock.
- Page 27 If you have any questions or problems concerning your recorder, please consult your nearest Sony dealer. After recording, push the red tab on the side of the tape you want to protect using a pointed object.
- Page 28 Prolonged operation will cause contamination of the tape head. To result in the best possible recording and playback, we recommend cleaning the tape head periodically (after a 10-hour run), using the Sony NTC-10CL cleaning cassette (supplied). If the recorder was not used for a long time, clean the tape head before operation.
- Page 29 If you experience any of the following difficulties while using your recorder, use this troubleshooting guide to help you remedy the problem. The cassette holder cannot be The cassette tape is not inserted properly. closed. • The recorder does not work •...
- Page 30 Format NT format Tape Digital micro tape (NT cassette tape) Recording system Helical scan 2 heads, digital recording Recording head 4 heads Recording time 60 minutes (with the supplied NTC-60) Tape speed Approx. 6.35 mm/s Drum rotation Approx. 3000 rpm Error correction Cross-interleaving code Approx.
- Page 31 Size AA (LR6) battery or AC power adaptor Battery life Approx. 5 hours (consecutive recording) Approx. 3 hours (consecutive playback) (Sony alkaline battery LR6 (SG)) Lithium battery life Approx. 1 year Power consumption Approx. 300 mW Approx. 112.8 × 22 × 63mm (w/h/d) Dimensions ×...
- Page 32 Car battery cord DCC-E215HG, DCC-E215 Car connecting pack CPA-8 Active speakers SRS-A91, SRS-A60 Cleaning cassette NTC-10CL Your dealer may not handle some of the above listed accessories. Please ask the dealer for detailed information how to order these accessories from Sony.
- Page 33 The NT format is the digital audio tape format which employs stamp-size cassette tapes and is intended as one of the next generation tape recorders. The major benefits of this NT format are: • Pocketable size • Digital Hi-Fi stereo sound •...
- Page 34 With the conventional helical scan system of tape tracking, a rotary head must precisely trace each recorded track of the tape during playback. This tracking method requires highly precise mechanical components, which makes it difficult to reduce the size of the recorder. On the other hand, with the NT (Non-Tracking) format, a rotary head is not required to precisely trace the recorded track during playback.
- Page 35 The data picked up may be disconnected or fragmented. However, the IC memory rearranges and augments the data and accurately reproduces the original sound.
- Page 36 This method has made a loading mechanism unnecessary. One of the features of this recorder NT-2 is the auto-reverse function. You can record or play both sides of a cassette continuously without turning the cassette over.
- Page 38 Fit the screw on the carring case to the hole on the recorder and fasten the screw. To avoid damage to the carring case, do not leave the headphones cord wound round the case.
- Page 39 OVER REMAIN REC DATE CLOCK PROTECT REC MODE AUTO MANUAL –dB REV FWD Lights up while the cassette is inserted. PROTECT REV FWD Shows that the remaining time Lights up along with the time of the tape (of one side) is less indication.
- Page 40 OVER REMAIN REC DATE CLOCK PROTECT REC MODE AUTO MANUAL –dB REV FWD Lights up while the cassette is inserted. PROTECT REV FWD Lights up while recording. Lights up when low frequency (bass) sound is emphasized. Shows the recording level is adjusted automatically (“AUTO”) or manually (“MANUAL”).