
Related Manuals for Philips CED781


Summary of Contents for Philips CED781
-
Page 1: User Manual
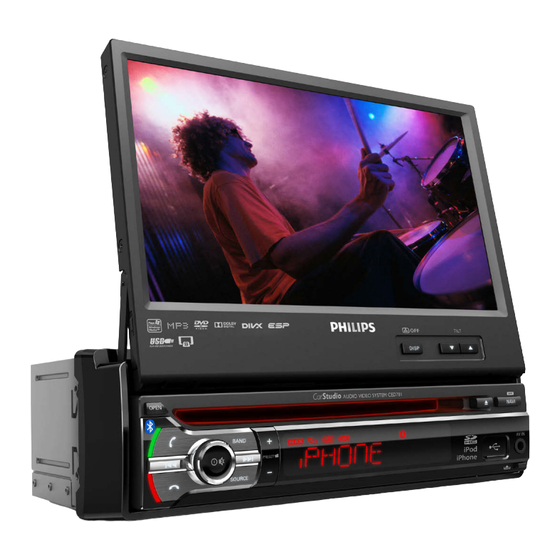
Always there to help you Register your product and get support at www.philips.com/welcome CED781 Question? Contact Philips User manual... -
Page 3: Table Of Contents
Contents 7 Use the navigation system Insert the map data card Navigate your road trip 1 Safety 8 Use Bluetooth devices 2 Your car entertainment system Activate the Bluetooth function Introduction Pair a device What's in the box Play audio from a connected device Overview of the main unit Make a call Overview of the remote control... - Page 4 15 Product information Specifications USB playability information 16 Troubleshooting General About the Bluetooth device 17 Notice Compliance Care of the environment Trademark notice Copyright...
-
Page 5: Safety
1 Safety Read and understand all instructions before you use the device. If damage is caused by failure to follow instructions, the warranty does not apply. • Use of controls or adjustments or performance of procedures other than herein may result in hazardous radiation exposure or other unsafe operation. -
Page 6: Your Car Entertainment System
Check and identify the contents of the package: system Congratulations on your purchase, and welcome to Philips! To fully benefit from the support that Philips offers, register your product at www.philips.com/welcome. Introduction With the car entertainment system, you can •... -
Page 7: Overview Of The Main Unit
Overview of the main unit a b c d a b c d d BAND a OPEN • Select a tuner band. • Eject or hide the TFT screen. e +/-PRESET • Select a preset radio station. • Press to answer a call. •... -
Page 8: Disc Slot
• Eject the disc. • Press to access the navigation system. • Press and hold to open the CarMirror application when an external Mirror Phone Box (not bundled) is connected with the system. j AV IN • Connect to the audio and video output sockets of an external player by a composite AV cable. -
Page 9: Overview Of The Remote Control
Overview of the remote control c SOURCE • Turn on or off the system. • Select a source. b NAVI • Access the navigation system. • Mute the speakers or release them from mute status. -
Page 10: Dvd Menu
e BAND • For DVD, select a speed for fast • Select a tuner band. backward or forward search. • Move the cursor up/down. f VOLUME +/- • Adjust volume. • Start play or pause. g SUBTITLE w OK • Select a subtitle language. -
Page 11: Install The Car Entertainment System
3 Install the car Connect wires entertainment Caution system • Make sure that all loose leads are insulated with electrical tape. Check the car's wiring carefully, then Always follow the instructions in this chapter in connect them to the supplied ISO wires. sequence. - Page 12 Connector Connect to Red wire The +12V power terminal which is live in the accessory (ACC) position of the ignition switch. If there is no accessory position, connect to the +12V car battery terminal that is always live. Ensure that black ground (earth) lead is connected to a metal surface of the car first.
-
Page 14: About The Gps Antenna
Connector/ Connect to/with Note Object • The video blocking system under parking brake not Pink wire Extension wire engaged only control the display of this unit, and will 2.5m extension Parking brake (-) not affect the video output through the rear RCA wire (not video output. -
Page 15: Mount Into The Dashboard
Remove the protective cover of the metal Connect the GPS antenna sheet, and then affix it. Affix the antenna box onto the metal sheet. Use clamps to secure the antenna cable. GPS AERIAL Mount into the dashboard Note • Check wire connection before you mount the unit Connect the GPS antenna to your car into a car. -
Page 16: Attach The Front Panel
When installing in a shallow space, change Attach the front panel the position of slide brackets. Attach the trim plate. Place the supplied rubber cushion over the end of the mounting bolt. Insert the left side of the panel in the chassis until it is correctly engaged. -
Page 17: Get Started
4 Get started Turn on Press • To turn off the system, press and hold for 3 seconds. Caution • Risk of car accidents! Never watch video or operate For the first time use this system while driving. After successful boot-up, the TFT screen is ejected with the following interface displayed on. -
Page 18: Use The Home Menu
[Bluetooth]: Use the Bluetooth • Use the home menu feature. • [AV-IN 1]/[AV-IN 2]: Switch the source to the audio and video input that is transferred from an external Note video player. [SWC]: Access the interface to • • is displayed when you touch an icon, it indicates that the selected media or feature is unavailable at the assign functions to buttons on the current time. -
Page 19: Adjust The Screen Brightness
Switch display designs Select a preset display design. , and then [Display In any mode, tap Design]. » The [Display Design]interface is Tap [Clock Mode] to select a time format. displayed. [24Hr]: 24-hour time format • • [12Hr]: 12-hour time format Tap [Date] to display the interface for setting the date. -
Page 20: Play From Hard Media
5 Play from hard Note media • Supported region code depends on where you bought the car audio system. DVD region code Countries and regions You can use this system to listen to audio, watch Latin America videos, and view photos that are stored on a disc, USB storage device, or SD/SDHC card. -
Page 21: Insert An Sd/Sdhc Card
• : Return to the home menu. Insert an SD/SDHC card • : Zoom in or out of the image. • : Select an available audio channel or audio language. Note • : Select an available subtitle. • Make sure that the SD/SDHC card contains compatible •... -
Page 22: Browse Recorded Files
• : Tap to display the contrast bar, and Pictures then tap on the bar to adjust the image contrast. • : Tap to display the saturation bar, and then tap on the bar to adjust the image saturation. • : Display control icons on the first page. -
Page 23: About Divx® Videos
Note • If no DivX Player is installed on your computer, download it from www.divx.com for free. • If you have no DivX Account, create one for free through DivX Player that is installed on your computer. On your computer through DivX Player Tap an icon to select a file category. -
Page 24: Listen To Radio
6 Listen to radio Tap [Distance] or [Local] to select a tuner sensitivity. • [Distance]: Stations with strong and weak signals can be tuned to. [Local]: Only stations with strong • signals can be tuned to. Switch to radio mode Enable the RDS feature After the boot-up at the first time, the system switches to radio mode automatically. -
Page 25: Store Radio Stations In Memory
Store radio stations in Use RDS related features memory Note You can store up to 6 stations in each band. • Only after RDS feature is enabled, you can use RDS related features. Store radio stations manually Select a band. Search for RDS programs of a specific Tune to the target radio station. - Page 26 VARIED Entertainment programs POP M Pop music ROCK M Rock music MOR M Light music LIGHT M Light classical music CLASSICS Classical music OTHER M Special music programs WEATHER Weather FINANCE Finance CHILDREN Children’s programs SOCIAL Social Affairs RELIGION Religion PHONE IN Phone In TRAVEL...
-
Page 27: Use The Navigation System
7 Use the Navigate your road trip navigation Note system • Risk of traffic accident! Never operate the navigation system during drive. Complete the setting of your destination and other navigation specifications before you drive. Insert the map data card Press Note •... -
Page 28: Use Bluetooth Devices
Make sure that Bluetooth function is enabled on your » The paring starts, and then a pairing device, and your device is set as visible to all other request from CED781 is displayed on Bluetooth devices. • The operational range between this system and a your device. - Page 29 : Tap it to return to the music playback interface. : Tap it to display the list of paired mobile phones. : Tap it to display the list of paired mobile phones. : Tap it to display the list of paired mobile phones.
-
Page 30: Play Audio From A Connected Device
Play a track on the connected device. On this system, tap to display the music playback interface. Tap [Paired Device]. » The list of paired devices is displayed. Tap icons on the interface to control play. • : Pause or resume play. •... - Page 31 Tap number icons to enter the phone number. • To clear the last digit, tap • To clear all digits, tap • To return to the previous screen, tap to send the call. to transfer the phone call to your •...
- Page 32 Search for a contact Tap the alphanumeric icons to enter the keyword. • To enter the first letter displayed on the icon, tap it once. • To switch between letters and the digit, tap an icon briefly and repeatedly. • To delete the last input, tap »...
-
Page 33: Play From An Ipod/Iphone
9 Play from an iPod/iPhone • Once your iPod/iPhone is connected and Note recognized, is displayed in the bar of • During play, no audio signals are transferred through popular icons on the home menu. You the headphone socket of your iPod/iPhone. can tap it to switch back to this playback interface. -
Page 34: Charge Your Ipod/Iphone
Search for a track You can select a track quickly through the music menu. to access the music menu. Tap to select a category. » Tracks under the selected category are listed. Tap a track name to start play. • If one or more subcategories are under the selected category, select a category first. -
Page 35: Use The Carmirror Application
Smart Connect Link is a device interoperability standard defined by Philips that offers integration between external peripheral (TV box, smart devices, etc) and Philips’s car entertainment system. Smart Connect Link brings the attached peripheral’s function into the application platform of the Philips car entertainment system where apps are still hosted and running on the external peripheral. -
Page 36: Universal Usb Charging
11 Universal USB Charging Philips enhanced the USB interface which was normally used for music playback from pen drive to now being able to supply current for charging smart devices. The current required for recharging phone battery or operation for some smart devices are higher than the standard USB can afford. -
Page 37: 12 Adjust Sound
This feature is unavailable when you listen to radio. video, follow the instructions below to adjust sound. Philips FullSound restores the audio details that are lost due to compression. It enriches the Adjust the volume level music signals so that what you hear is the full sound with every nuance of emotion and every detail of musical genius. -
Page 38: Others
Others Select a listening zone on the playback interface. Philips’ innovative Zone technology enables the » The setup interface is displayed. driver or passengers to enjoy music with the best speakers balance and experience more vivid spacial effect as the artist is intended to create. -
Page 39: 13 Adjust Settings
13 Adjust settings Adjust general settings Access system setup menus > to display all feature icons. Settings Options Description [Radio Select a radio Region] region that matches your location. [Beep] [On] Turn the beep sound on. Each time you press a [Settings]. -
Page 40: View System Information
[Navigation Voice] interface. [Servo version] [MCU Version] [Bluetooth View the MAC address of MAC] CED781. [Bluetooth View the version of Bluetooth. version] [All]/[Front left]/[Font right]: Select a • [DVD zone for navigation voice. View the DVD region code that regions] [Off]: Mute the navigation voice. -
Page 41: Adjust Bluetooth Settings
[Off] Answer phone calls manually. [Pin Set the password Code] for pairing the car entertainment system with another Bluetooth device. The default password is 0000. [Device CED781 The name of this Name] system as a Bluetooth device... -
Page 42: 14 Others
14 Others Use buttons on the steering wheel You can assign a function to a button on the steering wheel, and then control the system Play external audio/video with that button. input > to access the full menu with all feature icons displayed. -
Page 43: Set The Rear View Camera
Set the rear view camera Replace the fuse If a rear view camera is connected, you can If there is no power, the fuse may be damaged view on the screen what the camera takes. and need to be replaced. >... - Page 44 Log in with your account on the prompt Web page. • If you have no account for Club Philips, create one first on this Web page. Search your product with "CED781/55" as the keyword. Click the link of search result to access the Web page for registering your product.
-
Page 45: Product Information
15 Product Radio information Frequency range - FM 87.5 - 108.0 MHz (50 kHz per step) Frequency range - 530 - 1710 kHz AM(MW) (9 kHz per step) Note Usable sensitivity - FM 5 uV Usable sensitivity - AM 25 uV •... -
Page 46: Usb Playability Information
Supported video formats: GPS antenna • Antenna Build-in ceramic • Divx patch antenna Supplying voltage 50 ± 0.2 V Note Operating temperature -20 ~ +70 • To ensure a better playback, it is recommended that file Cold start 28 s (typical), <50 s image size is no higher than 640 x 480, frame rate is 20 Hot start 1 s (typical), <3 s... -
Page 47: 16 Troubleshooting
USB storage device. Transfer it to a requesting service. If the problem remains compatible disc instead. unsolved, go to the Philips Web page (www. No image philips.com/support). When you contact the •... - Page 48 The audio quality is poor after connection with a Bluetooth-enabled device. • The Bluetooth reception is poor. Move the device closer to the system or remove any obstacle between the device and the system. Cannot connect with the system. • The device does not support the profiles required for the system.
-
Page 49: 17 Notice
DivX, Inc, a subsidiary of Rovi human health. Corporation. This is an official DivX Certified® Please visit www.recycle.philips.com for device that plays DivX video. Visit divx.com additional information on a recycling center in for more information and software tools to your area. -
Page 50: Copyright
Rovi Corporation. Reverse engineering and disassembly are prohibited. 2014 © WOOX Innovations Limited. All rights reserved. Philips and the Philips’ Shield Emblem are registered trademarks of Koninklijke Philips N.V. and are used by WOOX Innovations Limited under license from Koninklijke Philips N.V. ”... - Page 52 WOOX Innovations, and is the manufacturer of the product. WOOX Innovations is the warrantor in relation to the product with which this booklet was packaged. Philips and the Philips Shield Emblem are registered trademarks of Koninklijke Philips N.V. CED781_55_UM_V1.0...