Pioneer SPH-DA110 AppRadio Operation Manual
Hide thumbs
Also See for SPH-DA110 AppRadio:
- Operation manual (66 pages) ,
- Installation manual (48 pages) ,
- User manual (36 pages)

Related Manuals for Pioneer SPH-DA110 AppRadio


Summary of Contents for Pioneer SPH-DA110 AppRadio
- Page 1 Operation Manual SPH-DA110 AppRadio Be sure to read Important Information for the User first! Important Information for the User includes important information that you must understand before using this product. English...
-
Page 2: Table Of Contents
Contents Thank you for buying this Pioneer product. Please read through these instructions so you will know how to oper- ate your model properly. After you have finished reading the instructions, keep this document in a safe place for future reference. - Page 3 Contents Reading the screen ........36 Customizing the system settings .... 48 Using the touch panel keys ..... 37 ₋ Setting the type of the mobile device to be connected ........48 Using hands-free phoning ₋ Setting the rear output ......49 Starting procedure ........
-
Page 4: Introduction
Chapter Introduction • Touch panel keys that are available on the Manual overview screen are described in bold in brackets [ ]: • Before using this product, be sure to e.g.) read Important Information for the Tap [Radio] on the Home screen. User (a separate manual), which • Extra information, alternatives and other contains warnings, cautions, and other... -
Page 5: Iphone / Ipod Compatibility
Chapter Introduction • iPhone 4 iPhone / iPod compatibility • iPhone 3GS This product supports only the following iPhone models and iPhone software versions. iPod with Lightning connector Others may not work correctly. Made for • iPod touch 5th generation • iPhone 5: iOS 6.0 • iPhone 5 • iPhone 4S: iOS 6.0... -
Page 6: To Ensure Safe Driving
Chapter Introduction To ensure safe driving Certain functions (such as viewing of app based visual content and certain touch panel key operations) offered by this product could be dangerous and/or unlawful if used while driving. To prevent such functions from being used while the vehicle is in motion, there is an interlock system that senses when the park- ing brake is set. -
Page 7: About Appradio
Chapter About AppRadio Features Checking part names and functions Listening to the radio You can listen to the radio using this product. Playing iPod music and video You can play and operate audio sources and video sources with the iPhone connected. Viewing/operating mobile device applica- tions With the App Mode, you can view the screen... -
Page 8: Connecting And Disconnecting Mobile Devices
• If data loss or corruption occurs on the mo- bile device for any reason, it is usually not possible to recover the data. Pioneer ac- cepts no liability for damages, costs or ex- penses arising from data loss or corrup- tion. - Page 9 Chapter About AppRadio p When you make hands-free phoning or use Connect your iPhone with Lightning your iPhone with Lightning connector as a connector Bluetooth audio device, you must make the Using the following cable and adapter enables Bluetooth connection, but do not have to you to connect your iPhone to this product.
- Page 10 Chapter About AppRadio p When you use AppRadio Mode, you Disconnecting your iPhone must make the Bluetooth connection with Se- Pull out the iPhone cable after check- rial Port Profile (SPP) from this product. ing that no data is being accessed. p When you make hands-free phoning or use your Android device as a Bluetooth audio Connect your Android device (HDMI...
-
Page 11: Available Sources And Conditions
Chapter About AppRadio Available sources and conditions Connect your MirrorLink device The available sources varies according to con- Using the separately sold USB interface cable ditions as follows. for MirrorLink (CD-MU200) you to connect your MirrorLink device to this product. Sources Conditions Ü... -
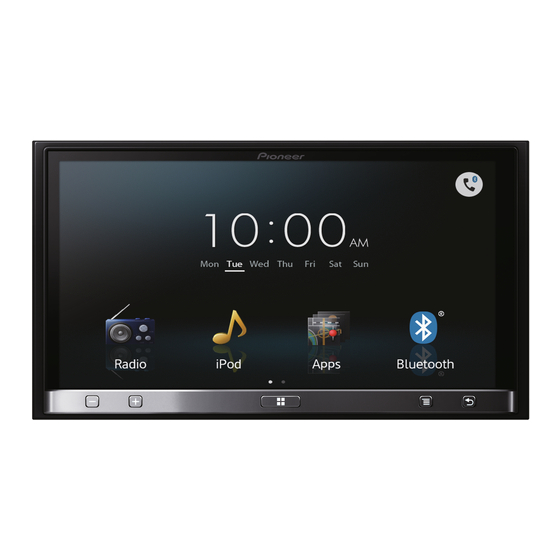
Page 12: Basic Operation Home Screen
Chapter Basic operation Home screen Using the touch panel keys Page one The Home screen is the main screen that al- lows access to your entertainment sources, apps, settings and more. Reading the screen Page one Radio Displays the radio source screen. -
Page 13: Pandora Internet Radio
Chapter Basic operation Page two Appears when your Android device is connected via the separately sold App Connectivity Kit and processing the Bluetooth connection. Appears when your Android device is connected via the separately sold App Connectivity Kit and Bluetooth wireless connection (SPP) is established. -
Page 14: Touch Panel Keys Common To Each Function
Chapter Basic operation Touch panel keys common to Audio source control each function When you press the Home button twice, the audio source control keys will be displayed The touch panel keys for operations common on-screen. Using these keys, you can operate to each function are described below. - Page 15 Chapter Basic operation The icon state changes as follows. p When you turn the ignition switch off (ACC OFF) and then turn it on again (ACC ON), Icons Conditions MIX ON Appears when the audio sourc- these settings will be reset. es are mixed.
-
Page 16: Using The Radio
Chapter Using the radio Starting procedure Using the touch panel keys 1 Press the Home button to display the Home screen. 2 Tap [Radio] on the Home screen. Ü For details, refer to Home screen on page 3 Use the touch panel keys on the screen to control the radio. -
Page 17: Using The Functions
Chapter Using the radio Using the functions Storing the strongest broadcast frequencies This function automatically assigns frequen- cies with good reception to the preset chan- nels in the selected band. You can update six channels in each band. p Storing broadcast frequencies may replace broadcast frequencies you have already saved. -
Page 18: Playing Ipod Music And Video
Chapter Playing iPod music and video [iPod] source is enabled only when an iPod Reading the screen or iPhone with 30-pin connector is connected Music to this product. When an iPhone with Light- ning connector is connected, [iPod] is dis- abled. -
Page 19: Using The Touch Panel Keys
Chapter Playing iPod music and video Video • : Artist list Displays a list of all artists saved in the connected iPod. • : Album list Displays a list of all albums saved in the connected iPod. • : Genre list Displays a list of all genres saved in the connected iPod. -
Page 20: Using The Functions
Chapter Playing iPod music and video Using the functions Video Narrowing down song (episode) or video sources with the list Tapping an item on a list allows you to search for song (episode) or video sources and play them in your iPod. 1 Tap the category list you want to search. -
Page 21: Random Play (Shuffle)
Chapter Playing iPod music and video Category lists (for music): Random play (shuffle) • Playlists This function shuffles songs, albums or vide- • Artists os and plays them in random order. • Albums • Songs • Podcasts Tapping changes the setting as follows: •... -
Page 22: Changing The Wide Screen Mode
Chapter Playing iPod music and video 4 Tap the first letter of the title of the song/video you are looking for. While searching, touch panel key operation is not available. To refine the search with a different letter, tap [Cancel]. 5 Tap the title of the list that you want to play. -
Page 23: Using Pandora ® Internet Radio
Cell Network Audio Quality. • : Station name indicator p Pandora internet radio is a music service Shows the Pandora station name the not affiliated with Pioneer. More informa- tuner is currently tuned in to. tion is available at • : Artist name http://www.pandora.com... -
Page 24: Using The Touch Panel Keys
Chapter ® Using Pandora internet radio Using the touch panel keys Using the function Selecting a Pandora station from the list 1 Tap The station list screen appears. 2 Select the search mode. If you tap [A-Z], the station list can be sorted alphabetically. -
Page 25: Viewing/Operating Mobile Device Applications
(for iPhone) on page 55. ing. 1 Unlock your device and then connect • Pioneer is not liable for any issues that your iPhone to this product. Ü For details, refer to Connecting and discon- may arise from incorrect or flawed app- necting mobile devices on page 8. - Page 26 Chapter Viewing/operating mobile device applications 3 Tap [Apps] on the Home screen. 2 Press the Home button to display the Home screen. 3 Tap [Apps] on the Home screen. Apps in the AppRadio Mode (iPhone) The application startup message appears and the AppRadio app launches, then the Applica- Apps in the AppRadio Mode (Android) tion menu screen appears.
-
Page 27: Mirrorlink Mode
Chapter Viewing/operating mobile device applications p Some applications may not launch de- MirrorLink mode pending on the state of the connected When you connect a MirrorLink device with device. In that case, launch the application the compatible applications installed, you according to the application startup can control the applications for the mobile message. -
Page 28: App Mode
Chapter Viewing/operating mobile device applications App Mode App Mode for iPhone with 30-pin connector When a mobile device is wired to this prod- uct, you can view the screen image currently In the App Mode, you can view the screen displayed on the mobile device (iPhone with image of the App Mode compatible applica- Lightning connector, Android device) or the... -
Page 29: Registering And Connecting A Bluetooth Device
Chapter Registering and connecting a Bluetooth device If your devices feature Bluetooth technology, p If you try to register more than three devic- this product can be connected to your devices es, the system will ask you to select one of wirelessly. - Page 30 Chapter Registering and connecting a Bluetooth device 4 Tap [Connection] on the “Bluetooth 7 Tap the Bluetooth device name you Connection Menu”. want to register. p If a PIN code input is required, enter a PIN code. (The default PIN code is “0000”.) p If you tap , the system starts searching for Bluetooth devices waiting for connec-...
-
Page 31: Pairing From Your Bluetooth Devices
Chapter Registering and connecting a Bluetooth device Pairing from your Bluetooth devic- Deleting a registered device When you have already registered three You can register a Bluetooth device by setting Bluetooth devices and you want to add anoth- this product to standby mode and requesting er one, you must first delete one of the regis- connection from the Bluetooth device. -
Page 32: Connecting A Registered Bluetooth Device Manually
Chapter Registering and connecting a Bluetooth device 4 Tap for the registered device you 3 Tap on the phone menu. want to delete. The “Bluetooth Connection Menu” screen The message “Delete OK?” appears. appears. 5 Tap [Yes] to delete the device. 4 Tap [Connection] on the “Bluetooth The message “Deleting”... -
Page 33: Setting The Bluetooth Auto Connect Function
Chapter Registering and connecting a Bluetooth device Setting the Bluetooth auto Disconnecting a Bluetooth device connect function If this function is set on, a connection be- 1 Tap on the Home screen. tween your Bluetooth device and this product Ü For details, refer to Home screen on page will take place automatically as soon as the two devices are less than a few meters apart. -
Page 34: Switching Product Visibility
Chapter Registering and connecting a Bluetooth device Switching product visibility Changing a PIN code This function sets whether or not to make this When connecting your Bluetooth device to product visible to the other device. Initially, this product via Bluetooth wireless this function is set to “On”. -
Page 35: Displaying Bluetooth Device Address
Chapter Registering and connecting a Bluetooth device 4 Enter an arbitrary PIN code (up to 8 Displaying Bluetooth device digits). address This product displays its Bluetooth device address. 1 Tap on the Home screen. Ü For details, refer to Home screen on page The phone menu screen appears. -
Page 36: Using The Bluetooth Audio Player
Chapter Using the Bluetooth audio player You can control the Bluetooth connection of Reading the screen the audio device that supports Advanced Audio Distribution Profile (A2DP) or A2DP with Audio/Video Remote Control Profile (AVRCP), to operate the audio source. To connect using the Bluetooth function, you must first use the audio device to pair this product with the device. -
Page 37: Using The Touch Panel Keys
Chapter Using the Bluetooth audio player Using the touch panel keys Tapping the key skips to the start of the next song. Tapping the key once skips to the start of the current song. Tapping key twice quickly will skip to the previous song. -
Page 38: Starting Procedure
Chapter Chapter Using hands-free phoning Using hands-free phoning Using the touch panel keys CAUTION For your safety, avoid talking on the phone as much as possible while driving. You can control the Bluetooth connection of the mobile device, and make a call using the incoming or outgoing call histories, trans- ferred phone book, or by dialing. -
Page 39: Adjusting The Phone Volume
Chapter Chapter Using hands-free phoning Using hands-free phoning Adjusting the phone volume Calling a number in the phone book You can select and call a contact from the During the hands-free phoning, you can ad- phone book entries transferred to this prod- just the phone volume using the Volume uct. -
Page 40: Selecting A Number Using Alphabet Search Mode
Chapter Chapter Using hands-free phoning Using hands-free phoning 4 Tap the list to display the phone num- Selecting a number using alphabet ber list of the selected entry. search mode The details screen of the phone book appears. If a lot of numbers are registered in the phone 5 Tap the phone number you want to dial. -
Page 41: Answering An Incoming Call
Chapter Chapter Using hands-free phoning Using hands-free phoning Answering an incoming call Using advanced functions This product informs you that it is receiving a Answering a call automatically call by displaying a message and producing a You can enable or disable auto answer for ring sound. -
Page 42: Using The Preset Dial Lists
Chapter Chapter Using hands-free phoning Using hands-free phoning Using the preset dial lists Setting the private mode During a conversation, you can switch to pri- 1 Tap vate mode (talk directly on your mobile de- The “Preset Dial” list appears. vice). -
Page 43: Using The Voice Recognition Function (For Iphone)
Chapter Chapter Using hands-free phoning Using hands-free phoning Using the voice recognition Notes for hands-free phoning function (for iPhone) General notes You can use the voice recognition function of • Connection to all mobile devices featuring iPhone. Bluetooth wireless technology is not guar- p When an iPhone running iOS 6.1 or later is anteed. -
Page 44: Making And Receiving Calls
Chapter Chapter Using hands-free phoning Using hands-free phoning Making and receiving calls The received call history and the dialed number history • You may hear a noise in the following situa- tions: • Calls made or editing performed only on - When you answer the phone using the your mobile device will not be applied to button on the phone. -
Page 45: Customizing Preferences
Chapter Customizing preferences Ü For details, refer to Setting the rear output Customizing the audio on page 49. settings 3 Tap to adjust front/rear speaker The audio settings cannot be set when balance. the source is set to “ OFF ”. Each time you tap , the front/rear 1 Press the Home button to display the... - Page 46 Chapter Customizing preferences Adjusting the 5-band graphic equalizer Equalizer curve You can adjust the level of each band for the S.Bass (Super Bass) is a curve in which only low- equalizer curves. pitched sound is boosted. p A separate “Custom1” curve can be creat- Powerful (default) is a curve in which low-pitched and ed for each source.
-
Page 47: Adjusting Loudness
Chapter Customizing preferences 5 Tap next to “Level” to adjust Adjusting loudness the output level. Loudness compensates for deficiencies in the “+6” to “–24” is displayed as the level is in- low- and high-sound ranges at low volume. creased or decreased. 1 Display the “Audio”... -
Page 48: Adjusting Source Levels
Chapter Customizing preferences Customizing the system Adjusting source levels settings “Source Level Adjuster” lets you adjust the volume level of each source to prevent radical changes in volume when switching between 1 Press the Home button to display the the sources. Home screen. -
Page 49: Setting The Rear Output
Chapter Customizing preferences • iPhone (Digital AV) (default): Setting the RCA output When an iPhone with Lightning connec- This product’s preout (RCA rear output or tor will be connected, select “iPhone subwoofer output) can be used for a full-range (Digital AV)”. speaker (Full) or subwoofer (Subwoofer) • Others: connection. -
Page 50: Selecting The System Language
Chapter Customizing preferences Selecting the system language Setting the keyboard layout The system language can be selected from You can select the keyboard layout displayed three languages. on this product for text input in the AppRadio p If the embedded language and the selected Mode. -
Page 51: Switching The Ever Scroll Function
Chapter Customizing preferences Switching the ever scroll function Updating Bluetooth connection software If a character string is too long for the speci- fied frame, the string scrolls automatically to This function is used to update this product display the full text. with the latest software. -
Page 52: Setting The Rear View Camera
Chapter Customizing preferences Setting the rear view camera CAUTION Pioneer recommends the use of a camera The following two functions are available. The which outputs mirror-reversed images. rear view camera feature requires a separately Otherwise, the screen image will appear re- sold rear view camera (e.g. -
Page 53: Adjusting The Picture
Chapter Customizing preferences 1 Display the “System” screen. • Contrast: Adjusts the contrast. Ü For details, refer to Customizing the • Color: Adjusts the color saturation. system settings on page 48. • Hue: Adjusts the tone of color (red or green is emphasized). -
Page 54: Setting The Clock Mode
Chapter Customizing preferences 2 Tap [System Reset]. Setting the clock mode A message confirming whether to restore the You can change the time format. settings appears. 1 Display the “System” screen. Ü For details, refer to Customizing the system settings on page 48. 2 Tap [Clock Mode]. -
Page 55: Switching The App Launch Assist
Switching the App launch assist USB memory device by downloading the function (for iPhone) newer firmware file from the pioneer web You can set whether to launch the AppRadio site. app automatically when you tap [Apps] icon “... -
Page 56: Customizing The Favorites Menu
Chapter Customizing preferences 4 Touch the tab on the left edge and/or Customizing the favorites scroll the bar on the right edge to display menu the desired menu item. You can register the desired menu items on 5 Touch and hold the menu item you the “Favorites”... -
Page 57: Appendix Troubleshooting
If you have problems operating this product, refer to this section. The most common problems are listed below, along with likely causes and solutions. If a solution to your problem cannot be found here, contact your dealer or the nearest authorized Pioneer service facility. Problems with this product... - Page 58 Appendix Appendix Symptom Cause Action (Reference) The display is very dim. Picture quality adjustment of the dis- Adjust the picture quality. (Page 53) play is not correct. No sounds are produced from an The volume level is low. Adjust the volume level. audio source.
- Page 59 Appendix Appendix Problems with AppRadio Mode screen Symptom Cause Action (Reference) A black screen is displayed. While operating an application, the Press the Home button and display application was ended on the mobile the Home screen. device side. The mobile device OS may be Stop the vehicle in a safe place and waiting for screen operation.
-
Page 60: Positioning Technology
Appendix Appendix • In some driving conditions, signals from Positioning technology GPS satellites may not reach your vehicle. Positioning by GPS In this case, it is impossible for the system to use GPS positioning. The Global Positioning System (GPS) uses a network of satellites orbiting the Earth. - Page 61 Appendix Appendix • If you make a slight turn. • If the road has a series of hairpin bends. • If there is a parallel road. • If there is a loop or similar road configura- tion. • If there is another road very nearby, such as in the case of an elevated freeway.
- Page 62 Appendix Appendix • If you enter or exit a multi-storey parking lot • When you drive around a traffic circle. or similar structure using a spiral ramp. • When starting driving immediately after starting the engine. • If your vehicle is turned on a turntable or similar structure.
-
Page 63: Setting List
Appendix Appendix Page Setting list App launch assist The customizable settings of this product are Firmware Version Information listed below. For details about changing each setting, refer to the page for that item. Firmware Update Other settings Audio settings Page Page Favorites Fader/Balance... - Page 64 253 Alexandra Road, #04-01, Singapore 159936 TEL: 65-6472-7555 PIONEER ELECTRONICS AUSTRALIA PTY. LTD. 5 Arco Lane, Heatherton, Victoria, 3202, Australia TEL: (03) 9586-6300 PIONEER ELECTRONICS DE MEXICO, S.A. de C.V. Blvd.Manuel Avila Camacho 138 10 piso Col.Lomas de Chapultepec, Mexico, D.F. 11000 TEL: 55-9178-4270 先鋒股份有限公司...
- Page 65 Installation Manual Manuel d’installation SPH-DA210 SPH-DA110 AppRadio...
- Page 66 Contents Precautions ₋ Installation notes ........18 ₋ Parts supplied .........18 Your new display unit and this manual ..3 Important safeguards ........ 3 ₋ When installing the antenna inside the vehicle (on the dashboard or rear Connecting the system shelf) ............19 Precautions before connecting Installing the microphone .......
-
Page 67: Precautions
Your new display unit and Important safeguards this manual WARNING Pioneer does not recommend that you in- • Do not operate this product, any applica- stall this product yourself. This product is tions, or the rear view camera option (if designed for professional installation only. -
Page 68: Connecting The System
Chapter Connecting the system • Do not route wires where they will be Precautions before exposed to high temperatures. If the connecting the system insulation heats up, wires may become damaged, resulting in a short circuit or WARNING malfunction and permanent damage to Do not take any steps to tamper with or the product. -
Page 69: To Prevent Damage
Chapter Connecting the system To prevent damage WARNING • Use speakers over 50 W (output value) and between 4 Ω to 8 Ω (impedance value). Do not use 1 Ω to 3 Ω speakers ACC position No ACC position for this unit. • The black cable is ground. When • To avoid short-circuiting, cover the dis- installing this unit or power amp (sold connected lead with insulating tape. -
Page 70: Parts Supplied
Chapter Connecting the system Parts supplied Installing the HDMI cable holder ® 1 Insert the lower tab of the HDMI ca- ble holder into the groove of this prod- uct. Groove This product Power cord GPS antenna Microphone 2 Insert the two upper tabs into the this product by pushing the HDMI ca- HDMI cable holder ble holder. -
Page 71: Connecting The System
Chapter Connecting the system Connecting the system This product 3.55 m Wired remote input (1 ft. 2 in.) Please refer to the instruction manual for the Hard-wired remote control adapter (sold separately). (13 ft. 1 in.) Vehicle antenna Microphone GPS antenna WARNING • To avoid the risk of accident and the potential violation of applicable laws, this product should never be used while the vehicle is being driven except for navigation purposes. -
Page 72: When Connecting An Iphone With 30-Pin
Chapter Connecting the system When connecting an iPhone with 30-pin USB interface cable for iPod / iPhone (*4) (sold separately) (6 ft. 7 in.) iPhone with 30-pin (*3) (*3) For details concerning operations and compatibility, refer to the Operation Manual. (*4) For details about how to connect the separately sold USB interface cable for iPod / iPhone (CD-IU201N), refer to the USB interface cable for iPod / iPhone manual. -
Page 73: When Connecting An Android Device With An Mhl Port
Chapter Connecting the system When connecting an Android device with an MHL port USB - micro USB cable (*8) (Type USB A - micro USB B) USB cable (*8) (Type USB A - USB A) (sold separately) 1.5 m (4 ft. 11 in.) (sold separately) 0.75 m (2 ft. -
Page 74: Connecting The Power Cord (1)
Chapter Connecting the system Connecting the power cord (1) Yellow To terminal supplied with power regardless of ignition switch position. To electric terminal controlled by ignition switch (12 V DC) ON/OFF. Orange/white To lighting switch terminal. Black (ground) To vehicle (metal) body. Notes • When a subwoofer is connected to this product instead of a rear speaker,... - Page 75 Chapter Connecting the system This product Power cord Fuse (10 A) Blue/white To auto-antenna relay control terminal. If the vehicle has a glass antenna, connect to the antenna booster power control terminal (max. 300 mA 12 V DC).
-
Page 76: Connecting The Power Cord (2)
Otherwise vehicle model. For details, consult you cannot switch to the rear view camera your authorized Pioneer dealer or picture. an installation professional. WARNING LIGHT GREEN LEAD AT POWER CONNECTOR IS... -
Page 77: When Connecting To Separately Sold Power Amp/Subwoofer
Chapter Connecting the system When connecting to separately sold power amp/subwoofer Front outputs (FL, FR) This product Power amp (sold separately) RCA cables (sold separately) Power amp (sold separately) Subwoofer/rear outputs (SW/RL, SW/RR) Power cord System remote control Blue/white To system control terminal of the power amp (max. -
Page 78: When Connecting A Rear View Camera
Chapter Connecting the system This product When connecting a rear view camera When this product is used with a rear view camera, it is possible to automatically switch from the video to rear view image when the shift lever is moved to REVERSE (R). Rear View mode also allows you to check what is behind you while driving. -
Page 79: Installation
Chapter Installation • Do not install this product where it Precautions before may (i) obstruct the driver’s vision, (ii) installation impair the performance of any of the vehicle’s operating systems or safety CAUTION features, including airbags, hazard • Never install this product in places lamp buttons or (iii) impair the driver’s where, or in a manner that: ability to safely operate the vehicle. -
Page 80: Installing This Product
Chapter Installation • When installing, to ensure proper heat Installing this product dispersal when using this unit, make sure you leave ample space behind the Installation notes rear panel and wrap any loose cables so • Do not install this product in places sub- they are not blocking the vents. -
Page 81: Parts Supplied
Chapter Installation Parts supplied Installation using the screw holes on the side of this product 1 Fasten the unit to the factory radio- mounting bracket. Position this product so that its screw holes are aligned with the screw holes of the brack- et, and tighten the screws at three or four lo- The display unit Truss head screw... -
Page 82: Installing The Gps Antenna
Chapter Installation Installing the GPS antenna Parts supplied CAUTION Do not cut the GPS antenna lead to shorten it or use an extension to make it longer. Altering the antenna cable could result in a short circuit or mal- GPS antenna Metal sheet function and permanent damage to this product. -
Page 83: When Installing The Antenna Inside The Vehicle (On The Dashboard Or Rear Shelf)
Chapter Installation When installing the antenna inside the vehicle (on the dashboard or rear shelf) WARNING Do not install the GPS antenna over any sensors or vents on the dashboard of the vehicle, as doing so may interfere with the proper functioning of such sensors or vents and may compro- mise the ability of the metal sheet under the GPS antenna to properly and securely affix to the dashboard. -
Page 84: Installing The Microphone
Chapter Installation Attach the microphone clip to the Installing the microphone sun visor • Install the microphone in a place where its direction and distance from the driver make it easiest to pick up the driver’s Microphone clip voice. • Be sure to turn off (ACC OFF) the prod- uct before connecting the microphone. -
Page 85: Installation On The Steering Column
Chapter Installation Installation on the steering column 1 Detach the microphone base from the microphone clip by sliding the microphone base while pressing the tab. Microphone Clamps Use separately sold clamps to secure the lead where necessary inside the vehicle. Microphone clip Microphone base 2 Mount the microphone on the steering... - Page 86 253 Alexandra Road, #04-01, Singapore 159936 TEL: 65-6472-7555 PIONEER ELECTRONICS AUSTRALIA PTY. LTD. 5 Arco Lane, Heatherton, Victoria, 3202, Australia TEL: (03) 9586-6300 PIONEER ELECTRONICS DE MEXICO, S.A. de C.V. Blvd.Manuel Avila Camacho 138 10 piso Col.Lomas de Chapultepec, Mexico, D.F. 11000 TEL: 55-9178-4270 先鋒股份有限公司...
- Page 87 Important Information for the User Information importante pour l’utilisateur SPH-DA210 SPH-DA110 AppRadio Be sure to read Important Information for the User first! Important Information for the User includes the important information that you must understand before using this product. Veuillez commencer par lire l’Information importante pour l’utilisateur ! L’Information importante pour l’utilisateur comprennent des informations qu’il est nécessaire de...
- Page 88 Contents Thank you for buying this Pioneer product. Please read through these instructions so you will know how to operate your model properly. After you have finished reading the instructions, keep this document in a safe place for future reference.
-
Page 89: Precaution
Chapter Precaution Information to User NOTE: This equipment has been tested and found to comply with the limits for a Class B digital device, pursuant to Part 15 of the MODEL NO. : SPH-DA210, SPH-DA110 FCC Rules. These limits are designed to FCC ID : AJDK064 provide reasonable protection against IC : 775E-K064... -
Page 90: The Safety Of Your Ears Is In Your Hands
Chapter Precaution The Safety of Your Ears is in Your For SPH-DA210 users Hands CAUTION: Get the most out of your equipment by play- USE OF CONTROL OR ADJUSTMENT ing it at a safe level—a level that lets the OR PERFORMANCE OF PROCEDURES sound come through clearly without annoy- OTHER THAN THOSE SPECIFIED HERE- ing blaring or distortion and, most impor-... -
Page 91: Important Safety Information
Pioneer Service Station. Do not use • To promote safety, certain functions are this product in this condition because doing disabled unless the vehicle is stopped and/ so may result in a fire, electric shock, or other or the parking brake is applied. -
Page 92: Notes Before Using This Product
Chapter Notes before using this product Important (Serial Number:) • In some jurisdictions the viewing of video im- The serial number of this device is located age on a display inside a vehicle even by per- on the bottom of this product. For your own sons other than the driver may be illegal. -
Page 93: Rear View Camera
• Pioneer cannot guarantee compatibility with all USB mass storage devices and assumes no responsibility for any loss of data on media players, smart phones, or other devices while... -
Page 94: Failure To Operate
FM Pioneer Service Station. stations broadcasting RBDS signals. Details of functions and After-sales service for Pioneer products operation of this product Please contact the dealer or distributor from which you purchased the product for after... -
Page 95: Appendix
CAUTION fer to the Operation Manual. • Pioneer accepts no responsibility for data lost p In this manual, iPod and iPhone will be re- from a mobile device, even if that data is lost ferred to as iPhone. -
Page 96: Itunes
Content application(s) or ser- Android and Google Play are trademarks of vice by its provider. Google Inc. • Pioneer is not liable for any issues that may arise from incorrect or flawed app- Using app-based connected based content. content • The content and functionality of the sup-... -
Page 97: Bluetooth
DVD and CD discs that display the logos SIG, Inc. and any use of such marks by shown below generally can be played on PIONEER CORPORATION is under license. this built-in DVD drive. Other trademarks and trade names are DVD-Video those of their respective owners. -
Page 98: Dolby Digital
THE WARRANTIES SET FORTH IN PIONEER’S symbol are trademarks of Dolby LIMITED WARRANTY ARE THE ONLY WARRAN- Laboratories. TIES MADE BY PIONEER OR ANY OF ITS LICENSORS, AS APPLICABLE. PIONEER AND ITS LICENSORS EXPRESSLY DISCLAIM ALL OTHER WARRANTIES, EXPRESS OR IMPLIED,... -
Page 99: Sha1, Sha2
Appendix Appendix sha1, sha2 OpenSSL Copyright (C) 1995, 1996, 1997, and 1998 LICENSE ISSUES WIDE Project. The OpenSSL toolkit stays under a dual li- All rights reserved. cense, i.e. both the conditions of the OpenSSL License and the original SSLeay license apply Redistribution and use in source and binary to the toolkit. -
Page 100: Ssleay
Appendix Appendix 6. Redistributions of any form whatsoever This library is free for commercial and non- must retain the following acknowledgment: commercial use as long as the following con- “This product includes software developed ditions are aheared to. by the OpenSSL Project for use in the The following conditions apply to all code OpenSSL Toolkit (http://www.openssl.org/)”... -
Page 101: Libpng
Appendix Appendix If you modify libpng you may insert addi- 4. If you include any Windows specific code tional notices immediately following this (or a derivative thereof) from the apps sentence. directory (application code) you must include an acknowledgement: This code is released under the libpng “This product includes software written by license. - Page 102 Appendix Appendix following individuals added to the list of ence Library, even if advised of the possibili- Contributing Authors: ty of such damage. Tom Lane Permission is hereby granted to use, copy, Glenn Randers-Pehrson modify, and distribute this source code, or Willem van Schaik portions hereof, for any purpose, without fee, subject to the following restrictions:...
-
Page 103: Specifications
Appendix Appendix High ......11 dB (100 Hz), 11 dB (10 kHz) Specifications (Volume: −30 dB) HPF: General Frequency ....50 Hz/63 Hz/80 Hz/ 100 Hz/125 Hz Rated power source.... 14.4 V DC Slope ......−12 dB/oct (allowable voltage range: Subwoofer: 10.8 V to 15.1 V DC) Frequency .... - Page 104 Appendix Appendix CEA2006 Specifications Frequency response ... 30 Hz to 15 000 Hz (±3 dB) Stereo separation ....45 dB (at 65 dBf, 1 kHz) AM tuner Frequency range ....530 kHz to 1 710 kHz (10 kHz) Usable sensitivity ....25 μV (S/N: 20 dB) Signal-to-noise ratio ...62 dB (IHF-A network) Power output ....
- Page 105 253 Alexandra Road, #04-01, Singapore 159936 TEL: 65-6472-7555 PIONEER ELECTRONICS AUSTRALIA PTY. LTD. 5 Arco Lane, Heatherton, Victoria, 3202, Australia TEL: (03) 9586-6300 PIONEER ELECTRONICS DE MEXICO, S.A. de C.V. Blvd.Manuel Avila Camacho 138 10 piso Col.Lomas de Chapultepec, Mexico, D.F. 11000 TEL: 55-9178-4270 先鋒股份有限公司...