Table of Contents
Advertisement
HT502SH-AH.JA1ULLK_ENG_MFL38637190
© Copyright 2007, LG Electronics U.S.A., Inc.
DVD RECEIVER
OWNER'S MANUAL
MODEL: LHT734
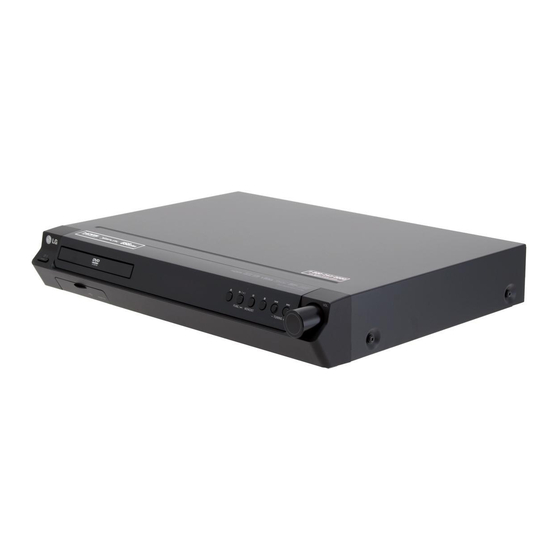
Main Unit - LHT734
Speakers - SH52SH-S
Before connecting, operating or adjusting this product,
please read this instruction booklet carefully and
completely.
SH52SH-C
SH52SH-W
R
For service/
support Call:
Toll Free Number
1-800-243-0000
Advertisement
Table of Contents

Related Manuals for LG LHT734


Summary of Contents for LG LHT734
- Page 1 DVD RECEIVER OWNER’S MANUAL MODEL: LHT734 Before connecting, operating or adjusting this product, please read this instruction booklet carefully and completely. © Copyright 2007, LG Electronics U.S.A., Inc. Main Unit - LHT734 Speakers - SH52SH-S SH52SH-C SH52SH-W For service/ support Call:...
- Page 2 • Consult the dealer or an experienced radio/TV technician for help. FCC COMPLIANCE: The responsible party for this product’s compliance is: Marketed and Distributed by LG Electronics U.S.A., Inc., 1000 Sylvan Avenue, Englewood Cliffs, NJ. Phone: 1-201-816-2000.
-
Page 3: Important Safety Instructions
IMPORTANT SAFETY INSTRUCTIONS CAUTION: PLEASE READ AND OBSERVE ALL WARNINGS AND INSTRUCTIONS IN THIS OWNER’S MANUAL. AND THOSE MARKED ON THE PRODUCT. RETAIN THIS MANUAL FOR FUTURE REFERENCE. This product has been designed and manufactured to assure personal safety. Improper use can result in electric shock or fire hazard. -
Page 4: Table Of Contents
• Controllable functions by LG TV’s remote control; Play, Pause, Scan, Skip, Stop, Power Off, etc. • Refer to the TV owner’s manual for the details of SIMPLINK function. • LG TV with SIMPLINK function has the logo as shown above. -
Page 5: Before Use
Most DVD discs have a globe with one or more numbers in it clearly visible on the cover. This number must match your DVD player’s regional code or the disc cannot play. If you try to play a DVD with a different regional code from your player, the message “Check... -
Page 6: Front Panel/Rear Panel
Front Panel/Rear Panel POWER DISC Tray AUDIO IN connector USB port Connect to a USB port of a memory device (USB memory etc.) Power Cord SPEAKER connectors Cooling fan OPTICAL IN connector AM Loop Antenna connectors MONITOR OUT connector COMPONENT VIDEO OUT terminals Connect to a TV with Y P TRANSMITTER (DC 7V OUT) Connect a wireless transmitter. -
Page 7: Remote Control
Sets the System to turn off automatically at a specified time. RESOLUTION Changes the resolution depending on your TV. Controls the TV. (LG TV only) (See page 25) Remote Control Operation Range Point the remote control at the remote sensor and press the buttons. -
Page 8: Installation And Setup
Installation and Setup TV Connection Make one of the following connections, depending on the capabilities of your existing equipment. Tips: Depending on your TV and other equipment you wish to connect, there are various ways you could connect the DVD/CD Receiver. Use one of the connections described below. -
Page 9: Optional Equipment Connection
Connect a Output of auxiliary device to the AUX AUDIO Input (L/R) Connector. OPTICAL IN connection (O) Auxiliary device Connect an optical output of DVD Player (or Digital Device etc) to the OPTICAL IN connector. VIDEO AUDIO (L) AUDIO IN connection (D) -
Page 10: Antenna Connection
Antenna Connection Connect the supplied FM/AM antenna for listening to the radio. Connect the AM Loop antenna to the AM antenna connector. Connect the FM Wire antenna to the FM antenna connector. Notes: To prevent noise pickup, keep the AM Loop antenna away from the DVD/CD Receiver and other components. -
Page 11: Hdmi Connection
HDMI Connection About HDMI HDMI (High Definition Multimedia Interface) supports both video and audio on a single digital connection for an easy all- digital output to an HDMI or DI-equipped TV. Connection to an HDMI TV requires an HDMI cable while connection to a DVI-equipped TV requires a DVI adapter besides a HDMI cable. -
Page 12: Displaying Disc Information On-Screen
Displaying Disc Information On - screen You can display various information about the disc loaded on-screen. 1. Press DISPLAY to show various playback information. The displayed items differ depending on the disc type or playing status. 2. You can select an item by pressing v / V and change or select the setting by pressing b / B. -
Page 13: Display
Display DISPLAY 16 : 9 TV Aspect Widescreen Display Mode Move Select TV Aspect 4:3 – Select when a standard 4:3 TV is connected. 16:9 – Select when a 16:9 wide TV is connected. Display Mode The display Mode setting works only when the TV Aspect mode is set to “4:3”. -
Page 14: Audio
AUDIO Each DVD disc has a variety of audio output options. Set the receiver’s AUDIO options according to the type of audio system you use. AUDIO 5.1 Speaker Setup Select Vocal HD AV Sync 0 ms Move Dynamic Range Control (DRC) With the DVD* format, you can hear a program’s soundtrack in the most accurate and realistic... -
Page 15: Lock (Parental Control)
LOCK (Parental Control) LOCK Rating Unlock Password **** Area Code Move Select Rating Blocks playback of rated DVDs based on their contents. Not all discs are rated. 1. Select “Rating” on the LOCK menu then press B. 2. To access the LOCK options, you must input the password you have created. -
Page 16: Operation
Operation General features Buttons Operations Z (OPEN / CLOSE) Opens or closes the disc tray. X (PAUSE) During playback, press X to pause playback. Press X repeatedly to play Frame-by-Frame. SKIP (. / >) During playback, press SKIP (. or >) to go to the next chapter/track or to return to the beginning of the current chapter/track. -
Page 17: Additional Features
Notes on general features: Zoom may not work on some DVDs. The A-B repeat function is available only in the current title. Additional features 1.5 times speed playback You can play at 1.5 times speed. The 1.5 speed allows you to watch the pictures and listen to the sound quicker than playing at a normal speed on the disc. -
Page 18: Playing An Audio Cd Or Mp3/Wma File
Playing an Audio CD or MP3/WMA file This unit can play Audio CDs or MP3/WMA files. MP3/ WMA/ Audio CD Once you insert an MP3/WMA files recording media or Audio CD a menu appears on the TV screen. Press v / V to select a track/file and then press PLAY or ENTER, and playback starts. -
Page 19: Viewing A Jpeg File
Viewing a JPEG file JPEG This unit can play discs with JPEG files. Before playing JPEG recordings, read the notes on JPEG Recordings on the right. 1. Insert a disc and close the tray. The PHOTO menu appears on the TV screen. PHOTO List Preview... -
Page 20: Playing A Divx Movie File
Playing a DivX Movie file Using this DVD/CD Receiver you can play DivX disc. 1. Insert a disc and close the tray. The MOVIE menu appears on the TV screen. MOVIE 0:00:00 List Movie Folder 1 Movie Folder 2 Movie Folder 3 Movie Folder 4 Movie Folder 5 Movie Folder 6... -
Page 21: Using Ipod
Using iPod You can enjoy playback of your iPod using the supplied remote control. iPod is a trademark of Apple Computer, Inc, registered in the U.S. and other countries. General operation 1. Connect your iPod and the unit with iPod cable. Refer to the page 9. - Page 22 Playing the iPod in the OSD iPod mode You can operate your iPod by controlling OSD menu on the TV screen with the supplied remote control. The controls on your iPod are not operational in the OSD iPod mode. 1. Press iPod on the Remote Control until “OSD IPOD”...
-
Page 23: Presetting The Radio Stations
Presetting the Radio Stations You can preset 50 stations for FM and AM (MW). Before tuning, make sure that you have turned down the volume. 1. Press BAND on the remote control until FM or AM (MW) appears in the display window. 2. -
Page 24: Sleep Timer Setting
XTS ON → NORMAL → XTS-P ON... XTS-P ON The unique sound quality of the LG Technology creates the optimum sound for you to play the perfect playback of the original sound and to feel the living sound source. -
Page 25: Controlling Your Tv With The Supplied Remote Control
Controlling other TVs with the Remote You can control the sound level, input source, and power switch of non-LG TVs as well. If your TV is listed in the table below, set the appropriate manufacturer code. 1. While holding down TV POWER button, press the number buttons to select the manufacturer code for your TV (Refer to table on the right column). -
Page 26: Language Codes
Language Codes Use this list to input your desired language for the following initial settings: Disc Audio, Disc Subtitle, Disc Menu. Language Code Language Abkhazian 6566 Fiji Afar 6565 Finnish Afrikaans 6570 French Albanian 8381 Frisian Ameharic 6577 Galician Arabic 6582 Georgian Armenian... -
Page 27: Troubleshooting
Troubleshooting Check the following guide for the possible cause of a problem before contacting service. Symptom • The power cord is disconnected. No power. • No disc is inserted. The power is on, but the DVD/CD Receiver does not work. •... - Page 28 Symptom • The antenna is positioned or connected Radio stations cannot poorly. be tuned in. • The signal strength of the stations is too weak (when tuning in with automatic tuning). • No stations have been preset or preset stations have been cleared (when tuning by scanning preset stations).
-
Page 29: Specifications
Specifications Power supply Power consumption Net Weight External dimensions (W x H x D) Operating conditions Operating humidity Laser Signal system Frequency response (audio) Signal-to-noise ratio (audio) Dynamic range (audio) Harmonic distortion (audio) Video input Video output COMPONENT VIDEO OUT Tuning Range Intermediate Frequency Signal-to Noise Ratio... - Page 30 Limited Warranty - USA This LG Electronics product, will be repaired or replaced, at LG’s option, if it proves to be defective in material or workmanship, under normal use, during the warranty period (“Warranty Period”) listed below, effective from the date (“Date of Purchase”) of original consumer purchase of the product.