Panasonic UB-7325 Operating Instructions Manual
Electronic board
Hide thumbs
Also See for UB-7325:
- Operating instructions manual (44 pages) ,
- Installation manual (16 pages)
Table of Contents
Advertisement
Quick Links
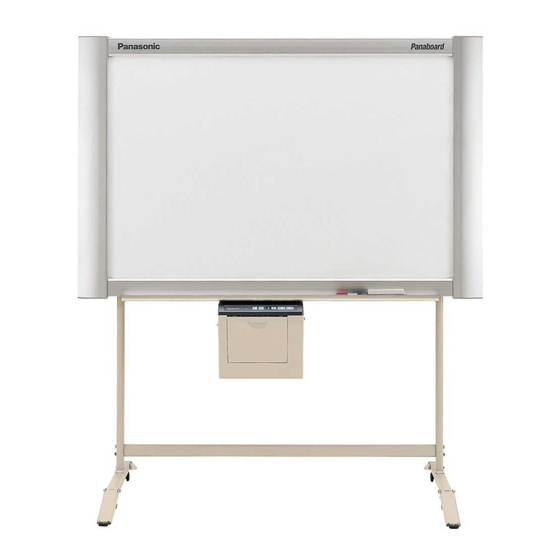
[Stand (option)]
[Wall-mounting (option)]
Stand and Wall-mounting kit are optional.
• To assemble this unit, please refer to the Installation Manual.
• Before operating this unit, please read these instructions completely and keep them carefully for future reference.
• Because of the nature of the print film, all the printed text will remain on the film.
Electronic Board
Operating Instructions
Model No.
English . . . . . . . . . . . . . . . . . .1–28
Français . . . . . . . . . . . . . . . .29–56
Deutsch . . . . . . . . . . . . . . . .57–84
Español . . . . . . . . . . . . . . .85–112
Italiano . . . . . . . . . . . . . . .113–140
Nederlands . . . . . . . . . . .141–168
Svenska . . . . . . . . . . . . . .169–196
中 文 . . . . . . . . . . . . . . . .197–224
Русский . . . . . . . . . . . . . .225–252
UB-7325
Advertisement
Table of Contents

Related Manuals for Panasonic UB-7325


Summary of Contents for Panasonic UB-7325
- Page 1 Electronic Board Operating Instructions [Stand (option)] [Wall-mounting (option)] UB-7325 Stand and Wall-mounting kit are optional. Model No. English ....1–28 Français ....29–56 Deutsch .
- Page 2 Thank you for purchasing the Panasonic Electronic Board. For optimum performance and safety, please read these instructions carefully. Record these items for future reference Model number: _________________________ Date of purchase: ________________________ Serial number: _________________________ Dealer’s name: __________________________ Dealer’s address: ______________________________________________________________________...
-
Page 3: Table Of Contents
• Removing Panasonic-DMS ........ -
Page 4: For Your Safety
TO PREVENT FIRE OR SHOCK HAZARD, DO NOT cover is obtained. A replacement fuse cover can be EXPOSE THIS PRODUCT TO RAIN OR ANY TYPE purchased from your local Panasonic Dealer. OF MOISTURE. If the fitted moulded plug is unsuitable for the socket... -
Page 5: Precautions
Precautions Precautions Never remove the cover, take apart or modify the Do not position the electronic board in a location where product. This will void the warranty. it is unstable. Do not put drinks, other liquids or heavy items on the After installing or moving the electronic board, lock the tray or screen. -
Page 6: Cd-Rom
Precautions Do not lean against the screen or on the cover (lower), Have the unit installed, removed and even if the electronic board is mounted on the wall. disposed of only by qualified service personnel. CHOKING HAZARD When the unit will no longer be used, in order to prevent it from falling, do not leave the unit Keep the marker’s cap out of reach of installed, but remove it. - Page 7 • Use a shielded USB cable that is certified as logo by USB-IF. • If you connect the electronic board to a USB hub, it is not guaranteed to work. • Do not connect two or more Panasonic electronic boards to a computer. It may cause the computer operation to become unstable.
-
Page 8: Part Names And Functions
Part Names and Functions Part Names and Functions Scanner Screen One screen (with no ruled lines) of four screens can also be used for a projector (see page 14). Tray Printer Stand The stand is optional. Output Port Control Panel This port holds up to 10 (See page 9 for details.) sheets of output paper. -
Page 9: Control Panel
Part Names and Functions ■ Control panel Reverse Key Contrast/Remaining Film Advance Key Indicator Contrast Key Multi-Copy/Stop Key Copy Key Multi-Copy/Error Indicator Panel Name Description This lamp indicator notifies the user when the time to replace the thermal transfer film is approaching (estimated) and of the printing contrast used during copying. Indicator off: Normal printing contrast Indicator on:... -
Page 10: Installing The Thermal Transfer Film
Installing the Thermal Transfer Film 2) Insert the blue shaft into the front left hole. Installing the Thermal Transfer Film Install the thermal transfer film in the printer. Set the power switch to on ( I ). Blue shaft • “ ”... -
Page 11: Loading Copy Paper
Loading Copy Paper Tighten the film, then close the printer door. Loading Copy Paper 1) Rotate the blue gear in the direction of the arrow to take up the slack on the film. It is possible to load up to 40 sheets of A4 (Letter*) size copy paper (assuming a paper weight of 80 g/m Note that only A4 (Letter*) size paper may be used. - Page 12 Loading Copy Paper Pull the paper cover forward as shown in the Close the paper cover until a click is heard. figure. Note To prevent paper jams such as those caused by multiple sheets feeding at once, fan the • Close the paper cover, or the unit will not paper thoroughly, square it, align it with the work properly.
-
Page 13: Making Copies
Making Copies Note Making Copies • Do not use paper that has been copied on one side by this printer as copy paper in this This section describes how to copy text and unit or in any other copiers or printers as this illustrations drawn on the screen. -
Page 14: Using The Projector Screen
• Only use the designated product (UG-6001) from screen with no ruled lines. Panasonic as the replacement film. (Note that using another type of replacement film may result in degraded printing quality or damage to the unit.) Project an image on the screen. -
Page 15: Paper Jams
Paper Jams Install the thermal transfer film. Paper Jams • Refer to steps 3 and 4 in the section of “Installing the Thermal Transfer Film” on Remove paper jams by the following procedure when page 10. copy paper does not come out of the output port or •... - Page 16 Paper Jams To prevent paper jams such as those caused Turn the power on. by multiple sheets feeding at once, fan the • “ ” will light on the Multi-Copy/Error Indicator paper thoroughly, square it, align it with the to indicate that the unit is ready to copy. guide inside, and insert as far as it will go.
-
Page 17: Computer Interfacing
• If you connect the electronic board to a USB hub, it is not guaranteed to work. • Do not connect two or more Panasonic electronic This electronic board does not function with Hi-Speed boards to a computer. It may cause the computer USB 2.0. -
Page 18: Installing Drivers / Board Image Capture
Computer Interfacing ■ Installing Drivers / Board Image When the following window appears, check Capture that the electronic board is not connected to your computer and click [OK]. The USB, printer, TWAIN driver and Board Image Capture are installed in your computer by following procedures. -
Page 19: Installing Quick Image Navigator / Panasonic-Dms
Reader must be installed on your computer. Windows 7: Quick Image Navigator For Windows 98 / Windows Me: Panasonic-DMS If Panasonic-DMS is already installed, you do not ■ Removing Drivers / Board Image need to uninstall it. Capture / Quick Image Navigator Power on your computer and start Windows. -
Page 20: Removing Panasonic-Dms
(Scan) button. ■ Removing Panasonic-DMS • When scanning is completed, the Save Scan Image dialog box appears. If you need to remove Panasonic-DMS, perform the following steps. Power on your computer and start Windows. Click [Start], move the pointer to Programs–... -
Page 21: Scanning With The Quick Image Navigator / Panasonic-Dms
TWAIN tab, then click Select TWAIN- the Panaboard Operation Panel is displayed compliant scanning device..using Quick Image Navigator or Panasonic-DMS. For Panasonic-DMS: Click the File menu, then To start Board Image Capture, click [Close] in click Select source..the Panaboard Operation Panel window, then start Board Image Capture. -
Page 22: Panaboard Operation Panel
Computer Interfacing ■ Panaboard Operation Panel It is possible to perform the same operations as with the electronic board control panel (page 9) from the following Panaboard Operation buttons. Note • While the Panaboard Operation Panel is displayed, the Copy Key on the electronic board control panel is used for scanning images into the computer. -
Page 23: Printing
Computer Interfacing Panel Name Description Copy Button This button causes the screen to be copied. The status box displays the status of the TWAIN driver and the electronic board. Stand by: The electronic board is stand by. Both of the Panaboard Operation Panel and the electronic board control panel are operational. -
Page 24: Daily Care And Maintenance
Daily Care and Maintenance ■ Caring for the eraser Daily Care and Maintenance When the erasing surface of the eraser becomes dirty, hold down the sheet under the top sheet with your finger and peel off the dirty sheet (white or gray Always turn off the power switch and unplug the sheet) by pulling in the direction of the arrow. - Page 25 Daily Care and Maintenance Install the thermal transfer film in its original Clean the Printer Head position and close the printer door. Dampen the tip of a cotton swab in ethyl alcohol and gently wipe the printer head. Latches Cotton swab •...
-
Page 26: Help Troubleshooting
Install the new Panasonic-DMS again as follows. deleted from the Programs menu 1. Uninstall the current Panasonic-DMS. 19-20 or cannot be used after installing 2. Install the old Panasonic-DMS. the Panasonic-DMS. 3. Install the new Panasonic-DMS in the same folder with the old one. -
Page 27: Meanings Of Error Codes
Troubleshooting The old Panasonic-DMS is not uninstalled if the old version of the Panasonic Document Panasonic-DMS has been installed before installing the new one. Uninstall the old Panasonic-DMS from the Add / Remove Management System menu is Programs of the Control Panel. (Refer to “Removing Drivers / remained in the Programs menu Board Image Capture / Quick Image Navigator”... -
Page 28: Specifications
Specifications Specifications Model No. UB-7325 General Power supply Refer to the name plate on the printer Power consumption (Operational) Refer to the name plate on the printer 1396 mm × 1648 mm × 264 mm External dimensions (Height × Width × Depth,...