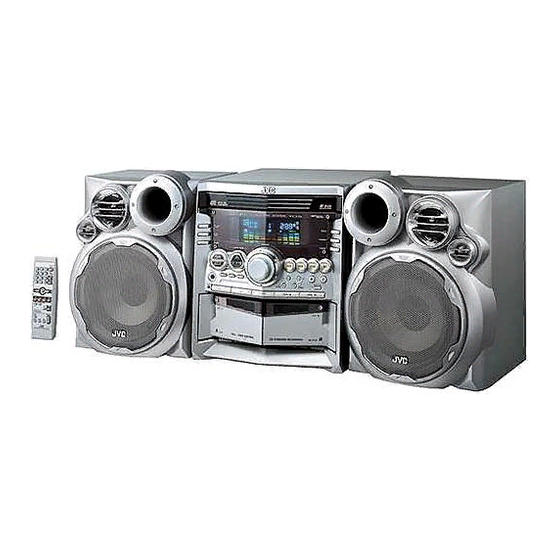
JVC MX-KA3 Service Manual
Compact component system
Hide thumbs
Also See for MX-KA3:
- (36 pages) ,
- Instructions manual (32 pages) ,
- Instructions manual (29 pages)
Table of Contents
Advertisement
SERVICE MANUAL
COMPACT COMPONENT SYSTEM
Contents
Safety precautions ---------------------------- 1- 2
Preventing static electricity ----------------- 1- 3
Important for laser products ---------------- 1- 4
Disassembly method ------------------------ 1- 5
Adjustment method -------------------------- 1- 18
MX-KA3
SP-MXKA3
CA-MXKA3
COPYRIGHT
2003 VICTOR COMPANY OF JAPAN, LTD.
SP-MXKA3
operation until TOC read -------------- 1- 20
Maintenance of laser pickup -------------- 1- 21
Replacement of laser pickup -------------- 1- 21
Description of major ICs ------------------- 1- 22
Wiring connection --------------------------- 1- 33
MX-KA3
Area Suffix
A ........................... Australia
UJ ..................... U.S.Military
UW ................ Latin America
U ................................. Asia
No.22081
Aug. 2003
Advertisement
Table of Contents

Related Manuals for JVC MX-KA3


Summary of Contents for JVC MX-KA3
-
Page 1: Table Of Contents
MX-KA3 SERVICE MANUAL COMPACT COMPONENT SYSTEM MX-KA3 SP-MXKA3 CA-MXKA3 SP-MXKA3 Area Suffix A ......Australia UJ ..... U.S.Military UW ....Latin America U ......... Asia Contents Safety precautions ---------------------------- 1- 2 Flow of functional Preventing static electricity ----------------- 1- 3... -
Page 2: Safety Precautions
MX-KA3 Safety Precautions 1. This design of this product contains special hardware and many circuits and components specially for safety purposes. For continued protection, no changes should be made to the original design unless authorized in writing by the manufacturer. Replacement parts must be identical to those used in the original circuits. -
Page 3: Preventing Static Electricity
MX-KA3 Preventing static electricity 1. Grounding to prevent damage by static electricity Electrostatic discharge (ESD), which occurs when static electricity stored in the body, fabric, etc. is discharged, can destroy the laser diode in the traverse unit (optical pickup). Take care to prevent this when performing repairs. -
Page 4: Important For Laser Products
MX-KA3 Important for laser products 1. CLASS 1 LASER PRODUCT 5. CAUTION : If safety switches malfunction, the laser is able to function. 2. DANGER : Invisible laser radiation when open and inter lock failed or defeated. Avoid direct exposure to 6. -
Page 5: Disassembly Method
MX-KA3 Disassembly method Commence disassembly of the set by removing the main units and then proceed to the components and assemblies inside the units. Replacement of the fuses and the power IC Top cover CD changer unit Front panel assembly... - Page 6 MX-KA3 <Disassembly of the main blocks of the set> Replacement of the fuses and the power IC Replacing the fuses (See Fig.1) Replacing the heat sink cover (See Fig.3) Prior to performing the following procedure, remove 1. Remove four screws B from the rear panel.
- Page 7 MX-KA3 Removing the top cover (See Fig.4 and 5) 1. Remove six screws C that retain the top cover from the panel rear of the body. 2. Remove six screws D that retain the top cover from the two sides of the body.
- Page 8 MX-KA3 Removing the CD changer unit (See Fig.6 to 9) Prior to performing the following procedures, remove the top cover. Antenna termianl [Caution] Although the CD mechanism unit can be removed without removing the CD tray panel, it is still recommended to remove it terminal in order to prevent damage.
- Page 9 MX-KA3 Removing the front panel assembly (See Fig.10 to 11) Prior to performing the following procedures, remove the top cover. Also remove the CD changer unit. 1. Disconnect the parallel wire and the cord wire from the connectors CN701, CN101 on the power amp.
- Page 10 MX-KA3 <Disassembly of units and assembly inside this set> CD PCB Removing the CD PCB (See Fig.12 to 13) Prior to performing the following procedures, remove the top cover. Also remove the CD changer unit. 1. Disconnect the wires from CN603A, CN603B and CN604 on the CD PCB, which is located on the back side of the CD changer unit.
- Page 11 MX-KA3 Removing the CD changer mechanism CD changer assembly (See Fig.14 to 15) unit Prior to performing the following procedures, remove the top cover. Also remove the CD changer unit. 1. Turn the CD changer mechanism cover base and remove the screws d connecting the unit to the CD changer mechanism assembly.
- Page 12 MX-KA3 Removing the CD pickup (See Fig.16) CD pickup Prior to performing the following procedures, remove the top cover. Also remove the CD changer unit. Also remove the CD changer mechanism. 1. Widen the section f. 2. While keeping the section f wide open, push the section g in the direction of the arrow to remove the shaft, and then remove the CD pickup.
- Page 13 MX-KA3 Removing the cassette deck mechanism (See Fig.19) Front panel assembly Prior to performing the following procedures, remove the top cover. Also remove the CD changer unit. Also remove the front panel assembly. 1. Remove six screws Z retaining the cassette deck mechanism.
- Page 14 MX-KA3 Removing the switch PCB and sound mode and CD function switch PCB (See Fig.20 to 23) Front panel assembly Prior to performing the following procedures, remove the top cover. Also remove the CD changer unit. Also remove the front panel assembly.
- Page 15 MX-KA3 Removing the cassette deck main motor, Cassette deck mechanism and replacing the main belts (Front side) (See Fig.19, 24 and 25) Prior to performing the following procedures, remove the top cover and both sides board. Also remove the CD changer unit.
- Page 16 MX-KA3 Removing the cassette deck heads Cassette deck mechanism (See Fig. 19 and 27) (Front side) Prior to performing the following procedures, remove the top cover and both sides board. Also remove the CD changer unit. Also remove the front panel assembly.
- Page 17 MX-KA3 Removing the power amp and supply PCB and the power trans PCB (See Fig. 2, 29 to 31) Prior to performing the following procedures, remove the top cover and CD changer unit. 1. Remove four screws B from the rear panel. (Fig.3) 2.
-
Page 18: Adjustment Method
MX-KA3 Adjustment method Measurement instruments required Radio input signal for adjustment AM modulation frequency : 400Hz 1. Low frequency oscillator. Modulation factor : 30% This oscillator should have a capacity to output FM modulation frequency : 1kHz 0dB to 600ohm at an oscillation frequency of Frequency displacement : 22.5kHz... -
Page 19: Tuner Section
MX-KA3 Arrangement of adjusting positions Cassette deck mechanism (Front side) PB Head REC/PB Head (Deck-A) (Deck-B) Head azimuth screw Head azimuth screw (Forward side) (Forward side) Head azimuth screw Head azimuth screw (Reverse side) (Reverse side) Tape recorder section Adjusting... -
Page 20: Flow Of Functional Operation Until Toc Read
MX-KA3 Flow of functional operation until TOC read Check Point Slider turns REST Confirm that the voltage at the pin5 Play Key Power ON SW ON. of CN602 is "H"\"L"\"H". Automatic tuning of TE offset Check that the voltage at the... -
Page 21: Maintenance Of Laser Pickup
MX-KA3 Maintenance of laser pickup Replacement of laser pickup (1) Cleaning the pick up lens Turn off the power switch and,disconnect the Before you replace the pick up, please try to clean power cord from the AC OUTLET. the lens with a alcohol soaked cotton swab. -
Page 22: Description Of Major Ics
MX-KA3 Description of major ICs STK402-070 (IC304) : Dual low noise operational 1. Terminal layout DBA4DC 10000 F +V CC -V CC 10000 F 2. Block diagram TR11 TR12 TR14 TR15 TR10 TR13 TR16 3. Application circuit 1-22... - Page 23 MX-KA3 Optical disc ICs BA5936S. (IC621) 1. Pin descriptions 2. Block diagram 1-23...
- Page 24 MX-KA3 Optical disc ICs HA12237F (IC401) 1. Block Diagram Pin Description, Equivalent Circuit (cont) = 12V, Ta = 25˚C, No Signal, The value in the table shows typical value.) Pin No. Pin Name Note Equivalent Circuit Description V = V...
- Page 25 MX-KA3 Pin Description, Equivalent Circuit = 12V, Ta = 25˚C, No Signal, The value in the table shows typical value.) Pin No. Pin Name Note Equivalent Circuit Description V = V RECOUT(L) V = V REC output RECOUT(R) PBOUT(L) PB output...
- Page 26 MX-KA3 Pin Description, Equivalent Circuit (cont) = 12V, Ta = 25˚C, No Signal, The value in the table shows typical value.) Pin No. Pin Name Note Equivalent Circuit Description ALC ON/OFF (Control Mode control input voltage = 3 V) High/Norm...
-
Page 27: Block Diagram
MX-KA3 AN22000A (IC611) : CD-DA Head Amp. 1. Terminal layout 2. Pin function Function Function Symbol I/O Symbol I/O APC Amp. input terminal 15 NRFDET O NRFDET output terminal O APC Amp. output terminal 16 GND Ground Power supply terminal... - Page 28 MX-KA3 MN6627482WA (IC601) : Digital servo & digital signal processor 1. Terminal layout 80~61 21~40 2. Pin function Symbol Function Symbol Function 1 BCLK Not use 41 PLLF2 Not use 2 LRCK Not use 42 TOFS Not use 3 SRDATA...
- Page 29 MX-KA3 BA15218 (IC102) : Dual low noise operational amp. 1. Terminal layout OUT1 - IN1 OUT2 +IN1 - IN2 +IN2 LA1823DIP (IC1) : 1chip AM/FM, MPX tuner system 1. Block diagram GND2 VCC2 MUTE PHASE PILOT DECODER COMP ST SW...
- Page 30 MX-KA3 TDA7440D (IC101) : Audio processor 1. Terminal layout RIN3 RIN4 RIN2 LOUT RIN1 ROUT LIN1 AGND LIN2 LIN3 CREF LIN4 MUXO-L IN(L) DGND MUXO-R TRE(R) IN(R) TRE(L) BIN(R) N.C. BOUT(R) N.C. BIN(L) BOUT(L) 2. Block diagram MUXO-L IN(L) TRE(L)
- Page 31 MX-KA3 TC74HC4094AP (IC402) : 8-bit shift and store resister 1. Terminal layout 2. Block diagram Ø Ø Ø Ø Ø Ø Ø Ø Ø Ø Ø Ø Ø Ø Ø Ø Ø Ø Ø Ø Ø Ø Ø Ø ØS ØS...
- Page 32 MX-KA3 LC72136N (IC2) : PLL Frequency synthesizer 1.Terminal layout LPFI LPFO CLOCK VCOSTOP FMIN AM/FM AMIN IFCNT SDIN IFIN 2. Block diagram Phase Reference Detector Driver Charge Pump Swallow Counter Swallow Counter 1/16,1/17 4bit 1/16,1/17 4bit Unlock Detector 12bit Programmable...
-
Page 33: Wiring Connection
MX-KA3 Wiring Connection 1-33... - Page 34 MX-KA3 VICTOR COMPANY OF JAPAN, LIMITED AV & MULTIMEDIA COMPANY AUDIO/VIDEO SYSTEMS CATEGORY 10-1,1Chome,Ohwatari-machi,Maebashi-city,371-8543,Japan Printed in Japan No.22081 200308...