
Related Manuals for Sanyo ICR-S240RM


Summary of Contents for Sanyo ICR-S240RM
- Page 1 INSTRUCTION MANUAL ICR-S240RM ICR-S250RM Digital Voice Recorder English Deutsch Français Nederlands...
-
Page 2: Table Of Contents
The symbols ® are not shown in this manual. SANYO takes no responsibility for recording failure due to power cuts or damage to the unit. To avoid potential risk of data loss caused by accidental operation or malfunction of the unit, we recommend that you save a backup copy of your recorded messages on a PC, etc.. - Page 3 Note: This handling description is printed prior to product development. When a part of the product specification must be changed to improve operability or other functions, priority is given to the product specification itself. In such instances, the instruction manual may not entirely match all the functions of the actual product.
-
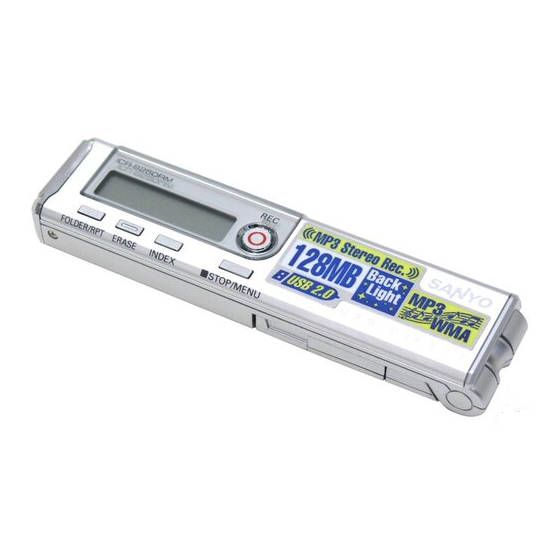
Page 4: Controls
Controls 1. Recording indicator 2. External stereo microphone socket ( 3. Jog switch (f a POWER e) (Power/Play/Speed/Skip/Search) 4. Volume buttons (VOLUME) 5. Hold switch (b HOLD) 6. Speaker 7. Battery compartment lid 8. USB terminal protector 9. USB terminal 10. - Page 5 LCD display 1. Battery 2. Record 3. Recording mode 4. Timer 5. Alarm 6. VAS (Voice activated system) 7. Microphone sensitivity 8. Repeat/Random/A-B Repeat 9. AM/PM 10. Time/Message/Mode display GB-4 [ENGLISH]...
-
Page 6: Before Use
Before use Inserting battery Install AAA/LR03/HP16 alkaline battery (supplied) Battery indicator Check the battery indicator on the LCD display for remaining battery power. : Good condition : Weak battery : Exhausted battery, must be replaced with new alkaline battery. If not, after displaying “LO bAT”, the LCD display goes out. -
Page 7: Using The Headphones
Using the headphones Connect the headphones to the socket. The speaker is automatically disconnected. Using an external stereo microphone Connect an external stereo microphone (not supplied) to the socket. The built-in microphones are automatically disconnected. Using the USB cover terminal Be sure to install the USB cover stand when using it under the condition that this opportunity is made. -
Page 8: Turning The Power On And Off
Turning the power on and off Press the Jog switch. “HELLO” appears briefly on the display and the power turns on. Then the last selected file number and total playing time appear (Resume function). Press the Jog switch for at least 2 seconds. “-byE-” appears and the power turns off. - Page 9 Date and time setting Make absolutely sure that the date and time are correctly set before starting a recording. In the stop mode, press the n STOP/MENU button for at least 2 seconds. The first stage menu appears. 2. Move the Jog switch up or down to select “COMMON”.
-
Page 10: Recording Time
Recording Recording time The recording time differs as shown below. ICR-S240RM Recording mode Recording time (approx.) SHQ: Super high-quality 1 hr. (stereo) HQ: High-quality 2 hr. 5 min. (stereo) SP: Standard 4 hr. 15 min. (stereo) LP: Long 8 hr. 35 min. (monaural) - Page 11 Starting recording Press the FOLDER/RPT button to select a folder (A, b, C or d). Press the m REC button. Recording starts. File number Remaining recording time To stop recording Press the n STOP/MENU button. To pause recording Press the m REC button. Press it again to resume recording.
- Page 12 VAS recording VAS: Voice activated system 1. In the stop mode, press the n STOP/MENU button for at least 2 seconds. Move the Jog switch up or down to select “VOICE”, then press the Jog switch. 2. Move the Jog switch up or down to select “VAS”.
-
Page 13: Playback
Playback 1. Press the FOLDER/RPT button to select a folder (A, b, C, d or M). 2. Move the Jog switch up or down to select a file. 3. Press the Jog switch. Playback begins. Elapsed playing time File number To stop playback Press the n STOP/MENU button. - Page 14 Fast reverse play Move the Jog switch down (f) during playback and hold it. This fast reverses the file currently being played. Once the beginning of the file is reached, reverse continues from the end of the previous file. Release the Jog switch to resume normal playback. To skip to the next or previous file Move the Jog switch up (e) or down (f) during playback or stop.
-
Page 15: Selecting Display
A-B repeat playback 1. During playback, press the FOLDER/RPT button at the beginning of the section you want to repeat (Point A). 2. Press the FOLDER/RPT button again at the end of the section you want to repeat (Point B). The specified section (between points A and B) is played back repeatedly. -
Page 16: Erasing
Erasing Erasing the selected file 1. Press the FOLDER/RPT button to select the folder. 2. Move the Jog switch up or down to select the file to be erased. Press the ERASE button. 4. While the display is blinking, press the ERASE button for at least 2 seconds. The selected file is erased. - Page 17 Formatting (Erasing all files in all folders) If you select the format function from the menu, the memory will be initialized and all files will be erased. Use only when you need it. Save a backup copy of your recorded messages on a PC, etc. if required. 1.
-
Page 18: Using Timer
Using timer Alarm timer A file can be played (or the alarm sounded) at a designated time. In the case of file playback, place the file to be played in the ALARM folder ahead of time (See page 31). The alarm will sound for 10 seconds if there are no files in the ALARM folder. -
Page 19: Timer Recording
Timer recording Recording can be started at a designated time. The recorded file will be created in the designated folder. 1. Follow steps 1 - 2 of “Alarm timer”. 2. Move the Jog switch up or down to select “TIM ON”. Then press the Jog switch. -
Page 20: Menu Setting
Menu setting Common procedures of menu setting 1. In the stop mode, press the n STOP/MENU button for at least 2 seconds. The first stage menu appears. 2. Move the Jog switch up or down to select the first stage menu. Each time the Jog switch is moved, the display changes as follows: “VOICE”... - Page 21 VOICE dIVIdE: Dividing a file You can use the file dividing function to get rid of unneeded parts or extract only those that are needed. y: execute file division in this position. N: return to menu screen. Note: Short files or files in the MUSIC folder cannot be divided. The divided parts of files will overlap for a few seconds with files before and after.
- Page 22 COMMON bEEP: Selecting the beep sound Turning on and off the beep when buttons are pressed. OFF: Beep off ON: Beep on CALENdAR: Date and time setting (see page 8) TIMER: Using timer (see page 17) FORMAT: Formatting (see page 16) REC LEd: Selecting the recording LED ON: Rec LED on OFF: Rec LED off...
-
Page 23: Connecting To Pc
Connecting to PC Recommended PC environment Supported PCs IBM PC/AT compatible Supported OS Windows XP Professional Windows XP Home Edition Windows 2000 Professional Windows Millennium Edition(Me) Windows 98 Second Edition Windows 98 USB port One required for connection Sound board 16-bit Windows-compatible sound board supported Other Speakers or headphones required... -
Page 24: Installing The Usb Driver
Reproduction of this driver is forbidden. This driver shall not be copied and reprinted. SANYO shall not be liable for any damages arising out of the use of this driver. 1. Turn on your PC and Windows is started. Do not connect the unit to the PC yet. - Page 25 4. Click [Next]. 5. Check that [Yes, I want to restart ...] is selected, then click [Finish]. The PC will restart. Connect the unit to the PC (See the next page). The USB driver is recognized by the PC automatically and the unit is displayed as Removable Disk.
-
Page 26: Connect The Unit To Your Pc
Connect the unit to your PC The USB terminal can be connected directly to the one on your PC. Remove the USB terminal protector and connect in accordance with the direction of the terminal. Forcing it may break the terminal. If required, use the USB connection cable (supplied). - Page 27 Selecting the action Windows is to take After connection, the following screen will appear (Windows XP only). For Windows98/98SE/ME/2000, this operation is not needed. The screen shots are of Windows XP. 1) Select 3) Click 2) Check Adjust your settings to match your PC’s environment. In this manual, [Take no action] is selected, [Always do the selected action] is checked, and [OK] is clicked.
-
Page 28: Disconnecting The Unit From Your Pc
Disconnecting the unit from your PC Before disconnecting, make sure no data is being transferred. For Windows98/98SE Disconnect the unit from your PC. For Windows XP/2000/ME Follow the steps below to disconnect. (The screen shots are of Windows XP.) The screen might be different for a different OS. 1. - Page 29 4. Check that [SANYO IC Recorder USB Device] is in the list, select [USB Mass Storage Device] and click [OK]. 5. Disconnect the unit from your PC. GB-28 [ENGLISH]...
-
Page 30: Displaying By Explorer
Displaying by Explorer To start up Explorer To use the same Explorer screen as the ones used in this manual, start up the Windows XP Explorer as follows. The screens displayed on your PC may not exactly correspond to those shown in this manual depending on the OS version and manufacturer. -
Page 31: Removable Disk Display
Removable Disk display An icon for a Removable Disk will appear in My Computer in Windows when the unit is connected to your PC. [VOICE_IC] folder Files recorded using the unit are stored here. Files recorded in the internal memory A folder are stored in the A folder inside the VOICE_IC folder with the name “IC_A_XXX (file number). - Page 32 [DATA_IC] folder This folder stores data files (Excel, Word, etc.) as a Removable Disk. [ALARM] folder MP3/WMA files played when the alarm sounds are stored in this folder. The alarm will sound if there are no files in the ALARM folder. Only one file can be played.
-
Page 33: Copying Data By Using Explorer
Copying data by using Explorer Start up Explorer (See page 29). (1) Copying files to the unit Select the MP3/WMA files to copy and drag and drop them to the MUSIC_IC folder in the Removable Disk drive. Be sure to place the files in the MUSIC_IC folder in the Removable Disk. The files cannot be played if they are placed in the VOICE_IC folder. -
Page 34: Transferring Data Using The Media Player
Transferring data using the Media Player If you have the Microsoft Windows Media Player installed, you can transfer WMA files to the unit and listen to them. See the Windows Media Player online help for details on how to do this. The screens displayed on your PC may not exactly correspond to those shown in this manual, depending on the OS version and manufacturer. - Page 35 4. Click [Copy] button. Transfer is complete once [Status] changes from [Copying] to [Complete]. Important note: Never disconnect the unit from your PC during transfer. Precaution when copying WMA files to the unit: Transfer from your PC to the unit and/or playback are impossible in the following cases.
- Page 36 3. Open [Copy Music] in tab. Make sure that [Copy protect music] is not checked. 4. Click [Apply] then [OK]. Note: Repeatedly transferring data from your PC and/or deleting data will cause the transfer rate to slow. If this happens, turn the unit off and on. Some MP3/WMA files may not be able to be played on this unit.
- Page 37 Designating the playback order (Playlist) It is possible to designate the playback order of music. Create a playlist on your PC and transfer it to the unit to play your music in that order. It is also possible to transfer two or more playlists to the unit. 1.
- Page 38 Playing back music files in the created folder When transfering files to the unit, you can create a folder in the MUSIC_IC folder and copy files to that folder. It is possible to create two or more folders. Note: Folders are created directly in the MUSIC_IC folder. To select the folder: 1.
-
Page 39: Troubleshooting Guide
Troubleshooting guide Symptom Possible cause Corrective action The unit does not start. Battery is not inserted properly or is dead. Reinsert the battery correctly or replace with new alkaline battery. Internal memory error. Format (initialize) the internal memory and then reattempt recording. Buttons do not respond. - Page 40 Symptom Possible cause Corrective action The Removable Disk is not displayed when the unit is connected to the PC. The PC and the unit are not connected correctly. Make sure the connect is corrected. Disconnect the unit from the PC and reconnect it again. Sufficient power is not being supplied from the PC.
-
Page 41: Cleaning The Cabinet
Do not use benzene, thinner or alcohol since they will mar the finish of the surfaces. SERVICE UNITED KINGDOM For online support and assistance contact: UK: Freephone: 0800 328 7060 (Mon–Fri, 8am–5pm) Outside of UK: +44 1582 730 730 (Mon–Fri, 8am–5pm) Email: dictationsupport@sanyo.co.uk or visit our website www.sanyodictation.co.uk GB-40 [ENGLISH]... -
Page 42: Specifications
Specifications Internal memory: 64MB (ICR-S240RM), 128MB (ICR-S250RM) Frequency response (over all): 40Hz - 15kHz (Built-in microphone, SHQ) 40Hz - 7.5kHz (Built-in microphone, HQ) 40Hz - 3.5kHz (Built-in microphone, SP) 40Hz - 3.5kHz (Built-in microphone, LP) Frequency response (playback): 20Hz - 20kHz Music playback capability: MP3 (16 - 44.1kHz, 16 - 192kbps)