Table of Contents
Advertisement
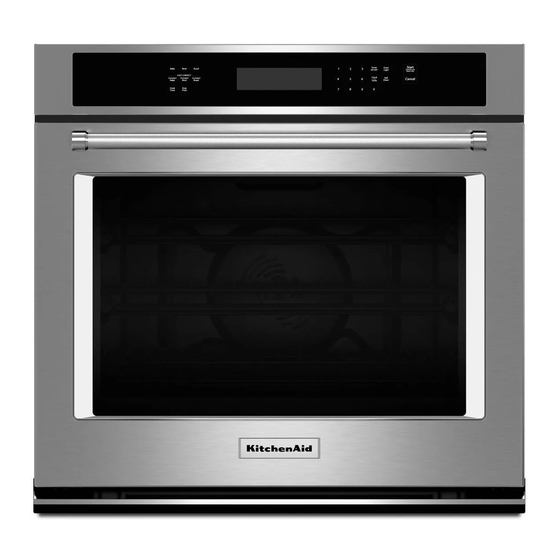
27" (68.6 CM) AND 30" (76.2 CM) ELECTRIC
SINGLE AND DOUBLE BUILT-IN OVEN
FOUR ÉLECTRIQUE ENCASTRÉ 27" (68,6 CM) ET 30"
BUILT-IN OVEN SAFETY ...............................................................2
INSTALLATION REQUIREMENTS ................................................2
Tools and Parts ............................................................................2
Location Requirements................................................................3
Electrical Requirements ...............................................................6
INSTALLATION INSTRUCTIONS ..................................................7
Prepare Built-In Oven...................................................................7
Remove Oven Door(s) ..................................................................7
Replace Oven Door(s) ..................................................................7
Make Electrical Connection .......................................................13
Install Oven.................................................................................14
Above Warming Drawers) ..........................................................15
Complete Installation .................................................................16
IMPORTANT:
Save for local electrical inspector's use.
IMPORTANT :
À conserver pour consultation par l'inspecteur local des installations électriques.
W10725670B
INSTALLATION INSTRUCTIONS
INSTRUCTIONS D'INSTALLATION
(76,2 CM) - SIMPLE ET DOUBLE
Table of Contents/Table des matières
SÉCURITÉ DU FOUR ENCASTRÉ ..............................................17
EXIGENCES D'INSTALLATION ...................................................17
Outillage et pièces......................................................................17
Exigences d'emplacement.........................................................18
Spécifications électriques ..........................................................21
INSTRUCTIONS D'INSTALLATION.............................................22
Préparation du four encastré .....................................................22
Dépose de la/des porte(s) du four .............................................22
Réinstallation de la/des porte(s) du four ....................................23
Positionnement des pieds du four pour des ouvertures
d'encastrement de hauteur différente........................................24
Raccordement électrique...........................................................28
Installation du four......................................................................29
Installation de l'ensemble de déflecteur du tiroir-réchaud
(uniquement pour les fours installés au-dessus d'un tiroir-
réchaud)......................................................................................31
Achever l'installation ..................................................................32
Advertisement
Table of Contents

Related Manuals for KitchenAid KODE300E


Summary of Contents for KitchenAid KODE300E
-
Page 1: Table Of Contents
INSTALLATION INSTRUCTIONS 27" (68.6 CM) AND 30" (76.2 CM) ELECTRIC SINGLE AND DOUBLE BUILT-IN OVEN INSTRUCTIONS D’INSTALLATION FOUR ÉLECTRIQUE ENCASTRÉ 27" (68,6 CM) ET 30" (76,2 CM) - SIMPLE ET DOUBLE Table of Contents/Table des matières BUILT-IN OVEN SAFETY ...............2 SÉCURITÉ... -
Page 2: Built-In Oven Safety
BUILT-IN OVEN SAFETY Your safety and the safety of others are very important. We have provided many important safety messages in this manual and on your appliance. Always read and obey all safety messages. This is the safety alert symbol. This symbol alerts you to potential hazards that can kill or hurt you and others. -
Page 3: Location Requirements
Location Requirements IMPORTANT: Observe all governing codes and ordinances. Undercounter Installation (With Cooktop Installed Above): Cabinet opening dimensions that are shown must be used. Ovens approved for this type of installation have an approval ■ Given dimensions provide minimum clearance with oven. label located on the top of the oven. - Page 4 Single Ovens Installed in Cabinet Cabinet Dimensions - Single Ovens Single Oven Undercounter (Without Cooktop Installed Above) 27" (68.6 cm) models 30" (76.2 cm) models A. 27" (68.6 cm) min. cabinet A. 30" (76.2 cm) min. cabinet width width ¹⁄₂ ¹⁄₂...
- Page 5 Product Dimensions - Double Ovens Cabinet Dimensions - Double Ovens Double Ovens Installed in Cabinet 27" (68.6 cm) models 30" (76.2 cm) models 27" (68.6 cm) models 30" (76.2 cm) models A. 51 ³⁄₁₆ " (130.0 cm) max. overall A. 51 ³⁄₁₆...
-
Page 6: Electrical Requirements
For power requirements for models KOST107E, KOST100E, cavity on double ovens. See the following illustrations. KOSE507E, KOSE500E, KODE307E, KODE300E, KODE507E, KODE500E, KODT100E and KODT107E, refer to the following table. -
Page 7: Installation Instructions
INSTALLATION INSTRUCTIONS 4. Partially close the door to engage the door latch locks. The Prepare Built-In Oven door will stop at this point. 1. Decide on the final location for the oven. Avoid drilling or cutting into house wiring during installation. WARNING Excessive Weight Hazard Use two or more people to move and install oven. -
Page 8: Positioning Oven Feet For Multiple Cabinet Cutout Heights
3. At a 45° angle, align door hinges with slots in the lower front Positioning Oven Feet for Multiple Cabinet of the oven cavity. Slowly insert door, making sure you maintain the 45° angle. You will know the door is engaged in Cutout Heights the slot when you feel a slight drop. - Page 9 Cutout Height is Between 26¹⁵⁄₁₆" and 27¹¹⁄₁₆" (68.4 cm and Cutout Height is Between 28¹¹⁄₁₆" and 29⁷⁄₁₆" (72.8 cm and 70.3 cm) 74.8 cm) 1. Using 2 or more people, place the oven on its back on a 1. Using 2 or more people, place the oven on its back on a covered surface.
- Page 10 6. Using 2 or more people, place the oven in its upright position. Double Ovens The positioning of the oven feet allow a double oven to be installed in a cutout height between 48⁷⁄₈" and 52³⁄₁₆" (124.1 cm and 132.6 cm). Refer to the following instructions to position the feet for the size of your cabinet cutout.
- Page 11 Cutout Height is Between 50¹⁄₂" and 51¹⁄₈" (128.2 cm and 4. Install a front foot on the left front spacer using a #8-18 x ³⁄₈" 129.9 cm) screw. NOTE: Position the foot so the long side of the foot is facing 1.
- Page 12 Cutout Height is Between 51³⁄₁₆" and 52³⁄₁₆" (130.0 cm and 5. In the same manner, install a font foot on the right front of the 132.6 cm) oven. 1. Using 2 or more people, place the oven on its back on a 6.
-
Page 13: Make Electrical Connection
Make Electrical Connection For Double Ovens For Single Ovens WARNING WARNING Electrical Shock Hazard Electrical Shock Hazard Disconnect power before servicing. Disconnect power before servicing. Use 8 gauge solid copper wire. Use 12 gauge solid copper wire. Electrically ground oven. Electrically ground oven. -
Page 14: Install Oven
Install Oven 3-Wire Cable from Home Power Supply - U.S. Only 1. Using 2 or more people, lift the oven partially into the cabinet IMPORTANT: Use the 3-wire cable from home power supply cutout. Use the oven opening as an area to grip. where local codes permit a 3-wire connection. -
Page 15: Install Warming Drawer Deflector Kit (Only For Ovens Installed Above Warming Drawers)
5. The bottom vent and bottom vent trim (required when the Align vent tab (B) with oven frame (A) as shown. ■ oven is installed with the feet in the tall position) are shipped Using one #8-18 x ³⁄₈" screw (E) on each side of the vent ■... -
Page 16: Complete Installation
Install Deflector Kit Complete Installation 1. Flex the upper vent piece (C) away from the lower vent piece (D) to slide the warming drawer deflector (B) between them. 1. Check that all parts are now installed. If there is an extra part, Some force may be required to flex the upper vent trim (C) go back through the steps to see which step was skipped.