Fujitsu N7100 Getting Started
Hide thumbs
Also See for N7100:
- Operator's manual (458 pages) ,
- Operator's manual (487 pages) ,
- Consumable replacement and cleaning instructions (20 pages)
Table of Contents
Advertisement
Quick Links
Advertisement
Table of Contents

Related Manuals for Fujitsu N7100


Summary of Contents for Fujitsu N7100
-
Page 1: Getting Started
P3PC-5232-01EN N7100 Getting Started... -
Page 2: Table Of Contents
Contents Introduction ......................4 ■ Manuals .......................... 4 ■ About This Manual ......................4 ■ Warning Indications Used in This Document ..............5 ■ For Safe Use ........................5 ■ Precautions ........................7 ■ Disclaimer of Liability ...................... 7 ■ Regulatory Information ....................7 ■... - Page 3 Copyright ......................23...
-
Page 4: Introduction
Introduction Thank you for purchasing FUJITSU Image Scanner Manual Description N7100 (hereinafter referred to as "the scanner"). N7100 Provides information about This scanner is a network image scanner. This easy-to- Help (HTML) items on the windows, and operate scanner facilitates the optimal flow of office work descriptions and actions to for the workgroup communicating via the network. -
Page 5: Warning Indications Used In This Document
® Adobe Reader Adobe Reader or an electric shock. Scanner FUJITSU Image Scanner N7100 The scanner is damaged for any reason. Smoke or heat coming from the scanner is Admin Tool Network Scanner Admin Tool detected. Strange noise or smell is detected. - Page 6 Do not place or use the scanner in locations CAUTION which are subject to high temperature, humidity, poor ventilation, or dust. If placed in an area subject to high temperature, the cover may When installing the scanner on a table, make become overheated and deformed, resulting in sure that none of the scanner's parts extend over an electric leakage or fire.
-
Page 7: Precautions
■ Precautions Replacing Batteries In order to retain data such as BIOS information, this READ ALL OF THIS DOCUMENT AND THE product has a battery (CMOS RAM battery) on board. OPERATOR'S GUIDE CAREFULLY BEFORE USING THIS SCANNER. IF THIS SCANNER IS NOT USED ... -
Page 8: Failure And Repair
Für den Scanner wird folgendes bescheinigt: that the scanner is correctly connected or configured. If In Übereinsstimmung mit den Bestimmungen der the problem still persists, contact your FUJITSU scanner EN45014(CE) funkentstört dealer or an authorized FUJITSU scanner service Maschinenlärminformationsverordnung 3. GPSGV: Der höchste Schalldruckpegel beträgt 70 dB (A) oder... -
Page 9: Chapter 1 Before Using The Scanner
This manual provides information about Steps 1 to 5 If anything is missing or damaged, contact your FUJITSU shown below. scanner dealer or an authorized FUJITSU scanner For information about Steps 6 to 9, refer to the manual service provider. -
Page 10: Part Names
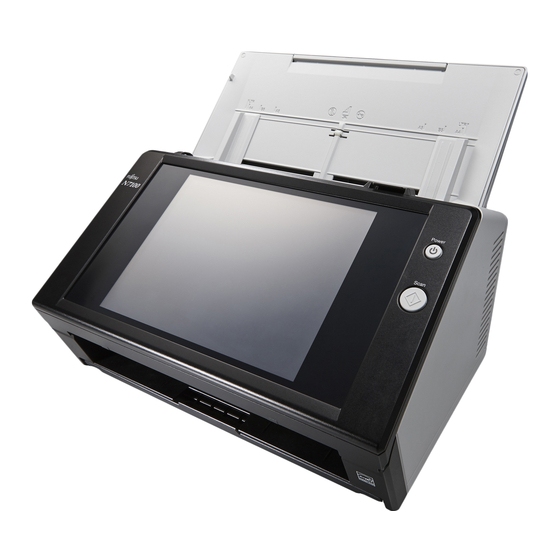
1.3 Part Names 1.4 Signs on the Scanner This section explains names of the scanner parts. This section describes the signs on the scanner. ■ Front view ■ Front Turns the power of the scanner on/off. ADF paper chute Note that this button is used to power off Extension the scanner only in an emergency. -
Page 11: Chapter 2 Setting Up The Scanner
Chapter 2 Setting up the Scanner 2.1 Removing the Protective 2.2 Connecting the Scanner Packaging Place the scanner at its installation site. The scanner comes with a protective foam sheet and Do not hold the ADF paper chute protective card attached. Follow the procedure described to lift up the scanner. -
Page 12: Chapter 3 Configuring Scanner Basic Settings
Chapter 3 Configuring Scanner Basic Settings Select the items to be specified in the scanner Do not move or shake the scanner basic settings. when it is turned on. CAUTION Select the target items to be configured on the This may damage components in the scanner and cause data to be [Installation Wizard] window, and press the [Start] lost. - Page 13 Set the scanner name. Set the date and time. On the [Scanner Name] window, specify the scanner On the [Date / Time] window, specify the date format name and workgroup or domain for joining the and the current date and time, and press the [Next] network, and press the [Next] button.
- Page 14 Set the scanner's IP address. Set the Central Admin Server. On the [IP Address] window, set the scanner's IP On the [Scanner Central Admin Server] window, set address, and press the [Next] button. whether to enable the Central Admin Server and the Central Admin Server settings, and press the [Finish] button.
- Page 15 HINT When the scanner name or domain name has been changed, the scanner is restarted. If you select [No] for [Show the Installation Wizard at next startup?], the [Installation Wizard] window does not appear immediately after the next scanner startup. This concludes the scanner basic settings procedure.
-
Page 16: Chapter 4 Checking The Network Connection
Chapter 4 Checking the Network Connection This section describes how to check the status of the Press the [Ping] button. network connection. A ping test is performed and the results are The network connection can be checked by using [Ping] displayed. -
Page 17: Chapter 5 Downloading The Manual
Chapter 5 Downloading the Manual For this scanner, the Operator's Guide (PDF), which Click the [Save] button. contains information about scanner settings, administration, and operations, is provided in addition with this manual. Read it when using the scanner. Use Adobe Reader to view the Operator's Guide. Adobe Reader can be downloaded from the following site. -
Page 18: Appendix A Troubleshooting
Appendix A Troubleshooting The network transmission mode may differ from the A.1 Network Connection connection target. On the [Network Status] window, change [Link speed/Duplex mode] from [Auto- Troubleshooting Negotiation] to a fixed mode. This can be changed as follows: ■... -
Page 19: Failure To Connect To A Server Using Its Ip Address
■ Action Another host or communication device Check that the ping target host name or FQDN is is connected using the same IP address correct. as the scanner. Check that the DNS server or WINS server settings are correct. ■... -
Page 20: Failure To Connect To A Server Using Its Host Name Or Fqdn
■ Failure to Connect to a Server ■ Failure to Access the Scanner Using Its Host Name or FQDN Using Internet Explorer, the Admin Tool, the Central Admin Server, or If the scanner cannot connect to a server by specifying its host name or FQDN, or if a server does not respond User Editor to a ping test by specifying its host name or FQDN, try... -
Page 21: Protocol Setting
The URL of the target scanner is not A proxy server is being used. registered as a trusted site. ■ Action Set the proxy server not to be used. ■ Action Set the scanner URL as a trusted site for Internet 1. -
Page 22: Power Troubleshooting
If the solution to your problem cannot be found on the above web page, refer to the contact information for your ■ Action Fujitsu office on the following web page: Press the power button. http://imagescanner.fujitsu.com/warranty.html ■ Contact for Purchasing the ■... - Page 23 Copyright LEADTOOLS for .NET distribution and use acknowledge that the software was developed by the University of California, Berkeley. The name of the University may not be used to endorse or promote products derived from this software without specific prior Copyright ©...
- Page 24 WinDump FITNESS. IN NO EVENT SHALL DIGITAL EQUIPMENT CORPORATION BE LIABLE FOR ANY SPECIAL, DIRECT, INDIRECT, OR CONSEQUENTIAL DAMAGES OR ANY DAMAGES WHATSOEVER RESULTING FROM LOSS OF Copyright © 1999 - 2005 NetGroup, Politecnico di Torino (Italy). USE, DATA OR PROFITS, WHETHER IN AN ACTION OF CONTRACT, Copyright ©...