Table of Contents
Advertisement
Quick Links
Advertisement
Table of Contents

Related Manuals for Philips Strand Lighting


Summary of Contents for Philips Strand Lighting
- Page 1 For OS Version 1.04 and Up...
-
Page 2: Philips Strand Lighting Offices
Lighting no asume responsabilidad por errores o omisiones que puedan aparecer. Cualquier comentario, sugerencia o corrección con respecto a este manual, favor de dirijirlo a la oficina de Philips Strand Lighting más cercana. Der Inhalt dieses Handbuches ist nur für Informationszwecke gedacht, Aenderungen sind vorbehalten. Philips Strand Lighting uebernimmt keine Verantwortung für Fehler oder Irrtuemer, die in diesem Handbuch auftreten. -
Page 3: Important Information
Philips Strand Lighting Limited Two-Year Warranty Philips Strand Lighting offers a two-year limited warranty of its luminaires against defects in materials or workmanship from the date of delivery. A copy of Philips Strand Lighting two-year limited warranty containing specific terms and conditions can be obtained by contacting your local Philips Strand Lighting office. -
Page 4: Table Of Contents
500ML Lighting Control Console Operation Guide TABLE OF CONTENTS Philips Strand Lighting Offices ......................Inside Front Cover IMPORTANT INFORMATION Warnings and Notices................................. 1 Additional Resources for DMX512............................ 1 Philips Strand Lighting Limited Two-Year Warranty......................1 Open Source Software ................................ 1... - Page 5 500ML Lighting Control Console Operation Guide Keyboard Settings................................33 Setting Time and Date ..............................34 Network Settings................................35 Working with Shows................................. 37 To Create or Load a Show ................................ 37 Creating a New Show ............................... 37 Loading an Existing Show..............................38 Importing Shows from a USB Key...........................
- Page 6 500ML Lighting Control Console Operation Guide Creating a Group................................73 Merge Fixtures into Groups.............................. 74 Removing Fixtures from Groups ............................74 Replacing a Group ................................75 Selecting and Deselecting Groups ............................ 77 Naming a Group................................77 Copying Groups................................78 Moving Groups ................................. 78 Deleting Groups................................
- Page 7 500ML Lighting Control Console Operation Guide Storing Cues in a Cuelist ..............................109 Storing a Cuelist to a Master............................109 Storing Cues in Cuelists Using Cuelist Pool Window....................110 Storing Cues in Cuelists Using Command Line Interface....................110 Naming a Cuelist ................................111 Copying Cuelists................................
- Page 8 500ML Lighting Control Console Operation Guide MAINTENANCE Importing and Exporting Fixture Libraries..........................163 Exporting Fixture Libraries ............................163 Importing Fixture Libraries ............................165 Updating Console Software ..............................167 Updating Console Software via USB Key........................167 Updating Console Software via Internet Connection ..................... 170 Calibrating Touchscreens................................
-
Page 9: Preface
(as described above), please contact your Authorized Strand Lighting Dealer for assistance. Note: Monitors, cables and other accessories are not included and are sold separately. For available accessories, please contact you local Authorized Strand Lighting Dealer. A list of Authorized Dealers is located on the Strand Lighting web site at www.strandlighting.com. -
Page 10: Console Overview Control Features
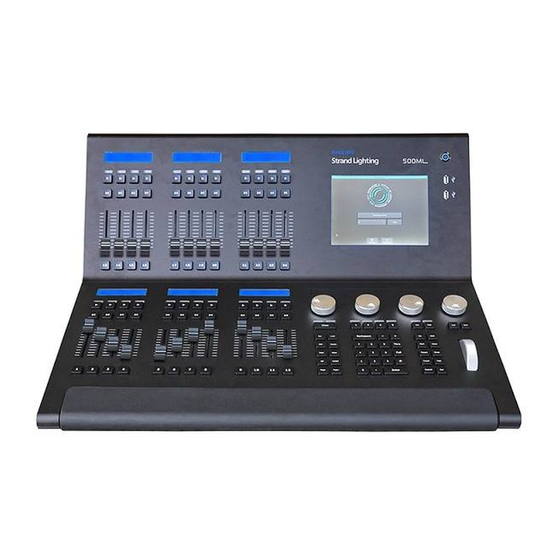
500ML Lighting Control Console Operation Guide CONSOLE OVERVIEW 1. Control Features Figure 1 is a quick overview of the 500ML Lighting Control Console controls. 8-Inch Color TFT Display On / Off Button Status Displays Fader Play / Pause / USB 2.0 Ports Reverse Buttons Faders Bump Buttons... -
Page 11: 8-Inch Tft Touchscreen
500ML Lighting Control Console Operation Guide 8-Inch TFT Touchscreen The 8-inch TFT touchscreen is one of the key elements used for user interaction with the console. It provides an easy- to-use and understand graphical user interface. Command / Programming Keys The 500ML Lighting Control Console command and programming keys correspond with the touchscreen interface. -
Page 12: Rear Panel - External Connections
500ML Lighting Control Console Operation Guide 2. Rear Panel - External Connections Figure 1 is a quick overview of the 500ML Lighting Control Console rear panel connections. Desk Lamp Connection (3-Pin XLR, 5VDC) Desk Lamp D C 5V operatio n 1= Shield/GN D 2= Negativ e 3= Positiv e... -
Page 13: Basic Concepts Hybrid Console
500ML Lighting Control Console Operation Guide BASIC CONCEPTS 1. Hybrid Console The 500ML Lighting Control Console is a hybrid console. This means it is not limited to control of a specific fixture type only. It treats dimmer channels and moving lights equally. Fixtures vs. - Page 14 500ML Lighting Control Console Operation Guide Programmer Priority The general programming layer, called the "Programmer" always takes precedence over playbacks, unless it is in "Blind"-Programming mode. This may seem a bit strange at first glance, but in fact is very useful since the programmer enables the user to gain additional control over the consoles output at any time.
-
Page 15: Tracking
500ML Lighting Control Console Operation Guide Dimmer Color Gobo Cuelist #2 Off 100% Blue Gobo 1 Tracking Basic Idea When a sequence of cues is programmed, the lighting console can store the information in one of two ways: either it records the settings for all attributes of all the fixtures used in the cuelist, or it is only recording the values that have changed. -
Page 16: The Fixture Library Concept
500ML Lighting Control Console Operation Guide Tracking can be very useful when you want to make the same change to a series of cues: for example, you might have a series of cues that include a fixture that lights a part of the set in the same way throughout. If you later want to change the intensity of that light, you may change it in the first cue the light appears, and the change will track trough to all the cues until the next change for this attribute of this particular fixture. -
Page 17: System Library
System Library The System Library gets replaced with every Software Update. It contains around 6700 Fixtures and is maintained by Strand Lighting. It is not editable by the user. User Library The User Library is fully editable by the user and is not replaced or deleted during software updates. It is stored on the flash-disk of the console and its fixture types are available to all existing or new shows. -
Page 18: The Graphical User Interface
500ML Lighting Control Console Operation Guide 4. The Graphical User Interface The console utilizes an easy to use and intuitive graphical user interface (GUI). The following sections explain the basics of finding your way around the GUI, in the internal as well as the external display. Figure 4: On-Board LCD Screen Screens The console shows context sensitive screens for each step of the show creation. -
Page 19: Encoder Labels
500ML Lighting Control Console Operation Guide Figure 6: Programmer Values Window Encoder Labels The Encoder Labels show encoder function and values. Clicking on them toggles between a set of common values. In the programmer screen, labels will not show values. Instead, the programmer window is used to display values. Figure 7: Record Encoder Labels Figure 8: Programmer Encoder Labels Toolbars... - Page 20 500ML Lighting Control Console Operation Guide Default Toolbar The Default Toolbar is used to allow quick access to other toolbars that contain programming aid, like the Fixture Sub-Selection toolbar or the Fan-Options toolbar. Additionally it provides a Clock and a button to save the Show. Figure 9: Default Toolbar Fixture Selection Toolbar The Fixture Selection Toolbar provides quick access to fixture sub selection.
- Page 21 500ML Lighting Control Console Operation Guide • Output Window: The Output Window provides a quick way to check output values, source of the values and the source of an running effect. • Console Status Window: This window shows the consoles system log. •...
-
Page 22: Command Line Syntax
500ML Lighting Control Console Operation Guide The console will ask for confirmation when any of the “Reset” or “Release” buttons is pressed. However you may omit the Confirmation Screen when holding the [SHIFT] button pressed while clicking on any of these buttons. Figure 16: Off Toolbar Fader Page Indicator The Fader Page indicator shown in the bottom left corner of the Internal Display shows which Fader Page you are on. -
Page 23: Pool Windows And Pool Items
500ML Lighting Control Console Operation Guide • [OPEN] + [FIXTURE] will open the Fixture Pool Window • [OPEN] + [GROUP] will open the Group Pool Window • [OPEN] + [PRESET] will open the All Preset Pool Window • [OPEN] + [I] will open the All Preset Pool Window •... -
Page 24: Fixture Pool And The Level View
500ML Lighting Control Console Operation Guide The toolbar shown on the bottom of the Pool View provides quick access to useful functions, dependent on the type of the Pool. The Group, Preset and Cuelist Pool Items in general have 3 States: Empty, Not Selected and Selected. The Empty state is indicated by a dark background color. -
Page 25: Scrolling In Screens And Pools
500ML Lighting Control Console Operation Guide A toolbar shown on the bottom of the Pool View provides quick access to useful functions. Figure 24: Fixture Level View Item Selected fixtures will show a green bar just below the header, like all other Pool Items do. By default the header and border of a Level View Item look similar to those of a regular Pool Item. -
Page 26: Keypad Dialogs
500ML Lighting Control Console Operation Guide Figure 25: Fixture Level View - Scroll Fixtures Example Keypad Dialogs Whenever a Keypad Dialog is shown, the keypad on the faceplate of the console or the multifunctional wheel may be used to set values. The multifunction wheel will increment or decrement values; the keypad may be used to directly enter values or to increment / decrement values using the [+], or [-] Key. -
Page 27: On-Screen Keyboard
500ML Lighting Control Console Operation Guide On-Screen Keyboard You may enter values and names using the touchscreen keyboard or an external USB Keyboard connected to the console (by others) whenever the On-Screen Keyboard is shown. Figure 27: Touchscreen Keyboard Example External Monitor If an external monitor (sold separately) is connected, the monitor provides enhanced overview over your show file. - Page 28 500ML Lighting Control Console Operation Guide Each of the button contains a different predefined View: 1 - Quad Mixed Button The Quad Mixed View contains a Fixture, Group, Preset and Cuelist Pool. The Type of the Preset Pool may be set using the buttons provided in the Pools Toolbar.
- Page 29 500ML Lighting Control Console Operation Guide 3 - Fixtures & Groups Button The Fixtures & Groups View contains Fixture and Group Pools. Figure 32: Fixtures & Groups Pool Screen 4 - Level View Button The Level View contains one large Fixture Pool, providing a quick overview of the current fixtures. Figure 33: Level View Screen 5 - Cuelist View Button The "Cuelist View"...
- Page 30 500ML Lighting Control Console Operation Guide Figure 34: Cuelist View Screen 6 - Quad Cuelists Button The Quad Cuelists View contains four Cuelist Pools, whereas each pool may have a different mode and may be scrolled differently. This makes it a perfect view for busking. Figure 35: Quad Cuelists Screen BASIC CONCEPTS...
- Page 31 500ML Lighting Control Console Operation Guide Enable / Disable Toolbars Button The external screen toolbars may be disabled or enabled by clicking on the Toolbars Enable / Disabled button in the Quick Options section of the external Screen. This will provide you with one more row of Pool Items for each Pool. Figure 36: Quick Options Screen - Toolbars Disabled / Enabled Button Enable / Disable Timecode Button The external Screen contains a button for the timecode input of the console to be disabled or enabled by clicking on...
-
Page 32: Fader Labels
500ML Lighting Control Console Operation Guide Fader Labels Fader labels give you a quick overview of fader assignments, current cuelist states and much more. The look of the fader labels varies a little depending on the fader contents. The following sections provide you with insight on fader labels. -
Page 33: Operation
500ML Lighting Control Console Operation Guide OPERATION 1. To Begin Using the Console Unpack Console and Accessories Before you can use the console, unpack it and its accessories from the shipping carton. For a complete list of included items, refer to "Included Items"... -
Page 34: Configuring System Settings
500ML Lighting Control Console Operation Guide Configuring System Settings Before you start using the console, it is advised to make sure all basic settings are configured. This includes the USB keyboard layout, time, date and network settings. These settings are saved in the console, not show files. From the Welcome Screen (Figure 42), select the Settings button. -
Page 35: Keyboard Settings
500ML Lighting Control Console Operation Guide Keyboard Settings From within the System Setup Tab, select Keyboard Settings to open the settings window. Note: This setting is for external USB keyboard (by others) settings only. Changing this setting does not affect the on-screen keyboard. -
Page 36: Setting Time And Date
500ML Lighting Control Console Operation Guide Setting Time and Date From within the System Setup Tab, click on Clock Settings to open the Change Date / Time window.. Figure 46: Clock Settings Button The Change Date/Time window will appear (Figure 47). -
Page 37: Network Settings
500ML Lighting Control Console Operation Guide Network Settings From within the System Setup Tab, select Network Settings to open the settings window. Figure 48: Network Settings Button Once the Network Setup windows appears, you may change IP Address and all associated settings. After making changes, you can test the network connection. - Page 38 500ML Lighting Control Console Operation Guide Note: If you assign IP Addresses manually, you must set both the IP Address and Subnet Mask. Consult your network administrator for assistance. IP Address This field will display the IP Address of the console if manual configuration has been selected. Use the Edit button on the right of the text field to set the IP Address.
-
Page 39: Working With Shows
500ML Lighting Control Console Operation Guide 2. Working with Shows Show files contain all of your show related settings like fixture schedule and patching, input settings, groups, presets, cues, master assignments, etc. Multiple shows may reside on the console and the amount of shows is only limited by hard disk memory. -
Page 40: Loading An Existing Show
500ML Lighting Control Console Operation Guide You may also enter values by using an external USB keyboard (by others, sold separately) anytime the keyboard dialog is shown. As soon as you hit the Enter button a showfile with a name given is created. Showfile Name Field Figure 53: Touchscreen Keyboard &... - Page 41 500ML Lighting Control Console Operation Guide A list of shows will appear. Select the show or shows you would like to import and hit the Import button on the touchscreen display. Figure 55: Select Show to Import A confirmation screen will appear with a brief summary of the show or shows to be imported as displayed in Figure 56.
-
Page 42: Show Files
500ML Lighting Control Console Operation Guide After the loading process begins, the Import Status box will now display the import process. After the process finished, click on the Close button. Figure 57: Import Show(s) from USB - Import Status of Selected Shows - Completed 4. -
Page 43: Save Show As - New Showfile
500ML Lighting Control Console Operation Guide To enable or disable Show Autosave, press [SETUP] on the console and then the Show Settings tab. Select Enable Autosave or Disable Autosave. If the Enable Autosave option is selected, you can set the Autosave Interval via the dropdown menu. - Page 44 500ML Lighting Control Console Operation Guide The next screen will display a list of shows in the console’s memory. Select the show or shows you would like to export (copy) to the USB key. Then, hit the Export button on the touchscreen display to export them to the USB key. Figure 61: Select Show(s) to Export Screen - Exporting Shows to USB Key A confirmation screen will appear confirming your selection(s) to be exported as shown in Figure...
-
Page 45: Closing A Show
500ML Lighting Control Console Operation Guide When the process finished successfully, click on the Close button as indicated in Figure Figure 63: Export Show(s) to USB Screen - Export Completed Closing a Show To load a show (as described in "Loading an Existing Show"... -
Page 46: Showfile Settings
500ML Lighting Control Console Operation Guide You will now be presented with a list of shows. Select the show you would like to delete and hit the Delete button on the touchscreen display. WARNING! Once a showfile is deleted, it cannot be undone. Figure 66: Delete Show Window - Delete Show Example Note: You cannot delete a show that is currently loaded. -
Page 47: Setting Button Backlight
500ML Lighting Control Console Operation Guide Setting Button Backlight Turning the first rotary encoder while the Setup Menu > Show Settings screen is shown will set the brightness of the button backlighting. Figure 68: Button Backlighting Adjustment Setting Setting LCD Intensity Turning the second rotary encoder while the Setup Menu >... - Page 48 500ML Lighting Control Console Operation Guide Note: Sensitivity and Acceleration will automatically adapt to the type of value the encoders are controlling. Steps for setting up the day of a month for example will have a different speed and acceleration than setting a DMX default value or a percentage.
-
Page 49: Programming
500ML Lighting Control Console Operation Guide PROGRAMMING 1. Fixture Setup Adding Fixtures to a Show In order to add and patch fixtures, please press the [Setup] key on the consoles front panel. A menu will appear on the touchscreen display, presenting you several options. Choose Add Fixtures in the Setup Menu screen (Figure 74). - Page 50 • You may search for fixtures using the search field shown in the top part of the screen. In order to complete the examples shown in this guide, search for "vari 3000" and select the Philips Vari-Lite VL3000 Spot from the list. To clear your search, click the Reset Filter button.
-
Page 51: Patching Fixtures
500ML Lighting Control Console Operation Guide • Default Fixture Settings - You can select Invert Pan, Invert Tilt or React to Master (react to Grandmaster). In this example 12 fixtures will be added, with User Number starting at 501. After setting these parameters, click Next. -
Page 52: Configuring Existing Fixtures
500ML Lighting Control Console Operation Guide Figure 79: Patch new Fixtures Windows - Manual Patch For now, choose "Manual Patch", select Universe 1 and set the start address to 1 and click on Finish. Configuring Existing Fixtures Should you desire to modify the User Number, Fixture Name, Options, Patch or Type for a fixture that has already been added to the show, open up the Setup Menu by pressing [SETUP], select the Show Settings tab and click on Configure Fixtures as illustrated in Figure... - Page 53 500ML Lighting Control Console Operation Guide The Configure Fixtures (Figure 81) will be shown. Figure 81: Configure Fixtures Screen All options in the Configure Fixtures Screen will be applied to the selected fixtures only. Fixtures may either be selected before entering the Configure Fixtures screen, or after. Selection may occur by using the standard methods of fixture selection (see "Selecting Fixtures"...
-
Page 54: Change User Number
500ML Lighting Control Console Operation Guide Change User Number The User Number is a unique ID that is used to select a single or multiple fixtures using the keypad found on the console's faceplate. In order to change the User Number open the Configure Fixtures Screen as described in section Configuring existing Fixtures and hit the User Number button as shown in Figure Figure 83: Configure Fixtures - Change User Number... -
Page 55: Change Fixture Name
500ML Lighting Control Console Operation Guide Change Fixture Name The Fixture Name will be shown in Fixture Pool Items and on Fixture-Submaster Fader-labels. To change the Fixture Name for multiple fixtures at once, open the Configure Fixtures window as described in "Configuring Existing Fixtures"... -
Page 56: Change Dmx Patch
500ML Lighting Control Console Operation Guide To do this for multiple fixtures at once, first select the fixtures you would like to change the Pan and Tilt Invert for and click on Change Options within the Configure Fixtures Screen (Figure 87). - Page 57 500ML Lighting Control Console Operation Guide Figure 89: Configure Fixtures - Change Pan / Tilt Invert. The Patch Fixtures window will open (Figure 89). Figure 90: Patch Fixtures Window Within the Patch Fixtures window you are presented with several options: •...
-
Page 58: Unpatch
500ML Lighting Control Console Operation Guide Unpatch Unpatch will remove any patch information from the fixtures. However, the fixtures and all of their programming will be kept within the showfile. Figure 91: Patch Fixtures Window - Unpatch Option Manual Patch The fixtures will be patched to the address and universe specified by the user. -
Page 59: Auto Patch
500ML Lighting Control Console Operation Guide Figure 93: Patch Fixtures Window - Manual Patch Option Auto Patch The fixtures will be patched at the next free address of the selected universe automatically. Should the selected universe not have sufficient unused DMX channels left, Auto Patch will automatically add the remainders that do not fit onto the next DMX Universe. - Page 60 500ML Lighting Control Console Operation Guide Figure 95: Configure Fixtures - Change Type Option The Select New Fixture Type window will open (Figure 96), asking you to select the new fixture type from the Show Library. If the desired fixture is in the Show Library already, select it from the list and click on Next and skip the next steps.
- Page 61 500ML Lighting Control Console Operation Guide A screen (Figure 97), asking you for the type of library you would like to import your fixture from will appear after selecting Add Library. If you would like to add a predefined Fixture Type, select on Factory Library. If you would like to add a User created or User modified fixture, select User Library.
-
Page 62: Clone Fixtures
500ML Lighting Control Console Operation Guide The console will now ask for confirmation on the fixture replacement (Figure 99), displaying a brief summary of the changes to be made. If the new fixture type is acceptable, Click Ok to proceed. Figure 99: Replace Fixture Confirmation Screen The 500ML console will now transfer existing programming over to the new fixture type. - Page 63 500ML Lighting Control Console Operation Guide To do this, open up the Setup Menu by pressing [SETUP], select the Show Settings tab and click on Clone Fixtures as illustrated in Figure 101. A wizard will appear to assist you in the cloning process. Figure 101: Setup Window - Show Settings - Clone Fixtures Option In the Clone Fixtures Window (Figure...
- Page 64 500ML Lighting Control Console Operation Guide Additionally, you will be shown which fixture's programming will be taken over to which of the new fixtures. Click on Next when done. Figure 103: Select Content of Fixtures to Clone Window The results of the Clone process will be shown. The new fixtures are still unpatched and do not have user numbers assigned to them.
-
Page 65: Delete Fixtures
500ML Lighting Control Console Operation Guide Delete Fixtures Should you wish to delete fixtures and all of their programming from the showfile, press the [SETUP] key, select the Show Settings tab and click on Delete Fixtures as illustrated in Figure 105. -
Page 66: Selecting Fixtures Using Keypad / Command Line
500ML Lighting Control Console Operation Guide The selection order matters during programming and is recorded as part of groups, but is not recorded in presets or cues. Note: Because the 500ML console records the selection order as part of groups, you can select the group and use the Next and Back keys to sub-select each fixture in a particular order. -
Page 67: Selecting / Deselecting Fixtures Using Fixture Pool Window
500ML Lighting Control Console Operation Guide Selecting / Deselecting Fixtures Using Fixture Pool Window Press and hold the [OPEN] key and press the [FIXTURE] button. The Fixture Pool window will open up (Figure 109). You may now select or deselect fixtures by simply clicking on them. Figure 109: Fixture Pool Window Selecting Fixtures Using a Previously Recorded Group Press and hold the [OPEN] key and press the [GROUP] button. -
Page 68: Fixture Sub-Selection
500ML Lighting Control Console Operation Guide Fixture Sub-Selection Fixture Sub-Selection provides additional fixture selection features based on your current fixture selection set. This means that all sub-selection functions are applied to your current fixture selection. If you do not have fixtures selected, the Fixture Sub-Selection will be applied to all fixtures instead. -
Page 69: Even / Odd Fixture Selection
500ML Lighting Control Console Operation Guide Step 2. Press the Even Odd button on the selection toolbar as described in "Even / Odd Fixture Selection". The console will now select all even fixtures out of the selection you have previously made. Step 3. -
Page 70: Random Fixture Selection
500ML Lighting Control Console Operation Guide 3) To select the second half of the overall selection set (the "memorized" fixture selection), press the Half button again. Random Fixture Selection If no Selection has previously been made, Random will make a random selection out of all fixtures contained in the showfile. -
Page 71: Last And Next Button - Stepping Through Fixtures
500ML Lighting Control Console Operation Guide Last and Next Button - Stepping Through Fixtures Sometimes it is desirable to step through the fixtures one by one at a time, especially when used in combination with the "Highlight" function to be able to quickly and easily focus a large number of lights in series. This may be accomplished by using the [LAST] or [NEXT] keys on the faceplate. -
Page 72: Using The Configure Fixtures Window
500ML Lighting Control Console Operation Guide Assigning Name Using Command Line Interface You may use the Command Line by typing [ASSIGN] [ASSIGN] (the Command Line will read Name) followed by the fixture selection, in example: [FIX] [501] [THRU] [512] [ENTER]. Refer to "Selecting Fixtures Using Keypad / Command Line"... - Page 73 500ML Lighting Control Console Operation Guide There are two ways to assign a Fixture to a Dimmer Master; using the Command Line Interface or the Fixture Pool Window. Using the Command Line Interface Press the [ASSIGN] key, followed by the fixture selection, in example: [FIXTURE] [501]. Now select the [GO], or [PAUSE/BACK] key of the fader that should act as the Dimmer Master.
-
Page 74: Edit Fixture Window
500ML Lighting Control Console Operation Guide Edit Fixture Window The Edit Fixture window (Figure 123) may be used as a quick way to read fixtures DMX universe / address, fixture type and set options like invert of movement, the User Number or Fixture Name. Figure 123: Edit Fixture Window To open the Edit Fixture Window, type [EDIT] followed by the User Number of the fixture you would like to edit, eg. -
Page 75: Working With Groups
500ML Lighting Control Console Operation Guide 3. Working with Groups About Groups Groups are meant as a programming aid and are a quick way to access specific groups of fixtures. As opposed to the theatrical term "Group" they do not store any values. They only store information about fixture selection and selection order. -
Page 76: Merge Fixtures Into Groups
500ML Lighting Control Console Operation Guide Merge Fixtures into Groups Sometimes you may need to add some fixtures to a group that already exists. To do so, first select the fixtures you would like to add. Merge Fixture(s) into Group using Group Pool Window Press and hold the [REC] key and then press the [GROUP] button. -
Page 77: Replacing A Group
500ML Lighting Control Console Operation Guide Removing Fixture(s) from a Group using Group Pool Window Press and hold the [REC] key and then press the [GROUP] button. As shown in Figure 124 on page 73, the Group Pool window will appear. You may now select the Remove Option in the Record Toolbar (Figure 129). - Page 78 500ML Lighting Control Console Operation Guide Replacing Fixture(s) from a Group using Group Pool Window Press and hold the [REC] key and then press the [GROUP] button. s shown in Figure 124 on page 73, the Group Pool window will appear. You may now select the Replace Option in the Record Toolbar (Figure 132).
-
Page 79: Selecting And Deselecting Groups
500ML Lighting Control Console Operation Guide Selecting and Deselecting Groups Selecting or Deselecting Fixture Groups using Group Pool Window Press and hold the [REC] key and then press the [GROUP] button. s shown in Figure 124 on page 73, the Group Pool window will appear. -
Page 80: Copying Groups
500ML Lighting Control Console Operation Guide Figure 137: Enter Group Name using On-Screen Keyboard Assigning Name using Edit Group Window You may also assign a Name to the group and its contained fixtures using the Edit Group Window. Please see "Edit Group Window"... -
Page 81: Deleting Groups
500ML Lighting Control Console Operation Guide Deleting Groups Deleting Groups using Group Pool Window Press and hold the [DELETE] key while holding down the [GROUP] key. The Group Pool window and delete toolbar will be shown. Make sure Delete Object is selected on the delete Toolbar. Now select the Group you would like to delete. -
Page 82: Edit Group Window
500ML Lighting Control Console Operation Guide To switch off a Cuelist, select it from the List and press the Off Selected button. Figure 142: Off Menu Window Edit Group Window The Edit Group Window (Figure 143) may be used as a quick way to rename a group and all of the contained fixtures. Figure 143: Edit Group Window To open the Edit Group Window, type [EDIT] [GROUP], followed by the ID of the group you would like to edit, eg. -
Page 83: Working With Values
500ML Lighting Control Console Operation Guide Smart Name Clicking on the Smart Name button will open up an on-screen keyboard asking for a new group name. Smart Name will also rename contained fixtures using the same name that you enter for the group. -
Page 84: Emptying The Programmers "Content
500ML Lighting Control Console Operation Guide With Values Figure 146 illustrates how the programmer appears when fixtures are selected with values assigned in the programmer. The programmer takes precedence over cuelist output for the attributes with values in the programmer. However, these values would not be recorded. -
Page 85: Programmer Options
500ML Lighting Control Console Operation Guide 5. Programmer Options Show All Figure 149: Programmer - Values Window - Show All Option Show all Values will cause the programmer to show every attribute that has values set in the programmer for all fixtures that have values in the programmer. -
Page 86: Live Fade
500ML Lighting Control Console Operation Guide Live Fade Figure 151: Programmer - Values Window - Live Fade Option When Live Fade is turned on, the console will fade changed attribute values (in example: recalled presets, entering or leaving blind mode, clearing the programmer) instead of snapping them. This is especially useful should you find yourself in an unstructured show with lots of live access. -
Page 87: Highlight Function
500ML Lighting Control Console Operation Guide With Blind turned on, any change made in the programmer will not be output live. This enables you to prepare a look for later use, or make changes to a different cue that is not yet played back. Highlight Function Pressing the Highlight key temporarily sets the selected fixtures to a "Full on, open white"... -
Page 88: Altering Intensity (Dimmer Values) Using Multifunction Wheel
500ML Lighting Control Console Operation Guide Altering Intensity (Dimmer Values) Using Multifunction Wheel The Multifunction (dimmer) wheel on the right hand side of the console faceplate (as indicated in Figure 1 on page can be used to increment up or decrement down the dimmer values of the selected fixtures. Altering Intensity (Dimmer Values) Using Keypad Numerical dimmer values (levels) may be applied directly to selected fixtures using the command line interface by typing [@] followed by either [FULL] or the intensity value (in percent) followed the [ENTER] key. -
Page 89: Altering Parameters Using Encoders
500ML Lighting Control Console Operation Guide Altering Parameters Using Encoders To change fixture parameters, select either a fixture or group of fixtures (see "Selecting Fixtures" on page 63). Select the parameter group of the parameter to be changed - [I], [F], [C], or [B]. Repeatedly press the [I], [F], [C], or [B] button until the toolbar indicates the desired parameters. -
Page 90: Filter Gels By Manufacturer
500ML Lighting Control Console Operation Guide Figure 157: Programmer - Swatch Book Filter Gels by Manufacturer Within the Programmer - Swatch Book window, use the filter drop down menu to display filter gels by manufacturer. Figure 158: Swatch Book - Filters by Manufacturers Drop Down Menu Filter Gels by Search Function Another option to look for colors is the integrated text search field. -
Page 91: Altering Color Values Using Color Picker
500ML Lighting Control Console Operation Guide Altering Color Values Using Color Picker To open up the color picker, press the Color Picker button found in the programmer window as indicated in Figure 160. The center triangle sets the Saturation and brightness, whereas the outer circle sets the colors Hue. As opposed to other consoles, the 500ML does not store HSB color information in Cues, hence cues will cross fade in RGB or CMY color space. -
Page 92: Fanning (Spreading) Values Across Fixtures
500ML Lighting Control Console Operation Guide Fanning (Spreading) Values Across Fixtures Fanning is a very useful function used to spread values across a range of fixtures. A quick way to fan intensity values is described in "Altering Intensity (Dimmer Values) Using Keypad" on page 86. -
Page 93: Fan Mode Options
500ML Lighting Control Console Operation Guide Keypad Entry Meaning Will fan the Intensity for selected fixtures from [VALUE A] to [VALUE B] [VALUE A] [THRU] [VALUE B] For Example: [0] [THRU] [100] with 3 selected fixtures will set fixture 1 to 0%, fixture 2 to 50% and fixture 3 to 100%. -
Page 94: Fanning With Groupings
500ML Lighting Control Console Operation Guide Fan Options - Center (Default) As described in "Fan Any Value using Encoders" on page 90, the middle fixture remains unchanged, while the values for the first and last fixtures' change most, in opposite directions. Fixture 1 Fixture 2 Fixture 3... -
Page 95: Removing Values
500ML Lighting Control Console Operation Guide Removing Values Sometimes you just want to remove attribute values from the programmer, either for a fixture, a group of fixtures, or a specific attribute only. This section will provide you with the information necessary. Note: Should you wish to clear the entire contents of the programmer, press the [CLEAR] button three (3) times. - Page 96 500ML Lighting Control Console Operation Guide The Output Window will be shown (Figure 167). Figure 167: Output Window By default, the Output Window will show All Fixtures and the Fixtures’ current value, using colors to indicate the origin of the Value: Background Color State Light Grey...
- Page 97 500ML Lighting Control Console Operation Guide All Fixtures Button The All Fixtures button displays all fixtures in the showfile.. Figure 170: Output Window - All Fixtures Button Selected Only Button The Selected Only button displays only those fixtures in the showfile you select. Figure 171: Output Window - Select Only Button Output Value Button The Output Value button will display a list of values that are currently being outputted for the fixture.
-
Page 98: Working With Effects
500ML Lighting Control Console Operation Guide Base Source Button The Base Source button will display the source of the base value being outputted for any fixture parameter. The "base value" are all output values which are not modified by an effect. Figure 173: Output Window - Base Source Button FX Effect Source Button The FX Effect Source button will display the origin of the effects being outputted for any fixture parameter. -
Page 99: The Effects (Fx) Programmer
500ML Lighting Control Console Operation Guide Note that any effect is relative to its attributes base level. It will vary the value of the attribute to either side of its base level determined by either the current output, or the base value that is set in the programmer. You may combine any effect types applied to any fixture attribute. - Page 100 500ML Lighting Control Console Operation Guide For example: You select Fixture 501 and set the Intensity level to 50%. Now you'd apply a simple effect sine waveform to the intensity attribute and set the effect size to 50. The resulting effect will be alternating between 25% intensity and 75% intensity, since the size is 50% around the base value that is set to 50%.
- Page 101 500ML Lighting Control Console Operation Guide "Offset" Effect Attribute The "Offset" effect attribute shifts the start and end point for each effect, so they can be spread. The effect offset is assigned in degrees, where 0° means the start and end points are not shifted, whereas 360° means they are shifted by a full duration of the effect.
-
Page 102: Creating A Simple Dimmer Effect
500ML Lighting Control Console Operation Guide Creating a Simple Dimmer Effect With the fixtures selected, click on Add FX button as shown in Figure 180. Figure 180: Programmer Window - FX Programmer Now choose the attribute and the movement shape you would like to apply to the chosen attribute. In this case, referring to Figure 181, you may want to select Dimmer under Select Channel as the attribute and Sine as the form... -
Page 103: Deleting An Effect
500ML Lighting Control Console Operation Guide Deleting an Effect To delete an effect, you first need to select the effect you would like to delete by clicking on the button that reads the effect type and parameter shown in the first column of the Effects Programmer. Make sure you only have the effects selected, which you would like to delete. -
Page 104: Naming A Preset
500ML Lighting Control Console Operation Guide You may select different record options from the Record toolbar after pressing the [REC] button. Figure 183: Preset Pool Window - All Presets Note: You may select different record options from the Record toolbar after pressing the [REC] button. For more info, see "Record Toolbar"... -
Page 105: Removing Contents From A Preset
500ML Lighting Control Console Operation Guide The Enter Preset Name on-screen keyboard will appear (Figure 186). Figure 186: On Screen Keyboard - Enter Preset Name Assigning Names Using Edit Preset Window You may also assign a Name to the Preset using the Edit Preset Window. Please see "Edit Preset Window"... -
Page 106: Replacing A Preset
500ML Lighting Control Console Operation Guide Figure 188: Merge or Replace Preset Alternatively, you may also select Remove from the Record toolbar (Figure 187 on page 103) after hitting the [REC] Key, which will prevent the "Not Empty - What to do?" Window from opening. Note: Removing attributes from a preset may break cues that are already referencing to this Preset. -
Page 107: Merging Contents Into A Preset (Updating A Preset)
500ML Lighting Control Console Operation Guide Alternatively, you may also select Replace from the Record toolbar (Figure 189 on page 104) after hitting the [REC] Key, which will prevent the "Not Empty - What to do?" Window from opening. Merging Contents into a Preset (Updating a Preset) In case you wish to update a preset to just adjust some values, in example for a preset that is containing the position of the lead singer of the show you tour with, the "merge"... -
Page 108: Recalling A Preset As A Reference
500ML Lighting Control Console Operation Guide Figure 192: Merge or Replace Preset - Merge Alternatively, you may also select Remove from the Record toolbar (Figure 193) after hitting the [REC] Key, which will prevent the "Not Empty - What to do?" Window from opening. Figure 193: Record Toolbar - Merge Button Note: Merge does not remove any values from a Preset! Recalling a Preset as a Reference... -
Page 109: Copying A Preset
500ML Lighting Control Console Operation Guide Deselecting (Knocking Out) a Preset To deselect a Preset, click on it again or press the [OFF] Key followed by the Preset. Copying a Preset Copying Presets using the Preset Pool Window Press and hold the [COPY] key while holding down the [PRESET] key. The Preset Pool window will be shown. Now select the Preset Pool type using the Preset Pools toolbar and select the Preset you would like to copy, followed by the destination Pool Item. -
Page 110: Edit Preset Window
500ML Lighting Control Console Operation Guide Deleting Presets using the Command Line Interface You may delete presets using the command line approach by pressing the [DELETE] followed by the [PRESET] key and the ID of the preset you would like to delete, ie. [31]. Please note you may delete multiple presets by using the [+], [-] and [THRU] keys to extend your selection. -
Page 111: Cuelists
500ML Lighting Control Console Operation Guide 8. Cuelists What is a Cuelist? A cuelist consists of multiple cues, whereas each cue stores the attribute values or preset references for each touched attribute of fixtures that had touched values. Each cue has its own next time (the time after which the next cue will automatically be triggered) and fade / snap time. -
Page 112: Storing Cues In Cuelists Using Cuelist Pool Window
500ML Lighting Control Console Operation Guide To store another cue into the same Cuelist, simply press the [REC] key again, followed by the Cuelist you would like to add the cue to. If the Cuelist only contains one cue, a window (Figure 197) will pop up asking you what to do. -
Page 113: Naming A Cuelist
500ML Lighting Control Console Operation Guide Naming a Cuelist Assigning Names using Cuelist Pool Window Hit the [CUELIST] key while holding down the [ASSIGN] key. The Cuelist Pool window will be shown. The command line will still read Assign. Now, press the [ASSIGN] key again. The command line will now read Name. Now select the Cuelist you wish to rename from within the Preset Pool Window. -
Page 114: Moving Cuelists
500ML Lighting Control Console Operation Guide Moving Cuelists Moving Cuelists using Cuelist Pool Window Press and hold the [MOVE] key while holding down the [CUELIST] key. The Cuelist Pool window will be shown. Now select the cuelist you would like to move, followed by the destination Pool Item. Moving Cuelists using Command Line Interface You may move cuelists using the command line approach by pressing the [MOVE] key. - Page 115 500ML Lighting Control Console Operation Guide You may also use the command line approach by, press the [REC] key followed by the [CUELIST] key. Type the number of the cuelist you would like to update a cue from to - i.e., [1]. Before executing the command, make sure you selected Merge (Figure 204) from the Record Toolbar.
-
Page 116: Replacing A Cue
500ML Lighting Control Console Operation Guide If the cuelist only contains one cue, the action will be executed right away. If the cuelist contains more than one cue a window will be opened asking you to select the cue you would like to remove the information from. See Figure 208 for more details. -
Page 117: Inserting Cues Into Cuelists
500ML Lighting Control Console Operation Guide If the cuelist only contains one cue, the replace action will be executed right away. If the cuelist contains more than one cue a window will be opened asking you to select the cue you would like to replace. See Figure 211 for more details. -
Page 118: Deleting Cues
500ML Lighting Control Console Operation Guide A window will open asking you to select the Cue you would like the new cue to be inserted in front of. See Figure for more details. Click on Insert after selecting the Cue the new Cue should be inserted in front of. Figure 214: Insert Cue into Cuelist Window Deleting Cues To delete a cue from a Cuelist, press the [DELETE] key on the keypad. -
Page 119: Loading Cues To The Programmer
500ML Lighting Control Console Operation Guide Figure 217: Delete Cues from Cuelist Window Loading Cues to the Programmer Sometimes it is desirable to load a complete cue into the programmer to edit it. To do so, press the [LOAD] key on the keypad. -
Page 120: Assigning Cuelists To Masters
500ML Lighting Control Console Operation Guide Note: Loading a Cue to the programmer will replace the programmer’s current contents with the contents from the cue. Because of tracking, the contents of the programmer may look different from what you see on stage. Assigning Cuelists to Masters Assigning a Cuelist to a Master Using Cuelist Pool Window To assign a cuelist (in the Cuelist Pool) to a Master, press and hold the [OPEN] key and press the [CUELIST] key on... -
Page 121: Changing Cue Names And Timings
500ML Lighting Control Console Operation Guide Open Cuelist View Window Using External Screen / Cuelist Edit Window You may quickly open up a Cuelist view for any cuelist by clicking into the light gray area containing the Cuelist Status of a fader item on the external screen. Figure 222: Fader Label - Cuelist Status Cuelist View Window - Top Row Buttons Figure 223: Cuelist View Window - Top Row Buttons... -
Page 122: Edit Cuelist Window
500ML Lighting Control Console Operation Guide • Snap Time - This is the time after all parameters that are set to be a "Snap-Channel" (in the fixture library) will snap to their new value. Note: A Next Time of 0 (zero) sets the cuelist to wait for a "Manual Go" command if the Run Mode is set to Auto, Timecode, or if a Master Speed Fader controls cuelist timings. - Page 123 500ML Lighting Control Console Operation Guide Options are: • Auto - The Cuelist will be run with Next Times specified in the Cuelist View Window. • Manual - Each step of the cuelist needs to be started manually. • Master Speed 1 to 3 - The Cuelist will act like a chase; being triggered by any of the Master Speeds as defined. See "Assigning a Speed-Master"...
- Page 124 500ML Lighting Control Console Operation Guide Release at End - The cuelist will release (Switch off) itself after hitting go another time while the last cue is being output. Stop at End - The cuelist will stop at the last cue and pressing the "Go" Button again does not show any effect. Playback Order This defines the Playback order of the cues in the cuelist.
-
Page 125: Playing Cuelists
500ML Lighting Control Console Operation Guide Start Timecode This will define the start time of the cues, if the Cuelist has set the Trigger Mode to Timecode. This is a quick way to enter timecode offsets. Learn Next Times The Learn Next Times Button is very useful if you need to learn next or Timecode timings for given Cuelist. -
Page 126: Working With Masters
500ML Lighting Control Console Operation Guide To switch off a cuelist, select it from the List and press the Off Selected button. Figure 226: Off Menu Window 9. Working with Masters Master Basics Masters work like remote controls - you may assign different objects to masters and configure them independently in terms of button and fader configuration. -
Page 127: Assigning Groups To Masters (Creating An Inhibitive Groupmaster)
500ML Lighting Control Console Operation Guide There are two ways to assign a Group to a Dimmer Master: Using the Command Line Interface Press the [ASSIGN] key, followed by the Fixture ID, in example: [FIXTURE] [1]. Now select the [GO], or [PAUSE/ BACK] key of the fader that should act as the Dimmer Master. -
Page 128: Assigning A Speedmaster
500ML Lighting Control Console Operation Guide Assigning a Speedmaster Press the [ASSIGN] key, followed by the [GO], or [PAUSE/BACK] key of the fader that should act as the Speedmaster. A window will open, asking you what to assign to this master. Select one of the three different Speedmasters. -
Page 129: Moving Masters
500ML Lighting Control Console Operation Guide Moving Masters To move a master’s assignment to a different master, press the [MOVE] key. Now, press the [GO] or [PAUSE / BACK] key of the master you would like to Move followed by the [GO] or [PAUSE / BACK] key of the destination Master. -
Page 130: Fader Setting Options
500ML Lighting Control Console Operation Guide Fader Setting Options From Figure 236 on page 127, these setting options are available. Autostart The Autostart option will only shown for cuelists. Enabling it will cause the cuelist to be started when the Fader is pulled up from 0%. Autostop The Autostop option is only shown for cuelists. - Page 131 500ML Lighting Control Console Operation Guide Groups Button Function Action of Button Press Disabled Select Fixture Selects the fixtures contained in the Group. Will flash the fixtures Master Dimmer Level of the selected Group to 100%, which means the Flash dimmer value of the fixture is determined by cuelist output and the programmer.
-
Page 132: Working With Fader
500ML Lighting Control Console Operation Guide Fader Function Action of Button Press Disabled Master Speed The fader controls the Speed in a range of 0.10s to 10s. Master Fades Button Function Action of Button Press Disabled Time Increase Adds the amount of time entered in the combobox. Time Decrease Subtracts the amount of time entered in the combobox. -
Page 133: Changing Fader Pages
500ML Lighting Control Console Operation Guide Changing Fader Pages Fader Pages may be changed at any time by pressing the [NEXT PAGE], or [LAST PAGE] buttons on the front panel of the console or from within the Fader Page Directory window by selecting the page you would like to change to and pressing the Goto Page button as indicated in Figure 238. -
Page 134: Setting Inputs And Outputs
500ML Lighting Control Console Operation Guide Deleting Pages Open the Cuelist Directory window, select the page(s) you would like to delete in the directory window and click on the Delete Page(s) button. Figure 241: Fader Page Directory - Deleting Pages Naming Pages Pages may be named for organization purposes. -
Page 135: Shownet Network Dmx
Note: Network DMX uses Broadcast communications to a SubNet address derived from the console’s IP address Your console can connect directly with any Strand Lighting ShowNet Network, transmitting levels to other Strand Lighting ShowNet-enabled Nodes or Dimmer Racks that are part of that Network. -
Page 136: Enable Dmx Output Over Ethernet
500ML Lighting Control Console Operation Guide The XDMX settings then post the data on the Network as follows: Patch Range XDMX ShowNet Start NetSlot 1 – 512 1 – 512 513 – 1024 2049 - 2560 1025 - 1536 3073 -3584 Enable DMX Output over Ethernet To set up DMX Output over Ethernet, open the Setup Menu by pressing the [SETUP] key, head over to the Show Settings Tab and select DMX Output from the Input / Output Groupbox. -
Page 137: Shownet Setup
500ML Lighting Control Console Operation Guide Figure 246: Enter ArtNet Universe Screen ShowNet Setup To enable ShowNet Output (refer to "ShowNet Setup" on page 135 for more information), tick the Enable ShowNet checkbox. To configure each Universe, select it from the list and press the [SET] key. A new screen allowing to enable or disable ShowNet Output, as well as to set the start Slot for this universe will be shown. -
Page 138: Timecode Input
500ML Lighting Control Console Operation Guide Figure 248: Enter ShowNet Slot Offset Screen Timecode Input To set up the Timecode Input, open the Setup Menu by pressing the [SETUP] key, head over to the Show Settings Tab and select Timecode Input from the Input / Output Groupbox. All Timecode settings are stored inside the Showfile. -
Page 139: Timecode Options In Trigger Engine (Used By Midi)
500ML Lighting Control Console Operation Guide To start the timecode generator, click on Enable Timecode button. To disable it, click the button again. Figure 250: Timecode Input Configuration Screen External Timecode Source To use an external Source to trigger the 500ML Console, connect the Timecode source to the console - either using the SMPTE (Linear Timecode) connector on the back, or by connecting to the MIDI In for MIDI Timecode. -
Page 140: Midi Input
500ML Lighting Control Console Operation Guide Using Timecode The defined Timecode Source may trigger Cuelists when their Run Mode is set to Timecode. Please see Run Mode for more details. MIDI Input To set up the MIDI Input, open the Setup Menu by pressing the [SETUP] key, head over to the Show Settings Tab and select MIDI Input from the Input / Output Groupbox. - Page 141 500ML Lighting Control Console Operation Guide Figure 255: MIDI Input Configuration - Playback Remote List Editor Add MIDI Triggers To add a MIDI Input trigger, click either the Append (to append a trigger to the list) or Insert (to insert a trigger in front of the selected row) Button.
- Page 142 500ML Lighting Control Console Operation Guide MIDI Trigger Setup Window (Step 1 of 2 - Source Selection) The MIDI Input Trigger wizard is used to define which MIDI Note, Program or Control Change on which channel the Console should listen on. When done, click on Next. The Midi Trigger - Target Setup Window will be shown. Figure 260: Midi Trigger - Source Setup Setting the MIDI Trigger Type Note On / Off...
- Page 143 500ML Lighting Control Console Operation Guide Setting the MIDI Note, Program or Control Change The Midi Note / Program Change / Control Change defines which MIDI Note, Program Change or Controller Event will be used for this trigger. You may also put the console into a Learn mode that causes it to listen to the MIDI Input and select the appropriate command and channel number automatically (based on the last received MIDI command).
- Page 144 500ML Lighting Control Console Operation Guide Table 5: On / Off Triggers by Item Type Item Action Description The Fixture-Master Dimmer level will be set to 100% when the Note On portion of the command is received, and back to the level defined by the Fixture Dimmer Flash Fixture-Master Dimmers fader when the Off part of the command is...
- Page 145 500ML Lighting Control Console Operation Guide Measures the time between Note On commands and sets the Speed Master TapSync to that amount. Increase Time Time of the Speed Master will be increased by given amount. Decrease Time Time of the Speed Master will be decreased by given amount. Multiply Time Time of the Speed Master will be multiplied by given amount.
- Page 146 500ML Lighting Control Console Operation Guide Single On Triggers Single On Triggers are emitted by either Note On or Note Off only sources, or by Program Changes. Since the console is only getting one single command as opposed to an On / Off command, some of the actions mentioned previously are not available.
-
Page 147: Locking The Consoles User Interface
500ML Lighting Control Console Operation Guide Value Triggers Value Triggers are provided by Controller Events. They may control all On / Off Triggers. The On portion of the command will be issued when the value is above 50% (For MIDI, this would be > Value 64), the Off is issued when the value falls below 64 (or 50%). -
Page 148: Locking The Console
Figure 263: Enter New Desklock Code Wizard WARNING! Philips Strand Lighting does not receive or keep user-set PIN codes. Once you establish a PIN code, write it down and keep it in a safe place in case you forget the PIN code you set. -
Page 149: Unlocking The Console
Figure 265: Desklock Window WARNING! Philips Strand Lighting does not receive or keep user-set PIN codes. Once you establish a PIN code, write it down and keep it in a safe place in case you forget the PIN code you set. -
Page 150: From Within A Show
500ML Lighting Control Console Operation Guide Figure 267: Setup Menu - System Setup Tab From Within a Show To edit the fixture library from within a show file, press the [Setup key], and select the System Setup. Figure 268: Setup Menu - System Setup Tab 1 4 8 Programming... -
Page 151: Fixture Library Editor
500ML Lighting Control Console Operation Guide 14. Fixture Library Editor This section explains the Library Editor that is used throughout the library creation or edit process. Figure 269: Fixture Library Editor The Library Editor consists of two different Pages, one that contains the General Setup of a fixture (like Name, Short Name, Mode and Pan / Tilt Range), and one that contains the Parameter Mapping. - Page 152 500ML Lighting Control Console Operation Guide • Dimmable: This column defines if this parameter will be dimmed by Dimmer Faders and the Grandmaster. • Type: If set to Fade, this parameter will crossfade, if set to Snap it will snap when changing values as opposed to a smooth crossfade.
-
Page 153: Edit Existing Fixture Libraries
500ML Lighting Control Console Operation Guide Figure 274: Library Editor: General Setup Edit Existing Fixture Libraries To edit an existing fixture library, click on Edit Fixture contained in the Fixture Library Groupbox as indicated in Figure 275. Figure 275: System Setup Tab A screen (Figure 276 on page 152), asking you in which library the fixture you would like to edit is residing in, will... - Page 154 500ML Lighting Control Console Operation Guide Please note that the system library is read-only. If you would like to edit a fixture that is contained in the system library, you first need to transfer it to the user library. See "Transfer Fixtures Between Libraries"...
-
Page 155: Add A New Fixture To The Library
500ML Lighting Control Console Operation Guide Figure 278: Library Editor Add a new Fixture to the Library To edit an existing fixture library, click on New Fixture contained in the Fixture Library Groupbox as indicated In Figure 279. Figure 279: System Setup Tab Fixture Library Editor... -
Page 156: Start A Fixture From Scratch
500ML Lighting Control Console Operation Guide Start a Fixture from Scratch A screen asking a few questions in regards to the new fixture will be shown. You need to specify the Manufacturer, Fixture Type, Short Type and Fixture DMX Mode. In order to create a fixture from scratch, make sure Create Empty Fixture is selected. -
Page 157: Create Fixture Using An Existing Fixture Type As A Template
500ML Lighting Control Console Operation Guide The Library Editor (See “Fixture Library Editor” on page 149) will be shown allowing you to make changes to the fixture type. Click on Save and Close when done. Figure 282: Create New Fixture: Library Editor Screen Create Fixture using an Existing Fixture Type as a Template A screen asking a few questions in regards to the new fixture will be shown. - Page 158 500ML Lighting Control Console Operation Guide Figure 284: Select Source Library for Template Fixture A menu that allows you to pick a fixture type will appear. You may search for fixtures using the filter field shown in the top part of the screen. Alternatively, you may select the fixture by selecting the Manufacturer, Type and Mode. Click on Select when done.
- Page 159 500ML Lighting Control Console Operation Guide The Create New Fixture Library screen is shown again. Make sure you entered a Manufacturer and Name for the new Fixture Type and hit the Next button when done. Figure 286: Create New Fixture Library The Library Editor (See “Fixture Library Editor”...
-
Page 160: Transfer Fixtures Between Libraries
500ML Lighting Control Console Operation Guide Transfer Fixtures Between Libraries Sometimes the need to transfer fixtures between the different library types may arise. In order to do so, go to the System Setup Menu and select Transfer Fixture. Figure 288: System Setup Window - Transfer Fixture Selection A screen asking for the source Library of the Fixture type is shown. - Page 161 500ML Lighting Control Console Operation Guide A menu that allows you to pick a fixture type will appear. You may search for fixtures using the filter field shown in the top part of the screen. Alternatively, you may select the fixture by selecting the Manufacturer, Type and Mode. Click on Next when done.
-
Page 162: Delete A Fixture Type
500ML Lighting Control Console Operation Guide A dialog asking for confirmation will be shown. If all is good, click on Yes. Figure 292: Confirm (or Cancel) Transfer Delete a Fixture Type Do delete a fixture type, head to the System Setup Menu and select Delete Fixture. Figure 293: System Setup Window - Delete Fixture 1 6 0 Programming... - Page 163 500ML Lighting Control Console Operation Guide A screen asking for the source Library of the Fixture type is shown. Select the desired Library and click on Next. Figure 294: Select Source Library A menu that allows you to pick a fixture type will appear. You may search for fixtures using the filter field shown in the top part of the screen.
- Page 164 500ML Lighting Control Console Operation Guide A dialog asking for confirmation will be shown. If all is good, click on Yes. Figure 296: Confirm (or Cancel) Deletion Screen 1 6 2 Programming...
-
Page 165: Importing And Exporting Fixture Libraries
500ML Lighting Control Console Operation Guide MAINTENANCE 1. Importing and Exporting Fixture Libraries Exporting Fixture Libraries Connect USB key to console. From the Welcome Screen hit the Settings button as illustrated in Figure 297. Should a show be open and running, open the Setup Dialog by striking the [SETUP] key on the console’s front panel instead. Once the Setup Menu is shown, switch to the USB tab and hit the Library Export button. - Page 166 500ML Lighting Control Console Operation Guide The Export Library window (Figure 299) will appear to allow you to specify which or all Libraries to be exported. After making your selection, click on Export button to copy the selected Libraries onto the USB Key. Figure 299: Export Library Window A confirmation window will be shown with a brief summary of the Library or Libraries that will be exported.
-
Page 167: Importing Fixture Libraries
500ML Lighting Control Console Operation Guide When the process has successfully finished, click on the Close button. Importing Fixture Libraries Connect USB key to console with the library fixture file loaded. From the Welcome Screen hit the Settings button as illustrated in Figure 301. - Page 168 500ML Lighting Control Console Operation Guide You will now be presented with a screen (Figure 302) allowing to specify how the library should be imported. After setting the desired options, hit the Import button on the touchscreen display.y. Figure 302: Import Fixture Library Window A screen asking for confirmation will be shown with a brief summary of the Library or Libraries to be imported.
-
Page 169: Updating Console Software
In order to update the software on the console, make sure you have downloaded the appropriate software from the Strand Lighting website. Copy the downloaded file (with the file extension .swu) to the "\strandml\software_update" folder on the USB key supplied with the console. - Page 170 500ML Lighting Control Console Operation Guide Connect the USB key into one of the console’s USB Ports (refer to Figure 1 on page 8 Figure 2 on page 10) and navigate to the Setup Menu by pressing [SETUP] and selecting the USB Tab. Click on USB Update in the Maintenance section.
- Page 171 500ML Lighting Control Console Operation Guide A wizard will lead you through a few steps as shown in Figure 308 Figure 309. Figure 308: Software Update Window - Software Update Confirmation Figure 309: Software Update Window - Perform Update Confirmation Updating Console Software...
-
Page 172: Updating Console Software Via Internet Connection
500ML Lighting Control Console Operation Guide Once the process is completed, you will be prompted to reboot the console. Click the Reboot Now! button as shown Figure 310. Figure 310: Software Update Window - Reboot Now Updating Console Software via Internet Connection CAUTION: Before updating the console software, make sure you have made backups of all important show and library files! In order to update the software on the console using an Internet connection, make sure the console network interface... - Page 173 500ML Lighting Control Console Operation Guide The Console will present you with a list of available software updates found on the Internet. Select the appropriate file and click on Donwload as shown in Figure 312. Figure 312: Select Software Update Window - Downloading Online Software Note: You must reboot / restart the console in order for the new software to take effect.
-
Page 174: Calibrating Touchscreens
500ML Lighting Control Console Operation Guide Figure 314: Software Update Window - Preform Update Once the process is completed, you will be prompted to reboot the console. Click the Reboot Now! button as shown Figure 315. Figure 315: Software Update Window - Reboot Now 3. -
Page 175: Calibrating External Console Touchscreen
500ML Lighting Control Console Operation Guide Figure 316: Setup Menu Window - Calibrate Internal Touchscreen Calibrating External Console Touchscreen If an external touchscreen was purhcased and is connected to the console, it may be necessary - from time to time - to recalibrate the external touchscreen. -
Page 176: General Hotkeys
500ML Lighting Control Console Operation Guide HOTKEYS 1. General Hotkeys [SHIFT] + [OFF] = Release all Cuelists, clear Programmer and reset all Fader values back to 100% [OFF] + [CUELIST] = Release all Cuelists [SHIFT] + Preset PoolItem = Copy Preset contents for all selected fixtures to programmer instead of linking to preset Pressing the [BACKSPACE] Button for longer will clear the complete command line. - Page 177 500ML Lighting Control Console Operation Guide Notes External Keyboard Hotkeys...